

Pooling water is a major concern for people who live in rainy areas. Improper gutter systems fail to collect and transport the rainwater from the house, resulting in many issues. For instance, accumulated rainwater can cause soil erosion and damage your home’s foundation.
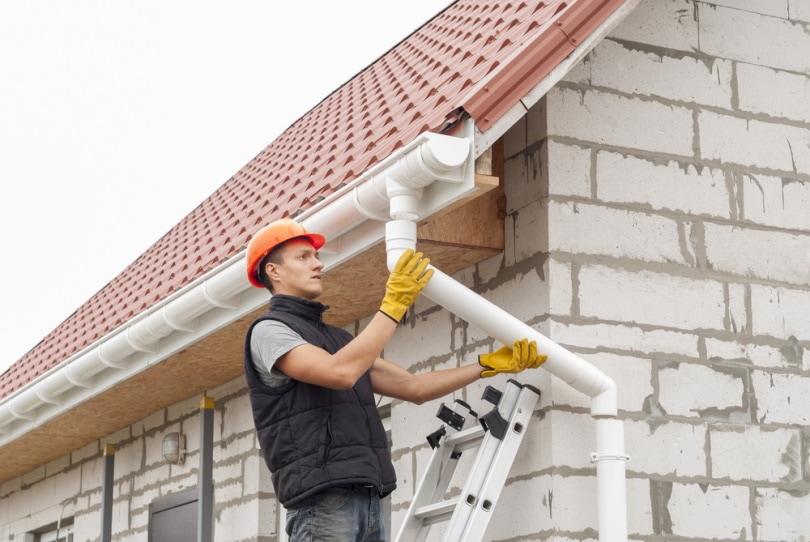
If your home’s gutters often become clogged with rainwater, you can install an extra downspout. But you may need to know a few tips and tricks for perfect execution. The good thing? The process is very easy.
Let’s get into a detailed version of these quick gutter downspout installation steps. So, gather your nuts and bolts to fix your home’s drainage system yourself.

Installing a Gutter Downspout: What You Need to Know
Whether you’re a beginner or an expert, you must know a few things before installing a gutter downspout. Doing so will help you make the most of your time and efforts. Let’s start with the basics, instructions, and materials you need for installation.
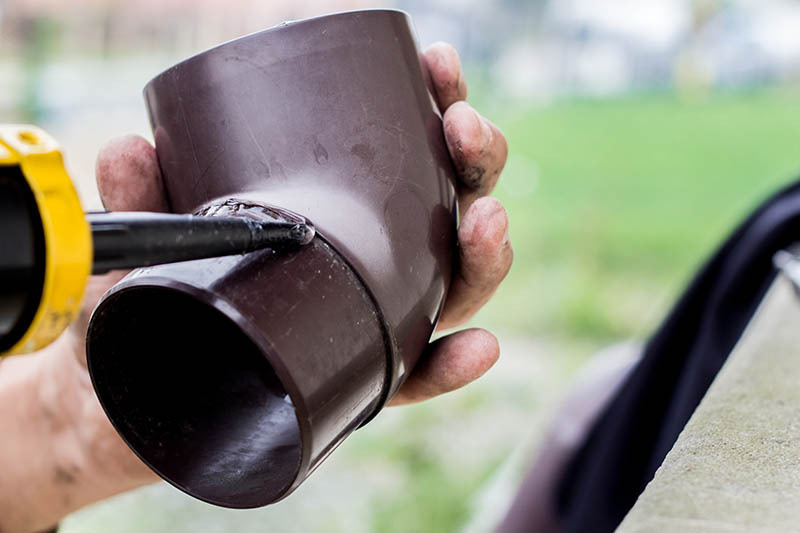
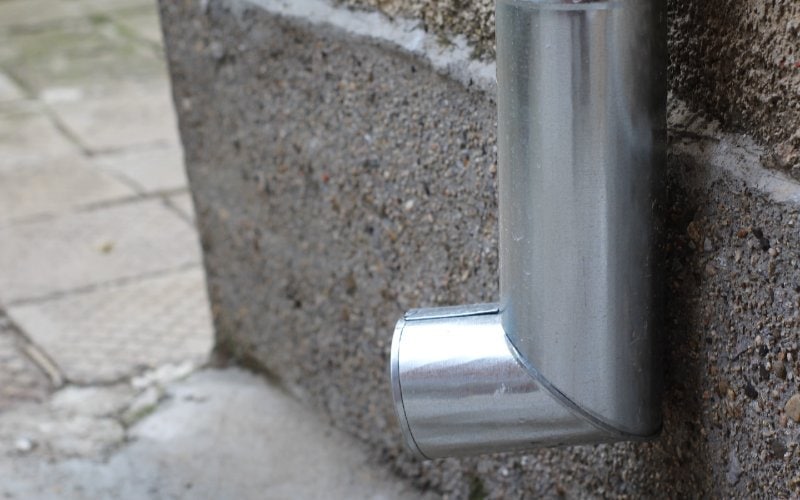
What Are Downspout Elbows?
Downspout elbows work like the “human elbows” of the downspouts. They diverge water flowing through the gutters. You’ll probably need to place them at the downspout’s bottom and the top.
Downspout elbows come in various sizes and angles (45 or 90 degrees) to fit every size of the gutter. However, you can also get them custom-made from different angles. To install the elbows, you must have a pre-installed downspout outlet on your gutter.
Things You Will Need
- A downspout
- A downspout connector
- A downspout outlet
- 3 elbows
- Ladder
- Measuring tape
- Screws
- Mounting brackets
- A pencil
- Gutter seam sealant
- Straight hacksaw
- Drill
- Screwdriver bit
- Drill bits
- Hacksaw to right-size parts
- Rivet tool
Important Instructions
If your gutter overflows or clogs after heavy rainfalls, you should install an extra downspout to continue water transport. But first, you should determine where your new downspout should be installed.
Always take gutter-to-wall and gutter-to-ground measurements before getting started. These two measurements help estimate how much straight downspout the process will require.
The 9 Easy Steps to Install a Gutter Downspout
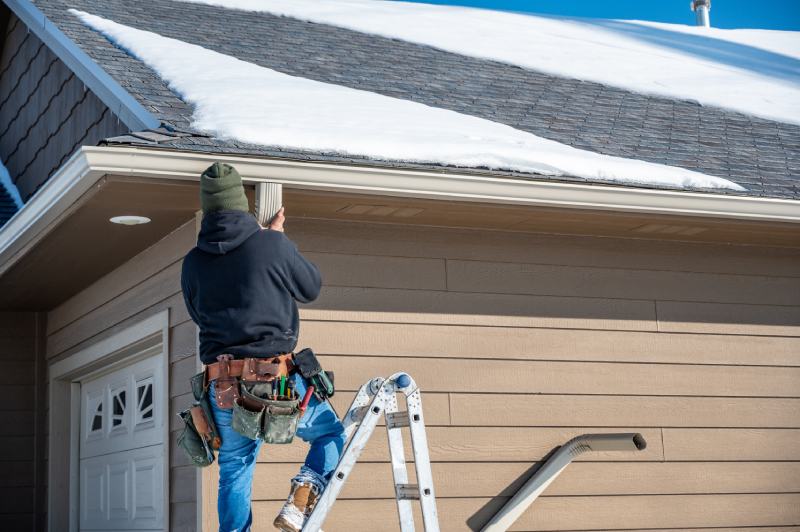
Once you’ve collected all the essential tools, it’s time to get on the battlefield. But remember, it is a professional’s job, and you might need an expert alongside if you’re installing a gutter downspout for the first time.
However, if you feel ill-prepared, follow these nine easy steps to install a gutter downspout perfectly:
1. Note the Gutter’s Measurements
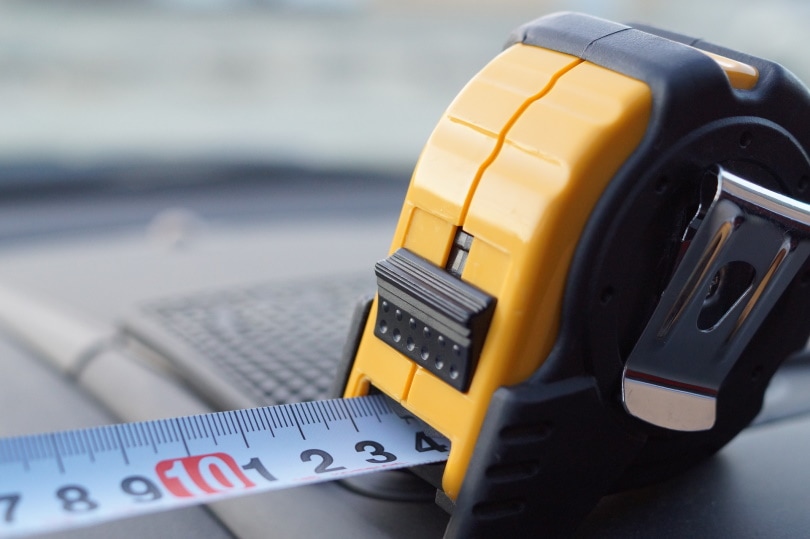
The first step is to measure the distance between the flap’s fold and the wall. After that, you must mark the measurements. Next, use a measuring tape and pencil to measure the gutter’s bottom from a distance of 4 inches from any outside corners.
Then, choose the installation place and put the ladder beneath it. Make sure that it’s precisely at the right spot.
2. Use the Drill to Make Holes
The next step is to make holes in the gutter’s bottom. Take a drill attachment measuring 1-inch and drill the bottom at the 4-inch mark. Now, take the pencil again and make a mark on the exterior of the connector. Keep doing it until you get the proper position for your connector.
3. Position and Install the Connector
Use a sheet metal cutter to cut through the connector’s trace. Also, ensure to keep the area around the gutter hole free of debris. You can use a shop rag for this purpose. Don’t forget to dry the area after cleaning and proceed forward.
Finally, put the inner lip of the connector inside the gutter to install it. Take a cordless screwdriver to fasten the lip with the metal screws. Opt for the 3/8-inch sheet ones. It’s recommended to do it from underneath the gutter for better results.
4. Seal the Interior
This step includes sealing the gutter’s interior and the connecting flange. Aluminum is the best sealant that you can use via a caulking gun. Ensure that the caulking on your gutter dries quickly or else the aluminum sealant won’t stick properly.
5. Install the Elbows
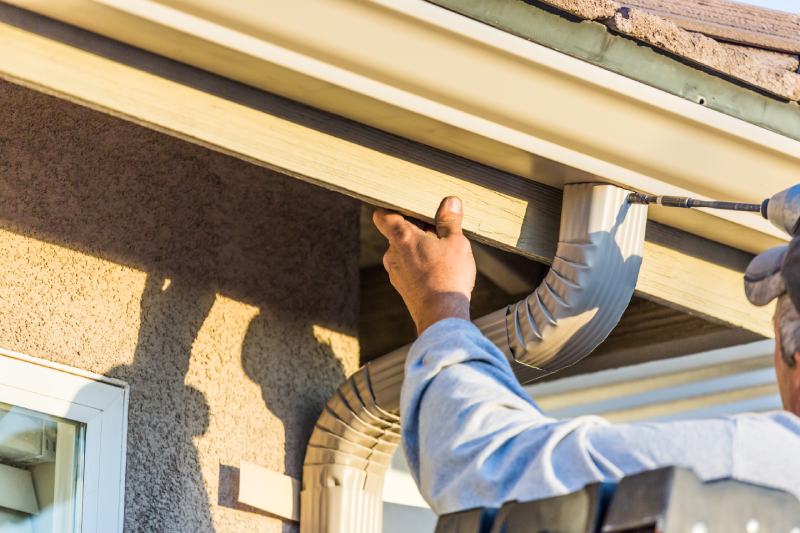
It’s time to place the elbows. Attach the first elbow to the first connector. Use a metal screw to fasten the elbow to the connector. Remember that the connectors beneath the gutter will let the elbow slip around 6 inches. That must be below the first elbow’s bottom.
Place the second elbow against your house. Here you can take help from an expert as things may become challenging. Once you get the backup, you can work backward from one elbow until you reach the curve’s original point.
6. Put the Screws on the Elbows
If you haven’t already measured the straight downspout’s length, do it now. Then, according to your findings, cut it through a hacksaw. The straight piece should be cut as a house elbow. Once you’re done, take one sheet metal screw and fasten it on the elbow’s back and the front.
Insert the straight piece’s one end into the gutter’s elbow. Lastly, put two metal screws on the elbow.
7. Connect the Wall’s Elbow to the Downspout
Again, if you didn’t measure the wall’s elbow to the floor’s bottom, use the measuring tape now. Then, use a hacksaw to straighten the downspout by cutting 8 inches from the measurement you just got.
Finally, connect the wall’s elbow to the downspout. You can use two sheet metal screws, and make sure to tighten them properly.
8. Fasten the Downspout Straps
In this step, you must install downspout straps every 10 feet of your house. Again, use screws for the attachment. Typically, the ideal placement for the straps is 2 feet above the ground and beneath the downspout.
With one screw, fasten the strap to the downspout with the curve. If any extra strap is left, remove it with the sheet metal cutter.
9. Secure the Final Elbow
The last step is to fasten the final elbow. Take a few metal screws and tightly secure the elbow to the end of the downspout’s bottom. Once done, find a splash block and put it under the downspout. This will diverge the rainwater from your home and prevent pooling.
During the installation, you may damage your home’s outside wall plaster. If that happens, you need to fix the plaster after installing the gutter downspout. As mentioned above, the process is not a one-man’s job, especially if you’re a beginner. Simply don’t panic or feel shy asking for help.

 How Much Does Downspout Installation Cost?
 How Much Does Downspout Installation Cost?
The total cost of a gutter downspout installation depends on many factors. These include the paint finish type, gauge, and downspout size. A typical downspout comes for $3 to $5 a lineal foot. But that doesn’t include the cost of the accessories, like straps, elbows, and outlets.
Therefore, the close cost estimation for the installation is double the downspout cost. That means you may have to pay $10 for the entire installation if you’re doing it yourself. It will go higher if you hire professionals.
Conclusion
Installing a gutter downspout is an effective way to improve your home’s drainage system. Pooling water doesn’t only look unpleasant, but it also impacts the integrity of your home. When not drained for days, rainwater can even damage your garden plants.
While we made it look easy in our nine steps, remember that things can go out of your hands anytime. So, if you don’t have enough experience, ask for a helping hand or hire professionals. Paying a few more bucks to avoid all the hassle is worth it!
Featured Image Credit: tokar, Shutterstock
Contents
