
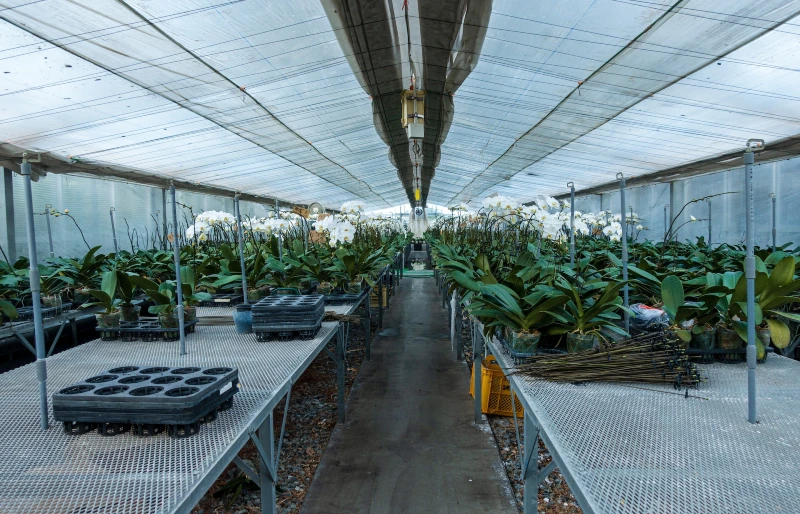
Greenhouse farming is practiced both on a large and small scale. At home, having a small greenhouse protects the plants against harsh conditions during winter and improves productivity. According to Science Direct1, greenhouse technology can multiply production by up to 15 times that of open-field farming.
With high production comes extra expenses, such as buying or making greenhouse tables. Greenhouse tables hold plant trays and support low-growing crops like strawberries for easy harvesting.
For many reasons, having sturdy and durable tables should be a top priority. Here are the top DIY greenhouse tables you can make today.

The 4 DIY Greenhouse Tables
1. Rolling Tables
| Materials: | Stainless steel frames, stainless-steel rods, a metal sheet, and a welding rod |
| Tools: | Welder, hack saw, tape measure, hammer |
| Difficulty: | Hard |
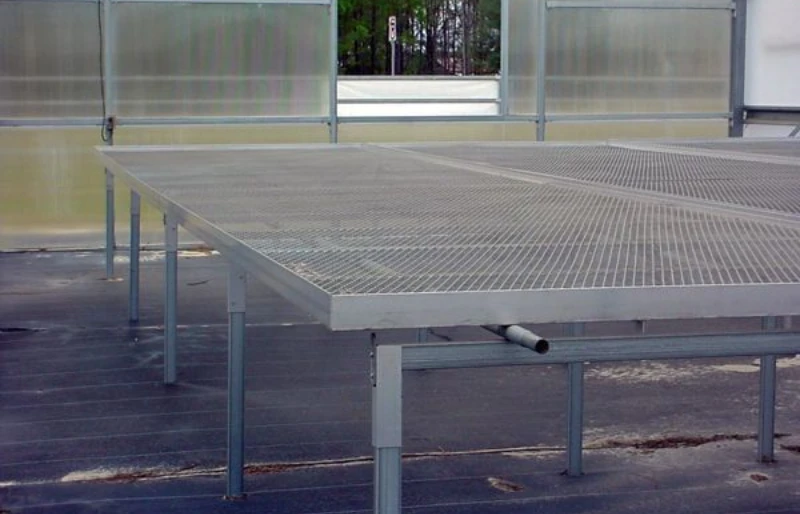
Rolling greenhouse tables maximizes the use of space by up to 33%, improves movement between isles, and has a positive impact on the internal climate by allowing air to circulate freely between rows.
To be functional, rolling tables employ a simple design technique—build a table where the top can be moved over rollers.
Start by building a sturdy stainless-steel stand measuring 3 by 6 feet. Next, construct a table top measuring 4 by 8 feet using lightweight and waterproof materials such as plastic or aluminum sheets. Note that we are using a slightly wider top for stability.
Rather than welding or screwing the top on the stand, fix rollers at the right place. The purpose of rollers is to allow the top to move freely on the stationary stand. For this, you will need two 8 feet long stainless-steel guide rollers or round stainless-steel rods up to an inch thick.
Place the rollers on top of the stand lengthwise. You may place small notches on aprons to prevent them from moving but ensure they are rotating around the same place. Lastly, place the top on the rollers.
2. Movable Table

| Materials: | Heavy-duty castors, screws, bolts, and nuts |
| Tools: | Spanner and screwdriver |
| Difficulty: | Simple |
At any time of the year, a greenhouse is a beehive of activities. You might be planting in the morning, pruning in the afternoon, and harvesting in the evening. Some of these activities require more space to move around than others. This is where a movable table comes in.
A movable greenhouse table is made in a similar way to a normal table, only that it has castors at the bottom.
Equipping castors on a table requires the castors themselves, a screwdriver or a spanner, and screws or nuts and bolts. Buy 4-inch heavy-duty castors and bolt or screw them on the table legs. It is essential to go for heavy-duty casters with a minimum carrying capacity of at least 1,000 pounds to support growing plants and the potting medium.
3. Foldable Greenhouse Table
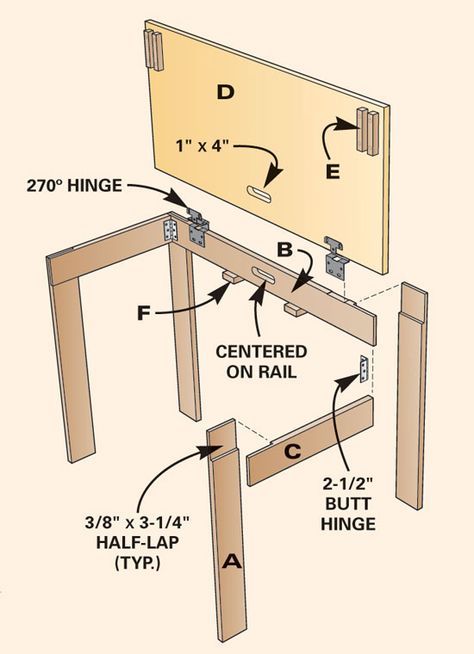
| Materials: | Several hinges or chains, wooden slats, steel frames or 4x4s, nails, a long piece of steel angle, nuts and bolts |
| Tools: | Saw, tape measure, hammer, power drill, spirit level, and a spanner |
| Difficulty: | Medium |
A foldable greenhouse table offers gardeners and greenhouse owners a practical and convenient way to cultivate plants in a small, structured space. It is thus a great alternative to ordinary tables, which are difficult to work with in limited spaces.
You can use wood or metal when making a foldable table, depending on your preferences. Of course, wooden tables are easy to make and inexpensive. In contrast, it is challenging to work with metal, but the final product is long-lasting.
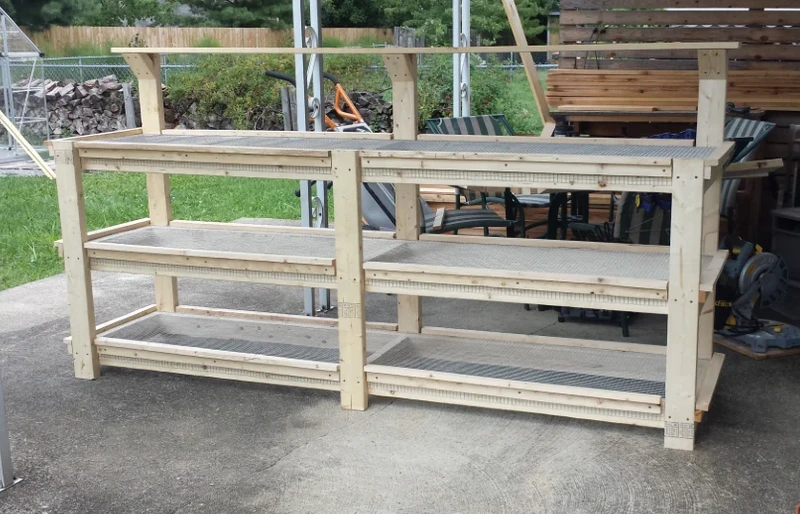
4. Multi-Tiered Greenhouse Table
| Materials: | Steel frames, mesh panels, metallic sheets, nuts, and bolts |
| Tools: | Drill and drill bit, miter saw, welder |
| Difficulty: | Simple |
Multi-tiered tables multiply greenhouse space by several times thanks to their ability to use vertical space. Besides space maximization, the tables are stunning and easy to make.
After assembling all the tools, determine the size of the table you want to have, then make sure you have all the required materials before building the basic frame.
Simply build another table of the same size as the first one and place it on top of the original table to form a 2-tier table. Remember to secure the legs of the top table on the original table’s top with nuts and bolts or screws.
Repeat the process until you have a three or four-tiered table.
The two-tier greenhouse table has two wide growing platforms. The bottom tier is known as the ground-level tier. Use it as a storage space for empty pots, potting media, and large plants. Smaller plants or seedlings grow vibrantly on the upper level where there is a lot of sunlight, airflow is great, and temperatures are high.
3-tier tables are best suited for growers who require more space than what the 2-tier offers. Mature plants can be placed in the bottom tier, while those in the vegetative stage are in the middle zone. Use the top zone to grow seedlings.
While every gardener may want to enjoy the benefits of multi-tier tables, please note that:
- The higher the table goes, the more unstable it becomes. Use a wide base for extra support. Also, avoid placing large and heavy pots on the top two tiers.
- Ensure the top tiers are easy to access or consider buying a small ladder or a stool.
- To promote better plant growth, have grow lights fitted on the bottom two tiers.
Conclusion
Greenhouse tables maximize growing areas and allow gardeners to access plants easily during watering, pruning, or harvesting. With simple tools, you can create foldable, multi-tiered, or foldable greenhouse tables. Additionally, if you have traditional tables, you can make them movable by bolting heavy-duty castors on each leg.
- You might also like: 3 DIY Blinds You Can Make Today (With Instructions)
Featured Image Credit: Jan Bouken, Pexels
Contents
