
A laser level is a handy tool that can be used for various tasks, from hanging pictures to remodeling your home. It projects a beam of light to create a level line to use as a guide.
There are many uses for laser level in applications that require straight-line referencing. For example, the construction industry primarily uses laser levels for grading, leveling concrete forms, installing metal framing or drop ceilings, hanging doors, and creating level reference lines.
Since you can mount most laser levels to a wall or a tripod, your hands are free to use the hammer or carry whatever you need. Here’s an overview of different use cases for laser levels.

The 8 Ways a Laser Level Can Help With Your Projects
1. Shelf and Cabinet Alignment
It’s quite a nuisance when your shelves are out of alignment. It can be tough to tell if they’re perfectly level when you move around, trying to see if everything lines up.
A laser level can take the guesswork out of it and help you get your shelves looking great.
Start by finding the bubble level on your laser. It is usually a small, circular vial of liquid with an air bubble in it. Once you have found it, hold the laser level so that the bubble is in the center of the vial.
Now, point the laser beam at one end of the shelf. You may need to adjust the focus of the laser beam by turning the knob on the laser level.
Create a mark on the wall where the laser beam hits. Then, move the laser level to the other end of the shelf and create another mark.
2. Cutting Boards

If you love woodworking, then a laser level can be a helpful tool for cutting boards. When working with different pieces of wood, it can be challenging to get them all to fit perfectly together.
For instance, you may be cutting a board to size and find that it’s not exactly the right length. If you have a laser level, you can level the board before you make your cut.
Keep the laser level on the ground and adjust it to make the beam level. Then, place the board on top of the laser level and make your cut.
3. Interior Framing
Laser levels are also helpful for interior framing projects like installing drywall or building a closet. For these projects, you need to ensure the framing is well-aligned so that your walls are at the right level and the closet has no weird angles.
If you don’t level the closet’s framing, your doors might not fit right. That could become a problem later because you may have to cut the doors or get custom ones made for your closet.
Since it’s an interior project, you can use a line laser level. These levels have a long, bright horizontal or vertical line that you can use as a reference point.
Adjust the laser level so thаt thе line it projects is at the height уоu nееd it to be. For example, if you’re installing drywall, the line should be at the level of the top of the drywall.
Once the line is where you need it, make a mark on the wall at each end of the line. These marks will be your reference points for hanging the drywall. Then, follow the same steps for leveling the closet frames.
4. Masonry Alignments

If you’re doing a DIY project that involves bricks, blocks, or stone, a laser level can help you ensure everything is aligned correctly. Proper material alignment is essential for ensuring symmetrical patterns and avoiding any lopsidedness in your work.
For example, if you’re planning to build a brick wall, you’ll want to ensure the first course of bricks is level. You can use a string line and chalk to mark a level line on the wall, but using a laser level is much easier (and more accurate).
Set the laser level to project a horizontal line across the wall surface. Then, align the first course of bricks with the line.
A rotary laser is the best option for masonry and grading work. Although expensive, it can cast a 360-degree line over a long distance. Plus, it’s more accurate when used over longer distances or in cases where lost visibility is a limitation.
5. Hanging Pictures
We’ve all struggled to get a picture hung straight, especially when doing it ourselves. It can be difficult to tell if the nail is in the right spot and the picture is level, especially when you’re trying to create the perfect Pinterest-inspired gallery wall.
Luckily, one of the uses for laser level is hanging up pictures. Besides picture frames, you can also use a laser level to hang other decorative items, such as mirrors and clocks.
It’s best to start with a reference image or a roughly drawn layout if you want to hang multiple pictures. First, decide the height at which the picture will be hung.
Set the laser level at that height too. Move it horizontally along that point. If you don’t have a tripod, you can use pins or suction cups to keep the laser level in place.
Mark the point on the wall where your picture will go. Hammer a nail into the spot where you made a mark.
6. Plumbing Installation

Laser levels are also useful for plumbing projects. Whether you’re installing a new sink or toilet or running pipes for a new addition to your home, a level can help.
Suppose you want to install a new sink in your bathroom. For the whole system to work efficiently, the drainage pipe should be at level with each other. It will prevent leaks and ensure proper drainage.
You don’t necessarily have to spend money on an expensive rotary laser for indoor projects. Instead, you can use a line laser, which is less expensive and easily available.
It can cast a laser line up to 200 feet, sufficient for a regular bathroom. To use a line laser, mount it on a tripod.
Then, extend the legs of the tripod to make sure the laser is level with your work surface. Cast a laser line and mark the spot to install drainage pipes.
7. Setting Grade
A laser level can be used to set grades too. Since this is a slightly more complicated project, you’ll need some experience working with laser levels to pull this off.
You need a rotary laser level for setting the grade. A rotary level laser has a laser detector mounted on a rotating base. The sensor sweeps around the room, bouncing off walls and objects to create a 360-degree level plane.
When the laser beam hits an object, the detector picks up the reflection and sends a signal back to the base station. When it reaches the level, it makes a beep sound, so you know when to stop.
Mount the rotary laser level on a tripod and allow it to level itself. It will do that when you turn it on. Check the grade’s starting height.
Make sure the bottom of the rod is at your desired height while you adjust the laser detector until it beeps. After you hear the beep, secure the detector and mark the point.
Now, adjust the laser detector so that the up and fall distance is the same. Next, go to the grade’s bottom and use the laser level to find the level.
Use the leveling rod’s bottom as your grade’s bottom. After inserting a stick in the ground at that point, you’re all done.
8. Shower Installation

Installing a shower is one of those projects where the level is key. The base of the shower should be level so that the water drains properly and the tiles will lay evenly.
In the absence of proper leveling, water might pool in the shower or, even worse, get out into the rest of the bathroom. Naturally, no one wants to deal with such bathroom malfunctions.
Using a laser level can ensure your shower base is level before you even start tiling. It will save you time and effort in the long run.
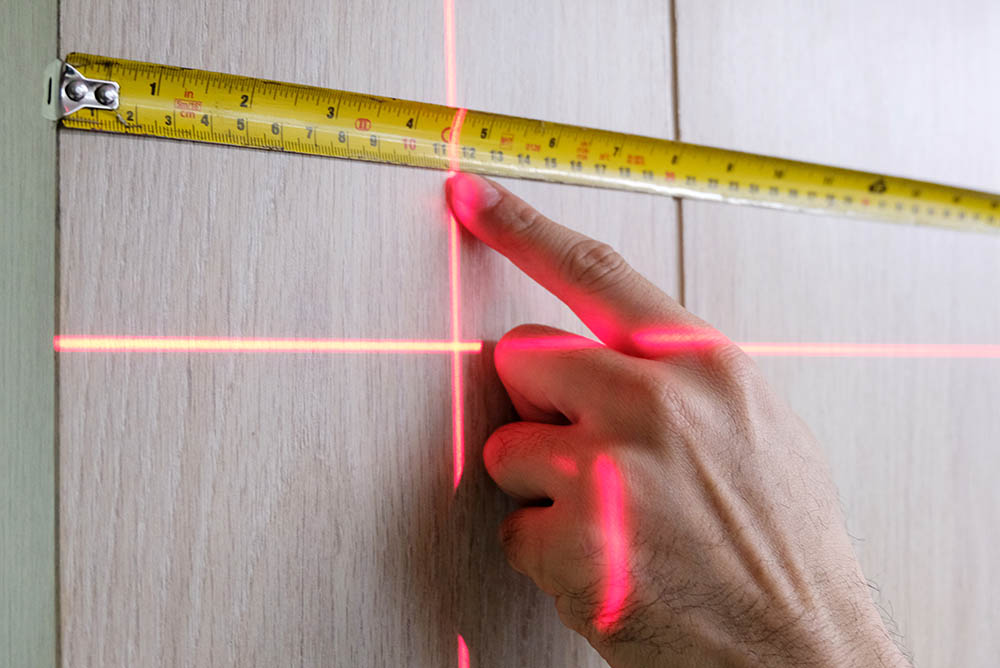
You should use a cross-line laser for bathroom projects since it simultaneously projects horizontal and vertical lines on a surface.
First, you need to set up the laser level on a tripod so that it is at the same level as the center of the shower base. Then, turn on the laser and adjust the knob until the lines are perfectly level.
Now, use a tape measure to find the edges of the shower base. Once you have the measurements, transfer them onto the wall with a pencil.

Types of Laser Levels
You need to choose the right laser level for the project or tasks you will be performing. While some laser levels are better for interior projects, others work better for outdoor jobs. There are three main types of laser levels: line, cross-line, and rotary.
Line Laser Level
A line laser level projects a single bright horizontal or vertical line of light. It is excellent for long, level lines such as those needed when hanging pictures, installing cabinets, or laying tile.
Such a laser level is also called a dot laser level. Since it’s basic in terms of functionality, it’s much cheaper than other laser levels. You can use it for 1D calculations, such as basic decorating at home.
Most line lasers are only visible up to 150–200 feet. Thus, they’re not very accurate over longer distances.
Rotary Laser Level

A rotary laser level is more expensive than a line or dot laser level, but it’s also more versatile. It projects a horizontal or vertical laser beam around the room to create 360-degree reference lines.
You can use it for complex tasks such as leveling concrete forms and installing drop ceilings. Some rotary laser levels can project a beam up to 2,000 feet, making them easier to read.
They’re also more accurate than other laser levels. So besides leveling concrete forms, they can also be used for masonry work and digging foundations.
Cross-Line Laser Level
A cross-line laser level projects two lines—one horizontal and one vertical—that intersect to form a cross. It’s great for basic home DIY projects such as hanging shelves and pictures or installing cabinets.
Some cross-line laser levels can also be used for more complex tasks, such as tiling projects and alignment work. In addition, cross-line laser levels are generally more affordable than rotary laser levels.
Related Read: Green vs Red Laser Level: What’s the Difference?
Conclusion
As established, laser levels have many uses. For example, you can use a laser level to hang pictures, dig foundations, or even install a new pool. Besides the construction industry workers, DIY enthusiasts can invest in a budget-friendly laser level to ensure perfect alignment for home improvement projects.
While the line laser level is ideal for basic home improvement projects, the rotary laser level is perfect for more complicated outdoor jobs. How you use each type will also depend on the scope of your project.
Featured Image Credit: Frogastro, Shutterstock
Contents
