

New tile in a shower can completely revitalize a bathroom, but for many of us, the task of ripping out and installing tile work can seem too challenging or costly to take on. Fortunately, if your old shower tile is in good shape, you can often cut tons of time and costs by tiling over it!
Tiling over tile in a shower can turn a daunting task into a DIY project and high installation costs into low-priced materials. You may be able to transform your shower in a day and for only a few hundred dollars.
Everyone loves cheap and straightforward, but most people know that doesn’t describe the average home remodel project unless there’s a catch involved. And to be sure, while tiling over tile can work many times, there are also situations where this cost-saving measure could cause more headaches (and expenses) down the line.
 Can You Tile Over Tile in a Shower?
 Can You Tile Over Tile in a Shower?
Whether on the floor, shower walls, or both, you can often cover existing tile work with new tiles to update the look of your bathroom. The existing tile needs to be in workable condition. It can’t retain moisture or have cracks and uneven sections.
You can eliminate hours of work and hundreds or even thousands of dollars in expenses from the equation by installing over tile. There’s no need to knock out old tile or prep or replace backer boards. Although it sounds like a lifesaver, some situations may make tiling over tile a poor idea.
When Should You Not Tile Over Tile in a Shower?
You can sometimes overcome minor dents, cracks, and displaced tiles for tile-over-tile to work in a shower. But when damage reaches a certain threshold, it will be easier to replace the existing installation.
Indications of trapped moisture, such as mildew or mold buildup, are concerning, as covering up the problem will only cause it to worsen. Likewise, you’ll save yourself frustration by starting from scratch if you find many tiles are loose or damaged (generally over 5% of the tiles).
No matter the state of your tiles, it’s crucial to remember that, by tiling over the tile, you change the surface’s profile. Walls will stick out more, and floors will rise. Your plumbing fixtures, however, stay in place, and they can’t always accommodate the added dimensions.
On the shower floor, you’ll need to raise the drain to match the depth of the added tile. On the wall, the shower head and tap will need to work with the new tile. The last thing you want is to finish a whole job only to find the faucet handle can’t move or that you can’t reattach the shower head because the wall is too far out.
With these plumbing considerations in mind, you’ll have to stretch your DIY knowledge. Working with your water system can set you up for disaster in several ways. It’s crucial to assess the quality of your tile and the implications of the added depth.
How to Tile Over Tile in a Shower: The Basics
Depending on your materials, you can tile over tile in a couple of afternoons or even one day. You don’t need any special tools either.
- Paper towels
- Clean cloths
- Rubber gloves
- Trowel
- Water
- Detergent or denatured alcohol
- Bonding primer
- Thin-set adhesive
- Grout
Step-by-Step Guide
1. Assess and Prep

The existing tile has to be strong enough to hold the new tile, and the backer to that tile has to be strong enough to hold double the weight.
The backer board is generally strong enough to hold the weight if there isn’t any indication that it’s failing. But the tile can hide flaws, looking perfectly fine while lacking the stability to hold up the new installation. A solid, level surface will work for the new tile. Use a mallet to tap the tiles. Listen for hollow sounds and inspect for loosened adhesive. Look for potential moisture issues and mold, and check for an even surface by laying a level across the tile and inspecting for high or low spots.
You can reset the random loose tile with adhesive and smooth uneven spots with an angle grinder. If you have extensive touch-ups, you might be better off replacing the tile. You can sand down the tiles at this stage to remove the glaze and rough them up. Use coarse-grit paper on an orbital sander or an angle grinder. It can get messy and take extra effort, but sanding can remove the need to use a primer later.
2. Clean the Area and Protect the Surroundings
The tiniest amounts of moisture and dust will prevent solid seals from forming between the old and new tile, leading to weak installations and potential mold problems. After prepping the tile, it’s crucial to clean it before you start adding layers.
Remove anything getting in the way of the new tile, such as shower heads, taps, cover plates, and drain covers. Vacuum any dust or debris from the tile and the surrounding area. Clean the existing tile with a clean rag and degreasing soap, denatured alcohol, or TSP.
Let it dry completely, and make sure no water is present before taping off edges and laying down plastic. It’s crucial to protect your fixtures and other surfaces before working, as the primer, thin set, and grout can leave hard-to-remove spots if you drip them on your bathtub or floor.
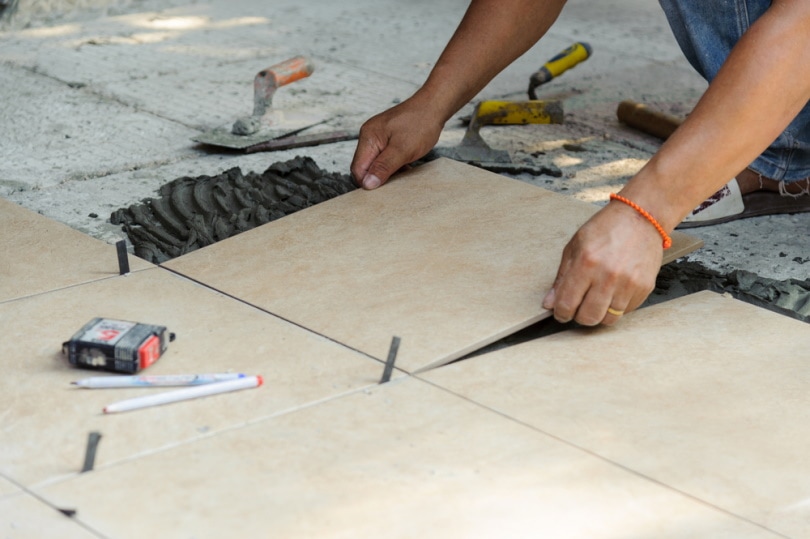
3. Lay Out the Tile and Cut to Fit

Do a dry run with your tile by laying it over the existing surface. Cut the tiles to size and double-check your setup.
4. Prime the Existing Tile
Use a bonding primer to create a textured hold on the existing glazed tile and keep the thin set from loosening. Primer uses grit that tends to sink to the bottom, so ensure you mix it well before applying.
Coverage doesn’t have to be flawless for the primer, and you don’t need high-quality tools. It’s better to use cheaper brushes and rollers because they will be nearly impossible to clean afterward. For added reassurance after priming, consider rolling on a waterproof membrane over the primer.
5. Lay Tiles Section by Section
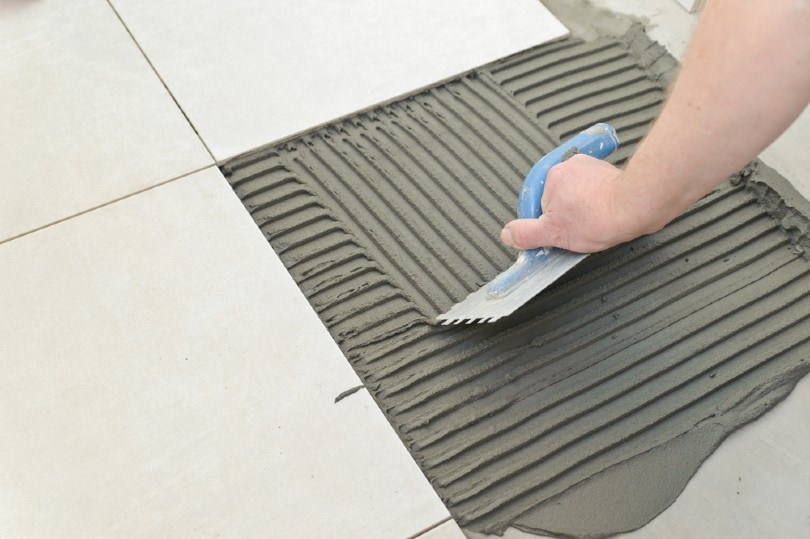
Apply a thin layer of adhesive with your trowel’s toothed edge to score parallel lines. You don’t want the thin set to dry too quickly, so you’ll need to work one section at a time. Don’t forget to add your spacers as you go.
6. Grout Your Tile
Complete your work by grouting and sealing once the adhesive has set. Save time with a premixed grout, and apply it at one time. Finish with a high-quality penetrating sealer to protect the tile and grout.
- Related Read: 10 Best Shower Curtain Rods – Reviews & Top Picks
Final Thoughts
Tile work can be one of the scariest DIY updates, but tiling over tile in the shower makes it far less challenging. If your existing tile is in good condition, there’s no need to wait or hire an expensive contractor. In many cases, tiling over tile is an excellent idea and one of the few times when the easy route is also the best one.
Featured Image Credit: Sergey Ryzhov, Shutterstock
Contents
