
Let’s face it; golfing isn’t particularly affordable. To play it professionally, you’ll need to invest in expensive gear and gain access to a large field. That’s exactly why this sport isn’t particularly popular in the States (or any other country, for that matter). But what if we told you that there are tried-and-true ways to arrange a mini golf field right in your backyard?
Yes, we’re talking about DIY putting greens! To help you with the process, we made a list of the most creative, easy-to-build green plans for the backyard. These vary in shape, size, and require slightly different materials and tools to build. However, at the core, they’re very similar. Alright, now let’s get to it!

The 7 DIY Backyard Putting Greens
1. DIY Golf Putting Green by Steve Watson
| Materials Needed: | Putting carpet, landscape fabric and spikes, pressure-treated lumber (12-inch 4x4s and 2x4s), stone dust, silica sand, pea gravel |
| Tools Needed: | Wheelbarrow, shovel/spade, rake, plate compactor, water drum roller, string line, level, hammer, electric drill + bits, hole cutter |
| Difficulty Level: | Easy/Moderate |
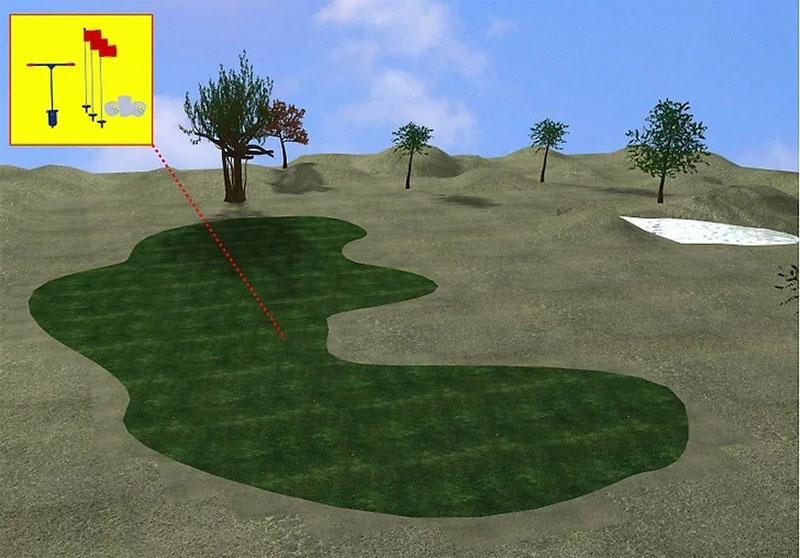
Do you feel like a slightly bigger field will help you master stroking and putting faster? Then try building the Steve Watson Golf Putting Green plan. It’s very similar to the previous two but slightly different in shape. You will need a bit more sand and gravel, which is why a wheelbarrow is highly recommended. Essentially, it’s up to you to decide how large you want the area to be. To achieve the best results with the base, add it in layers.
Fill out 2 inches of sand, gravel, and stone dust and compact it; then, add another 2 inches and do the same. The plate compactor and water drum roller can be rented for cheap.
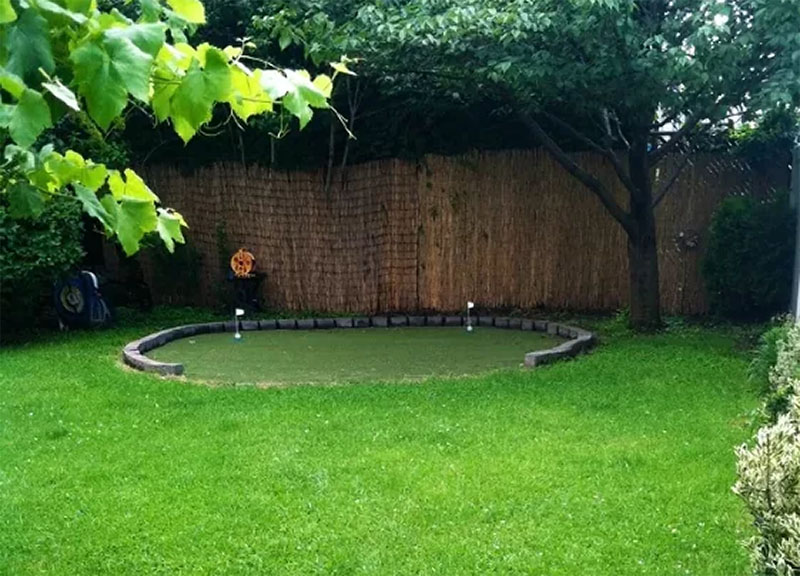
2. Easy-To-Build DIY Putting Green by Crazy DIY Mom

| Materials Needed: | Synthetic turf, bedding sand, edging kit, anchoring spikes, hole cups, hole flags, rock décor |
| Tools Needed: | Rake, hammer, tamper, shovel, level, measuring tape, wire, 2×4, utility knife |
| Difficulty Level: | Easy |
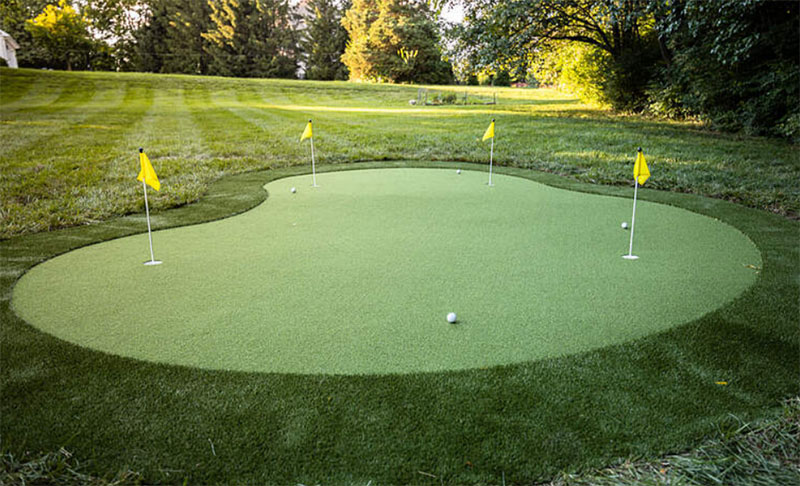
Here, we have one of the simplest yet highly functional putting green projects out there. So, if you were a bit worried about doing the whole thing manually, this easy-to-build custom DIY putting green won’t take much effort to pull off. First, the bedding isn’t that deep (unless you live on rocky terrain). That means less work for you. Second, it doesn’t require the use of any expensive or complex tools. As long as you have a rake, hand tamper, and shovel, you can get it done.
Moving on to the edging, go with patio bricks and rocks or a standard edging kit. Oh, and if you want the putting green to stand out, put a fake rock décor right next to the hole cups and flags.
3. Perfectly-Shaped DIY Golf Turf by Artificial Turf Express
| Materials Needed: | Artificial/natural turf, infill, sand, stones/gravel, adhesive/joining tape, hole sleeves, cups, edging (optional) |
| Tools Needed: | Plate compactor, shovel or spade, garden rake, pickaxe, scissors (heavy-duty), turf cutting tool, level, measuring tape, wheelbarrow (optional) |
| Difficulty Level: | Easy/Moderate |
A putting green doesn’t have to be super smooth. However, with this perfectly-shaped golf turf DIY plan, you’ll be able to make your green look very sleek and professional. As for the turf, it can be synthetic or natural—that’s up to you. Edging is optional, just like a wheelbarrow, as we won’t be hauling a lot of heavy stuff.
The main focus here is on making the putting green look seamless and streamlined, because the more realistic it is, the easier it will be to improve your golfing skills. So, mark the site, make sure it’s free of rocks and vegetation, set the base, compact it, and cut the turf with a sharp cutting tool to give it the desired shape.
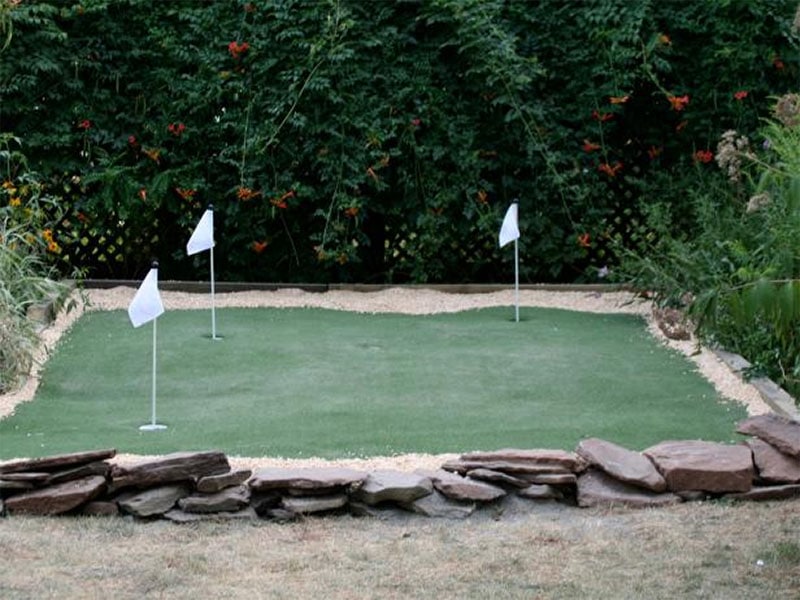
4. Makeshift DIY Green With Border Stones by Hometalk
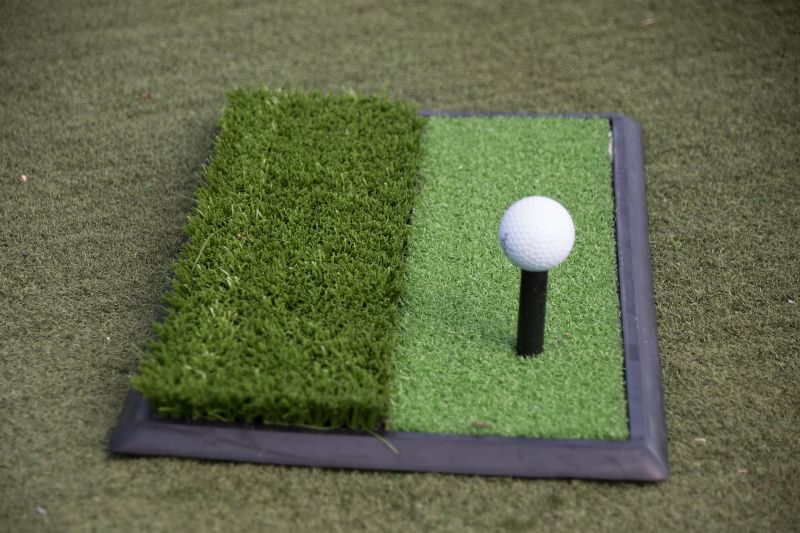
| Materials Needed: | AstroTurf, chipping mat (4×4), playground sand, border stones, putting cups |
| Tools Needed: | Metal rake, lumber (2″x6″x12′ board), tamping machine, work gloves |
| Difficulty Level: | Easy |
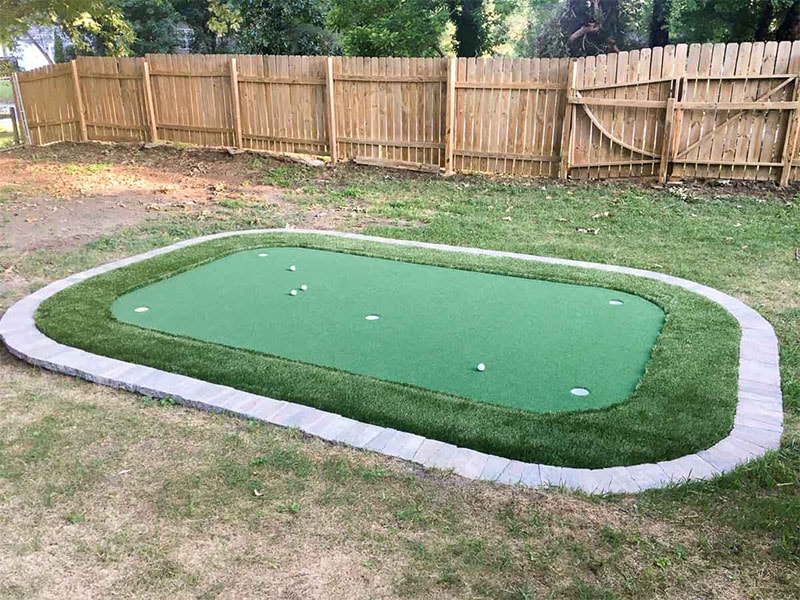
This is another straightforward, low-cost DIY plan for your backyard. It will cost you less than $200 yet serve as an excellent “training ground” for all of your golfing tricks. AstroTurf is a can’t-go-wrong-with pick, but you’re free to use whatever synthetic grass you see fit. To make the makeshift green with border stones nice and even, get your hands on at least 10 bags of sand (50 pounds each). It doesn’t matter where you install the putting green.
As long as there’s enough space between the field and the chipping mat, it will work. The stones, in turn, will prevent the ball from escaping the putting and add a decorative element to the backyard.
5. Natural DIY Grass Golf Green With Drainage by wikiHow
| Materials Needed: | Natural sod/seed, topsoil, drain pipes, pea gravel (4”), sand (2”), flags, pins, cups, irrigation system (optional) |
| Tools Needed: | Shovel, plate compactor, mower, wheelbarrow, level, tamper, sod cutter, duct tape, wire/cord |
| Difficulty Level: | Moderate |
Even if you live in a hot and dry area, excess moisture can still be a problem. That won’t be the case with a natural grass golf green with drainage, though. As the name suggests, it’s not made of artificial grass, which makes a proper drainage system that much more important. Don’t worry: adding drain pipes and an irrigation system is a straightforward process.
The process is straightforward and doesn’t take weeks to complete. Get the ground ready using a shovel, plate compactor, and tamper, and even it out with sand and pea gravel. The biggest challenge here is digging out 20 inches of soil to make room for the base and the pipes.
6. DIY Backyard Putting Green by XGrass
| Materials Needed: | Putting carpet (double-sided), pre-cut fringe, retriever base, poles, flags, cups, panels, 4-inch hole sleeve, spray paint |
| Tools Needed: | Rake, shovel, push broom, post hole digger, hammer, carpet kicker, plate compactor, drill, utility knife, staple gun, tape measure, level, deck washer |
| Difficulty Level: | Moderate |
XGrass is a leader in the synthetic grass market. While their kits are somewhat expensive, they do make the installation process fast and not at all complicated. Along with that, this XGrass backyard putting green boasts an extended lifespan. Now, the panels interlock for quick assembly and the numbers arrive with pre-cut holes, but the kit does require two sets of hands to install—keep that in mind. Also, it’s recommended that the site be small-sloped (< 3%).
Measure and mark the area with spray paint, remove any sod in the vicinity, and level the site with a rake and a compactor.
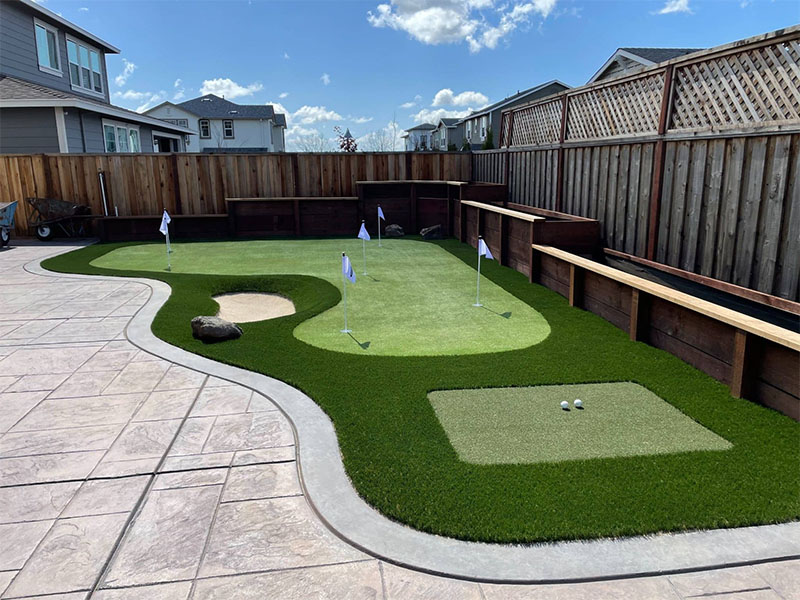
7. Pro-Level DIY Putting Green by Dogwood Golf
| Materials Needed: | Putting green, fringe turf, landscape fabric, layer rock, screening rock, spikes + U-staples, stone pavers, caps, adhesive, weed barrier, infill |
| Tools Needed: | Level, spray paint, measuring tape, tamper, sod cutter, shovel, garden hose, hammer, jigsaw, wheelbarrow |
| Difficulty Level: | Moderate/Hard |
If you’re a big golf fan and are planning on living in the same house for at least a decade, a pro-level DIY putting green will be the ultimate investment. While this isn’t the least expensive DIY plan, it is very reasonably priced. And it’s built to last. To get the rock base for cheap, go to a local mulch yard. The stone for the perimeter won’t cost much, either. You will have to do a lot of digging, though.
But that’s going to ensure the putting green doesn’t deteriorate over time.
Are Putting Greens Worth It?
If you enjoy golfing but don’t want to spend big bucks at a local golf course to improve your skills, putting greens will be a great investment. The same is true if you are ready to pay for a membership, but the nearest golf area is miles away. Having the ability to work on your short game in the backyard (literally) is worth the time and money invested into a green.
This smooth, grassy area will add a “royal” touch to your backyard. Outdoor putting greens are great for practicing strokes and turning into a great mini-golf player. More importantly, they give you the feel of “working” on a real golf course. And one more thing: putting green on your property will boost its value and make it easier to sell it.
Putting Green Maintenance 101
Most backyard greens are made of artificial grass, which takes less effort to take care of compared to pro-level greens with natural grass. Turf grass is cheap, too: you can just replace parts of the field when they go bad and not the whole thing. Artificial grass is durable, lasts for a long time, and doesn’t grow (no need to mow it). More than that, it doesn’t attract any insects—you won’t have to treat it with any bug-repelling detergents.
Also, forget about watering, reseeding the grass, or waiting for hours before it gets dry. Just make sure to remove all the leaves, dirt, and debris at least once in 2–4 weeks. A leaf blower is a great tool for that; if you don’t have one, consider renting it. Finally, when the grass gets dusty, rinsing it with a hose will fix that.
What’s the Best Size for You?
For a backyard putting green, 500 square feet is the golden middle. This size is just right for practicing at home. Is there a good enough reason to make it bigger? Well, not quite: for a residential home, anything larger than 500 square feet will be overkill. With that said, commercial (non-PGA) putting greens are two or three times bigger (1–1.5K sq. ft.).
And if you visit a PGA Tour, you’ll see that the “greens” there are enormous (up to 5–6K sq. ft.). What you should do is start with a small area, get some of the basics down in the comfort of your own home, and only then switch to a commercial field. Don’t rush the “transition” to a bigger field—let it come naturally.
How Much Will It Cost?
You can install a putting green in your backyard for as low as $400. On average, most folks in the US pay $500–900 for it, with the high-end cost reaching $9–10K. The final cost price will, of course, be determined by how big the area is and the materials used. Contractors charge a lot for the labor as well ($10–25 per square foot). That’s exactly why we encourage you to try and do it manually, DIY style.
In Conclusion
You don’t have to be a pro golfer to like the game. Besides, once you get into it, golfing can help you both relax and get more focused. Forget about 10-acre fields! As long as you have at least 500 square feet of empty space in the backyard, it’s very well possible to install a putting green there and start putting those balls into the holes.
To build a backyard putting green, go through our top nine DIY plans and pick the one that fits your current needs and capabilities. True, a putting surface won’t be able to replace a full-fledged golf course, and it will take work to build. But for honing your skills and impressing some friends/relatives, it will be just right!
Featured Image Credit: Pixabay
Contents
