

If you’re an avid gardener and want your flowers, plants, or veggies to get that “royal” treatment, a raised garden bed is a must. The #1 job of a raised garden bed is to contain the soil, allowing you to enrich it. Plus, this forces the roots to grow deeper into the ground. Mostly crafted from wood, the bed can be of any shape or size, and if you want it to last, go with cedar.
Cedar easily handles moisture and mold, and is a natural insect repellent. More importantly, it holds up well to harsh outdoor conditions. So, today, our focus will be on the best raised cedar garden beds plans. Don’t worry: they don’t require a science degree to build. While some are more complex than others, all you have to do is follow the simple, down-to-earth instructions. Alright, now let’s find the perfect bed for your garden!

The Top 10 DIY Cedar Raised Garden Beds Plans
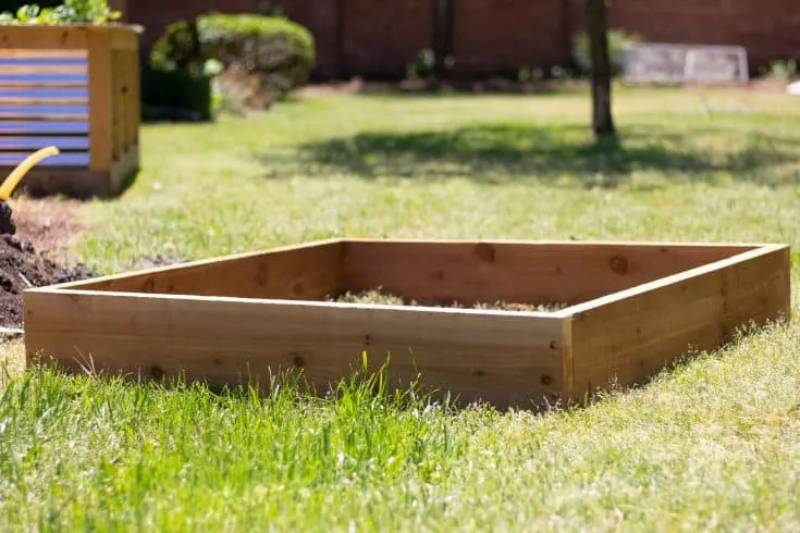
1. Simple, Single-Layer Cedar Bed
- Materials Needed: 2 2’ x 8’ x 2’ cedar boards, 8 3” wood screws
- Tools Needed: Table saw, measuring tape/ruler, standard drill
- Difficulty Level: Easy
We start the list with one of the simplest yet most popular DIY plans. This single-layer cedar bed will be a perfect pick for a beginner gardener, as it only consists of one layer of cedar boards and takes less than an hour to complete. As long as you’ve got a saw and a standard-issue drill, you’ll be able to pull this project off. This raised garden bed is great at keeping weeds, pests, and critters at bay, ensuring fast, hassle-free growth for the plants.
Just make sure the screws are of the proper size, find the right spot for the garden bed (it should get 5–6 hours of sun per day), and you’re all set!
2. Three-Layer Western Red Cedar Bed with Spikes
- Materials Needed: Red cedar miters, boards, spikes, stainless steel screws, sledgehammer
- Tools Needed: Table saw, measuring tape, gloves, ear protection, pencil, drill
- Difficulty Level: Moderate
Durability is the top priority when building a raised garden bed. This three-layer western bed with spikes is built from red cedar (stronger than white cedar) and will serve you for many years, if not decades. As the name suggests, this DIY garden bed includes not only three layers of cedar boards for growing big plants, but it also comes with spikes. The idea behind this is to place the bed gently on soft soil and tap it into the ground with a sledgehammer.
That will anchor the bed and make it even more durable. If you only have hard/rocky ground in your garden, just skip the spikes. In any case, don’t forget to wear protection for your hands and ears.
3. Six-Sided Cedar Garden Bed
- Materials Needed: 2 1’ x 6’ x 8’ untreated cedar boards, 3” exterior wood screws, recycled cardboard
- Tools Needed: Safety equipment, drill + bits, tape, miter saw
- Difficulty Level: Moderate
If you’re going for a creative vibe in the garden, a six-sided cedar garden bed might be right up your alley. It’s very simple in design and is, in many ways, similar to the single-layer bed we checked earlier. However, instead of building a square, with this DIY plan, you can go with either five or six sides. Yes, that does take a bit more work and precision cutting, but this shouldn’t be a problem. A miter saw, a drill with bits, and a tape—that’s it for the required tools.
This can be done in an hour or two at a moderate pace, and we recommend building two smaller beds instead of a single large bed for easy maintenance and upkeep.
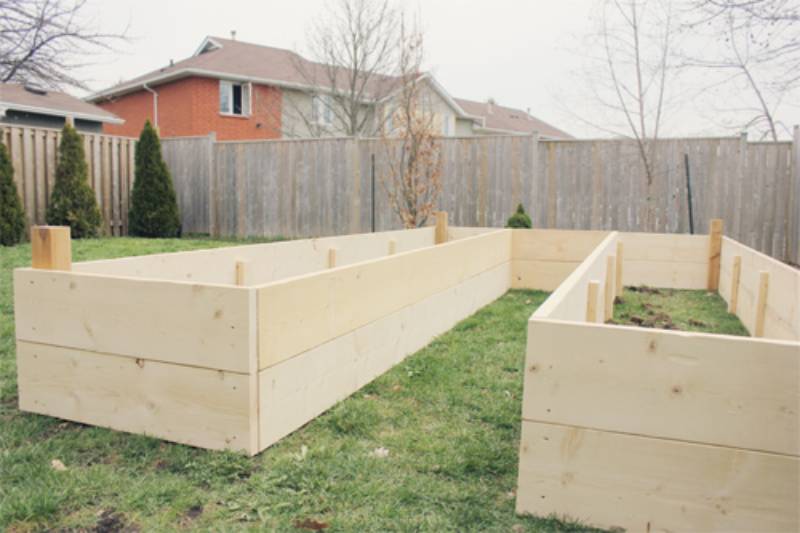
4. U-Shape Raised Cedar Bed
- Materials Needed: 12’ x 16’, 2’ x 4’, and 4’ x 4’ planks, a set of screws
- Tools Needed: Circular saw, marker, protection for the hands, eyes, and ears, drill, hammer
- Difficulty Level: Moderate
Here, we have another unusual design for a garden bed. With a U-shape raised cedar bed, it’s much easier to give each plant the attention it deserves. It allows you to move around freely and takes less time and effort to reach the furthest parts of the garden. Compared to a large rectangular bed, it is, indeed, a lot easier to work with and still gives plenty of room for planting. Besides, U-shaped beds look great and give your garden a very trendy touch.
More importantly, they’re relatively easy to build. The list of needed tools includes a drill, circular saw, and hammer. As for the cedar, use 12’ x 16’, 4’ x 4’, and 2’ x 4’ boards or planks.
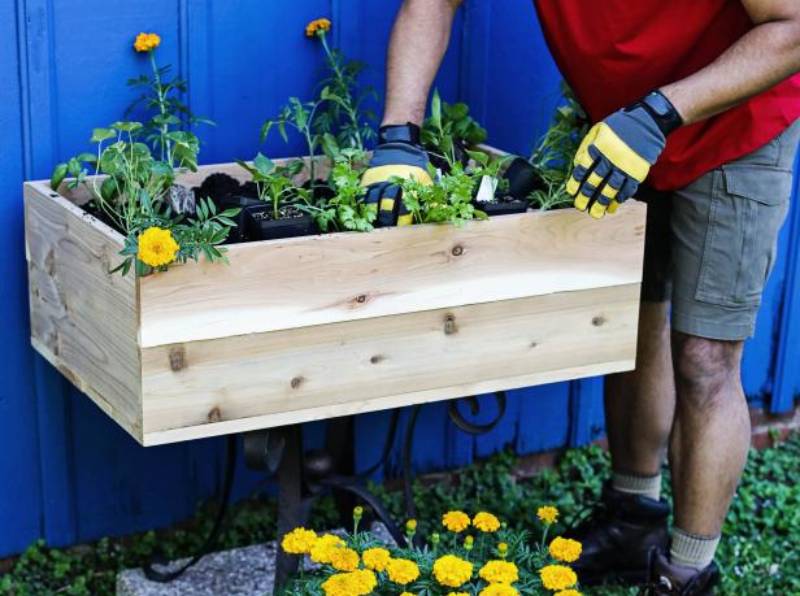
5. Fence Picket Cedar Garden Bed
- Materials Needed: 6 fence pickets, 1’ x 2’ cedar boards for corners, 2” screws, wood glue, garden stakes
- Tools Needed: Circular saw, table saw, drill, protective gloves + goggles, speed square, pencil, tape measure
- Difficulty Level: Low
The biggest pro of this DIY plan is the low price. It’s one of the least expensive options for a garden bed. That’s because, for it, you’ll only need a set of cedar fence pickets. Pickets are significantly cheaper than boards. Stakes are optional but will come in handy. This Fence Picket Cedar Garden Bed has a very neat, cozy look and will protect your plants from insects, humidity, and temperature fluctuations.
The project will take an hour to complete, by the way, given you have all the necessary tools (especially a table saw and a drill).
6. Cedar Garden Bed With a Metal Fence
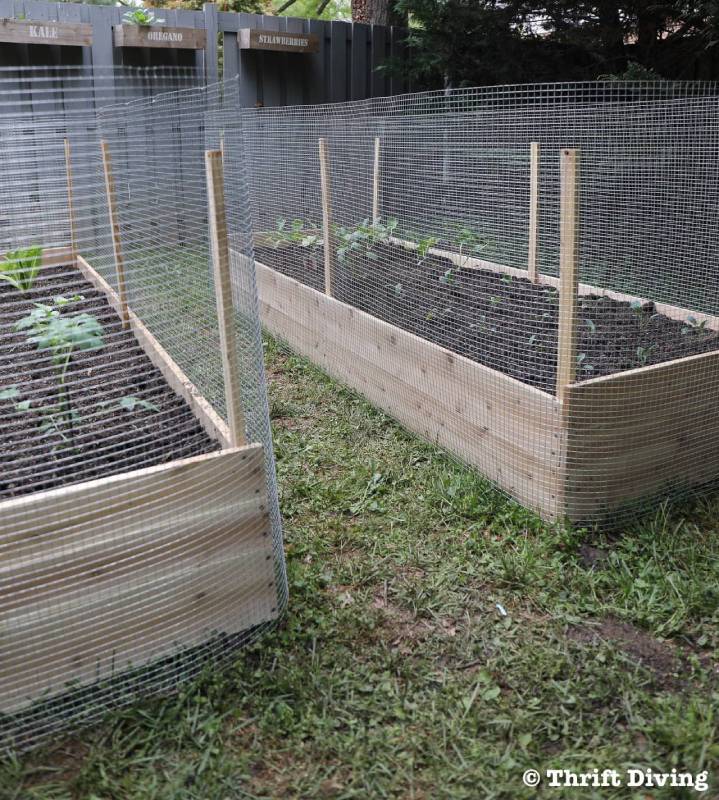
- Materials Needed: 12 1’ x 6’ x 8’ cedar boards, corner brackets/clamps, exterior screws, metal fencing, deer netting, stakes
- Tools Needed: Miter, circular, or jigsaw, power drill + bits, stapler (heavy-duty), tape measure, level, hammer
- Difficulty Level: Moderate/High
Next up, we have a highly efficient and useful DIY plan. But why would you want to go with a cedar garden bed with a metal fence instead of the regular thing? The answer is simple, actually: cats and dogs. If you’ve got some stray animals in the neighborhood, they’ll make short work of your fragile crops and plants. This DIY bed takes more effort to complete, of course, compared to a simpler plan.
You can start by building a regular cedar bed and adding the metal fence later. Just wrap the fencing around the stakes (that you tap into the soil using a hammer), and that’s it.
7. Raised Cedar Bed with Hinges
- Materials Needed: Cedar planks, brackets, plastic fencing, screws, hinges, clamps
- Tools Needed: Tape, wood glue, drill, pocket hole tool, miter saw, staple gun
- Difficulty Level: Moderate/High
If you’re ready to take the metal fence idea one step further, consider going with a raised cedar bed with hinges instead. It has a more modern look and does a better job of protecting against animals, including mice, rats, and bunnies. Do keep in mind that you’ll need to spend three–four hours on this DIY plan, and, again, it requires more expertise than the average bed. The name of the game here is precision. Be accurate with your cuts and follow the instructions closely.
On the bright side, plastic fencing is relatively easy to work with, especially if you have a staple gun to secure it.
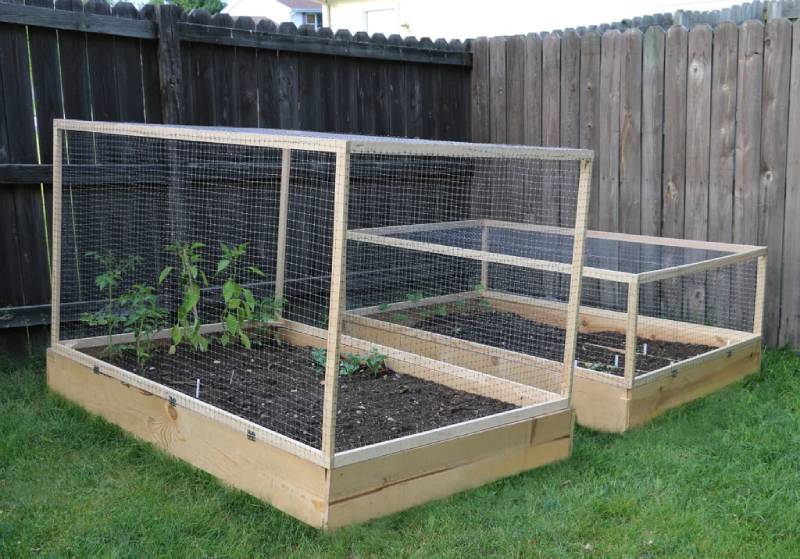
8. Garden Bed with a Removable Cover
- Materials Needed: Greenhouse plastic, cedar boards, deck screws, snap clamp, hinges, handle, PVC pipes and caps, Furring strips
- Tools Needed: Circular saw, drill + bits, measuring tape, marker/pencil
- Difficulty Level: High
At a glimpse, it might seem that the Garden Bed with a Removable Cover is the same as the raised cedar bed with hinges, but they’re quite different. In some ways, yes, the concept is similar. However, with the removable cover, you’ll be able to protect the plants (and the soil) from rain, hail, or snow. This DIY project involves not only working with wood, but pipes, strips, and clamps as well.
If you’re up for it and don’t live in an area with extremely strong wind, the removable cover raised bed will be an excellent choice.
9. Raised Garden Bed with a Trellis
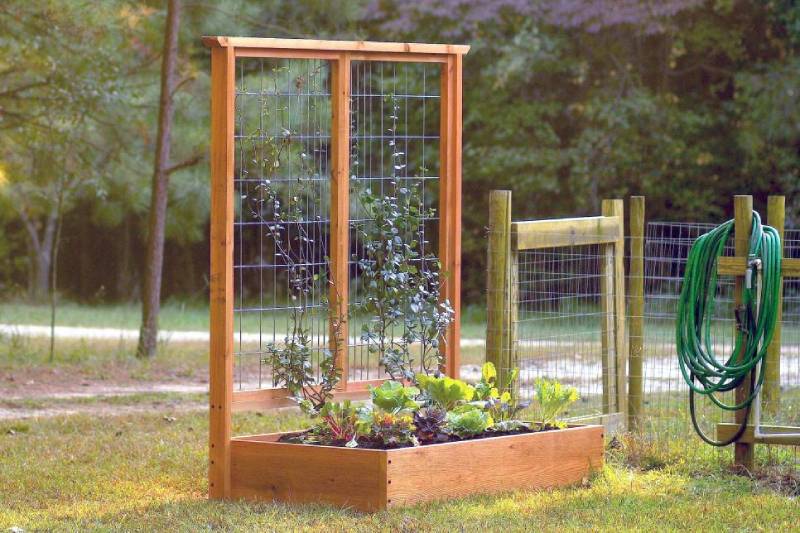
- Materials Needed: Rough-sawn cedar boards, 22 lag screws, 4 deck screws, finishing nails, cable clips, hog fencing panel
- Tools Needed: Circular saw, tape measure, level, drill, speed square, bolt cutters, nail gun/hammer
- Difficulty Level: Moderate/High
Are you a fan of vertical gardening? Then pay extra attention to this wonderful raised garden bed with a trellis. You’ll need tons of material for this, including a dozen cedar boards, nails, screws, and a hog fencing panel. As for the tools, bolt cutters, a nail gun, saw, and drill should get you started if you already have a square, level, and tape measure. Start with the bed frame and only then move on to the trellis frame.
The fence frames and the hog panels are quite time-consuming but easy to build/assemble. With a trellis bed, your plants will be able to live up to their true potential.
10. Raised Cedar Bed with a Bench
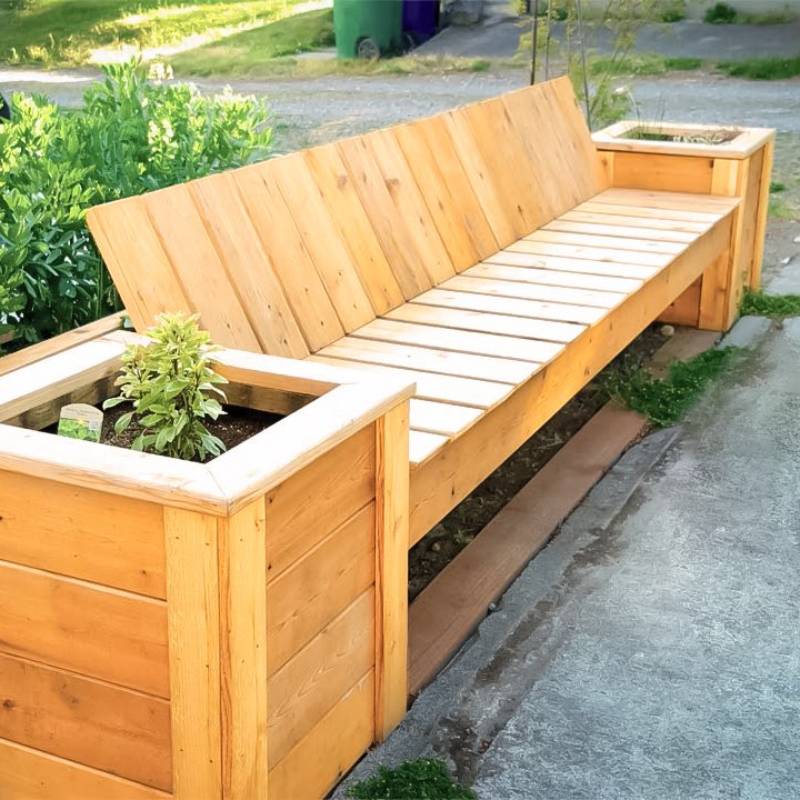
- Materials Needed: Cedar deck boards (20), fence pickets pressure-treated lumber, lag screws, deck screws, nails
- Tools Needed: Drill, chisel, scratch awl, Circular, table, track, and chop saws, jigsaw, square tool, ear protection, eye goggles, marker, measure, nail gun
- Difficulty Level: High
Finishing up with the list, we’ve got a rather fancy, two-in-one project: a set of raised cedar beds with a bench. These are gaining in popularity and will be a great fit if you spend long hours in the garden. No need to carry a chair around! The preparations, materials, and tools for the beds are the same. As for the bench, it doesn’t necessarily have to be complex in design. You will need lots of different saws for this DIY bed—keep that in mind.

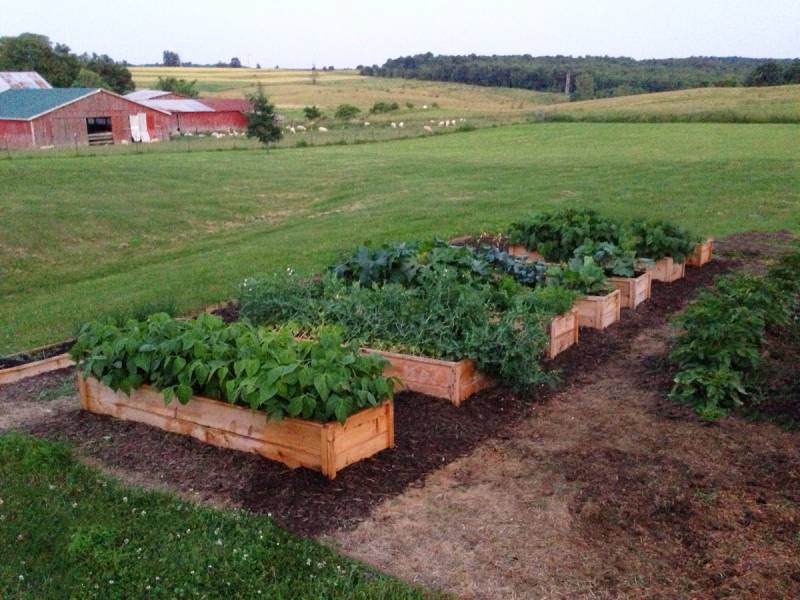
Are Raised Beds Worth it?
The short answer—yes, they’re definitely worth it. As we learned today, it doesn’t take much time (or investments) to build one. They vary in size, of course, but raised beds are usually 6–8 feet long, 3–6 feet wide, and 6–8 inches high. One of the biggest pros is foot traffic protection. This is especially important if you’ve got little kids or pets: cedar ensures the soil remains “intact”. On top of that, raised cedar beds guarantee a long growing season for your plants.
They drain much faster and warm up quicker. If you live in the South or somewhere with harsh weather conditions, raised beds will be 100% worth your time, money, and effort. Last, but not least, beds and planters (we’ll talk about the differences in a moment) allow easy access to plants for older folks or people with disabilities.
Raised Bed vs. Planter: Which One To Pick?
Sometimes, these terms are used interchangeably, and to the naked eye, raised beds and planters might look like the same thing. They both make your plants hard to reach for pests and give the garden a nice, tidy look. Plus, when designed properly, beds and planters eliminate the weeds. However, while they are, indeed, very similar, there is one big difference between the two. With raised beds, you only have four wood planks enclosing the soil—the bottom is not covered.
Open to the ground, they allow the roots to freely “dive” into the ground and feed on natural nutrients. Planters, on the other hand, are full-fledged containers. They sit above ground and cover the bottom. What’s the point behind this? First, the roots don’t have anywhere to go but into the rich, composted soil. Second, since planters are elevated, the bottom keeps the soil inside of the “box”. Raised beds are cheaper, though, and easier to build.
Conclusion
Raised garden beds are perfect for controlling the soil, enriching it, and ensuring near-perfect conditions for your plants to grow. If you’ve got a big, beautiful garden with lots of plants, we recommend using cedar beds. As mentioned, it’s one of the most durable, reliable, and long-lasting wood materials out there. Cedar isn’t afraid of rain, snow, wind, dirt, or extreme temperatures.
True, it is expensive, but it will be a great investment for your garden. We just checked out 10 outstanding cedar bed plans that you can use right now. They don’t require pro-grade skills or weeks to complete. As long as you’re good with your hands and have common tools in the garage (or have a neighbor you can borrow from), you’ll be done in no time!
Featured Image Credit: Kristen Prahi, Shutterstock
Contents
