
Every gardener loves decorating their home with refreshing and gorgeous planters. Yet, some struggle to find affordable and water-saving planters.
If you’re having difficulty finding an inexpensive yet beautiful planter, you should opt for self-watering planters. These planters have a drainage hole at the bottom where excess water accumulates and drains on its own. Luckily, it’s pretty easy to build a self-watering planter. You just need a few tools and old containers to create a DIY self-watering planter of your choice.
Below we discuss 13 self-watering planter plans to help you find what you’re looking for.

The 13 DIY Self-Watering Planter Plans
1. Recycled Air Conditioner Planter by Instructables
| Materials: | Condensate pump, brass hose, flexible tubing, 1/4-inch pipe nipple, and A-frame |
| Tools: | Drill, drill bits, saw, and glue |
| Difficulty Level: | Moderate |
If you love recycling your old stuff, you’ll enjoy building this recycled air conditioner planter. It may come to you as a surprise, but yes, you can use your air conditioner to create a self-watering planter on your own.
Your air conditioner produces water that is mainly absorbed by the ground or gets wasted any other way. You’ll reuse this water and supply it to your plants. This way, the plants will be watered whenever you switch on your air conditioner.
This DIY self-watering planter plan can be tricky if you’re a beginner. So, make sure to include more people with you in building it.
2. Empty Wine Bottle Planter by Instructables
| Materials: | Silicone O-rings, wine bottle, screen, and wick |
| Tools: | Bottle cutter and sandpaper |
| Difficulty Level: | Low |
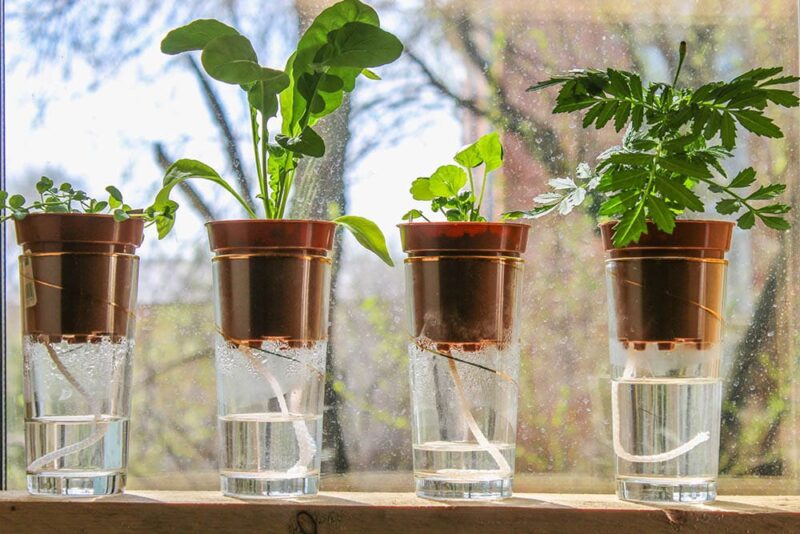
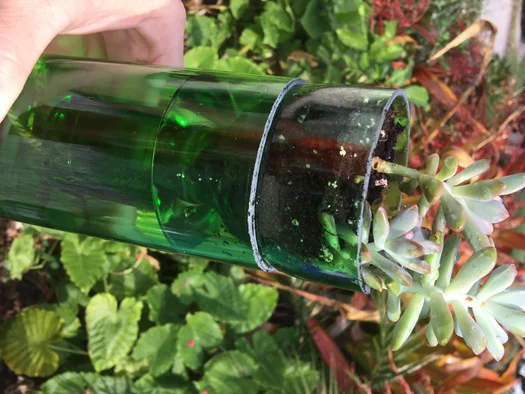
The empty wine bottles you think are useless can be recycled into an easy-to-build self-watering planter. The best part is that you don’t have to search for multiple tools and materials to create this planter. Even better, you can set up as many wine bottle planters as you want without going beyond your way.
While plastic bottles are not that sturdy, they are easy to cut. On the other hand, glass bottle self-watering planters are more robust but require a bottle cutter and a wheel to cut into two pieces.
Clamp the bottle to a cutting wheel and cut a line. Then, run the glass along the score by putting silicone O-rings around the wine bottle. Pour boiling water to cut the bottle perfectly along the score. Lastly, smooth the sharp edges and add the wick and screen.
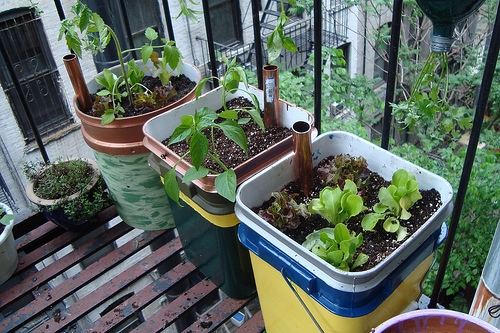
3. Standard Self-Watering Planter by Bucolic Bushwick
| Materials: | Watertight container with a lid, fill tube, tall water bottle, 2 fabric strips, and a tomato cage |
| Tools: | Electric drill or sharp knife |
| Difficulty Level: | Low |
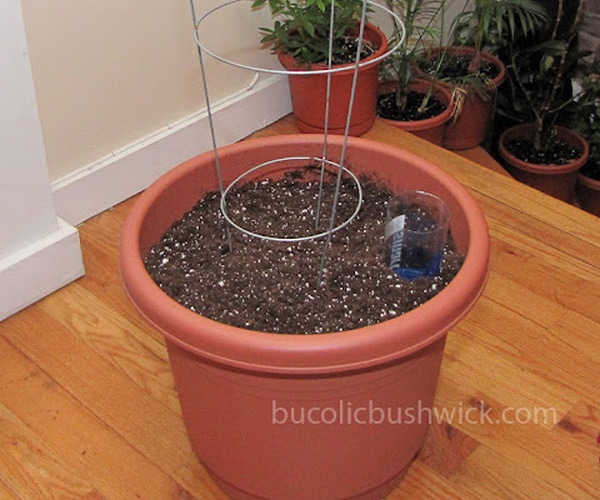
If you want to upgrade your ordinary planter into a self-watering one, you can easily do that within a few hours. The standard self-watering planters hold a week’s worth of water until the reservoir dries. This makes it an ideal DIY self-watering planter for people who stay away for days.
To build an eye-catching planter, choose a container that complements your planter in size. Then, use an electric drill or a sharp knife to make one big hole for the fill tube, four slits for the strips, and one overflow hole on the top corner of the reservoir. Don’t forget to make several tiny holes for soil aeration.
Now, insert the materials through the holes and set them up. Next, add a cage before adding the soil. Lastly, fill the reservoir through the tube to let the plant keep watering itself when you’re away.
4. A Downspout Planter by Instructables
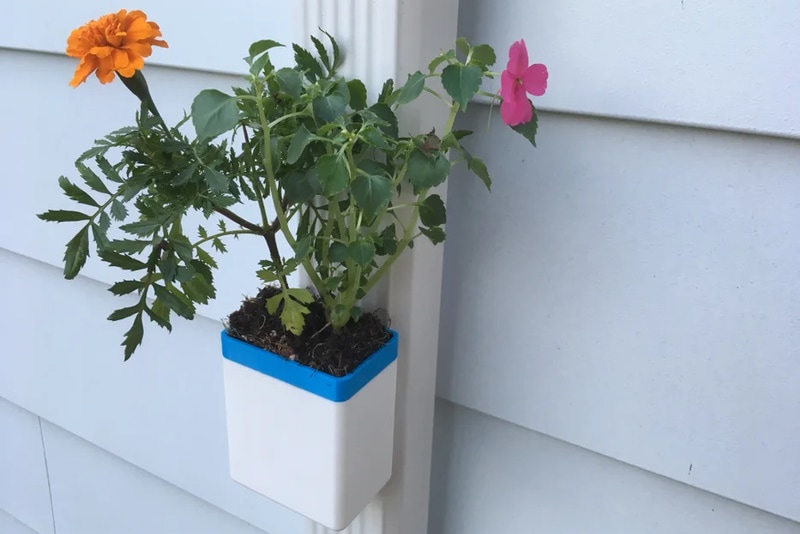
| Materials: | Plants or seeds, basket, and reservoir |
| Tools: | A ruler, pen, drill, drill bits, files, sandpaper, safety glasses, and gloves |
| Difficulty Level: | Low |
A self-watering downspout planter can be an adorable addition to your outdoors. The pot has a water reservoir that sends water to the planter through a wick or tiny holes.
You may have to keep the reservoir filled with water. But this DIY downspout planter also captures rainwater to help the plant thrive and make your home look attractive.
5. Large Container Planter by Networx
| Materials: | 2 5-gallon containers and a ½-pint deli container |
| Tools: | Drill, ¼″ drill bit, 3 ½″ hole saw, and 1 ¼″ hole saw |
| Difficulty Level: | Low |
You can turn the food-grade deli containers into practical DIY planters for your outdoors. So instead of throwing them away, recycle them into self-watering planters that could hold an entire garden. The process is pretty straightforward, too.
6. Mini Wicking Planter
| Materials: | 2 plastic tubs, a plastic container, a silicon tube, baskets, and a piece of landscape fabric |
| Tools: | Knife and glue |
| Difficulty Level: | Low |
If you want to grow radishes and chives in your garden, the mini self-watering wicking planter can provide you with the easiest yet organic supply. In addition, this planter has a wicking bed, so you don’t have to take care of the daily watering of the plants.
This planter consists of two plastic tubs, one serving as the water reservoir and the other as the planter. One basket is placed in the middle of the planter via a knife. It acts like a wicking bed, providing enough nourishment to your veggies.
Keep the bottom tub filled with water. This DIY self-watering planter is ideal for gardeners who live in apartments and want a touch of green in their homes.
7. Inverted Planters by Instructables
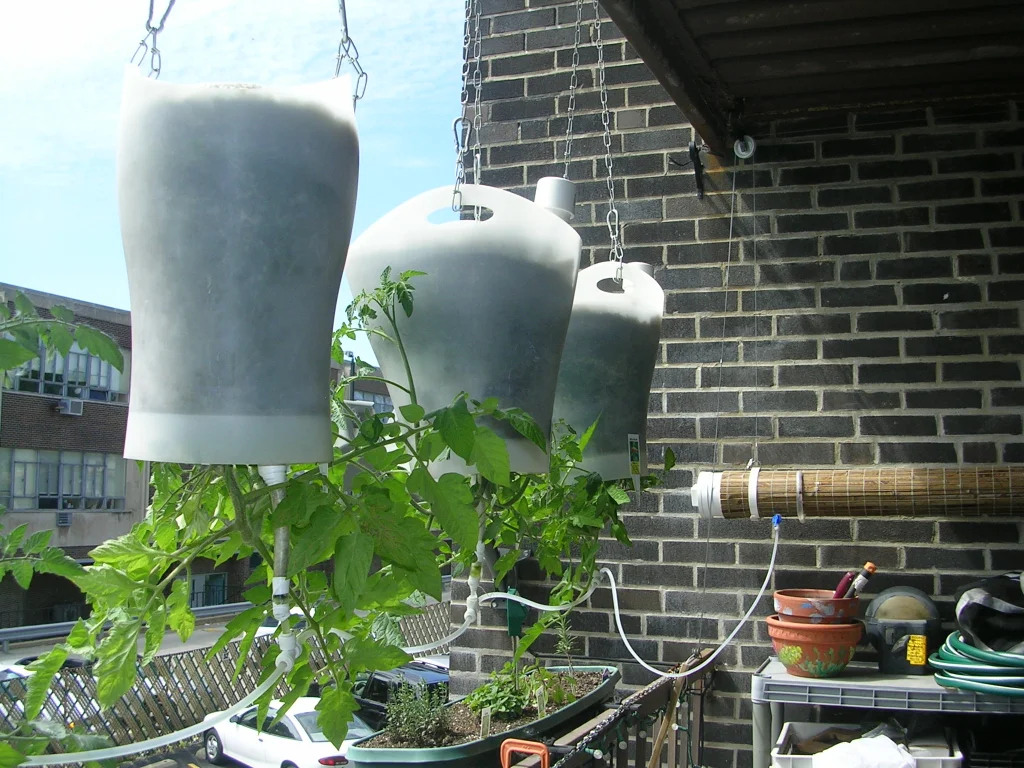
| Materials: | PVC pipes, pipe hangers, corks, baskets, hoses, foam, and soil. |
| Tools: | Rotary cutting tool, fat soldering iron, hot glue, PVC cement, Teflon ribbon |
| Difficulty Level: | Moderate |
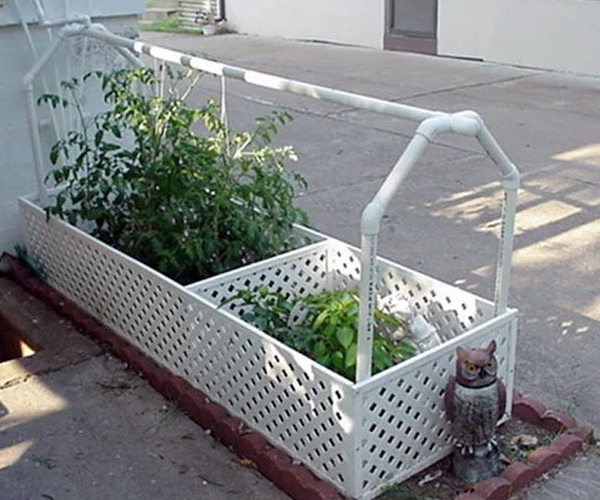
Upside-down planters add extra value to your outdoor garden setup. They seem fascinating, occupy little space, and are super easy to grow. Imagine them as plants hanging upside down in containers and self-watering themselves.
The system typically consists of four hanging planters connected to one water supply. You can add or subtract planters as per your gardening needs.
A horizontal hose is placed under the planters. This planter’s materials and tools list is pretty long, so you may need to ask for help.
You can hang the planters wherever you want. Then, build a reservoir and attach the planters to it for watering needs.
8. Foam Box Planter by The Handy Gardener
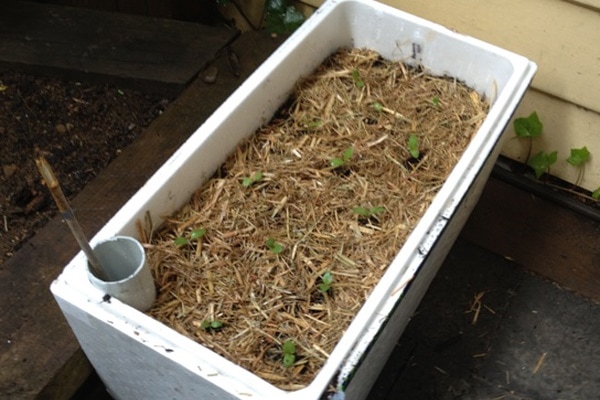
| Materials: | A foam box with lid, PVC pipe, and waterproof tape |
| Tools: | Saw, scissors, and stick |
| Difficulty Level: | Low |
A foam box planter comes in handy when you want to grow a few plants without watering them daily. This DIY plan consists of a self-watering foam box that looks like a cooler. The best part about this planter is that it is super affordable and easy to build. You can easily find a big-sized Styrofoam cooler from any dollar store or visit a local cafe or restaurant to get one.
Once you buy the foam box, start cutting the lid while keeping in mind that you’d need to cut the inside and use its sides as a frame. Now, cut the pipe to make its size the same as the box.
Cut the pipes into three pieces like connectors and insert them from the lid’s side. Finally, fill the container with soil and plant your favorite seeds.
9. Repurposed Storage Box Planter by Instructables
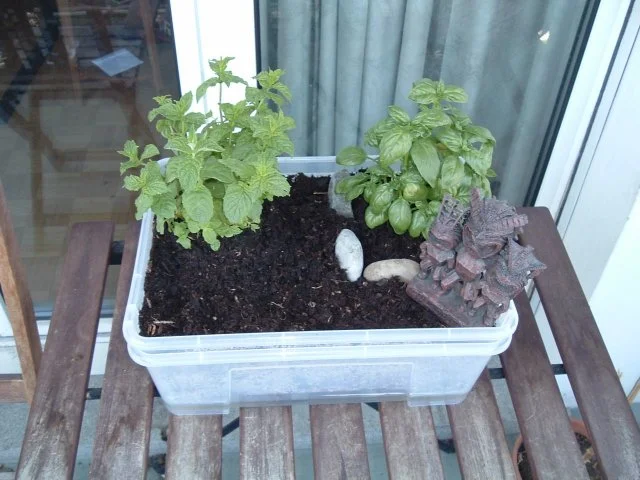
| Materials: | 2 plastic storage boxes, strings, and scissors |
| Tools: | Knife |
| Difficulty Level: | Low |
This easy DIY planter idea requires a handful of tools and materials. Only a pair of scissors, a knife, and strings can turn two ordinary plastic storage boxes into a self-watering planter with plenty of room for multiple plants. You can quickly get the storage box for a dollar or two.
Drill a few holes in the bottom of both boxes and insert the strings through them. Knot the strings to prevent them from falling. Now, fill the box with soil while pulling the strings up. Put this box in another plastic container and fill it with water.
Now you can plant whatever you want in your DIY self-watering planter.
10. Wooden Box Planter by Verticalveg
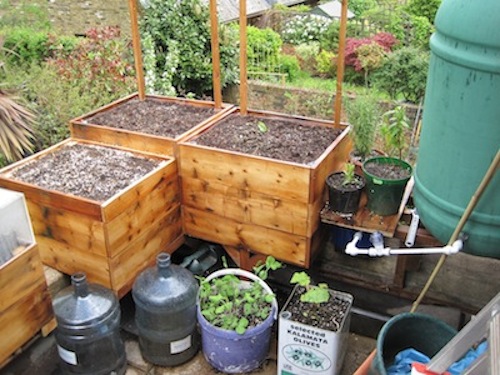
| Materials: | Wooden boxes, plastic boxes, a drum, plastic sheets, and pipes |
| Tools: | Zip ties, screws, and drill |
| Difficulty Level: | High |
If you’re willing to do something extra, how about bringing your inner craftsman out and building a wooden box planter? Sounds like an exciting idea, right? The wooden box planter can be pretty hard to make, especially for amateurs, but they look gorgeous indoors and outdoors.
To create this planter, you need a couple of wooden boxes with plastic at the bottom. You’d also need a drum or a water reservoir to fulfill the plants’ watering needs. The container connects to the wooden boxes through pipes.
The planters water themselves, so you don’t have to worry about their watering schedule. For bonus points, you can paint the wooden boxes with beautiful artwork to enhance the beauty of your garden.
11. Water Cooler Bottle Planter by Bucolic Bushwick

| Materials: | 5-gallon water cooler bottle and tomato cage |
| Tools: | Drill, measuring tape, and knife |
| Difficulty Level: | Low |
The water cooler bottle planters are for people who want to create a big garden. The 5-gallon planter has lots of space for different plants and a sufficient water supply that lasts for days. If you’re going on vacation, ensure that your reservoir is large and full.
To build the water cooler planter, drill holes on the bottle’s sloping side through the spout. Now cut the bottle into two halves—one for water supply and the other for soil. Use the measuring tape to ensure that both pieces are equal.
Make an overflow drainage hole in the water reservoir and place the soil container over it. Now, place a small tomato cage for the support and add the soil. Voila! You’re finished.
12. Concrete Planter by Instructables
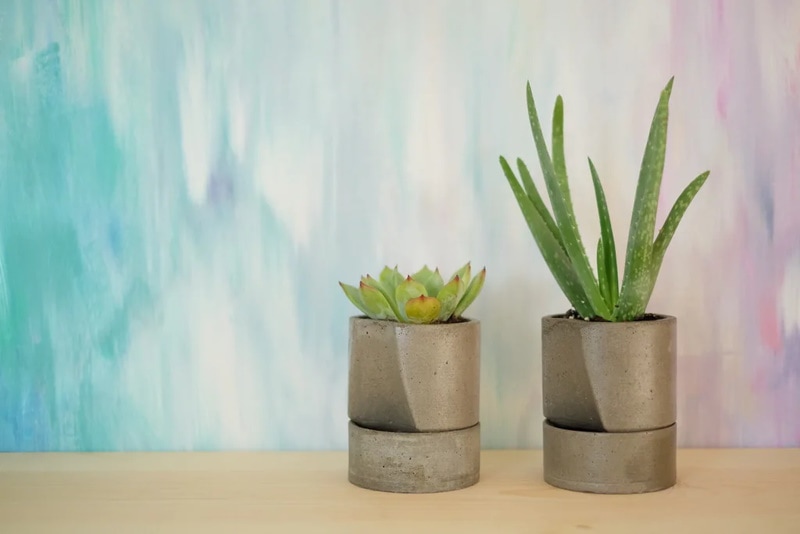
| Materials: | Quikrete vinyl concrete patcher, mold, concrete mix, smooth-on silicone, and poly rope |
| Tools: | Concrete sealer, drill, masonry bit, 3D printer, sandpaper, super glue, sanding sponge, and respirator |
| Difficulty Level: | High |
A concrete planter is an excellent addition to your indoor and outdoor gardening areas. You can even put these minimal concrete planters on your desk and working table. However, building them can be challenging.
This self-watering concrete planter has two parts: a planter on the top and a water reservoir at the bottom. The planter has a hole in the bottom that consists of a wick. The wick allows the water to steep into the planter’s soil.
Building a self-watering concrete planter will be like a breeze if you know how to create molds with a concrete mix.
13. Recycled Bottle Watering Globes by Vegetable Gardener
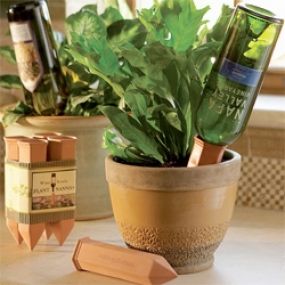
| Materials: | Empty plastic bottles with caps and a candle |
| Tools: | A nail |
| Difficulty Level: | Low |
A watering globe is a shortcut that you are looking for. You don’t have to build an entire planter from scratch. Instead, find some empty plastic bottles and reuse them as the water reservoir for your existing plant pots.
To build a recycled bottle watering globe, heat the nail in the candle’s flame. It will help the nail go through the plastic easily. Next, make multiple holes in the bottle’s neck and fill the bottle with water. Now, tightly screw the cap back on the bottle.
Put the bottle upside down in the pot and stick it in the soil until the holes are covered. These bottles keep your plants watered for days.

Conclusion
Whether you want to reduce water waste or are taking an extended vacation, self-watering planters are the best way to ensure both things. These planters keep watering themselves without requiring human interaction.
Most DIY self-watering planter plans come with a water reservoir and a separate soil container. Remember to keep the reservoir full for a smooth water supply to your plants. Your garden will look gorgeous no matter what plan you choose.
See also:
- 4 Types of Ticks in Massachusetts (With Pictures)
- What Is the State Insect of Arizona? How Was It Decided?
Featured Image Credit: Olya Detry, Shutterstock
Contents
