

When was the last time you took a good look at your stairs? Most likely, they aren’t in perfect condition. Now, stairs are built to handle high foot traffic and natural elements. However, over time, even the mightiest stairs do get overwhelmed by humidity, scratches, and cracks. The good news is—even if you’re not that great with a hammer or a drill, you can still give old and worn-out stairs a makeover.
It’s all about finding the right DIY guide! So, if you’re ready to breathe new life into your stairs, join us, and let’s check out the top DIY stair revitalization plans. Our team spent a little over a whole month looking for the best projects, and now we’re finally ready to share them with you!

The 10 DIY Stair Makeovers & Revitalizations
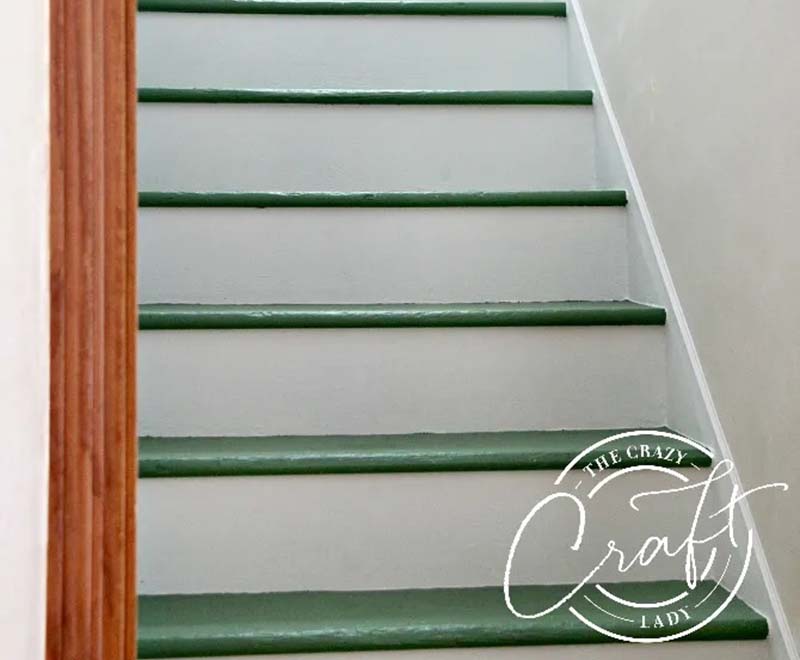
1. DIY Ripping the Carpet and Painting the Stairs by The Crazy Craft Lady
| Materials Needed: | Primer, patio paint, white paint, wood filler, sandpaper (different grits), rags |
| Tools Needed: | Staple remover, pliers, sander, a pair of brushes, putty knife, painter’s tape, stir stick |
| Difficulty Level: | Easy |
Are you tired of having to walk on the same old carpet every time you climb up the staircase? We have a solution for you: try ripping the carpet and painting the stairs. This might sound complicated, but it won’t take much effort on your side. To get rid of the carpeting, use a combination of pliers and a staple remover. Be very thorough, and make sure you remove every single nail and staple.
Patching and sanding are the next steps. Unless the stairs are in bad shape, a wood filler product will easily fill all those holes. Finish up, paint the risers, and call it a day!
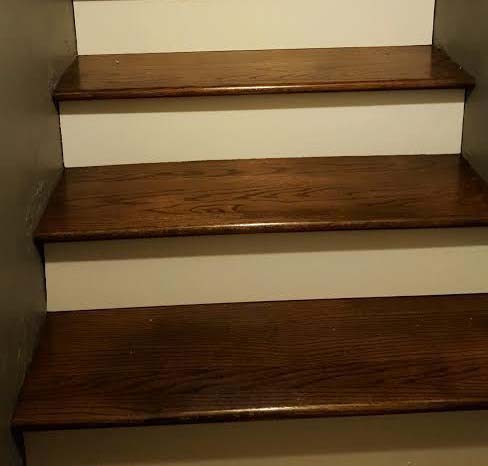
2. DIY Replacing the Carpet with Hardwood by Ka Inspired
| Materials Needed: | Stair treads and risers, wood conditioner, primer, paint, wood stain, polyurethane, rags |
| Tools Needed: | Miter saw, nail gun, pliers, air compressor, utility knife, sander, brushes, rollers |
| Difficulty Level: | Easy/Moderate |
Adding a brand-new coat of paint does revitalize the stairs quite nicely. But what if they’re old and worn out? Well, replacing the carpet with hardwood will definitely solve that problem! Again, arm yourself with pliers and remove the carpet—for good. Next, if you want to paint the walls as well, do that first and only then move on to the risers and treads. Oak is a go-to material for the stairs as it’s equally sturdy and long-lasting; plus, it looks great.
But you can go with whatever hardwood you’ve got handy. It’s safe to say that any hardwood will last longer than a carpet, making this DIY makeover worth your while.
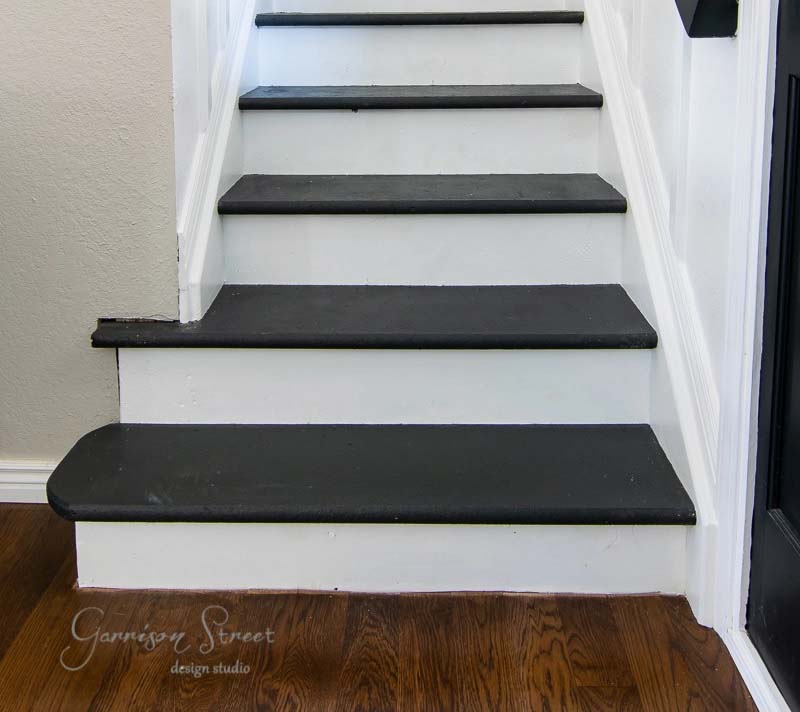
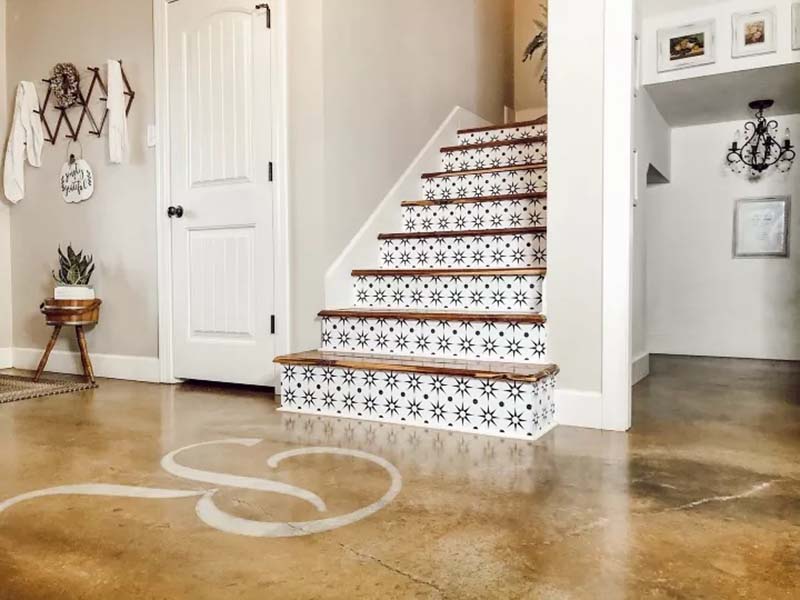
3. DIY Patterned Risers & Treads by Garrison Street Design Studio
| Materials Needed: | Stair treads, patterned risers, clear coat, paint or stain, sealing caulk, adhesive/glue |
| Tools Needed: | Table, miter, or jigsaw, multi-tool, contour gauge, tape measure, speed square, painters tape |
| Difficulty Level: | Moderate |
To brighten up the stairs and make them stand out, go with patterned MDF risers and natural oak treads. MDF is a cheap material, yet it fits risers perfectly. As for the pattern, bead boards and chevron are the most popular choices for staircases. To create a beautiful contrast, use natural oak for the treads (any natural, light wood species will do).
4. DIY Base Molding Fix by Cuckoo4Design
| Materials Needed: | Molding (base and quarter round), caulk (paintable), oil-based primer, wood filler, fishing nails, sandpaper (different grip) |
| Tools Needed: | Pry bar, pliers, hammer, screwdriver, angle cutter, miter saw, coping saw, putty knife, sander, brush, face mask, goggles |
| Difficulty Level: | Moderate |
Depending on the type of staircase, you’ll get the molding exposed when removing the carpet. If that’s the case, by fixing the old base molding, you can give the staircase a clean, refreshed look. Start by ripping the carpet off with a pry bar, hammer, and pliers. This is important: molding is one of the most vulnerable parts of any stairs. So, by filling the gaps with wood filler/epoxy and replacing the old molding, you’ll increase the lifespan of the whole structure.
No matter how great the caulk/sealant is, it won’t be nearly as effective as a filler product at patching all the gaps and fixing rotten wood.
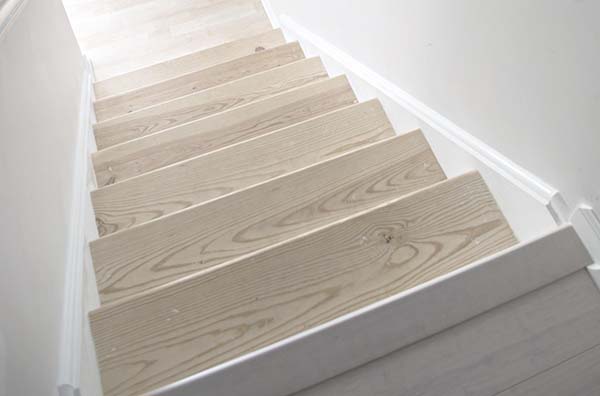
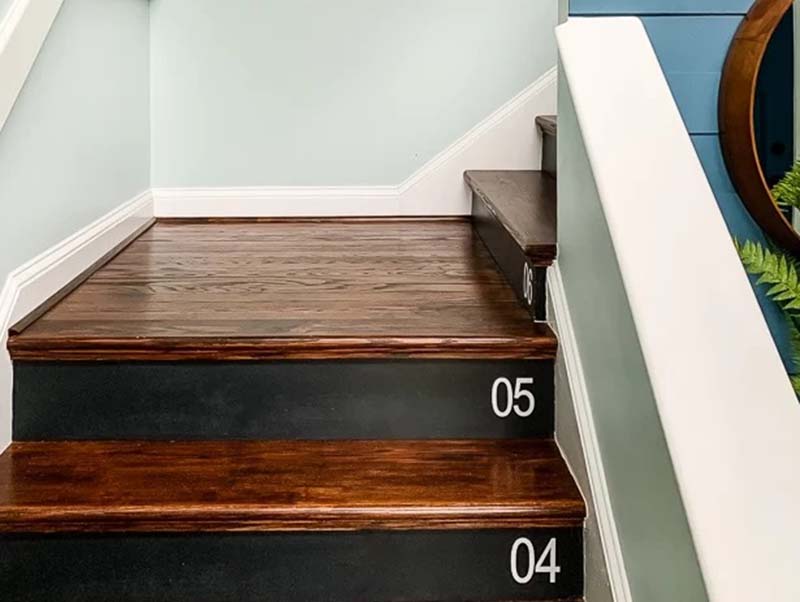
5. Classy DIY Staircase with Vinyl Numbers by Kaleidoscope Living
| Materials Needed: | Stair retreads, caulk, touch-up paint, construction adhesive, wood stain |
| Tools Needed: | Circular, table, or miter saw, nail puller, hammer, crowbar, utility knife, painters tape |
| Difficulty Level: | Easy/Moderate |
Numbering the stairs can be lots of fun, and, as this classy staircase with vinyl numbers DIY plan proves, it also looks rather cool and instantly grabs the attention. Now, if you don’t have the time or the budget to work on the retreads, you can just stick the numbers using adhesive and call it a day. However, it would be much better if you follow this through and replace every single riser and tread for a proper makeover.
Besides, by applying wood stain on natural wood, you’ll be able to give it that “expensive”, premium look. A circular saw (or it can be a miter or a table saw) will help cut the hardwood to match the stairs in size.
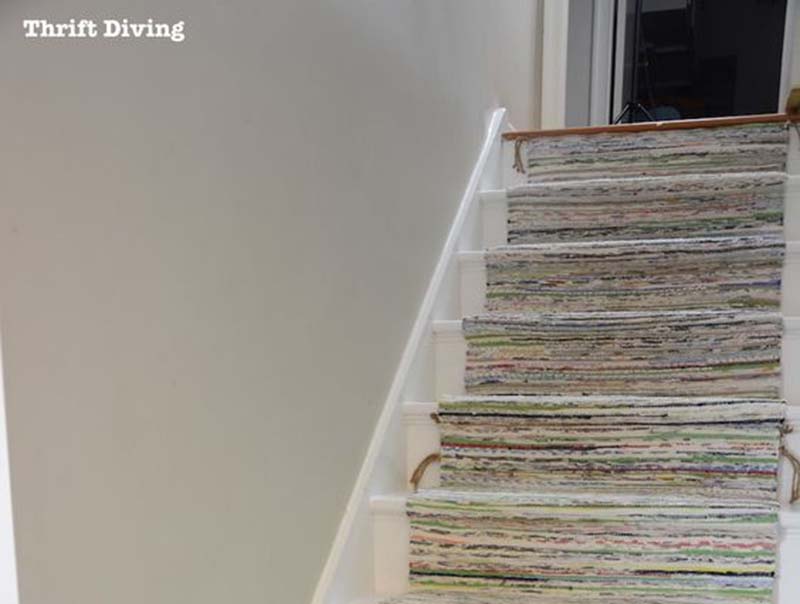
6. DIY Painted Stairs with Rugs Makeover by Thrift Diving
| Materials: | TANUM rugs, carpet pad, upholstery tacks, carpet tacks, finish nails (2”), semi-gloss paint, caulk, cleaning product |
| Tools Needed: | Nail gun (16-gauge), paintbrush, work gloves, tack hammer (optional) |
| Difficulty Level: | Easy |
Most DIY revitalization ideas focus on removing the carpet and painting the treads. But if you follow this painted stairs with rugs makeover plan, you’ll see the beauty of it. To get this done, you’ll need a carpet pad, a set of TANUM rugs (or any other rugs with a similar texture), and lots of tacks to hold it all in place. A nail gun will also come in handy, along with a tack hammer (optional).
The concept is rather simple: we paint the treads and risers white and put a rug through the middle. To fill out the cracks, use any type of caulk they’ve got at a local store.
7. Eye-Grabbing DIY Copper Risers by Frugal Family Times

| Materials Needed: | Stair treads, copper metal sheets, vinyl tape (double-sided), clear coat, patina solution, adhesive, screws |
| Tools Needed: | A pair of scissors, container, circular saw, hammer, electric drill, nail gun, multi-tool |
| Difficulty Level: | Easy/Moderate |
Want to make an impact and “flip” the stairs? That’s very well possible with these eye-grabbing DIY copper risers. As the name suggests, the stars of the show here are copper wraps for the risers. First, get your hands on copper. Next, cut it to match the stairs. Once that’s out of the way, it will be time to “cook” the patina solution. Essentially, it’s a combination of salt (500 ml) and vinegar (4L).
Soak the copper into this freshly-made solution for 1–2 hours. That should give you a unique “corroded metal” look. When the copper is ready, just stick it to the risers using double-sided tape.
8. Quick & Cheap DIY Mosaic Makeover by Hometalk
| Materials Needed: | Mosaic wraps, construction adhesive |
| Tools Needed: | Measuring tape, scissors, razor knife |
| Difficulty Level: | Easy |
This next quick and cheap mosaic makeover idea is almost identical to the previous one. Only this time around, we won’t be making any patina solution or soaking the wrapping in it. Instead, just order a set of mosaic wraps that you think will fit the whole vibe of your staircase and the room/house. All that you’ll have to do is just stick them to the risers using construction adhesive.
Do cut the wraps before gluing them to the stairs, though. A pair of scissors or a razor knife is the best tool for that.
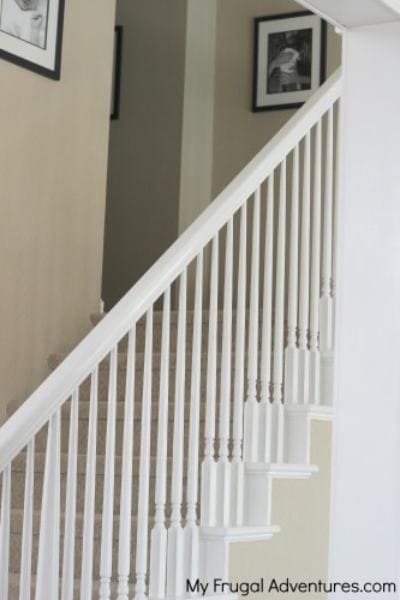
9. DIY Stair Railings Paint Job by My Frugal Adventures
| Materials Needed: | Primer (low-odor), paint, sandpaper, old rags, a set of balusters |
| Tools Needed: | Work gloves, painters tape (2 rolls), mini roller, electric sander, paintbrush |
| Difficulty Level: | Easy |
Moving on from the treads and the risers, why not try painting the stair railings? Just like the previous DIY plan, this project will cost you almost nothing. A can of primer, some decent-quality paint, and a set of balusters (to replace the worn-out railings) will revitalize the staircase without even touching the actual steps. So, which color do you go with?
White and black are all-time classics, but you’re free to choose whatever tones and hues you like. In any case, don’t forget to sand the railings and do at least one coat of primer before adding the paint. Speaking of the paint, we recommend adding three layers and giving each 24 hours to dry. This DIY project will cost less than $100, but it will take time to paint all the railings.
10. DIY Iron Balusters by View Along the Way
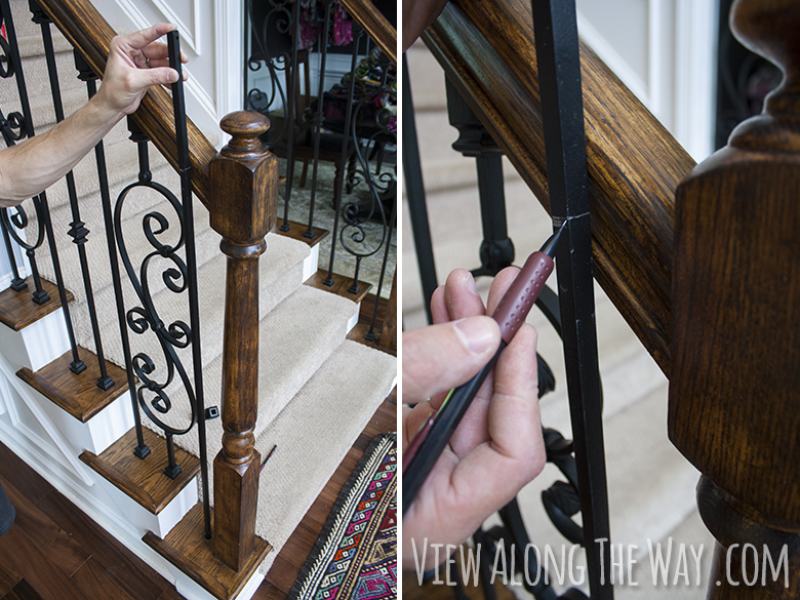
| Materials Needed: | Iron balusters, shoes for the balusters, glue (epoxy or hot) |
| Tools Needed: | Reciprocating or jigsaw, metal-cutting blades, electric drill + bits, pencil/marker, pliers (optional) |
| Difficulty Level: | Easy/Moderate |
Painted railings do, indeed, make your stairs look brand new. However, if you’re ready to take this one step further, installing iron balusters will have an even bigger impact. The best thing about this DIY plan—you’ll only need a set of balusters, shoes, and cheap glue to make this work. As for the tools, see that you have a metal-cutting jigsaw and a drill. Iron is sturdy and looks great in any environment. Just be careful not to install any of the shoes backward!
To complete this project, expect to spend up to 4–5 hours of spare time and $150–200. A quick note: before you order the balusters, make sure you’re 100% happy with the design.
How Long Do Stairs In a Modern-Day House Last?
On average, exterior stairs last for 15–35 years. As for interior stairs, they will serve you for up to 80–100 years. The lifespan depends on a wide range of factors, of course. For example, if the exterior stairs don’t have any type of protection and are exposed to rain, snow, dust, pollen, and mildew 24/7, expect them to start breaking down in 5–10 years.
And what about interior stairs—do you even have to worry about natural elements? If the humidity levels in your house are spiking, mold might be an issue, especially if the stairs sit really close to the foundation. However, if you’re good at maintenance and take proper care of the stairs, they will last for the life of the house. And one more thing: consider changing the carpet on the stairs every 5–10 years.
It’s Time to Repair the Stairs: The Most Common Signs
Just like any other man-made structure, stairs do wear out. Over time, you will start noticing signs of that. If the worn-out/cracked spots aren’t very large, that’s not something to worry about. With that said, here’s a quick look at the most dangerous side effects of faulty stairs:
- If you find cracks here and there (usually, due to humidity), that means repairs are in order. Or, you might try to replace the individual elements. We’re talking about the risers (the parts that hold everything together) and the treads (the horizontal parts that we step on when going up or down the stairs). When the cracks are too big, your foot can literally go through the wood!
- Noise is another common sign. Once the stairs get old, they make a creaking/squeaking noise that tends to be rather annoying. More importantly, this indicates that the gap between the treads and the risers is getting dangerously big. Get on top of this at an early stage, and some cheap wood glue will fix that right up.
- Next, check the handrail. If it’s loose, that will threaten the safety of your family. Instead of providing much-needed support, it will make it harder to maintain balance while going up and down the stairs. Shaky handrails also have a negative effect on the stability of the whole construction. Besides, in most states, wobbly handrails are a violation of building codes.
- Last, but not least, watch out for any signs of rotting. This is mainly caused by abnormally high levels of humidity. Warping is another common symptom. This applies to stairs that are located outdoors or in a dark basement, of course.
How Much For a New Set of Stairs?
Sometimes, when the stairs are in dire condition, a makeover or revitalization is simply not enough to bring them back to life. In that case, consider replacing the whole thing instead of trying to fix it. So, how much is that going to cost? In 2022, they’ll charge you $800–4.5K for the job, and that includes the labor. The price will differ depending on the materials used, the complexity of the job (straight stairs are easier to build than a spiral staircase), and the location.
The number of risers also affects the price, of course. If you only need a relatively short, unfinished staircase that goes into the basement, it will only cost $1–1.2 K. In contrast, high-end, custom-designed stairs that are crafted from oak, maple, or premium stone will set you back $8–10 K.
In Conclusion
If you live in a really old house or just haven’t been paying much attention to the stairs, we bet they’re begging for a makeover. Well, as we learned today, it doesn’t take a licensed carpenter to do that. Besides, revitalizing worn-out, battered stairs can be fun, especially if you have a decent DIY plan to serve as a guide. On average, updating the stairs takes 8–12 hours of work.
This can be a simple repainting job or a proper overhaul—the choice is yours! Our list is quite diverse and includes some “classic” revitalization plans along with one-of-a-kind projects. Pick one, and give your stairs a second life!
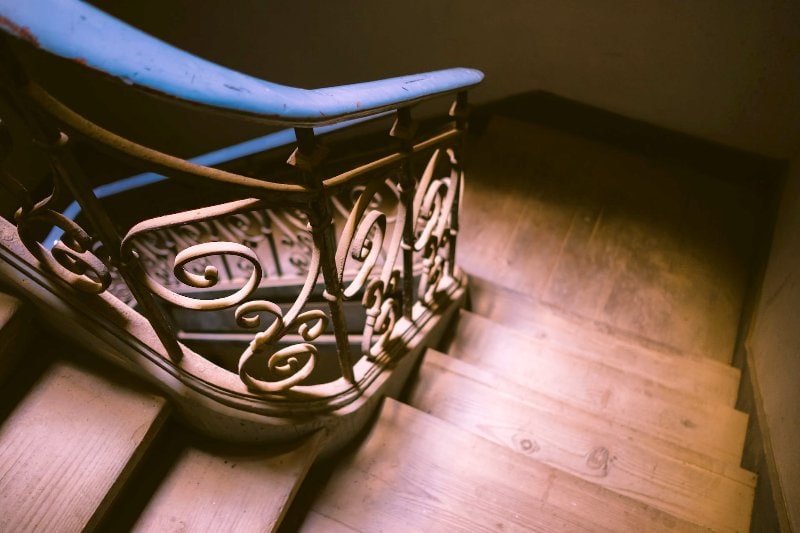
Featured Image Credit: R ARCHITECTURE, Unsplash
Contents
