
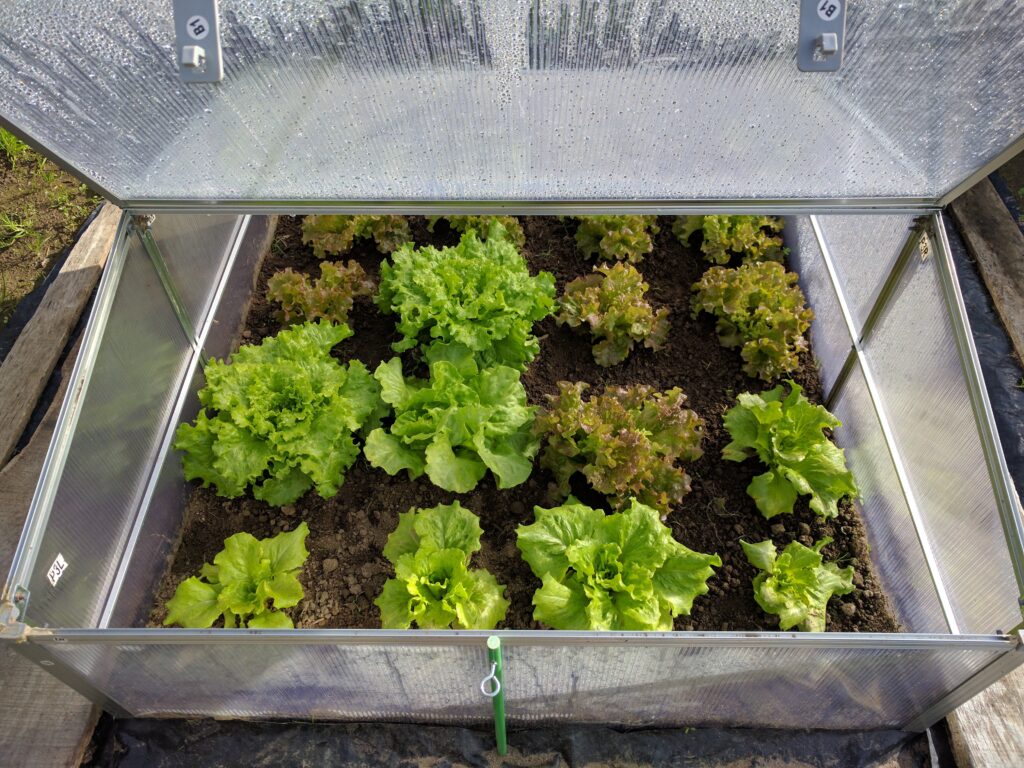
A cold frame is an easy and inexpensive way to extend your growing season. With a few supplies and an afternoon of work, you can build a cold frame that will provide shelter for young plants and tender vegetables in colder months.
If you’ve been wanting to build your own cold frame but haven’t gotten around to it, now is the time to do it. Read on to find out how you can build a cold frame in only five easy steps.

Getting Started: Preparation and Construction
The best laid plans are nothing without the right supplies and preparation.
- Saw
- Staple gun
- Staples (or tacks)
- Screws or nails
- Plywood
- Hinges
- 1x1s
- 2x2s
- Gravel/rocks (optional)
- Plastic sheeting
Please note that when you’re picking out 1x1s and 2x2s, they need to be the straightest pieces you can find. They are what make your lid, so any bows will prevent the lid from providing a tight seal when closed. Quality matters!
The design and construction of a basic cold frame are deceptively simple. Before you begin construction, it’s important to decide on the size of your cold frame. That means making sure you have enough room for all the plants or vegetables that you plan to grow.
Measurements for a traditional cold frame are provided in the steps below, but you are free (and encouraged) to adjust them according to your needs.
Once you’ve decided on a size, measure and mark off an area in your yard for the cold frame. When you know where you’ll be building, it’s time to start the actual construction of your cold frame.
The 5 Simple Steps on How to Build a Cold Frame
1. Constructing the Frame
Begin by cutting four pieces of plywood. These will be your frame. The first piece to cut should measure 4 feet long by 12 inches high. This will be the back piece of your frame. The next piece to cut should also be 4 feet long but only 7 inches high. This will be the front part of the frame.
Now it’s time to cut the side pieces of the frame. For these two remaining pieces, you still want them to measure 4 feet long, but their height will be different on each end, as you want them to match up with the front and back pieces you just cut.
Therefore, you need to mark one end at 7 inches and the other at 12 inches. Do this for both remaining pieces.
Once the plywood pieces are cut, attach them together with screws or nails to form a rectangular frame. Make sure the sides and bottom fit snugly together—this will help to keep out any drafts and provide better insulation for your plants.
2. Constructing the Lid

The lid to your cold frame merely consists of four 2x2s, each measuring 4 feet long. These pieces need to be screwed or nailed together to make a frame, just like a giant picture frame. Now, take your 1x1s and do the exact same thing.
Next, carefully cut the plastic sheeting to measure 4 feet in diameter.
Lay the 4-foot square of plastic over the giant frame you just made from 2x2s. Tack or staple the sheet in place so that it doesn’t move. Then, lay your frame made from 1x1s on top of the plastic that you just tacked in place. Screw the top frame in place. That completes the lid.
*Pro Tip: Leave a small block of wood or something similar nearby to keep the lid propped open from time to time. This is necessary to let heat out on warmer days.
3. Attaching the Lid
Now that your frame and lid are constructed, it’s time to attach them together. To do this, place the lid on top of the frame and use hinges to attach them together. Make sure you screw the hinges in securely so that they don’t come apart easily.
4. Securing the Frame
The next step is to secure the cold frame in place. You can do this by driving stakes into the ground and then screwing the frame onto them. This will keep your frame from moving when it’s windy or if you accidentally bump into it while tending to your plants.
5. Adding Gravel/Rocks/Soil
If desired, you can add a layer of gravel or rocks to the bottom of your cold frame. This will provide additional insulation and help to protect your plants from extreme temperatures. If you choose not to add a layer of gravel, then fill the cold frame with soil, and you’re ready to start planting.
And that’s it! You’ve just completed the construction of your own cold frame. With a little bit of maintenance and care, you should have a beautiful garden growing in no time.
Start Planting!
Now that your cold frame is complete, it’s time to plant your seeds or plants. Add some soil to the cold frame, then carefully place your seeds or plants. Water them, and then add a layer of mulch to the top.
Don’t Forget Maintenance
It’s important to keep up with maintenance to ensure your cold frame is functioning as intended. For starters, check on your plants regularly and water them as needed. Also, make sure that the plastic sheeting is still tight around the frame and that there aren’t any large holes or gaps.
And lastly, keep an eye out for pests. You will need to take the necessary steps to control them if they become a problem and a threat to your plants.
 Conclusion
Building a cold frame is a great way to get an early start on your garden, and it’s surprisingly easy to do. With the five steps outlined above, you can have a cold frame built and ready for planting in no time. And with proper maintenance and care, you can be sure that you’re getting the best use out of it.
Featured Image Credit: Jumpstory
Contents
