
Having a washer and dryer in your home is a convenience many of us overlook until they aren’t working properly. This is especially true for our dryers. Washing machines get a bit more love, due to us seeing the buildup inside. Dryers aren’t so lucky. Instead, we need to stay on a regular cleaning and maintenance schedule to ensure our dryers are working as they should and not becoming a potential hazard around the home. To help you achieve this goal, let’s take a look at a few simple steps you can take to clean out your dryer and keep it functioning properly.
 Before You Begin: Know the Differences
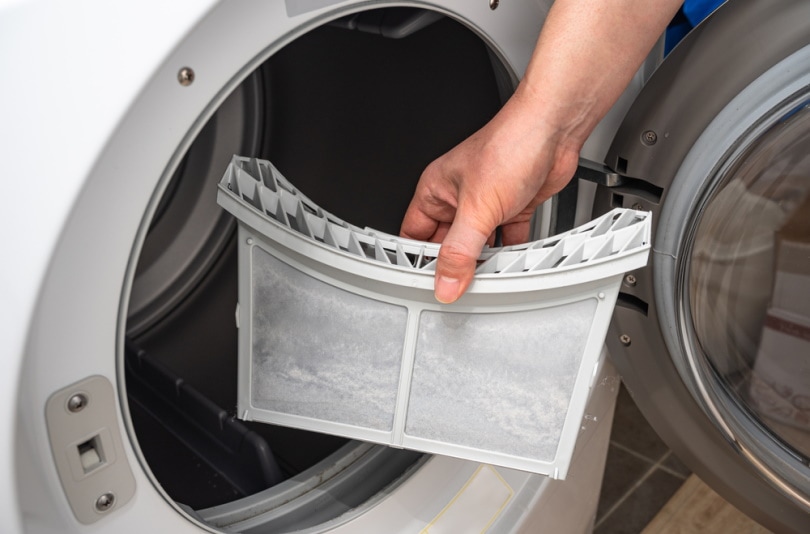
Each time you use your dryer, it’s common to pull out the lint screen and remove whatever is there. For some, they think this is the only part of the dryer that needs to be cleaned regularly. Unfortunately, that simply isn’t the case. Besides having a lint screen and trap beneath it, your dryer also has a vent. Your lint screen and trap are usually located at the top of the dryer making it easy to access and clean with each load. The dryer vent is at the back of your dryer and a bit harder to reach.
Both of these parts work in unison. If you don’t routinely clean your lint screen and use a long brush or vacuum to clean the lint trap below it occasionally, your dryer vent could become clogged. A dirty dryer vent can make your machine hot to the touch, cause a musty smell in your laundry area, and even cause extended drying times for your clothes. Now that you understand the difference between these important parts, let’s learn how to clean your dryer.

Items You May Need
Safety is at the top of the list when it comes to doing any DIY cleaning or maintenance of your dryer.
- Gloves
- Vent cleaning brush (or another type of long brush that will not puncture the vent)
- A vacuum cleaner with a hose
- Trash can or pail to collect any debris
- Screwdriver
- Cloth
- A mix of vinegar and water
The 10 Simple Steps to Clean Your Dryer
1. Unplug the Machine
Before starting any kind of maintenance on an electrical item in your home you should always unplug it first. If you have a gas dryer, please ensure that the gas is turned off before you begin. If you aren’t aware of how to do this, reach out to your gas company for assistance.
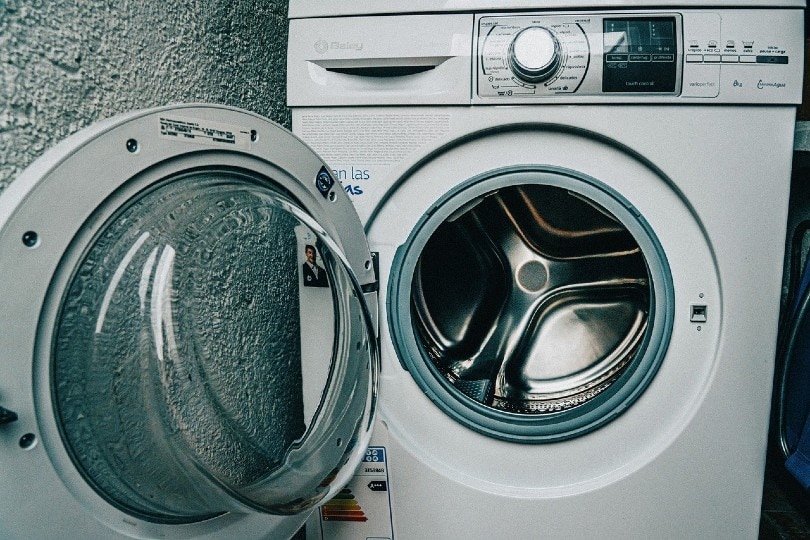
2. Move Your Dryer
When it comes to vent cleaning, access can be difficult. Instead of trying to reach behind your dryer in awkward positions, simply pull the dryer out from the wall. You can then turn it and settle it into any position you prefer for easier work.
3. Remove the Vent Clamp
All dryers aren’t made the same. You may have a vent clamp that simply needs to be squeezed to remove or one that requires a screwdriver to remove it. Inspect your clamp, located around the vent, to determine the kind you have then take the proper steps to remove it.
4. Inspect the Clamp and Vent Piping

While you are removing the vent clamp, this is the perfect time to inspect all your parts. Is the clamp in good shape? Is the vent piping cracked or showing signs of wear and tear? If you see any problems, stop at this step and replace the items that are damaged.
5. Check for Clogs
Now that you have the vent clamp removed, it’s time to check for clogs. While wearing your gloves, you can reach into the vent and remove any clogs you may see. Once that is done, it’s time to thoroughly clean your vent using a brush or vacuum. During this process, you want to remove all the lint and debris you see. Take your time and do a thorough job.
6. Move On to the Exterior Vent
Your dryer vent connects to an exterior vent outside your home. It is always located near your dryer, making it easier to find. Once your interior vent is clean, step outside and lift your exterior vent. Using your gloves, remove any lint and debris you may see. If needed, you can use the brush or vacuum to help with larger clogs.
7. Check the Area
While you’re working with your exterior vent, take the time to check the surrounding area. Plants and other outside obstacles can make it difficult for your vent to work properly. Ensure there are no issues with your exterior vent before you finish.
8. Reattach Your Clamp
When the exterior vent is free of debris, go back inside and reattach your dryer clamp to your machine. Again, use the screwdriver if that is the kind of dryer you have.
9. Clean Up
After everything is clean and reattached, you’ll notice lint and debris on the ground. Use your vacuum to clean up the area behind your dryer thoroughly before putting it back in place. Then you can empty your vacuum and the waste collector you’ve been using.
10. Give It a Try
When your dryer is plugged in and back in place, or the gas is turned back on for gas-powered machines, allow it to run for several minutes. This can help remove any debris you knocked loose. After the time has passed, step out to your exterior vent to inspect for new debris. If you see any, remove them. After this is done, you can wipe down the drum of your dryer with vinegar and water on a microfiber cloth. Then you can clean the exterior of your dryer with a cloth to remove all dust and debris caused by your cleaning.
How Often Should Your Dryer Be Cleaned?
The exterior of your machine and the drum can be cleaned whenever you see dust or buildup. When it comes to your lint screen, this should be cleaned with every load you run in your dryer. The lint trap, which is the part your screen slides into, should be vacuumed or cleaned with a brush monthly if not more often. This will help keep tons of debris from making its way into your dryer vent and causing issues with your machine.
The dryer vent should be cleaned at least every 2 years or per the instructions in your owner’s manual. If you start to notice issues with loads taking too long to dry or excessive heat when you touch your machine, it’s time to follow the steps above and perform routine cleaning of your vent and duct.

Conclusion
While cleaning your dryer may sound like a hard job, if you follow these 10 steps, you can help ensure your machine runs properly with minimal effort. Just remember to do a thorough cleaning routinely. This will help keep your dryer, which is a major necessity around the house, working as it should.
Featured Image Credit: Ju Jae-young, Shutterstock
Contents
