
If you are making a jewelry box, refurbishing a pool table, building a child’s rocking horse, or just trying to protect your wood from scratches, you are going to need to know how to glue felt to the wood properly. Felt stretches, especially in contact with glue, so it can be challenging to finish your project without wrinkles if you have never done it before. Still, with the proper knowledge and tools, you can expertly apply the felt and have an attractive, smooth finish.
We’ve assembled a short, easy-to-follow guide detailing all of the steps you need to take to achieve the proper finish. We’ll cover the tools you need and how to use them to make sure you’re happy with the finished result.

What Is Felt?

Felt is a cloth made from wood that may also contain other natural and synthetic fibers. It’s produced by matting, pressing, and condensing the fibers together. It’s fire-retardant and will self-extinguish. It also works well to absorb vibrations and sound, and it can hold fluid without feeling wet. Felt is biodegradable and available in many colors. It has a textured surface, high strength, and is lightweight.

Acquiring Supplies
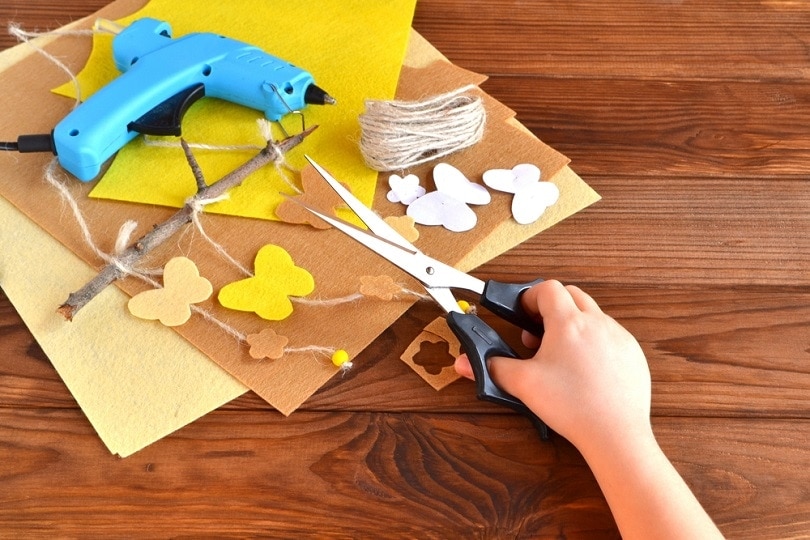
There are quite a few supplies you will need before you get started, so let’s go over them now.
- Felt
Obviously, felt will be the main component of this project, but felt Is available in many different qualities, and the type you choose will depend on the project. A lower quality felt can stretch and tear easily, especially when in contact with glue or other liquid. If you are doing school projects or something simple to gain experience, an inexpensive polyester felt is probably fine. However, if you are refurbishing a pool table or protecting your furniture, we recommend purchasing a higher quality 100% wool felt.
Higher quality felt will not stretch as much and won’t tear. It is also more resistant to fading due to sunlight and is easier to cut.
- Glue
The next most important supply you will need to consider is your glue. Smaller projects can use bottled wet cement. Titebond and Elmers make excellent adhesive for gluing smaller projects. When applying felt to a larger surface like a pool table, it’s better to use spray glue to cover the surface more evenly and produce better results. However, you will need to work fast when using a spray because it dries quickly, and it will require an additional step of covering the areas of the project where you don’t want the spray to land. We recommend Aleen’s Tacky Spray or a similar product when gluing felt to a large surface.
- Removable Tape
If you are using spray adhesive, you will need to cover the areas you don’t want glue to land on with removable tape. We recommend masking tape for this task as it’s easy to remove and doesn’t leave residue behind. You can find masking tape by bands like Scotch, Tarvol, Jak, and more, but any brand should suffice.
- Foam Brush
You will need a foam brush to apply your glue evenly when not using a spray. Foam brushes are inexpensive and easy to find in most hardware and paint stores. We recommend purchasing them new so no contaminants will get in the glue.
- Scissors
You are going to need a good pair of scissors to cut your felt. You don’t want to use dull scissors because it will lead to a jagged edge. We recommend a large pair of sharp precision scissors. You can find them by Scotch in most hardware stores and even the grocery store.
You can also use a razor knife, but they are a little harder to get an accurate edge and more dangerous.
- Template
If you need to cut your felt to a specific size or shape, you will need to gather your templates together before you get started. You can get felt templates online and at the local hardware and craft stores. They have a large selection of shapes and sizes for any project.
- Roller
If you are gluing to a large surface, you may need to use a roller to get any air bubbles out. A wooden roller commonly used in baking is your best option, but a paint roller may also work, and many smaller rollers are available that might work on smaller projects.
- Pencil
You will need to mark your felt so you know where to make cuts. A pencil is the best solution because it will not leave any permanent marks behind. A pen or marker will. Any ordinary number two pencil will work fine.
- Wax Paper
Wax paper will allow you to place weights on your wet glue to apply pressure. Reynolds is probably the most popular, but any brand will do. You don’t need to look for any special kind.

How to Glue Felt to Wood
1. Cut Your Felt
With all of your tools assembled, you can begin to cut your felt. If you don’t have a template, you’ll need to measure the amount you’ll need, use a pencil to trace the design onto the felt, and cut it out with your scissors. If you are using a template, place it on top of the felt and trace the design you want onto the felt. Position the template to conserve as much felt as possible and cut it out with the scissors.
In some cases, it may be preferable to cut a larger size than you need and then trim the excess after you glue it in place. We recommend doing this only when necessary because it can result in a jagged edge.
2. Apply Your Glue
If you are using the spray glue, you’ll want to mark off the areas you don’t want the glue to go before proceeding. Apply the glue to one side of the felt and the wood surface you want the felt to stick. If not using a spray, use the foam brush to apply the glue to remain even and consistent.
3. Apply the Felt
Start in one corner and place the wet surfaces together. Carefully use your palm or finger to apply pressure as you move out from the corner toward the other edges. You do not want to stretch the material, but you want it to be tight with no air pockets or wrinkles. Once finished, if the surface is large enough and requires it, you may want to go over it with a roller to make sure there are no air pockets.
4. Apply Pressure
With your material in place, it’s good to add some pressure while it dries to help form a stronger bond and keep the felt from shifting. To apply pressure, put down a wax paper layer with the wax side down to help prevent the glue from leaking through the felt and bonding with the weight. Place some books or other heavy objects over the surface for a minimum of 15 minutes to allow the glue to dry. Check the instructions on the adhesive for the ideal amount of time.
5. Trim
We recommend waiting at least 24 hours before inspecting the edges and using your scissors or utility knife to trim away any excess material. Patience and a sharp place can make a huge difference in your project’s final appearance, so take your time to get this step right. When you finish, your project is complete.
Summary
Patience and a high-quality felt will be the main contributors to your success. It’s not a hard project, but you may want to try it once or twice with some spare wood to know what to expect, how much glue to use, and how much pressure to apply when you are working from edge to edge.
If you have enjoyed reading and feel we helped you learn how to tackle your next project, please share this step-by-step guide on how to glue felt to wood on Facebook and Twitter.
Featured Image Credit: images72, Shutterstock
Contents
