How to Install a Sub-Woofer in Your Car (Quick Guide)
-

- Last updated:

Whether you’re trying to improve the sound of your factory-fitted car stereo or looking for an impressive system with a bass beat that you can feel, you really should consider installing a subwoofer in your car.
Installing a subwoofer isn’t overly hard, and while you could pay for a professional car stereo installer or an auto-electrician to do it for you, with a little bit of effort and this article as your guide, you could save yourself some money and do the job yourself.

Do I Need an Amplifier With My New Sub-Woofer?
In short, yes. Installing a subwoofer in your car without considering an amplifier is a mistake. Whenever you install new speakers in your vehicle, you need to consider your power needs, and the best way to ensure additional power is with an amplifier. Of course, it is possible to install a sub-woofer, or any other speaker for that matter, without an amp; however, doing so will almost certainly result in poor quality sound.
Fortunately, most car audio retailers understand this, and you can usually purchase a car subwoofer and amplifier package. It is worth taking advantage of such a package as not only will it save money, but also ensure you get a compatible amplifier for your new sub-woofer.


What Other Equipment Do I Need?
Apart from your new amplifier and subwoofer, you’re going to need to get a few other things to complete your installation.
Components or a Kit?
Firstly, it is unlikely that your new sub and amp package will come with wiring, so, you’ll need to buy these separately. You can purchase all the components you’ll need individually, either online or from an electronics store; however, a kit is once again the way to go here. We suggest that you consider something like this Boss Audio Systems wiring kit available from Amazon.
Type of Stereo
Next, you should consider the type of stereo system that is in your car. If you already have an aftermarket stereo installed, the chances are that it is likely already fitted with RCA outputs that will allow a direct connection to your new amplifier. However, if your car only has the factory fitted stereo you will also need to purchase and install a line output converter; a device that connects to your stereo’s speaker wires and converts them to RCA.
Tools
Once you have all of your components, you need to consider the tools you’ll need. If you already have access to an auto-electrical tool kit, you will likely have what you need. If not, here’s a list of the tools you’ll require:
- Comprehensive Solution - The Scosche TK12A Car Stereo Installation Tool Kit is a complete set, providing all the necessary tools and...
- Precision Tool Set - Screwdriver with magnetic bit holder offers 8 common bit sizes and types. Angled trim removal tool for safely...
- Versatile Use - This tool set is not only perfect for car stereo installations but also includes essential tools like the multi-bit...
- A car stereo installation kit, such as this Scosche KT12A budget kit from Amazon
- A set of basic hand tools – screwdrivers, pliers, wrenches and socket set
- A cordless variable speed drill
- A small package of ⅜″ length #8 self-tapping screws
- A wire coat hanger – straightened and handy for pulling wires through tight spots
- A sharp utility knife
- A roll of high-quality electrical tape
- A small sheet of sandpaper suitable for removing paint from metal surfaces
- A set of Posi-Taps (only required if you have a factory fitted stereo in your car), such as these from Amazon.
No products found.

Decide Where to Install Your Amplifier and Sub-Woofer
Most people chose to install their amplifier and sub-woofer in the boot as this is generally an area with plenty of space and ventilation. However, depending on the type of vehicle you own, and the size of your subwoofer, you could choose to install it under the driver’s seat or some other location.
Quick tips:
- Pick an area with enough ventilation so the speakers don’t overheat
- Install your amplifier and subwoofer as close as possible together to improve the sound quality

Let’s Start With the Power
The first thing you need to do before commencing any work is to disconnect the negative terminal from your car’s battery. Doing so will prevent you from shocking yourself or damaging your new equipment during the installation process. Once the negative terminal is disconnected, you should securely tuck the wire out of the way to ensure that it doesn’t accidentally contact the battery terminal—remember safety first.
Once your battery is disconnected, the first thing you should install is your heavy-duty power wire. During this process, you’ll run a power cable from the battery, through the firewall into the passenger compartment and then into the boot of your car.
Installing the Power Wire
Step 1: Ensure that there is a ring connector fitted to one end of your heavy-duty power lead. This may already be attached to your power cable if you bought a sub-woofer & amplifier wiring kit. If not, you will need to attach one. If you are not sure how to use a crimping tool to fix a ring connector, we recommend watching this YouTube Video.
Step 2: Locate one of the rubber grommets in the firewall that separates your vehicle’s engine bay from the passenger compartment. Ideally, you want one that is on the passenger side of the car, as this is the side along which you want to run your power cable.
Once you have identified a suitable grommet, use your utility knife to cut a small hole in it. Ideally, the hole will be only just large enough for you to pull a heavy-duty wire through it.
- Package Includes: 50 Rubber Grommets
- Inside Diameter: 1/2"
- Groove Width: 3/32"
Step 3: Take your straightened coat hanger and, using your pliers, create a small hook at one end of it. Then, push the coat hanger, hook end first, through the hole that you cut in the rubber grommet. Feed the coat hanger most of the way through to the passenger compartment; leaving just enough protruding to allow you to grab hold of it.
Step 4: With the coat hanger in place, take your heavy-duty power cable and go around into the passenger compartment. Behind the glove box, you should be able to find the hook end of the coat hanger. Once you have this, slip the ring connector of your heavy-duty wire over the hook you created in the coat hanger, and secure this in place with a small piece of tape.
Return the engine bay and pull the wire through to the engine bay using the coat hanger. You should pull through only enough wire to reach the battery, keeping in mind that the cable will need to run along the rear of the engine bay to a position near the battery, and not over the top of the engine.
- Complete Car Amp Wire Setup: Complete 8-gauge wiring kit for car audio amplifier installation; 20, 4-inch wire ties; 3 rubber grommets;...
- Power Cable and Fuse Holder: Features a 20-foot, 8-gauge red power cable, top-notch competition fuse holder; Sturdy cables for...
- Well Insulated Blue Wiring: Features a 16 Foot / 18 Gauge Blue Turn-On Wire, 30 Foot / 16 Gauge Speaker Wire; Reliable power wire for...
Step 5: Your amplifier and sub-woofer wiring kit will come with a fuse holder (with a fuse installed), and this needs to installed close to the battery. To do this, identify a suitable place to secure the fuse holder, then cut your heavy-duty power wire at a point that allows you enough cable to connect to each end of the fuse holder.
Once fitted, the fuse holder will be ‘in-line’ with your power cable. You can then go ahead and secure the fuse holder to the vehicle.
At this point, you may want to cover your power cable in flex-loom, from where it enters the engine bay to the fuse holder, to protect it. You can then secure it out of the way with zip-ties. Once done, you can go ahead and connect the ring connector at the end of your power cable to the positive terminal of your battery.
Step 6: With the power sorted out under the hood, your next step involves routing the power wire down through the cabin of the car; from the firewall to the boot. The simplest way to do this is to lay the cable out along the floor near the doors. It is then quite easy to tuck the wire under the plastic paneling at the edge of the carpet. You may need to use the panel removal tool that came with your stereo installation kit to do this; however, in most cases, you won’t need to remove any of the paneling.
- AUTO-TRIM REMOVAL KIT: Our auto tool kit makes removing clips and fasteners easy, safe, and quick. The shafts have pivot points for...
- DURABLE CAR TOOLS: This automotive tool kit includes 5 high-quality tools. The shafts are designed with SVCM satin chrome-plated steel...
- VERSATILE TRIM-PANEL SET: Perfect for use on most vehicles, our automotive tools help remove clips and fasteners that secure...
Step 7: The final step to installing the power is to connect a ground or earth wire. In your wiring kit, the ground wire will be another short piece of heavy-duty wire (the same gauge as your power cable), although it will usually be a different color. You should attach this wire to a solid bolt that is in contact with the chassis of the vehicle, and you may find that one of the rear seat bolts perfect for this.
Once you’ve identified the bolt that you wish to use, remove it and ensure that both the bolt and any metal surface it touches are free of paint. A small piece of sandpaper is perfect for this, as there must be nothing that could prevent an electrical current passing through them into the chassis. Then, connect the ground wire to the bolt with a ring connector and reinstall the bold.
You should now have two heavy-duty cables in the boot; your power wire connected your car battery, and the ground wire connected to a bolt in the chassis of your vehicle.
- Bluetooth - Play and control music through your smartphone or MP3 player as well as apps like Spotify / Pandora, wirelessly
- Push To Talk - Connect to your Smartphone’s Android and IOS assistant with a push of a button via Bluetooth. This unit Lets you...
- Weatherproof - The Receiver has been outfitted with the latest weatherproofing techniques to protect against splashing water
We Have Power, Time for Some Audio
Step 8: With the power wires in place, you now need to get the music from your stereo to the amplifier and sub-woofer. At this point, you need to gain access to the rear of your car stereo. If you have an aftermarket stereo installed, you need to get access to the RCA ports on the back of the stereo. Or, if you have a factory-fitted stereo, you need to gain access to the wiring harness behind it, and, your car’s speaker wires.
- High-sensitivity design
- High quality product
- Manufactured in Mexico
To remove your car’s stereo, you will likely need to pull part of your dashboard apart, which, once you know how to do it, is usually a simple process. Unfortunately, how you do this differs depending on the model of the car you own. If you are unsure, we recommend looking at YouTube. There are many online instructional videos for the most popular vehicle makes and models. Alternatively, you may need to seek advice from your vehicle’s manufacturer.
Step 9: As we mentioned earlier in the article, if you have a factory fitted stereo, you will have an extra step to do at this point, and you should continue following Step 9. If you have an aftermarket stereo installed, jump straight ahead to Step 10.
- Android compatibility
- Works with Pandora and Spotify
- Compatibility
With your car’s factory stereo system removed you need to connect your stereo’s speaker wires, power wire and ground wire to your new line output converter. How you do this will vary depending on the device that you purchased, and you should follow the manufactures recommended instructions. However, when it comes to connecting to your existing stereo’s wiring, we recommend using Posi-Tap connectors to make the connections as this is much easier than attempting to cut and splice wires together.
Once you have your line input converter installed, you will have RCA outputs that can connect to your amplifier.

Connect The RCA Cables
Step 10: Connect one end of the RCA cables contained in your wiring kit to the RCA output points at the back of your stereo, or on your installed line output convertor (factory fitted stereo only), and run the wires down through the dash towards the driver’s side floor. You can then run the RCA cables along the floor to the back of the vehicle, and as you did with the power wire, tucked into the paneling adjoining the carpet. Note: the RCA’s should not run down the same side of the vehicle as your power cable, or you will risk creating an electrical interference that may affect the quality of your sound system.
If your amplifier comes with a remote bass control knob, you should install this in at this point and run the cabling for this controller along the same side of the vehicle as your RCA cables.
- IN THE BOX: (1) 15 foot 2-Male to 2-Male RCA audio stereo subwoofer cable
- CRYSTAL CLEAR AUDIO: Enhances audio connections; ideal for home-entertainment and high-fidelity (HiFi) systems
- RCA INPUT/OUTPUT: 2 RCA output (connect to either L or R input) and 2 RCA input; input can be high frequency (digital audio) or low...
It’s Time to Make This Baby Hum
Step 11: You will now have all the necessary wires and components installed in your vehicle, and it’s time to bring it all together.
Start with the RCA’s, which you simply plug into the RCA ports on your amplifier. Then, connect the heavy-duty power cable to your amp at the appropriate point, followed by the ground wire. To connect these cables, you will likely need to strip the end of the wires, feed them into the appropriate points on your amplifier, and use either a screwdriver or Allen-wrench to tighten them in place.
If you have a remote bass control knob with your system, you should also connect the wire for this to your amplifier at this point.
Step 12: The final step in the process is to connect your amplifier to your subwoofer with some heavy-duty speaker wire. Then, set your amplifier and sub-woofer in place (secure them in place if required) and then finally, reconnect the negative wire to your car’s battery. Your amp and subwoofer are now installed, and you’re ready to try out your improved sound system.
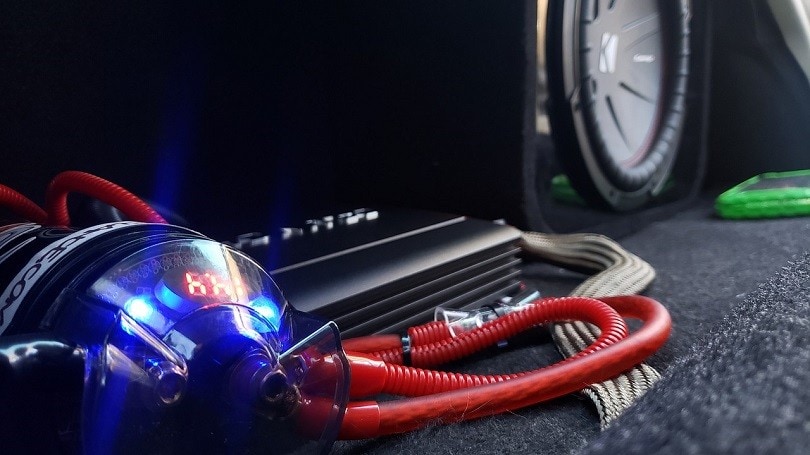
Featured image credit: Car audio amplifier by LQD-Denver, Pixabay
Contents


