

Prickly pear cactus is one of the most common and widely-grown succulents worldwide. It is native to the Americas but can also be found in plenty in Mexico. The plant has also been introduced to other parts of the world, such as the Caribbean Islands (West Indies), owing to its ornamental value.
The prickly pear cactus is a member of the Opuntia genus. It grows in various climatic conditions, from arid deserts to humid forests and even along rivers and lakes. It’s one of the most adaptable plants, making it easy to grow in home gardens.
So, if you love the idea of having a beautiful and exotic plant that is easy-to-grow and low-maintenance, why don’t you try planting a prickly pear cactus? This article will give you the procedure and tips for growing a prickly pear cactus.

Planting a Prickly Pear Cactus
You can propagate prickly pear cactus using two primary methods: using cuttings or seeds. Cactus seeds take longer to germinate and grow into adult plants. Cuttings, on the other hand, are ready to bloom within months after planting them in your garden or indoor containers.
Here, we’ll look at how to propagate prickly pear cactus using these two methods.
Planting Prickly Pear Cactus from Seeds
There are several species in the Opuntia genus but the most common is the prickly pear cactus. It’s a hardy plant that doesn’t need much attention.
Besides, for many gardeners, the cactus comes back on its own every year without extra care. Follow these steps if you want to know how to plant prickly pear cactus from seeds.
- Cactus soil
- Seed tray or small pots
- Plastic bags or cover
- Sandpaper
- Gloves
- Spray bottle or mister
- Fertilizer
The 8 Steps to Take to Plant Cactus from Seeds
1. Harvest Cactus Seeds
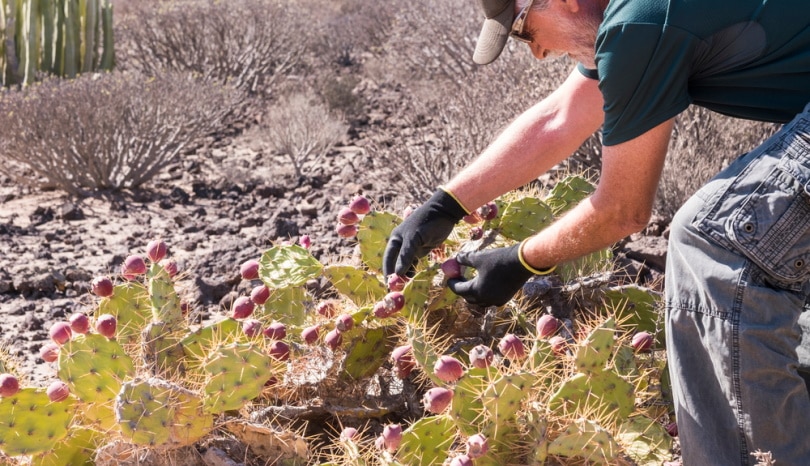
Harvesting prickly pear cactus seeds is an easy process. First, find ripe fruits on the prickly pear cactus. The fruits should be bright red, soft, and squishy to the touch. If they’re green or hard, they’re not yet ripe.
Put on gloves and be careful when handling prickly pear cactus. The plant has sharp spines that can lead to painful irritation of the skin.
Once you’ve found a ripe fruit, cut it open with a knife or scissors, then use your fingers to dig out the seeds inside the fruit’s fleshy exterior.
After removing the seeds from your prickly pear cactus, wash them to get rid of the pulp. Then, place them on a paper towel or cloth to dry out completely. Store them in an airtight container for future use of planting outdoors in your garden!
2. Prepare Planting Soil
Prickly pear cactus can grow in various soil types, as long as it is well-draining and not too alkaline or acidic. Fill up a container or seed tray with enough soil. It’ll allow plenty of room for your seedlings to grow into full-sized prickly pear cacti over time.
If you use containerized plants, use a potting mix that drains well but retains moisture in the root zone. Also, if there are soil lumps, break them up. Then, water the soil well and let it drain.
3. Get Your Stored Seeds and Scrap Them
Use sandpaper to rub prickly pear cactus seeds to remove any debris attached to the outside of each seed. It’s called scarification because you’re creating scratches for water to penetrate the seed. It also allows the seeds to germinate fast when you plant them.
4. Plant the Seeds
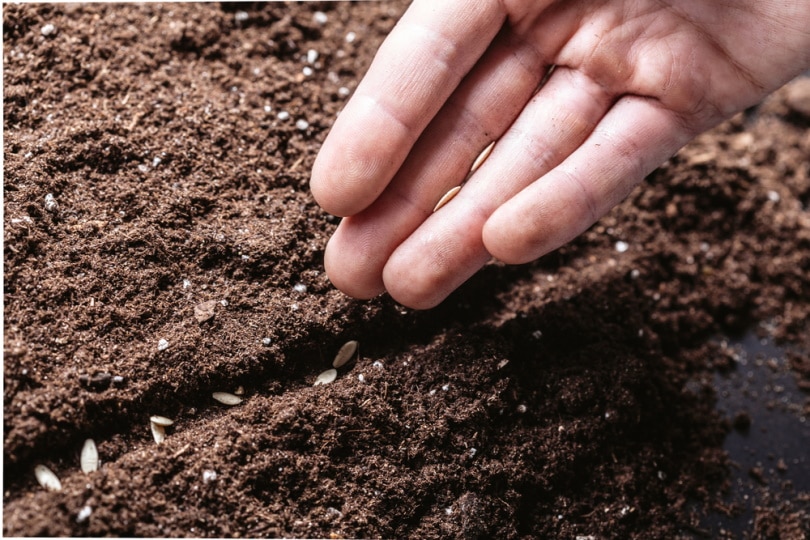
Plant prickly pear cactus seeds 1/4 inch deep in pots or seed trays filled with well-drained potting mix or commercial seed starting mix. If you plant the seeds in seed trays, ensure they are one inch apart.
After pressing the seeds into the soil, cover them using fine soil. Keep the soil evenly moist but not soggy until the plant germinates. Mist it by spraying water on the surface.
Germination takes about two weeks for most species. Fertilize once or twice a week with diluted high-phosphorus liquid fertilizer such as bone meal or fish emulsion.
5. Inspect the Temperature and Moisture
Position the seed tray or pots beneath artificial lights or next to a window. This way, your plants will receive several hours of sunlight. Check the soil daily for temperature and moisture. The ideal temperature range for germination is between 70 and 80 degrees Fahrenheit. Keep the soil moist but not wet during germination.
Also, avoid overwatering or allowing the soil to dry out completely. You can keep the seedbed covered with a clear plastic sheet to retain moisture and prevent evaporation by sunlight.
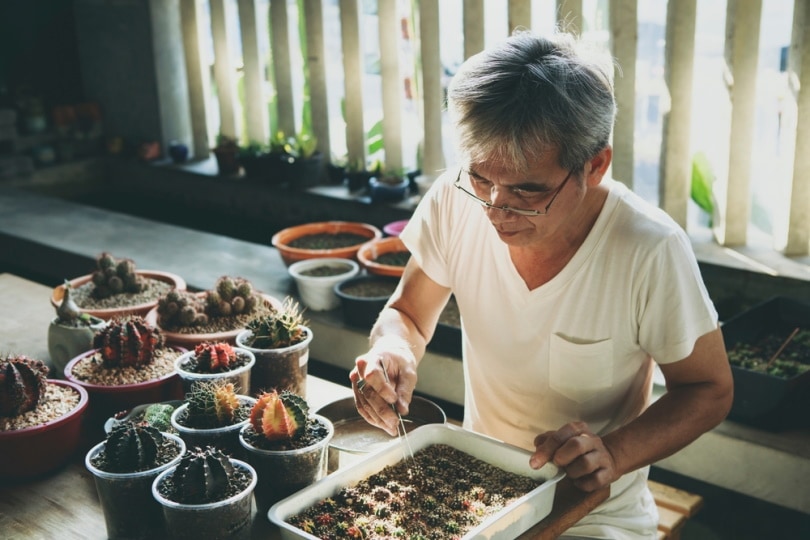
6. Inspect Your Seedlings
Once the seedlings emerge from the soil, that is within two weeks of planting the seeds, inspect them occasionally to see if they’re growing as they should. If they change to yellow, they’re not getting enough light. On the flip side, if the seedlings turn red or brown, there’s too much light. So, find an ideal location with neither too much nor too little light for your seedlings to thrive.
7. Transplant the Seedlings
When your seedling roots develop well, transplant them outside or in big pots at intervals of between 24 and 36 inches, and water them. Ensure the soil remains moist for the first fortnight or until they adjust to the new location. Once the cacti are established in their new habitat, reduce watering gradually.
8. Fertilize the Cacti You Have Transplanted
Are your seedlings about four inches tall? If yes, begin feeding them every two weeks with a dilute solution of 20-10-20 fertilizer mixed at half strength. That is half of what is listed on the package.
If you want to boost pad growth, use a balanced fertilizer, such as the 10-10-10. You can also apply a low-nitrogen fertilizer, such as 10-10-10, if you want your cacti to develop flowers.
How to Plant Prickly Pear Cactus from Cuttings
Propagating prickly pear cacti from cuttings is the most widely used and effective approach. In this method, you take a cutting from the parent plant. The process of taking a cutting from a prickly pear cactus is similar to taking one from other succulent plants.
If you want to propagate prickly pear cactus from cuttings, you’ll need to know how to do so effectively. Besides, you don’t need any special tools. Here’s what you need.
- Knife
- Heavy work gloves
- Watering can
- Perlite
- Compost
- A container
The 5 Steps to Take to Plant Cactus from Cuttings
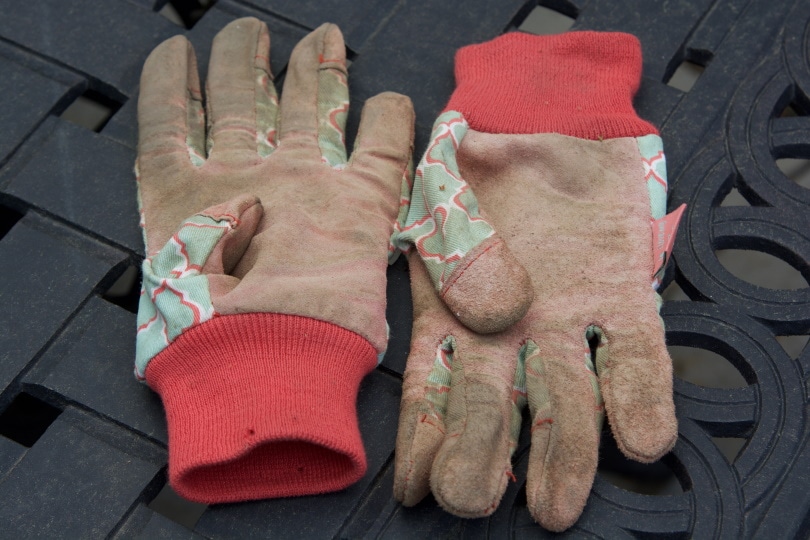
1. Protect Your Hands When Taking a Cutting
You can wear gloves or long sleeves and pants to prevent getting cut by the sharp spines of the cactus pads. Choose a healthy cactus and take a cutting from there. Ensure the cactus pad you choose is more than six months old and that it doesn’t have spots. Hold it well at the top as you cut the pad from the parent plant using a knife.
2. Put the Cutting on a Flat Place
After taking out a cutting, put it on a flat surface like wooden boards or cardboards. Let it sit there for seven to ten days. This way, it’ll form callus tissue where you cut it.
3. Prepare a Mixture of Perlite and Compost.
Prepare a mixture of one part compost and one part perlite. You’ll create a suitable environment for the cactus roots to grow in. These two ingredients will also help retain moisture in the soil mixture during the early stages of the plant.
4. Plant the Cutting and Water It
Plant the cactus cutting upright and ensure the callused edge sits in the soil. A half or a third of the cutting should be in the soil.
After planting the cutting, water the soil and ensure it’s evenly moist. Always water it when the soil starts drying. As soon as the cactus is established, minimize watering gradually.
5. Transplant the Cactus
Once you have grown your cactus in a container for a year, it’s time to transplant it. Do this during spring. Burrow a hole and ensure its width is twice as much as that of the cactus’ root ball. Plant the cactus into its new home and add soil. Press it firmly and water until moist but not dripping wet.
You can use a watering can to make sure it stays moist but not wet at all times after planting until established.
 The 7 Tips and Tricks on How to Plant Prickly Pear Cactus
 The 7 Tips and Tricks on How to Plant Prickly Pear Cactus
- Don’t plant prickly pear cacti near high-traffic areas such as paths or next to a gate where it can sustain injuries.
- Plant these cacti away from small kids and pets.
- The best way of growing prickly pear cacti in a cooler climate is in a container. So, if you live in a region with temperatures below -10 degrees Celsius, consider this option.
- If you plant the cactus in a container, ensure it has enough drainage holes at the base.
- Water it only when the soil surface is dry.
- Don’t prune the cacti, but you can remove damaged cacti pads or those that touch each other. Do this in late summer or spring.
- Don’t propagate the cacti if there’s a heat wave.
Conclusion
There are many advantages to growing prickly pear cacti. Not only do they add color and texture to your yard, but they also provide you with a delicious treat. You can use the fruit to make sweet cactus jam.
Besides, planting a prickly pear cactus is as easy as following a few simple steps. You don’t even need much knowledge on the subject to accomplish this task. Once you get the hang of it, you can move to bigger and better things like planting other succulent plants.
Featured Image Credit: Emily frost, Shutterstock
Contents
