House Grail is reader-supported. When you buy via links on our site, we may earn an affiliate commission at no cost to you. Learn more.
How to Sand Drywall in 3 Easy Steps
Codee Chessher
Last updated:
Sanding drywall is a crucial step near the end of drywall installation, necessary to create a smooth finish suitable for painting. It can be tricky to get right, especially if you’ve never done it before.
Let us take you through an easy, straightforward guide on how to sand your drywall to seamless perfection. Read on for the specifics.
What You Will Need
You’ll need to gather up some gear before you sand drywall to prep for painting. You may or may not have it on hand already, so let’s just list it all for a quick reference guide.
You Will Need:
Sandpaper (120 and 220 grit are good options here)
Sanding blocks
Electric sander (optional but highly recommended_
Painter’s plastic/drop cloths
Shop-vac/broom & dustpan
Dust mask
Sanding pole
Sanding sponge (optional but helpful for tight corners)
Joint compound
Once you’ve gathered all your gear, it’s time for the step-by-step guide on exactly how to sand your drywall.
Image By: LeoNeoBoy, Pixabay
The 3 Steps How to Sand Drywall
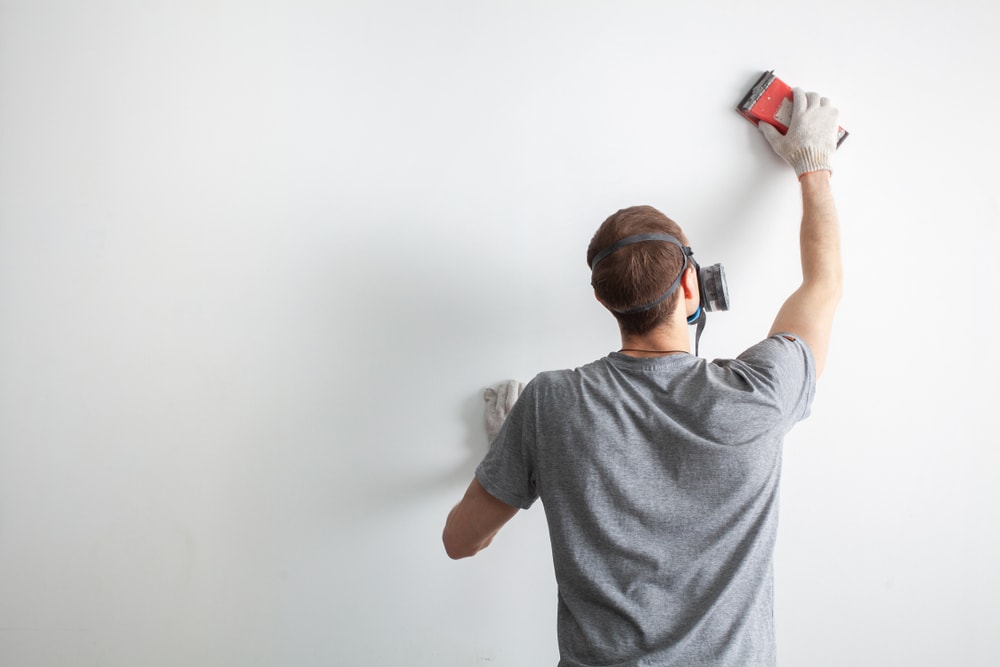
1. Assess & Start at the Corners
First, put on your dust mask to protect yourself from tiny airborne dust particles. Your lungs will thank you for it. Then, put down some drop cloths or sheets of painter’s plastic to catch falling debris and dust. You’ll save a lot of time later on cleanup.
Make sure that your joint compound is fully dry and ready to be sanded. Take your sanding sponge or coarse grit sandpaper in hand and start pressing firmly into the corners to be sanded. An electric sander is ideal, but by hand, you rub the sandpaper vigorously back and forth with an even amount of pressure.
A sanding sponge is especially helpful during this stage because it’s easier to work with in tight corners, but sandpaper works fine if you’re willing to work a bit harder. Wet sanding first and following up with sandpaper is a good rule of thumb to use.
Your goal here is to first sand off any thick clumps of joint compound and make the drywall surface smoother. This means you should rough sand first and go for a smoother finish in a second pass.
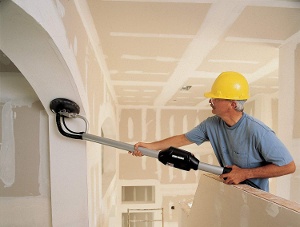
2. Start Low and Work Your Way Up
After your corners, use your sanding method of choice to make a first pass over the bottom half of the wall. Use sandpaper or a hand sander for lower areas. First work on visible seams, electrical outlets, and visible screw/nail patterns in the drywall.
Larger walls can be split up into smaller slices for convenience. Don’t sand it to perfection just yet. Instead, grab your sanding pole and possibly a stepladder and do the upper portion of the wall. For pole sanders, use a simple push-and-pull motion to work at rough seams.
Wet sanding is good for the initial stages, but don’t rely on it too much. Too much water while wet sanding can make it harder to get off big chunks of joint compound.
During this stage, you don’t have to sand it too much. Your objective is mainly to remove the built-up joint compound and rough up the surface a bit. Avoid unnecessary sanding and leave taped seams alone.
3. Finish Sanding & Repair Any Flaws
You have a lot of leeway in deciding how smooth is smooth enough here. Really, you just need a uniform surface that primer and paint can adhere to unless you have other plans for the wall. Take a critical look or two after you’ve gone over the whole wall with fine-grit sandpaper and look for visibly bumpy or unfinished seams in the drywall.
Once the wall is sanded to your satisfaction, you can go ahead and fill in any flaws with your preferred joint compound. Once you allow that to dry, simply sand the filled area and move on with your day.
Conclusion
Sanding drywall is a labor-intensive step needed to make your new wall ready for a fresh coat of paint. It doesn’t take a lot of special gear, but we at least recommend fine and rough grit sandpaper. If possible, a sanding pole will help a ton.
Featured Image Credit: lucky boy studio, Shutterstock
Contents
Writer
Codee Chessher
Codee Chessher is a freelance writer with extensive knowledge on a variety of subjects that include travel, sound engineering, automotive, DIY, pets, and more. He has a colorful past that includes building schools and commercial driving, but the written word was always his first love. He believes there's nothing a well-worded sentence can't accomplish.When not writing, Codee enjoys epic fantasy novels, home DIY projects, and memorizing useless pop culture trivia. He has lived in Florida, Georgia, Texas, and North Carolina. Most recently, he resides in northern Mexico.