

Whoever said gardening was easy clearly never tried potting plants! If you’re a plant parent, then you know that potting soil can be a real challenge. Not only is it prone to pests and diseases, but it’s also difficult to sterilize properly.
Without fancy products and special equipment, sterilizing potting soil is easier said than done. But did you know that you can effectively sterilize potting plants using simple household methods? Here are a couple of soil sterilization techniques that you can try to keep your potting soil healthy and pest-free.

What Is Soil Sterilization?
Soil sterilization is the process of killing harmful bacteria and other pathogens in potting soil so that your plants can thrive. The process involves using heat or chemicals to essentially “zap” the microbes that can cause disease and damage.
In doing so, potting plants will be able to grow healthy and strong, free from the risks of bacterial or fungal infections.
The 4 Methods to Sterilize Potting Soil
Here’s a brief breakdown of some common methods of soil sterilization: oven, solarization, steam, and microwave.
1. Oven Sterilization

Oven sterilization is ideal for small and medium soil volumes. As the name suggests, the process involves putting batches of soil inside an oven. The oven heats up to a high temperature, effectively killing off all pathogens in the potting soil.
For this technique, you’ll need the following:
- An oven (the bigger, the better)
- Oven-proof containers
- Water
- Aluminum foil
- Oven-safe thermometer
After gathering all the necessary equipment, you can begin the sterilization. All you have to do is:
Oven Sterilization Step-by-Step
- Preheat the oven to about 200 degrees Fahrenheit.
- Fill your oven-proof container to about three inches after removing rocks and unwanted plant matter.
- Moisten the soil with just enough water to soak it but not too much to reduce the heating temperature. Steam is needed to destroy contaminants in the soil.
- Cover the container with aluminum foil to keep it from drying out and ending the sterilization process immaturely.
- Check the soil temperature and when it reaches 180 degrees Fahrenheit, leave it to bake for about 30 minutes.
- After 30 minutes, turn off the oven, let the soil cool down, and you’re good to go!
Pros & Cons of Oven Sterilization
- A relatively low-cost and time-efficient potting sterilization method, which makes it ideal for home gardeners or plant parents with limited resources
- Won’t need any specialized equipment or tools to complete the process
- Easy to control and tweak, so you can customize it to fit your potting needs
- Time-consuming process since you must sterilize in small batches and bake for 30 minutes
- Limited to small volumes of potting soil
- Consumes a lot of power, making it an expensive method
- Kitchen will smell like baked soil
2. Solarization

If you’re looking for a cheaper and more energy-efficient way to sterilize your potting soil, then you should try solarization. This method involves using the heat of the sun to sterilize potting soil.
To complete this process, you’ll need:
- Plastic sheeting or tarpaulin (clear is best)
- Rakes and shovels to mix your soil well
- Water hose (optional)
With the necessary materials at hand, you can begin the sterilization. Follow the below steps to solarize your potting soil:
Solarization Step-by-Step
- Lay down the first layer of plastic sheets on an area that receives about 8 hours of sun in a day.
- Pour the soil onto the plastic sheet, breaking out any lumps, and distributing it evenly.
- Pour water on the soil but just enough to keep it moist.
- Place another layer of plastic on the soil and use something like stones to secure it in place.
- Leave it for about four to six weeks for the soil to sterilize completely.
Pros & Cons of Solarization
- Much more affordable than other sterilization methods
- Extremely energy efficient
- An environmentally friendly or “green” option
- A time-consuming process that takes weeks and even months to complete
- Only applicable during hot summer days
- Not as effective as other potting soil sterilization methods
3. Steam Sterilization
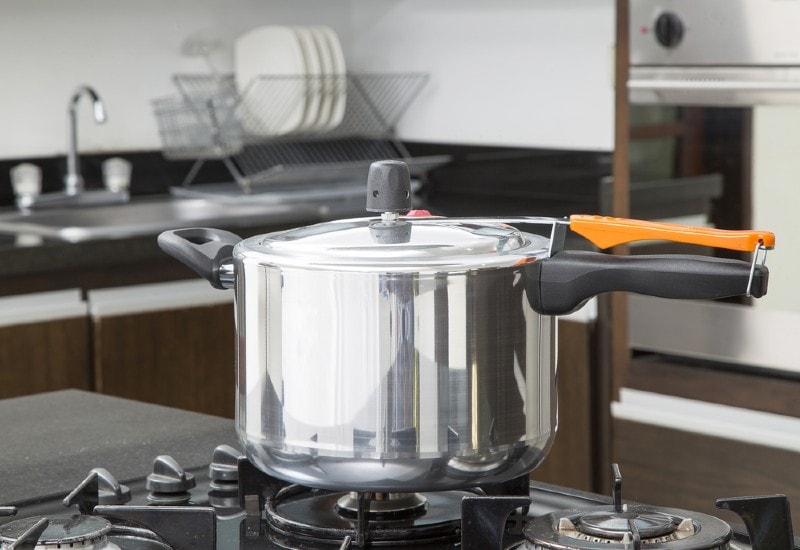
Another potting soil sterilization method is steam sterilization, which involves exposing potting soil to hot steam to kill bacteria and other contaminants. A pressure cooker works best for this sterilization method.
For steam sterilization, you’ll need:
- A pressure cooker with a rack
- water
- Aluminum foil
To steam sterilize your potting soil, follow the below steps:
Steam Sterilization Step-by-Step
- Put a few cups of water in the pressure cooker.
- Fill the containers with soil up to 4 inches deep.
- Cover the containers with soil and place them on the pressure cooker’s rack.
- Turn on the pressure cooker and wait for it to build steam.
- Use about 10 pounds of pressure and leave the soil for 20 to 30 minutes.
- Take out the soil and let it cool to room temperature before using it.
Pros & Cons of Steam Sterilization
- Extremely effective at killing all pathogens and contaminants in potting soil
- Fast sterilization method
- Energy-efficient since it only takes a short time to sterilize
- Requires specialized equipment (pressure cooker)
- Requires precise time control
- High potential for burns
4. Microwave Sterilization
Microwave sterilization involves exposing potting soil to microwaves to kill bacteria and other contaminants. For microwave sterilization, you’ll need:
- A microwave
- Zip-top plastic bags
- Plastic containers
- Water
- Heat-safe thermometer
After gathering the materials. Do the following:
Microwave Sterilization Step-by-Step
- Remove plant debris and any metal substances from the soil.
- Fill the zip-top plastic bags and containers with about 2 pounds of moist soil.
- With the bags and containers open, place them inside your microwave.
- Microwave the soil until it reaches temperatures of about 180 to 200 degrees Fahrenheit.
- Wait for the soil to cool before seeding or planting.
Pros & Cons of Microwave Sterilization
- Fast and efficient method that helps kill pathogens quickly
- Minimal energy usage
- Cost-effective method
- Potential for soil contamination if not done correctly
- May kill beneficial microorganisms
- Requires a microwave
- Limited to small volumes of potting soil

Factors to Consider When Choosing a Soil Sterilization Method
Potting soil sterilization is a simple and straightforward process if you know how to do it correctly. There are four main methods to sterilize potting soil. The best method for your plants depends on various factors, including:
The Amount of Labor You Have
Some soil sterilization methods are more labor-intensive than others. If you have spare hands around, a labor-intensive sterilization technique is an option for you. But if you have a limited labor force, you would be better off with a method that is less demanding.
The Volume of Soil You Need to Sterilize
Some potting sterilization methods such as using a microwave are only suitable when you have a small amount of soil to sterilize. Larger amounts of soil would require techniques such as solarization..
The Materials You Need
Some techniques, such as solarization, require just a plastic sheet. However, other methods may require equipment such as pressure cookers or ovens.
Final Thoughts
The information above should help you better understand potting soil sterilization methods and help you decide which method is best for your needs. Whether you opt for solarization, steam sterilization, or microwave sterilization, it’s important to follow the steps carefully to ensure that your potting soil is fully sterile and ready to use.
Remember, you can always buy sterile potting soil and save yourself the hassle of sterilizing your potting soil. But this means paying a little more for convenience so it’s up to you to decide the best method for your garden. Good luck and happy gardening.
Featured Image Credit: progressman, Shutterstock
Contents
