

Tons of people love to work on cars as a hobby, but it can be confusing to get started because there are so many different parts and tools. For instance, brake spring pliers don’t look like anything special, but they’re essential for quickly and easily doing work on your brakes. Let’s find out exactly how to use them.

Before You Start
Brake spring pliers aren’t the only thing you’ll need. Just like any other automotive work, you’ll need an array of tools at your disposal. Let’s check out everything you need to gather up before working on your brakes.
- Car
- Jack/jack stands
- Tire iron or impact wrench
- Screwdriver
- Wrench/ratchet
- Replacement brakes
The 5 Simple Steps on How to Use Brake Spring Pliers
Once you’ve gathered all these, it’s time to get down to brass tacks and learn how to use those brake spring pliers.
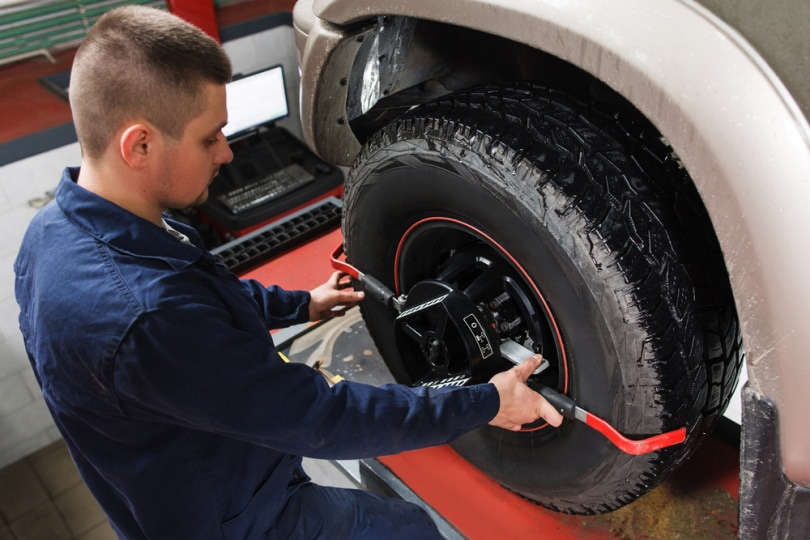
1. Remove the Wheels
The first order of business is to park your car on solid, level ground. Then, remove the hubcaps from the wheels you’re working on with a wrench or screwdriver, depending on the type of hubcap.
To remove the wheels, loosen all the lug nuts with an impact wrench or tire iron until they’re all almost off. Finally, jack the car up and remove the wheel(s). To avoid losing the lug nuts, remove them by hand and store them in a plastic cup for reassembly later. Jack stands are great for stabilizing the car but aren’t strictly required.
2. Getting to Your Brake Springs
First, pry off the grease dust cup with your brake spring pliers, which will reveal the retaining nut. To remove it, straighten the bent end of the cotter pin and pry it out with your pliers or screwdriver. This will let you finally remove the retaining nut with your wrench or ratchet. If it’s stuck, you can use WD-40 to lubricate it enough to come off.
If your drum has bolts securing them to the hubs, you’ll need to remove those. Now, firmly grasp the drum and pull it directly away from the hub, wiggling little by little until it comes free. If it won’t come off, check to make sure it isn’t getting caught on the brake shoes.
3. Remove Your Brake Shoes
Using the notched, round part of your brake spring pliers, put the round end on the anchor pin attached to the springs and rotate it until the notched part of the pliers catches the spring. Simply twist and pull firmly to pull the spring out. The next step is to remove the retaining rings. To do so, grasp the outside of the ring with your pliers, push in, and twist the pliers until the ring comes free.
Slide the spring off the bottom of the brake shoe and pull the brake shoe off the backing plate. Lastly, remove the emergency brake line attached to one of the shoes by opening the spring cover and sliding the cable out from the side.

4. Replacing Your Brake Shoes
Put your new brake shoe in the same way you removed the old one, then reattach the emergency brake line by sliding the cable into the same slot it was attached to on the old shoe. Before moving on, you may wish to lubricate the backing plate to prevent the shoes from squeaking or making other noise.
Hook the return spring into the slot on the bottom of the new brake shoe and slide the shoe all the way against the backing plate. Hold it in place until you can grab the retaining ring and put it back in place.
Next, repeat this process for the second brake, paying special attention to putting things back in the way they came out. Different cars may have different components, so everything in our guide may not be totally correct.
The final step here is to use a screwdriver to push your adjuster assembly down, then use another screwdriver to loosen the adjuster. This will adjust the springs to compensate for the new, thicker brake shoes.
5. Reassemble

Put the drum back on and wiggle it a bit until it slightly drags, making sure that it spins freely. If it doesn’t, you adjusted your springs too tightly. If there’s no drag at all, however, the springs are too loose.
Next, we’ll replace the bolts, retaining nut, and cotter pin. Tighten the retaining nut on the drum, then put your cotter pin back in the way it originally sat. Snap the dust cap back on, and let’s finish up.
Get your tire iron or impact wrench and the lug nuts, then put your wheel(s) back on the wheelbase. Hold it in place while you put the lug nuts back on. The easiest way to do this is to put all the nuts on the bolts a quarter turn and then tighten them.
The last step is to lower your jack, remove the jack stands (if applicable), and clean up. You’re all done!

Brake Spring Plier Tips and Tricks
- Always invest in a high-quality pair of brake spring pliers. Poor-quality pliers may rust or break more easily than high-quality pairs. Good-quality brake spring pliers can be cheaply bought, especially compared to other tools.
- Thoroughly wash your pliers with water after each use to avoid oil, dirt, and rust buildup. Neglecting this step will reduce how long your pliers last.
- When grasping components, always hold the pliers with a firm grip. Some parts are small and easy to lose if you drop them, while others are stubborn and difficult to pry loose.
- Because the pliers are metal, don’t use them until your car has cooled down. You risk burning yourself if you try to disassemble a freshly driven car!
 Conclusion
Brake spring pliers are one of the cheaper but invaluable tools for brake work on cars. Used correctly, they can reduce the difficulty of removing various components, like the grease dust cap and the brake shoe’s springs.
Featured Image Credit: Pixabay
Contents
