
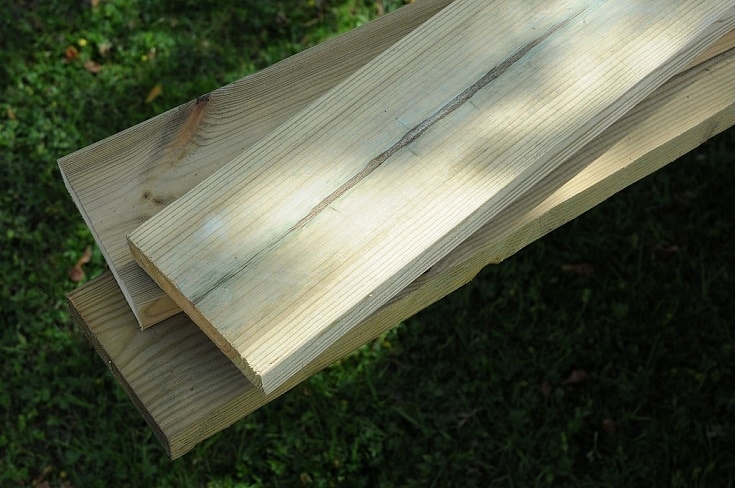
So, you’ve just installed some pressure-treated wood for a new deck, fence, or another exterior wood project, and you’re wondering if you can apply wood stain to it. The short and simple answer is—yes. Not only can you stain pressure-treated wood, you should.
Not only does staining pressure-treated wood help to improve its appearance, it also helps extend its life by protecting it against things like the sun, wind, moisture, and dirt. Staining your pressure-treated wood will help reduce its surface from cracking and splitting over time with the changing of the seasons. Read on to learn more about how to properly stain your pressure-treated wood for the best results.

How To Know If Your Wood Can Be Stained
When staining pressure treated wood, timing is everything. Perhaps the biggest cardinal rule is knowing how long to wait before proceeding with staining, as the wood needs to have the ideal moisture content before it can be stained. For instance, if the wood hasn’t had enough time to dry after its pressure treatment, staining it won’t be effective. You risk the stain job coming out patchy and uneven if the wood is still too wet.
When purchasing pressure-treated wood, look for kiln-dried wood. This type of wood will have a tag attached that either reads KDAT (kiln-dried after treatment) or ADAT (air-dried after treatment) and will be dry enough at purchase to be stained immediately. Be sure not to pick a pressure-treated wood that contains a water repellant, as neither water-based nor oil-based stain will work to stain this type of wood.
To be certain whether the wood you’re purchasing is ready for staining, have the dealer or shop test its moisture content. Moisture content of less than 12% is ideal for staining the wood. If you can’t determine the moisture content or how exactly the wood was treated, you can err on the safe side with an oil-based semi-transparent exterior stain.
If you can’t have the wood tested for its moisture content, use the “sprinkle test” to test its moisture level. Simply sprinkle a few drops of water onto the wood. If the wood absorbs the water within 10 minutes, it’s ready to be stained as soon as possible. If the water beads up on the surface, you’ll need to wait a little longer, but not too much longer. Again, timing is key. Each day the wood is exposed with no coating on it, ultraviolet light can degrade the wood’s surface, reducing how effective any stain will be when applied to it.
What Kind of Stain Should You Use?
As mentioned, using an oil-based semi-transparent exterior stain is your best option if you’re not certain what the moisture content of your wood is. While transparent stain has very little to no pigmentation to it, semi-transparent stains contain a bit more pigmentation to add some color when applied to your wood. You can find some at just about any home improvement store or online.
The tone and color of the stain is largely based on preference. Lighter-colored stains are recommended on newer wood, as they allow you the option of going darker in the future. On the other hand, darker stains are recommended for older wood, as they work well to cover up any imperfections that may have naturally occurred over time.
As a rule of thumb, avoid using a solid-color stain or paint when staining a deck floor. It can be hard to maintain as they peel more easily over time due to the normal wear and tear of people walking on it. If your deck receives a lot of direct sunlight, a lighter stain that reflects heat is recommended over a darker stain that naturally absorbs more heat.
Tips, Tricks, and Best Practices
For any first-timers, or anybody just wanting optimal results, we’ve gathered some tips and tricks for you to make sure you do your best job staining your pressure-treated wood the first time around.
- To check if your pressure-treated wood is ready for staining, use the aforementioned “sprinkle test” of sprinkling a few drops of water onto the wood. If the wood absorbs into the wood within 10 minutes, it is ready to be stained. If the water beads up on the wood surface, give it more time to dry while monitoring that not too much time goes by.

- If working with older pressure-treated wood, be sure to clean the wood surface of any dirt, debris, or mildew before applying any stain.
- Use a deck cleaner to wash the wood, scrubbing the wood surface with a brush while it’s wet. Let it soak into the wood for about 10 minutes before rinsing it thoroughly with a garden hose.
- Let the wood to dry for 24 hours. Brush the dry wood one more time to remove any dust or debris that may have settled while the wood was drying.
- Before you start to stain, protect areas and objects around the wood using tarp and painter’s tape.
- Find a place where you can apply stain that isn’t directly in the sunlight, as stain needs time to absorb into pressure-treated wood but tends to dry quickly.
- First test the stain by applying it to a separate patch of pressure treated wood to make sure it’s the color and appearance that you want.
- Use a paint pad applicator to stain the pressure-treated wood. This is much easier than using a paintbrush to hand paint a large deck or other large wooden structure. It is also more accurate than using a pressurized sprayer to apply the stain.
- Use a paintbrush to apply stain in between cracks and in problem areas that require special attention.
- If applying stain to pressure-treated wood on a fence post, railing, wall, or another vertical surface, be sure to apply from top to bottom.
- Allow the stain to dry for at least 24 hours.
Summary
Pressure-treated wood is the way to go for a few reasons. It is a reliable choice for renovation projects around your home, as pressure-treated wood is protected from the elements, the effects of aging, as well as termites and other harmful infestations.
As pressure-treated wood is not the sightliest as is, applying a healthy coat of stain to it can make a night-and-day difference for its appearance, all the while providing it with an additional layer of protection. We hope this article has better informed you of how to properly stain your own pressure-treated wood structures to give them the tasteful touch-up you desire.
Related Read: Can You Burn Pressure-Treated Wood?
Featured Image Credit: bricoydeco, Pixabay
Contents
