
If you have a big, beautiful garden with lots of plants and flowers, it can be a bit tiresome to take care of without a cart. Now, there are many brands out there that specialize in garden carts. But what if we said you could build one yourself? That’d be cool, right? One step ahead of you! The following list includes ten user-friendly garden cart plans that you can make right now!
While some of these are a bit more complicated than others, if you have a saw, drill, measuring tape, and some screws, you’ll be able to handle all these plans hassle-free. Follow the garden cart guides closely, and you’ll be done in no time!
 The 10 DIY Garden Cart Plans
 The 10 DIY Garden Cart Plans
1. Six-Wheeled Cart with a Pull Handle
| Materials: | 2 x 4 lumber, a set of average-sized wheels (6 in total), wood screws, washers, lock nuts, bolts, hinges |
| Tools: | Safety gloves, screwdriver, miter saw, electric drill + bits, framing square |
| Difficulty Level: | Easy |
Most garden carts only have four wheels, but if this is your first ever DIY plan, a six-wheeled cart with a pull handle will be a great place to start. First, it’s not at all hard to build. Second, the extra set of wheels means more control over the cart. The handle, in turn, makes it easier to carry even the heaviest weights. That’s right: this is a heavy-duty cart that can be used for hauling gravel, rocks, soil, and compost. And it’s only 24 inches wide, which makes it just right for tight garden pathways.
This cart won’t cost you much, and you should be able to complete the project in 3–4 hours. A screwdriver, drill and saw—that’s it for the required tools.
2. Universal Garden Cart with a Bungee Cord
| Materials: | 5 wood planks, 4 wheels, screws, stove bolts, lag bolts, bungee cord/regular rope, spring links, tote (optional) |
| Tools: | Gloves, Phillips screwdriver, drill, measuring tape, combination square |
| Difficulty Level: | Easy |
Do you have scrap wood lying around? What about a set of old wheels from a lawnmower? If the answer is yes to both questions, this universal garden cart with a bungee cord will be a perfect match. Like the previous plan, it’s incredibly cheap and takes minimal effort to make. But this time around, instead of attaching a pull handle, we’ll use a bungee cord.
It’s a go-to choice for most gardeners who move big, bulky, and heavy stuff all the time and need a reliable cord to strap their bags of soil, concrete, or gravel. If you want, add a plastic tote or wooden box on top of the cart.
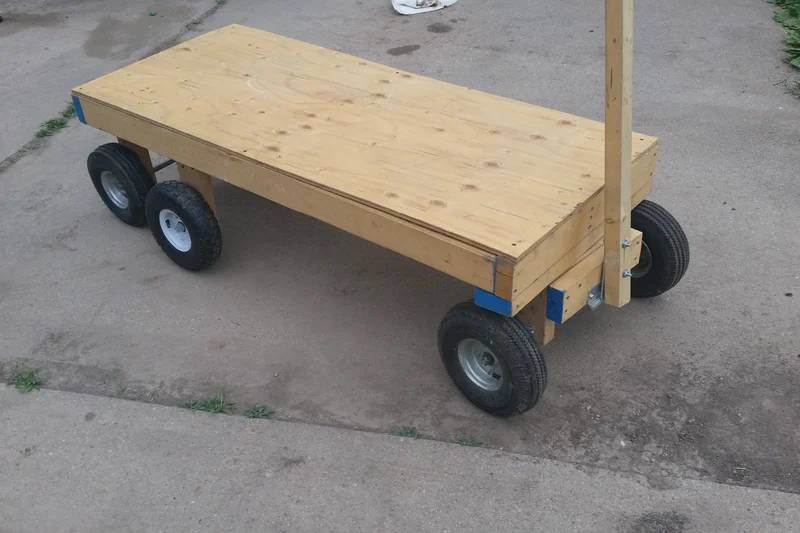
3. Large, Old-School Cart
| Materials: | 2 large wheels, axles, 3/4 inch treated plywood, screws, aluminum trim, washers, lock nuts |
| Tools: | Measuring tape, pencil/marker, miter saw, gloves + goggles, construction adhesive, electric drill + bits, grinder |
| Difficulty Level: | Moderate |
A big garden might greatly benefit from a large, old-school cart. Building it will take a day or two (4–8 hours in total), but the result will be well worth it. As long as you’ve got a set of big enough wheels (like from a bicycle, maybe) and some treated plywood (or any other sturdy and weather-resistant wood), you’re good. To make the cart last longer, consider adding aluminum trim around the edges.
For mounting it, use heavy-duty adhesive and screws. This garden cart is relatively lightweight yet very sturdy and weather resistant. And thanks to the sidewalls, you won’t have to worry about your stuff bouncing off.
4. Garden Cart from Pallets
| Materials: | Wood pallets, regular wheels from the store, hinges, screws, bolts, nuts, lock washers |
| Tools: | Screwdriver, wrench, cordless drill and bits, safety gloves, measuring tape, adhesive |
| Difficulty Level: | Easy |
As the name suggests, for this DIY plan, you’ll only need some wood pallets, a set of wheels (nothing fancy, just your average kit that costs $50–$60), and some hinges and screws to hold it all together. Now, you might not be able to haul hundreds of pounds of weights on this garden cart from pallets, but for gravel, sand, soil, and instruments, it will do just fine.
The important thing here is to make sure the pallets are strong (and wide) enough to hold the wheels. So, don’t go for the biggest wheels you see; instead, pick something smaller.
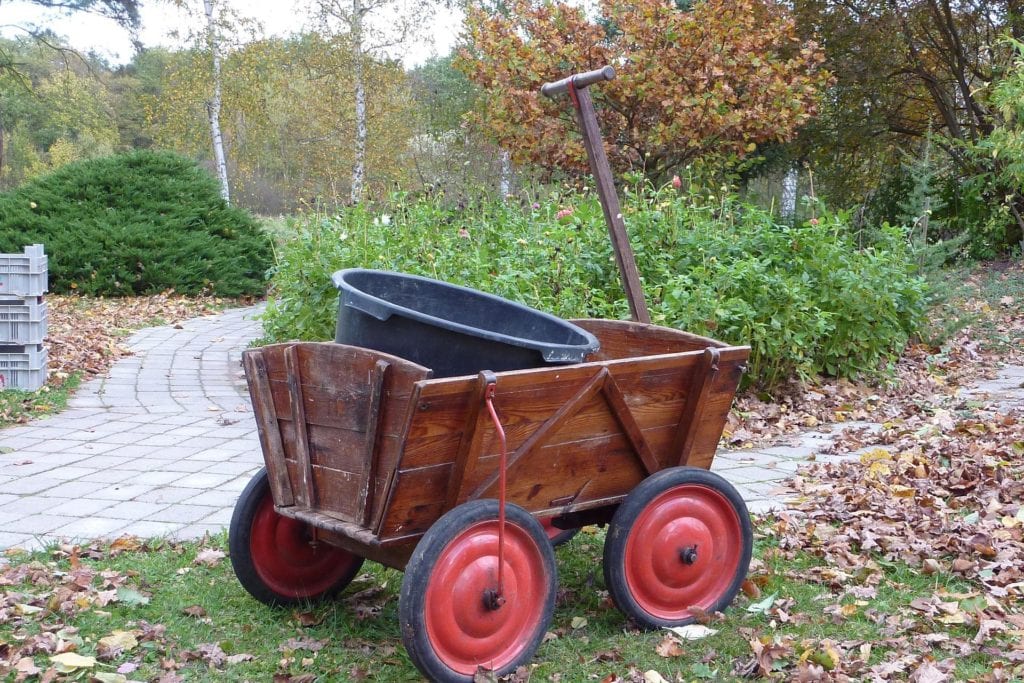
5. Classic Wooden Cart

| Materials: | Wood planks (Douglas fir, ash, or white oak), bicycle wheels, hinges, screws, bolts |
| Tools: | Miter, circular, hand, and jigsaw, drill with bits, measuring tape, clamps, combination square, protective gloves + goggles, screwdriver, wrench, sander, glue |
| Difficulty Level: | Moderate/High |
Looking for a well-balanced, user-friendly, and good-looking “workhorse” for your garden? Then this classic wooden cart deserves your attention. Do keep in mind, though, that you’ll have to spend the entire weekend building it. On the bright side, the plan is rather straightforward and intuitive. This is a two-store cart, meaning it can carry not only mulch, sand, and debris but also flowers, trowels, pruners, and everything in between.
Crafted from durable, long-lasting wood, it will serve you for many years if not decades. The cart can handle a heavy load without putting too much strain on your arms. The big wheels, in turn, are perfect for bumpy roads.
6. Portable Potting Bench/Garden Cart

| Materials: | Pressure-treated pine, 2 8-inch wheels, axle, corrosion-resistant screws, five-gallon bucket |
| Tools: | Miter saw, jigsaw, sander, screwdriver, heavy-duty adhesive, wrench, framing/combination square |
| Difficulty Level: | Easy/Moderate |
Also known as a gardening table, a potting bench is great for storing tools, pots, soil, and transplanting seedlings. As for a portable potting bench/garden cart, it comes with a set of tiny wheels. So, if you live in an area where it rains all the time, this DIY plan could very well be your best bet. It has more than enough storage for an average-sized garden and is easily modified for the task at hand. For example, a bucket mounted to the cart will store fertilizer, soil, or mulch.
7. Painted/Stained Cart with Shelves
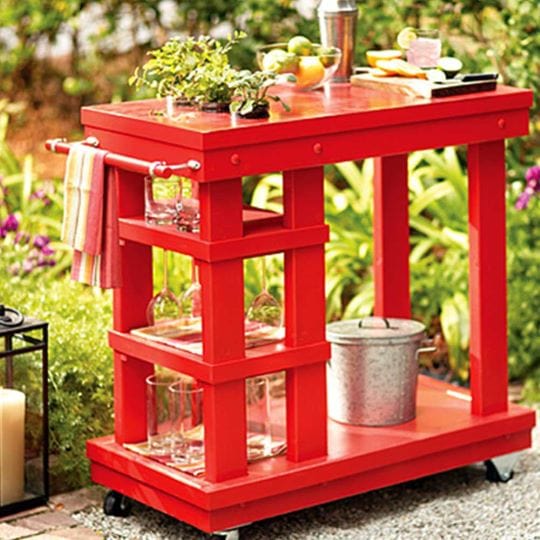
| Materials: | Wood frame pieces, wooden dowel, paint or stain, hooks, brackets, screws, clamps, bolts, nuts, casters, a bucket |
| Tools: | Measure tape, marker, framing square, drill + bits, miter, circular and hole saw, Phillips screwdriver |
| Difficulty Level: | High |
This right here is one of the best-looking carts that you can build with your own hands. On average, it takes 3–5 hours to complete. However, it’s a bit more challenging compared to your average carts. It is equally functional, reliable, and stylish, though. Besides, most of the work will be done on the jar holders, and if you have a hole saw, that won’t take much effort or finesse.
When picking between various wood types, choose the one that can withstand natural elements (white oak, cedar, or Douglas fir). Follow the instructions closely, and you’ll build a lovely painted/stained cart with shelves in no time!
8. Three-Level Garden Cart

| Materials: | 1 4 x 4 hardwood plywood sheet, 3 2 x 4 planks, 6 1 x 3 planks, self-tapping screws, wood screws, nails, wood glue, caster wheels, stain (optional) |
| Tools: | Circular saw (or table saw), drill, nail gun, hammer, pencil, speed square, tape measure, safety glass + gloves |
| Difficulty Level: | Moderate/High |
With the painted cart, we had two levels and two shelves. This time around, we’ll focus on building a three-level garden cart. It’s much bigger and can carry heavy garden stuff like bags of fertilizer, soil, water, stones, and plants/flowers. It can also serve as a rolling storage cart. The universal design and strong wheels make it highly flexible and versatile. Precision is the name of the game here. Don’t rush yourself, and make sure you get all the cuts right.
It’s highly recommended to rip the wood (cutting along the grain). To prevent the wood from splitting, pre-drill holes using a cordless drill. As for the shelves, stick them with wood glue before using the nail gun.
9. Utility Cart with a Door

| Materials: | 4 pneumatic tires, 2 axle rods (+ plastic caps and locking shaft collars), locking pillow blocks, spacing washers, pressure-treated plywood, wood planks, hinges, screws, bolts, end caps, hitch |
| Tools: | Miter saw, circular saw, chisel, drill with Forstner bits, protection for the eyes, ears, and hands, measuring tape, square |
| Difficulty Level: | Moderate/High |
Next up, we’ve got a utility cart with a door that will come in handy in any gardener’s daily routine. If you’re constantly worried that your flower/plant pots, rakes, and bags will fall off the wagon, that won’t be a problem with this cart. It looks like a baby crib and can be used as a trailer for a lawnmower. All you’ll have to do is use a hitch to attach the cart to it.
10. Hose Holder + Plastic Tub Garden Cart
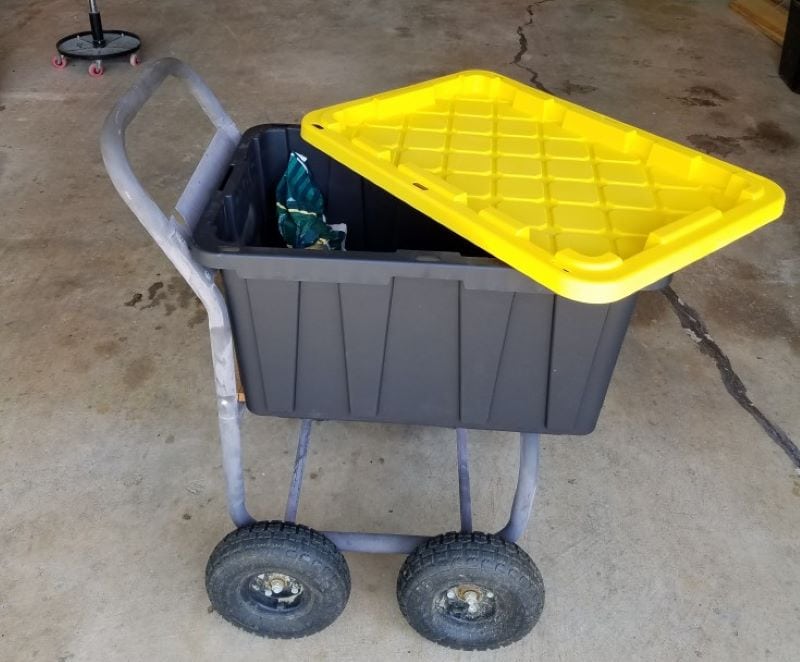
| Materials: | Wood board, hose holder, screws, bolts, washers, tub, wheels |
| Tools: | Safety gloves + goggles, screwdriver |
| Difficulty Level: | Easy |
Are you all about practicality and versatility and don’t mind a “rough” design? Then consider building a hose holder + plastic tub garden cart. It’s one of those rigid, tough, and long-lasting DIY plans that you can build for cheap. A water hose holder (preferably crafted from steel), a regular wood board, a set of wheels, and a plastic tub—that’s all you’ll need to pull this project off. Don’t forget to remove the metal spool!
What Is a Garden Cart?
As the gardeners like to say, there’s always something to haul, be it compost, tools, debris, weeds, bags of soil, or plants. And that’s exactly why garden carts are in large demand. Without one, you’ll break your back trying to carry all the heavy stuff. Mostly crafted from wood (plastic is too weak, while steel tends to be heavy and bulky), the average garden cart has four wheels for mobility and (ideally) a pull handle with enough vertical swing.
The rule of thumb here is—the simpler the design, the better. First, it will be much easier to build such a cart. Second, when something breaks, you won’t have to empty your bank account to have it fixed. That doesn’t mean you shouldn’t opt for the three-layer cart or the classic wooden wagon, of course. Still, do keep this in mind.
Garden Carts vs. Wheelbarrows: What’s the Difference?
While these terms are often used interchangeably, they are not the same thing. A wheelbarrow usually has one single wheel (or, it could be a pair, but always located on the front), while carts have a minimum of two (mostly four or even six). What does that mean in practice? Thanks to the extra number of wheels, it takes almost no effort to “drive” a cart. In contrast, wheelbarrows require more skills and sleight of hand, especially if you’re moving heavy stuff around.
Next, carts have a low bed, which makes it easier to get stuff in and out. They are mostly dragged, though, while with a wheelbarrow, you’re always in the front. Another big downside of carts is the lack of maneuverability. If the paths in your garden are nice and wide, that will make it easier to use it. However, a cart can never be as nimble as a wheelbarrow.
So, what’s the right choice here? If you’re the proud owner of a big garden with relatively large pathways, a cart will be the best pick. It will be able to handle bigger loads, too (like cement, stones, or wood). Finally, carts can be more advanced in terms of design and include slots for your tools, pots, and more. But if you’re working with limited space and need as much flexibility and maneuverability as you can get, go with a wheelbarrow.
Conclusion
A DIY garden cart might not look particularly fancy, but when built according to the plan and using the right instruments, it will get the job done. Plus, you’ll get to save a lot of money if you make the cart yourself instead of buying it. And let’s not forget about the thrill and excitement of building something with your own hands. If this is your first DIY project, pick a low-difficulty plan from the list.
Or, if you’re ready to take on a complex yet rewarding project, we’ve got plenty of those as well. Don’t rush yourself; make sure you have the right tools for the job, and only then get to work!
Featured Image Credit: Marina19560, Pixabay
Contents
