

Garbage disposals make life in the kitchen so much easier. No more smelly food trash in the garbage, and no worrying about getting every speck of food off of your plate before rinsing it in the sink. The only problem is that your garbage disposal is out of sight and out of mind.
Your sink and counters get cleaned regularly, but when was the last time you cleaned your garbage disposal? Many people forget all about their garbage disposal when cleaning the rest of the kitchen. If you’re part of this group, it’s okay. This article will cover everything you ought to know when it comes to keeping your garbage disposal clean.

What’s That Smell?
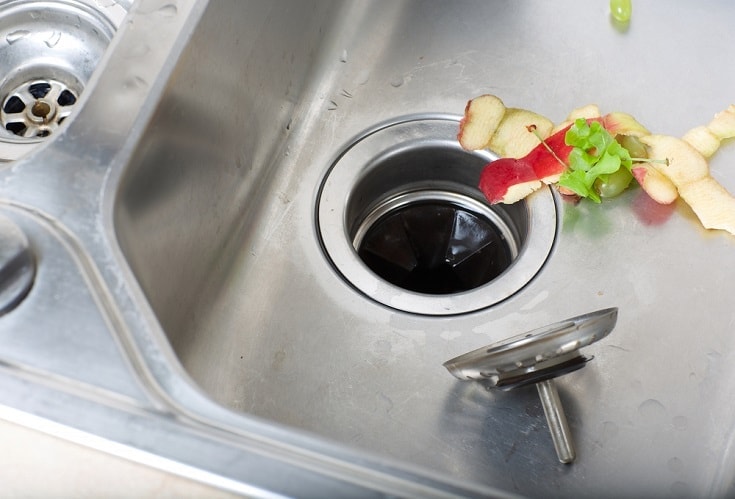
Have you ever noticed a putrid odor emanating from your kitchen sink? This is usually a good sign that cleaning of your garbage disposal is past due. That smell is a result of food scraps inside of your disposal that have started to rot, mold, and spoil.
Soon, these smells can start to spread out and make your kitchen reek. Dishes in the sink can start to smell as well, and the last thing you want to smell on your dinner plate is spoiled food from the disposal. If your disposal smells rotten, it’s time to give it a thorough cleaning. Of course, it’s always best to clean it before the rank odors start to stink up the room.
How Often to Clean Your Garbage Disposal
Since the disposal is hidden and you don’t actually see the mess inside of it, it’s easy to forget about. This means that most people let food build up in the disposal for way too long. But how often should you clean out your garbage disposal?
There is no hard and fast rule about disposal cleaning frequency. A good rule of thumb is to clean the disposal anytime you do a deep cleaning of the kitchen. For most, this is once every week or two.
If you’re very careful about cleaning off your dishes and getting only minimal leftovers in the disposal, then you can probably get away with longer stretches between disposal cleanings. Families with kids who haphazardly dump all their leftover dinner into the disposal will obviously need to clean it out more often.
If you start to smell the disposal, it’s a definite sign that you’re due for a cleaning, but it’s much better to clean it before it gets to that stage.

How to Clean Your Garbage Disposal
Now that you know how often your disposal needs to be cleaned out, let’s discuss the easiest way to do it. One reason that many people leave their garbage disposal alone and never clean it out is simply because they don’t know how. While it is a bit more involved than just wiping down the sink, it’s not that difficult of a task.
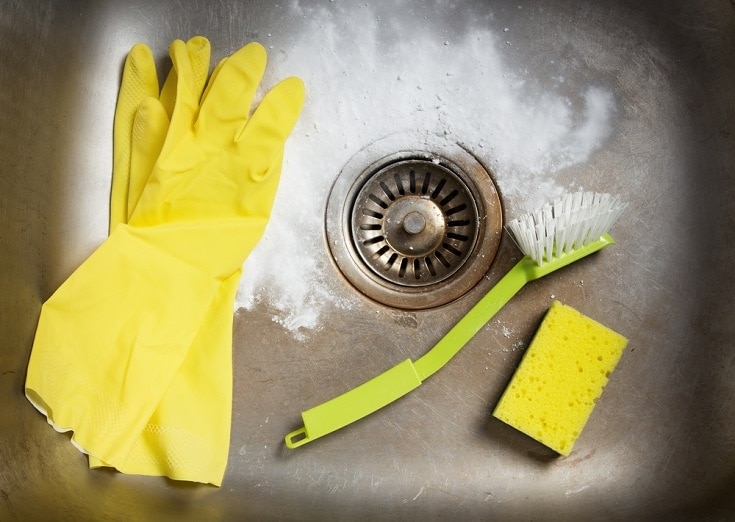
Materials
Before you get started, you’re going to need to gather a few different items to aid you in cleaning the disposal. Some of these may seem strange if you’ve never cleaned your disposal before, but they’ll make the job much easier.
- Pair of tongs or pliers (longer is better)
- Dish soap
- Flashlight
- Scrub brush with a long handle
- Ice cubes
- Salt

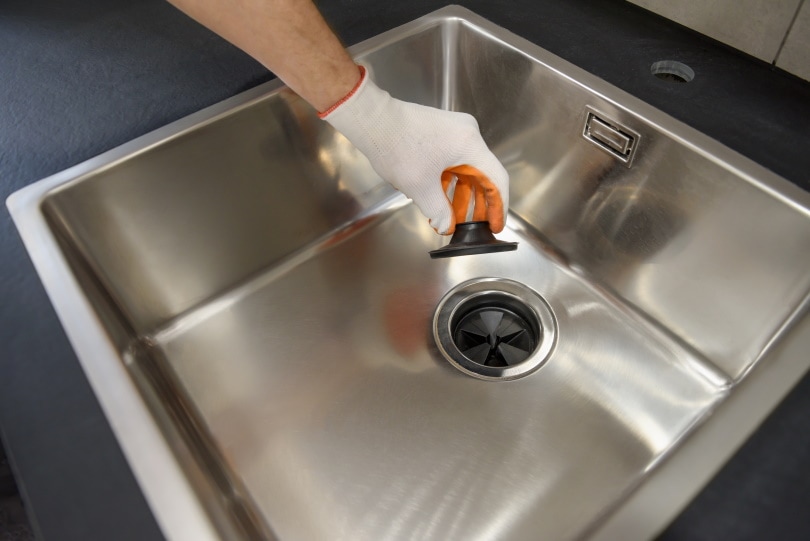
Step 1: Safety
Your disposal is an electrical appliance, so you don’t want to just start cleaning it haphazardly. Moreover, it’s full of sharp blades that can easily slice fingers, which means we don’t want to stick our bare hands down there either.
The first step is to unplug the disposal. You’ll find a power cord running from the disposal to an electrical socket under the sink. Just unplug the disposal from the socket.
Step 2: Unclog
Now that we’re certain the disposal isn’t going to accidentally be turned on while we’re cleaning, it’s time to remove the biggest pieces of food and debris. This is where the tongs or pliers will be necessary. You can stick them down into the disposal and use them to remove anything large that might prevent the blades from spinning or block the disposal from draining.
Step 3: Flush it Out
There should be no large chunks of food remaining in your disposal. Now, it’s time to flush the disposal out with a flood of water.
First, just turn the sink on and allow the water to run. As it drains through the disposal, it should take some of the smaller pieces of waste along with it.
After a few minutes of running the water, insert the sink stopper and allow the water to fill the sink at least a few inches deep. Add a few drops of dish soap while it’s filling so it gets nice and soapy. Also, be sure to use very hot water for this.
With the sink still full, remove the sink stopper and allow the flood of soapy warm water to drain through the disposal, hopefully, removing any remaining food scraps and particles.
Step 4: Cleaning the Blades
By now, most of the loose waste and mess has been removed from your disposal, but the job isn’t complete yet. There’s still a lot of nastiness caked on those blades that need to be eradicated.
For this step, we’re going to use ice and salt. Dump your ice cubes down the drain and into the disposal along with an entire cup of salt. Turn on the cold water and the garbage disposal. It’s going to be noisy, but don’t worry. Those ice cubes won’t hurt the disposal blades. However, the ice will get chopped into tiny rocks and shards which combine with the salt to create an abrasive paste that will help to remove any stubborn food particles that just won’t let go.
Step 5: Scrub
The last step helped to dislodge any stuck-on food particles, but we want to take this a step further. Pull out your long-handled scrub brush and use it to scrub down the blades of the disposal. You’ll probably want to unplug the disposal again for this step.
You can use your flashlight to get a good look at the inside of the disposal and see how clean it really is. Once you’re satisfied, give it one final rinse, and your job is done!
Tips for Keeping Your Disposal Clean

If your disposal becomes a stinky mess again, you know the steps to take in order to clean it and remove the offensive odors. But you don’t want to go through that entire process more than necessary. Instead, you’re better off preventing your disposal from ever getting that dirty in the first place. To help, we’ve gathered a few useful tips that should ensure your disposal never gets as bad as it was when you cleaned it the first time.
Dump Your Food First
Putting too much food down the disposal is the fastest way to make it dirty and stinky. Do your best to get rid of large food scraps before rinsing off your plate. You can even get a compost bin and use it for all of your food trash, which will keep your disposal smelling and operating like new.
Don’t Pour Grease Down the Drain
Grease can quickly clog up your drain pipes and wreak havoc on your plumbing. It’s also a quick way to clog your disposal and make it smell horrific. You should never pour grease into your sink, whether you have a disposal or not.
Grind Citrus Peels
Sometimes, your disposal can start to stink, even shortly after cleaning. When this happens, there’s an easy solution; grind up citrus peels in the disposal. Just throw a few orange or lemon peels down the sink and turn the disposal on. As it grinds them up, the strong smell of citrus will emanate from your sink, replacing the rotten smell of old food.

Conclusion
How often you need to clean your disposal depends on how much you use it and how careful you are about what goes into it. If you throw all your food scraps in a composting bin and never pour grease down the drain, you might only need to thoroughly clean your disposal every few months. If you haphazardly toss numerous food scraps into the disposal, you may require weekly cleanings.
Related Reads:
- How to Unclog a Garbage Disposal (7 Quick & Easy Steps)
- How to Unclog Your Kitchen Sink Drain (Quick & Easy)
- How Does a Garbage Disposal Work? Everything You Need to Know!
Featured Image Credit: mariakray, Shutterstock
Contents
