

People love front-load washers because they are energy and water efficient. Many models also consume less detergent, helping you save more money. But unfortunately, these washers are pretty challenging to clean.
Unlike top loaders, you can’t peek into the front-load washers from the top and clean them. Instead, they require a unique method to completely air out the interior components, including the gasket and drum.
When you find that your laundry room is starting to smell odd, know it’s time to deep clean your front-load washer. You must also maintain it regularly to prevent the growth of mildew. This is a step-by-step guide to help clean your front-load washer and maintain its lifespan.

The 11 Simple Steps to Clean Your Front-Load Washer
1. Find the Gasket
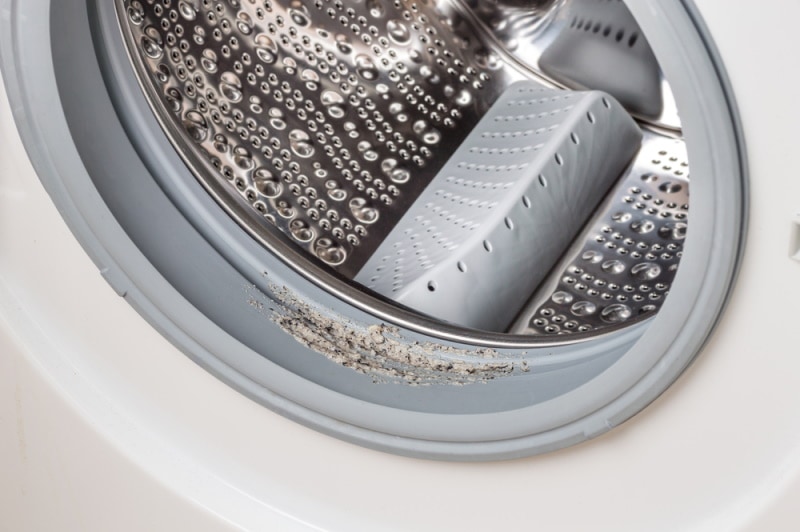
The first step is to find the gasket in your washer. It is a rubber ring that prevents water leaks from your washer’s drum. You’ll find the gasket running along the drum’s opening.
Once you find it, open the washer’s door wide enough to peel the rubber gently. Remember that you don’t have to remove the gasket entirely. Instead, it will stay fixed to the drum’s opening, and you’ll just open it a little and clean the area.
2. Remove Any Foreign Objects

After pulling the gasket, look for any foreign objects present between the gasket and the drum opening. Many items can damage your washer if you run the machine without removing them.
Also, double-check any sharp items left in your clothes’ pockets and remove them before washing. Some most common foreign objects include nails, paper clips, pins, and coins.
3. Clean Dust and Debris
If you see dust particles on the gasket, clean it immediately and keep the machine’s door closed. It’s natural for the dust to build up inside the washer and the gasket. The best way to cope with this is by regularly changing the lint trap in your laundry room.
You may also find hair in the gasket. While it could be your pet’s or any family member’s hair, it might also be the particles from your clothes. So, it’s a good practice to check the hair in the gasket once or twice a week.
When cleaning the gasket, remove lint or old detergent built up on the filter. It is located on the bottom left side of the front-load washer.
4. Remove Mildew

Mildew is the black spots that usually develop due to excessive moisture. When your washer’s gasket doesn’t dry out between washes, mildew will likely grow. It can also occur when the soap leaves a lot of residue.
To remove these black spots, use a mildew cleaner or a hot, soapy solution on the gasket. Then, wipe the cleaner or solution with a dry and clean cloth. Repeat the procedure until the cloth shows no mildew.
5. Deep Clean the Gasket

If you can’t remove mildew with the cleaner, try deep cleaning the gasket and the machine. First, add 1 cup of bleach to your machine’s tub and run one hot cycle. You can also pour ½ cup of bleach into the detergent compartment.
When the cycle completes, run a couple more hot water cycles to rinse the bleach and remove its scent. If you still see black spots on your machine, it could be mold. To remove it, you’d need to wear gloves and scrub the marks with a toothbrush that’s been dipped in the bleach solution.
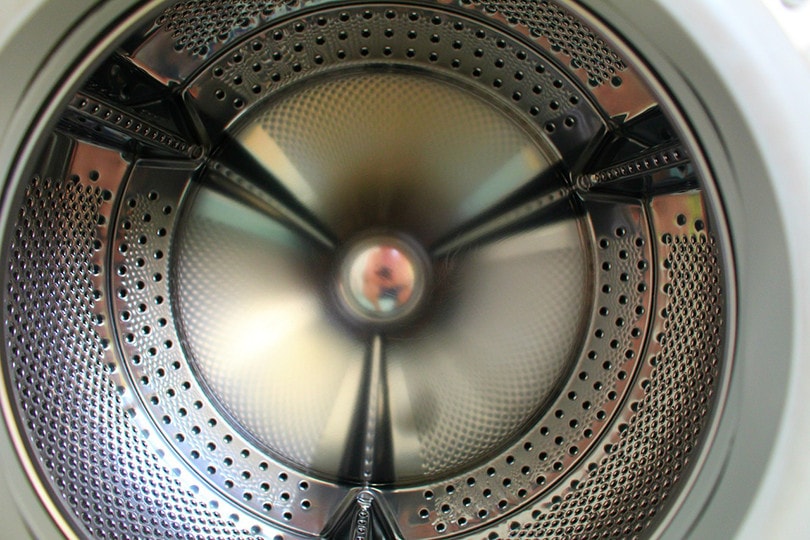
6. Clean the Drum
The washer’s drum can have different odors due to mildew, mold, or dirty clothes. Baking soda works wonders in removing all these odors.
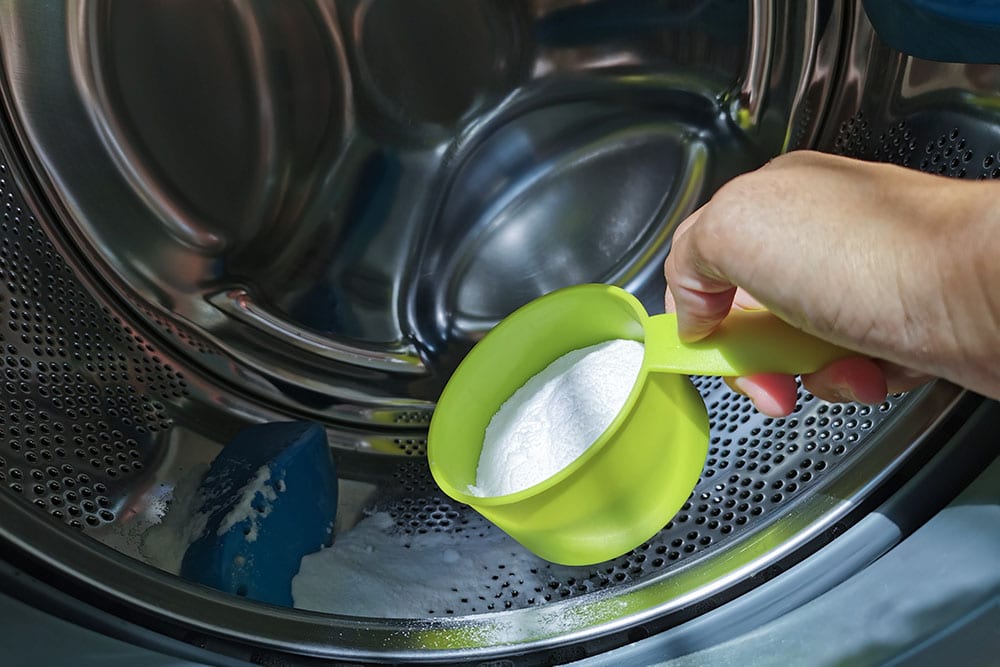
Sprinkle ⅓ cup of baking soda inside the drum and add 2 cups of white vinegar to the detergent compartment. You can load the remaining into the fabric softener section. Vinegar and baking soda make a strong and effective solution that cleans the washer’s drum within a few minutes.
7. Turn on Your Washer

If your washer has a cleaning cycle option, set the machine to it. Otherwise, turn the washer on the regular wash at a high temperature. It will allow the baking soda to react with the vinegar and show the magic.
Let the washer complete a full wash and rinse cycle. Also, don’t forget to read the manual for any specific instructions.
8. Clean Stains From the Drum
Mildew or black spots can also grow inside your washer’s drum. If you notice this, add two cups of bleach to the bleach dispenser and put the remaining in the fabric softener compartment.
Finish the cleaning procedure with a hot rinse cycle. Make sure there is nothing in the drum during the rinse.
Note: Never mix baking soda, vinegar, and bleach. Doing so will create toxic chlorine gas that could damage the washer and, worse, the human or pet standing close to it.
9. Clean the Detergent Dispenser Panel

The next step is to clean the detergent dispenser panel. Remove it carefully and soak it in lukewarm water for a few minutes. Then, take the panel out and spray it with a cleaner.
Finally, wipe it with a clean cloth and place it back in its place. You can also clean the fabric softener dispenser this way.
10. Wipe the Washer’s Exterior

Finally, use a multi-purpose cleaner and make the washer’s exterior clean as new. Use a clean cloth to wipe the entire surface of your machine, including any built-up dust, debris, hair, and lint.
Make sure to clean the outside of the washer after every use. Doing so will prevent any foreign objects from getting into the machine.
11. Follow a Maintenance Routine
High-efficiency machines require a special maintenance routine to function correctly. They also have unique requirements you may not have to follow for regular machines. These include:
- Using the Right Detergent: Always use a detergent made specifically for a high-efficiency machine. Never use excessive detergent and fabric softener. Otherwise, it will build up in your machine and clothes, leading to mildew development in the interior components of the washer.
- Taking Out Wet Clothes Immediately: Never leave your wet laundry in the washer for hours, as it will result in odor and mildew. Instead, take them out right away and put them in the dryer. If you can’t do it immediately, just leave the door open to release the moisture a little.
- Drying the Gasket: Wiping the gasket with a cloth between the loads is good practice. This will remove the moisture to prevent mildew growth. You should also dry the door from the inside.
- Air Drying the Dispenser Panels: Remove the detergent dispenser panel after every wash cycle and allow it to air dry. Also, notice if any black spots or stains are growing on the panel. If so, clean them immediately. Removing the panels lets air move in and out of the machine to prevent mildew or mold growth.
Final Thoughts
Front-load washers are high-efficiency machines that operate on less energy, water, and detergent. But all these perks come at a cost. To ensure the washer’s long-term functionality, you must follow a proper cleaning and maintenance routine.
Make sure to clean the gasket and the drum of dust, debris, hair, stains, mildew, and mold. Also, keep the inside and the outside of the machine dry to prevent the development of odors.
Regular cleaning of your machine allows a front-load washer to be your companion for years. So, follow the steps above and save some money!
Featured Image Credit: Elnur, Shutterstock
Contents
