

If you are looking for a fun woodworking project to kill some time, a live edge cutting board might be the perfect solution! Simple, functional, and gorgeous, a live-edge cutting board can be immensely satisfying for first-time DIYers and seasoned woodworking pros alike.
Find a quality piece of wood and some mineral oil, and you are all set to flex your creative muscle with one of these 15 live-edge cutting board plans.

The 15 DIY Live Edge Cutting Boards You Can Make
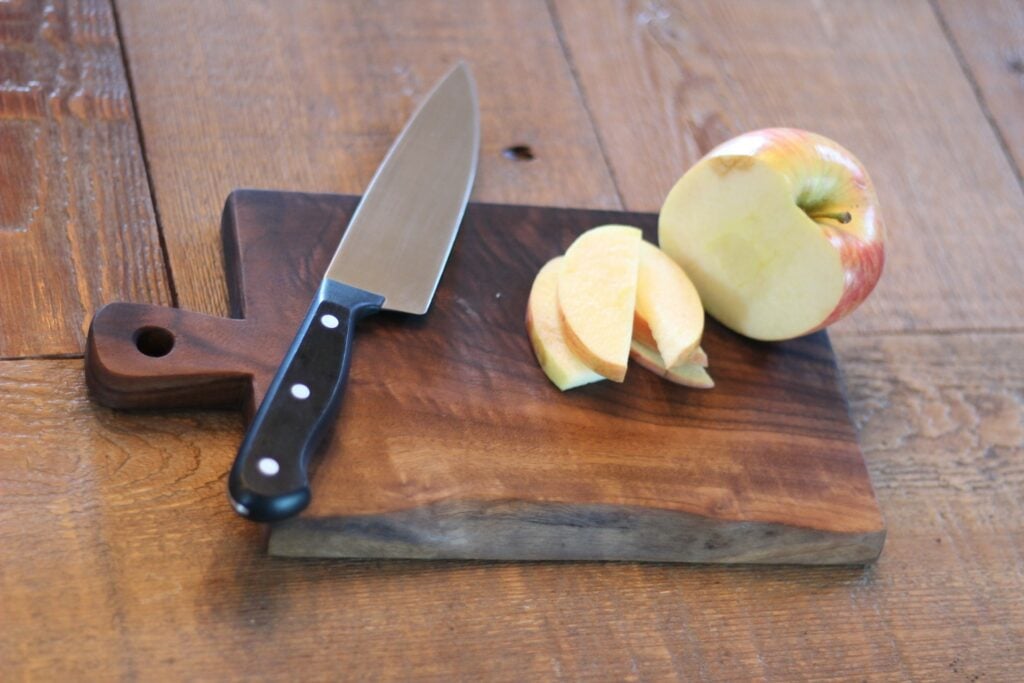
1. Live Edge Serving Board

- Jigsaw
- Drill press
- Forstner bit
- Hand rasp
- Wood clamps
- Sandpaper
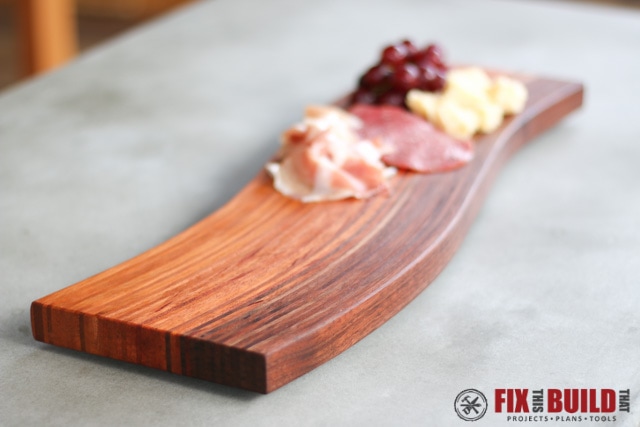
If you are the entertaining type, you can get some extra function out of this live edge serving board plan. The creator used black walnut for the project, coating it in food-grade cutting board oil to finish it off. In the most labor-intensive step, they designed the open handle with a drill press, but if you leave the hole out, you can complete the job with a jigsaw, rasp, and sandpaper.
2. Live Edge Wood Slab
- Jigsaw
- Chisels
- Sandpaper
If you can find it, a piece of ambrosia maple will give you this stunning live edge wood slab. With spalting and shades from an infected tree, this cut offers incredible colors made even more vivid with a healthy coat of mineral oil. The creator used an orbital jigsaw, but a standard jigsaw will work just as well.
3. Rectangle Live Edge Cutting Board with Handle
- Jigsaw
- Pull saw
- Drill
- Sandpaper
Make a live edge cutting board in an hour or less with this method using a jigsaw and pull saw on a piece of maple. Buying a piece of wood with the proper width or length will decrease the amount of ripping you need to do. But even if you do have to cut it down, it only takes a minute to get the sizing right.
The builder formed the delicate handle on this design with a pull saw, but finessing a jigsaw can accomplish the same look if you don’t have the right tool. Finish off by drilling a hole through the center for hanging, and you’ll have a clean, symmetrical board that looks store-bought!
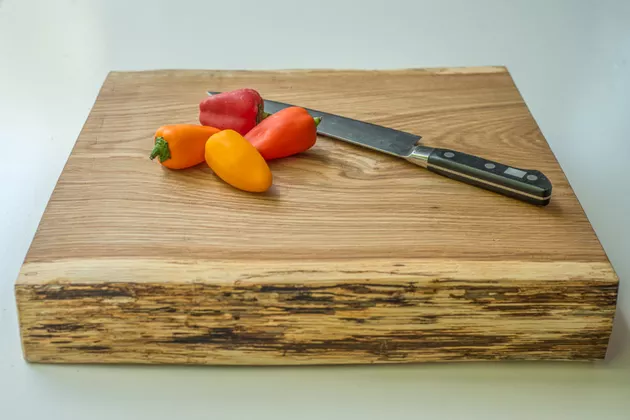
4. Basic Live Edge Cutting Board
- Multiple sandpaper grits (80–320)
- Vinegar
- Water
Sawing the wood is one thing, but the measure of a quality cutting board is in the sanding and finishing. The creator of these basic live edge cutting boards walks you through her process of sanding pre-cut live edge maple boards to get the perfect soft finish. There’s no shaping involved in the tutorial, but if you want to know how to sand and complete a cutting board the right way, this is the video to watch.
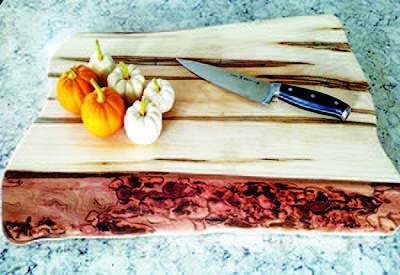
5. Large Live Edge Charcuterie Board
- Miter saw
- Jigsaw
- Table saw
- Router
- Planer
- Epoxy
The tools list looks daunting compared to some of the other cutting board plans, but the builder of this large live edge charcuterie board started with large pieces of lumber that had to be cut down with miter and table saws. If you’re starting with smaller pieces of wood, you can get by without these tools.
Unlike some more basic plans, this video points out an apt use of epoxy to fill imperfections in the wood. By the end of this project, you’ll have a professional-looking board that’s sure to impress.
6. Wood Slice Cutting Board
- 50-grit and 120-grit sandpaper
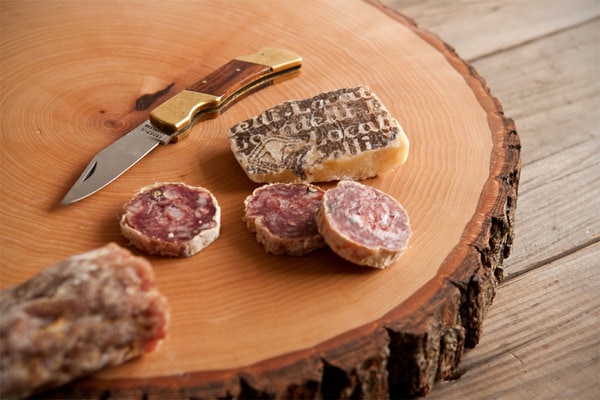
The liveliest of live edges are sometimes in the simplest designs, as you’ll find with this wood slice cutting board. The cutting board came directly from a tree stump, a slab of wood featuring bark all the way around. After cutting the slice, it’s a simple matter of sanding, finishing with mineral oil, and putting your brand new cutting board to good use!
7. Tree-Cut Cutting Board
- Chainsaw
- Scrap wood (1” x 3”)
- Orbital sander
- 80-grit, 120-grit, and 220-grit sandpaper
- Screwdriver
- Hammer
Can’t make it to the lumber yard to get a slab of wood? Take a look in your backyard for a quality tree, and use this 9-step cutting board plan to make a finished product. Outside of felling the tree, these instructions walk you through every stage of the process of converting a stump to a high-quality live edge cutting board.
8. Large Live Edge Cheese Board

- 80-grit, 120-grit, 220-grit, and 320-grit sandpaper
- Tack cloth
- Epoxy
- Painter’s tape
- Razor
Starting with a quality cut piece of hardwood, you can create this stunning cheese board for entertaining. Although the board starts as a pre-cut piece with zero shaping involved, this tutorial offers detailed insights into sanding for a silky smooth character. Pay attention to the epoxying method, as filling holes and cracks is crucial for preventing food bits from getting stuck.
9. Hand-shaped Live Edge Cutting Board
- Pencil
- Jigsaw
- Electric sander
- 60-grit sandpaper
- 80–220 grit sandpaper (optional)
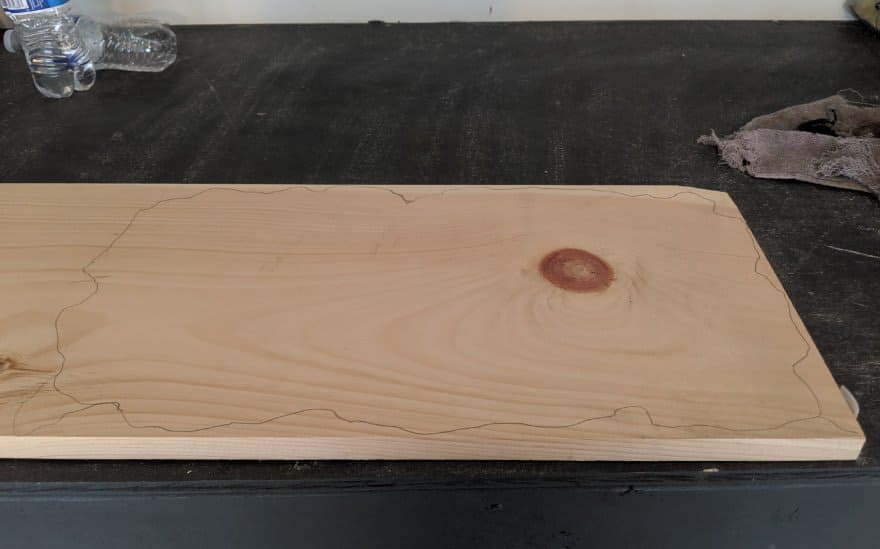
With a twist on the live edge cutting board build, this tutorial shows you how to make a hand-shaped “faux” live edge cutting board from a standard rectangular piece of wood. The creator walks you through three easy steps to outline your organic shape, cut it with a jigsaw, and finish it to create a rustic look. There are no secret tricks or special tools involved, just a few extra minutes to get the edge sanded into a unique, natural shape.
10. Ocean Wave Resin Cutting Board

- Resin & hardener
- Powder pigment (Bora Bora)
- Powder pigment (White)
- Powder pigment (Okinawa)
- Heat gun
- Carpenter crayon
- Double-sided tape
- Flush trim bit
- Roundover bit
Resin is all the rage in woodworking right now, as it’s an easy-to-use material for a seasoned DIYer that results in spectacular finished pieces. With blue and white pigment, the maker of this ocean wave resin cutting board added a thematic element, creating the illusion of foamy surf lapping against the natural wood surface. Apply the concept with different colors to any live edge design, and you’ll take your homemade project to a whole new level!
11. Live Edge Cutting Board with Epoxy
- Jigsaw
- Sandpaper
- Epoxy
- Blue mica powder
Epoxy is practical for cutting boards when you have an imperfect surface, and it’s a great way to add some dynamism at the same time. The creators of this live edge cutting board show you how they filled a seam in the wood with a vivid blue epoxy. Sporting both resin and a live edge, your cutting board will be full of delightful detail.
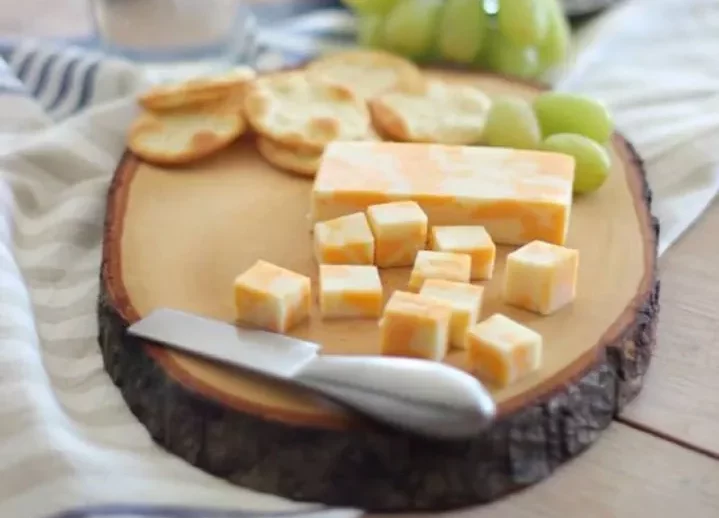
12. Easy Wood Slice Cutting Board
- 150-grit and 220-grit sandpaper
- Stiff brush
Yet another wood slice cutting board with a circular live edge, this simple wood slice cutting board ups the easiness by using a pre-cut slice from a crafts store. In less than an hour (and for under $10, according to the creator), you can make a charming petite cutting board/serving tray nearly identical to high-priced handcrafted pieces.
13. Curved Cutting Board
- Drum sander
- Parallel clamps
- Bandsaw
- Miter saw
- Tablesaw
- Sander
- Planer
- F-Clamps
- Router
- Roundover bit
- Hardwood scraps (or new)
- 3/4″ MDF
- Wood glue
- Glue brush
- Sandpaper
While not necessarily a live edge, the smooth form of this small curved cutting board is undeniably elegant. But don’t let the simplicity of the finished product fool you. Rather than using a single piece of wood, the builder of this board painstakingly cut and shaped thin strips of wood to create a texture unlike any other. The design is the most challenging and labor-intensive build on this list, so make sure you have the time and tools to achieve a flawless look.
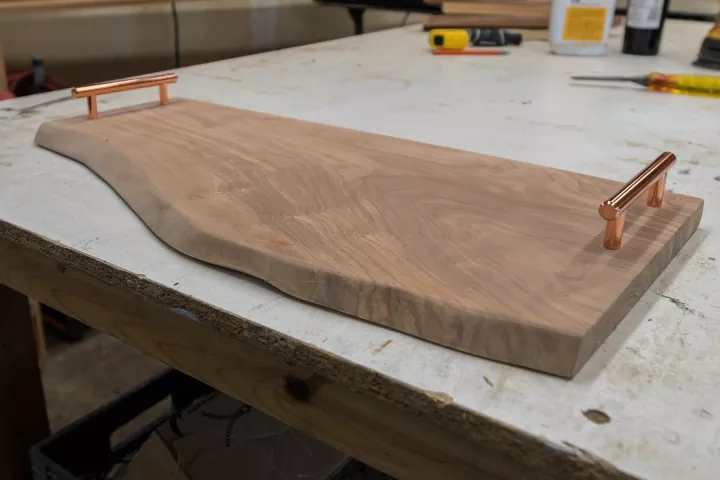
14. Live Edge Serving Board with Handles
- Orbital sander
- Circular saw
- Red wine
- Handles
Put a twist on the traditional by putting handles on a wine-stained cutting board. It’s easy enough to apply an extra layer of functionality to any live edge board design with this tutorial. And while the handles are a nice touch, the wine staining method is a fantastic suggestion to liven up the color of even the dullest cut of wood.
15. Live Edge Charcuterie Board with Handle
- Drill
- Chisels
- Jigsaw
- Hand router
- Orbital sander
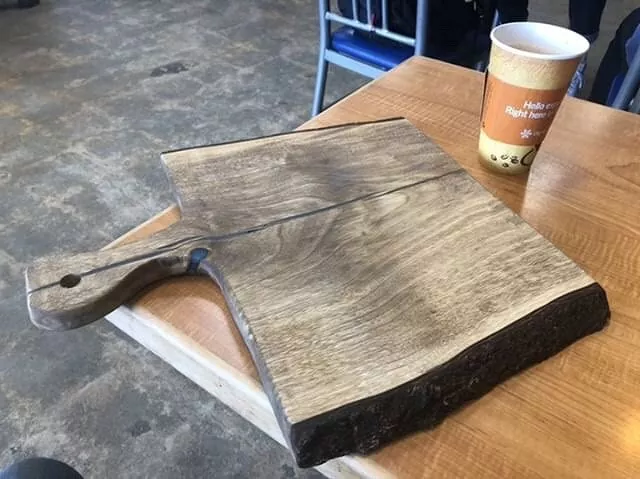
Adding an organic-shaped handle can be a pain without a router, but the maker of this live edge charcuterie board shows you how to get the shape with a paddle bit and a jigsaw. Take note, when drilling holes with the bit, you want to drill halfway through one side and then halfway through on the other side to prevent your board from splintering. The maker does use a hand route to round out the edges, but some sandpaper and patience can get you a similar look in a pinch.

Final Thoughts
A live edge cutting board is an excellent project for woodworkers of all skill levels because you can customize it to any difficulty. You can start with a tree and make it an all-day woodworking project, or you can start with a slab and knock it out with little more than a few pieces of sandpaper and some mineral oil. No matter your style, start with any of these templates for a rewarding way to enhance the aesthetic around your kitchen!
See Also: 12 DIY Live Edge Table Plans You Can Make Today (with Pictures)
Featured Image Credit: Pezibear, Pixabay
Contents
