

However often you routinely clean the house gutters, it’s not possible to entirely protect them from getting damaged. The corners will start leaking sooner or later, thus putting your home at risk of water damage. For this reason, it is essential to repair leaking gutter corners punctually.
You can hire a professional or fix the damaged corners yourself. Thankfully, the process is simple and easy. Stay put as we guide you on how to go about it!

Types of Miters
The corners in a gutter system are known as miters. It is essential to know which type of miter is installed on your roof to understand how to tackle the repairs. It also helps you determine the most appropriate type of miter saw to use. The following are four types of miters that are often found in most homes:
| Cross-Cutting Miters: | They join in a straight cut of 90 degrees. |
| Bevel Cutting Miters: | A cut along the material’s thickness, which can take multiple angles. With an angled edge, bevel-cutting miters are designed to avoid sharp corners. |
| Miter Cut: |
A cut along the material’s width which can assume different angles. They also have a straight edge.
|
| Compound Cut: | A combination of miter and bevel cuts. |
How to Repair a Leaky Gutter Corner: Step-by-Step Guide
1. Preparation
The first step towards getting your repairs done is to gather the tools and other necessary items.
- Silicone caulk
- Gloves
- Step ladder
- Garden hose
- Caulk gun
- Roofing cement
- Abrasive pad
Since you will be working with an extension ladder, ensure you keep it stable as you work. In addition, ensure you put on a long-sleeved shirt and work gloves to protect yourself from dirt and scratches.
It would also be wise to have a partner to help you handle secondary tasks, such as spraying water and supplying you with the necessary tools.
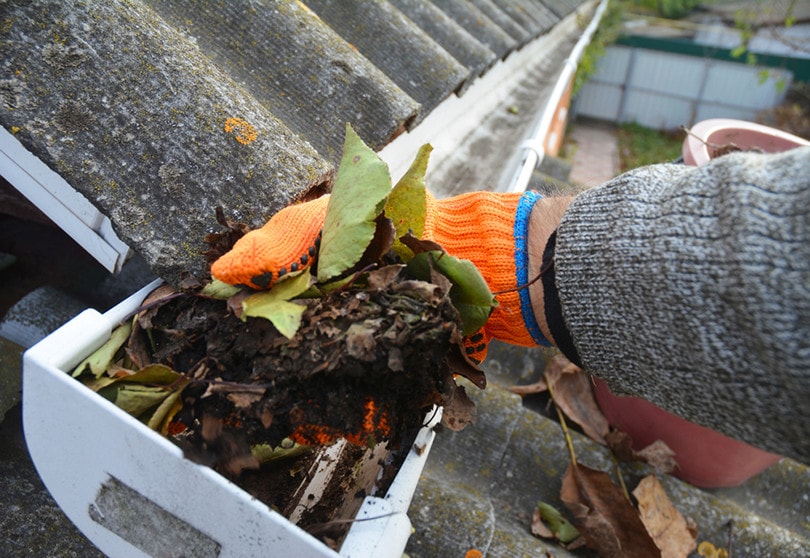
2. Remove Debris From the Leaking Area
The second step is to flush out all debris that has accumulated around the leaking corner over time. This means the best time to do repairs is immediately after the spring rains have ceased because all the leaves that shed off during the season are already dry.
Clean the area thoroughly to get a clear view of the holes that let out water. We recommend removing by hand and then flushing out the remaining debris using a garden hose.
3. Scrub the Crack With a Wire or Abrasive Pad
While still standing on the ladder, find the crack responsible for the leaking and scrub around it. It is highly recommended to use steel wool because it is readily available and highly effective. Just dip it in warm water and scrub smoothly until you obtain a smooth surface. This includes removing old silicone caulk from the joint connection.
While scrubbing, you should cover a surface area that fits a whole new replacement sheet. Wipe the area clean. If you still feel a rough texture along the edges, run a piece of sandpaper and cut out any fibers that stick out using a pair of scissors or needle-nose pliers. You can also use all-purpose cleaners to get rid of dirt and grit and rinse with water before wiping with a clean towel again.
4. Prepare the Replacement Patch
Your next step is to obtain a strong plastic that’s enough to cover the scrubbed area. Using a pair of scissors, cut a square or rectangular piece that’s 1-inch longer on the edges than the area you just scrubbed. This plastic piece will serve as your replacement patch.
When purchasing a replacement piece, it is better to find the same type as the one on your gutter system. Many types are available in your local supply store.
5. Apply the Replacement Patch
Apply a sealing putty to the edges of the plastic pieces you just prepared. Next, use your fingers to mold the putty while pushing it firmly into place. Confirm whether you can still look through the crack.
If you notice excessive putty oozing out from the leaking areas, you need not worry because you can still easily remove them after drying up. Meanwhile, make sure you remove the patches that are too small to cover the crack. You should do this before the putty solidifies. Furthermore, it would be best if you prepared a new patch and made any necessary adjustments first.
If you opt to cover the cracks with a metal patch, you’ll need to apply roofing cement to attach it to the gutter joints. You must also smooth out the roofing cement around the patch edges and let it dry.

6. Tidy Up the Patch
By now, your gutter corners should not leak anymore. But before confirming, you will need to cut away any excess putty solidification using a plastering trowel or utility knife. While it may be an unnecessary step, most homeowners prefer doing it to achieve a more professional look. Also, repeat the process in all other leaking corners.
7. Check for Further Leaks
Your final step is to confirm whether your gutter corners still leak or not. To do this, you should point the garden hose to the roof and turn it on. Allow the water to flow through the gutter for a few minutes and notice if the corners are still leaking.
A non-leaking gutter signifies solidity, whereas leaking corners mean the repaired area still needs additional putty. Be sure to do a thorough job to refrain from having to repeat the process.
Can You Use Flex Seals on Gutters?
Yes, it is advisable to spray your repaired miters with a Flex Seal. However, you must wipe the gutter clean using a damp towel and shake the Flex Seal thoroughly first.

After spraying the sealant, allow it to dry for 12–24 hours before removing the painter’s tape. Any sealant that got onto your house’s siding shouldn’t worry you because you can easily get rid of it with a putty knife.

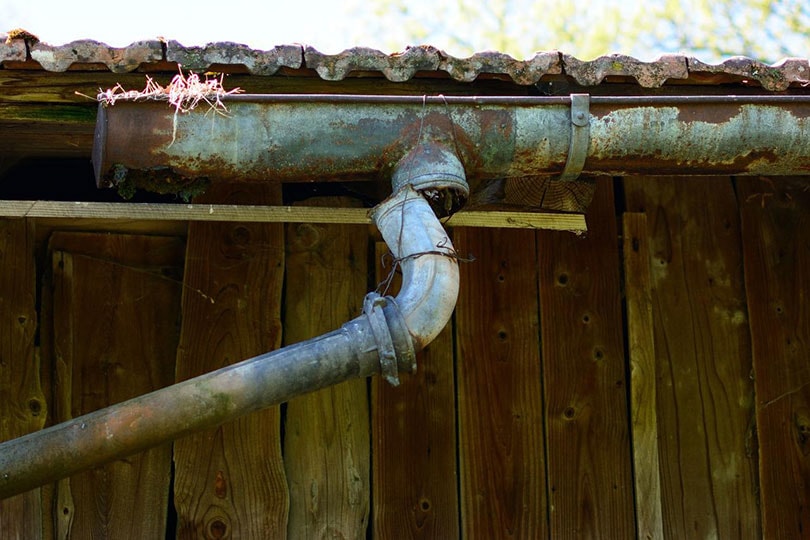
Why Are Gutter Corners So Problematic?
Most gutter leaks occur in the corners because they are made of two affixed pieces that connect. As such, the seam naturally becomes weak and easy to damage. Other factors that contribute to leaking gutter corners include the following:
Poor Installation
If your gutters were poorly installed or the corners inappropriately sealed, you can expect the miters to leak anytime. Other errors that installers commit include improperly sliding the installation material and using insufficient putty elements.
Corrosion
Aluminum gutters easily gather rust. You will likely find the inner parts of the gutter rusting, including the miters. If you notice a rust hole in your miters, it’s advisable to get them replaced as soon as possible.
Sealant Failure
Worn-out sealants also contribute to Miter leaks. While it is inevitable for sealants to wear out, it’s important to monitor them regularly to know if the time to replace them is up. Most sealants typically last for 4–5 years.
Negligence
If you fail to attend to your gutter after several months, the rotten material stuck on it may accelerate corrosion and cause leaks. It is even worse if the debris accumulates water and retains it over a long time.
Damage
Accidental damage can also affect the efficiency of miters. For example, when a tree branch falls on the gutter, it may crush the miters and affect the entire gutter system. Also, winter conditions can cause any water in the gutters to freeze, thus expanding and stretching the gutter system and causing leaks. If the damage is extreme, it would be better to replace the entire gutter system while repairing the miters.

Final Thoughts
If you have a leaking miter, you can decide to re-seal it or replace it with a new miter. You should base your decision on the existing miter’s condition. Ideally, you should fix them if they are less than 10 years old.
The repairing process is very simple—just remove all debris from the surrounding area, scrub the surface, and apply the replacement patch. Before closing your tool bag, you should confirm whether you fixed them well by pouring water over the gutter and checking for leaks.
Featured Image Credit: Klikkipetra, Shutterstock
Contents
