

A gap between your window and frame can enable drafts to get through, which can cause your heating bill to skyrocket. Plastic coverings and other temporary fixes can help reduce the impact on your wallet, but eliminating the gap entirely is the best solution. If you have cold air entering your home, keep reading this step-by-step guide to fixing a window gap to help you keep your heating costs under control and drafts to a minimum.

Fixing a Gap Between a Window and Frame
Preparation
Before you get started, we recommend gathering your tools and materials together to minimize the amount of time before you finish and to see if you need to purchase any additional supplies. Luckily, you won’t need to spend much money or buy many materials.
Required Materials
- Silicone caulk
- Tape
- Putty knife
- Utility knife
- Paint
- Masking tape
- Caulking gun
- Silicone caulk: To fill window gaps, many people use nothing more than silicone caulk that can be purchased in any hardware store and even in many grocery stores. Silicone caulking is resistant to moisture, and many brands have ingredients that make it more resistant to ultraviolet light. It doesn’t dry out or crack; it lasts a long time, and you can find it in several colors to match your window.
- Backing rod: If you have a large gap, you may need to purchase a backing rod to help you get a good seal. A backing rod is a rod or cord that you can use to help you get a tight seal. It’s flexible, easy to cut to size, and usually made of dense foam. It can significantly reduce the amount of silicone that you need without compromising the seal, and it will provide a better surface to apply the silicone.
- Other items: You may or may not need several other items, including a measuring tape, clear packing tape, a putty knife, a utility knife, and anything else that will help you create a tight seal between your window and frame.

How to Fix a Gap Between a Window and Frame (9 Steps)
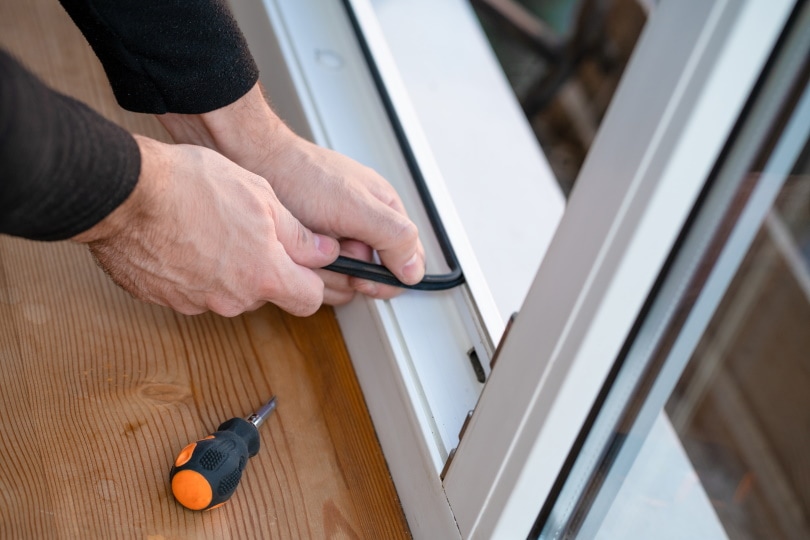
1. Clean the Area
Fortunately, there is not much preparation required before you can get started fixing the gap between your window and frame. The main thing that you want to do is clean the area well. If there is any chipping or flaking paint, you should remove that, so the silicone caulking will make a good connection with the surface to make a strong seal. You may also find that you can create a smoother surface if you lightly sand it, being careful not to scratch the window.

2. Insert the Backing Rod
If there is enough room in your gap for a backing rod, insert it now. Take time to measure it carefully, and be patient while inserting it to create the best seal possible, so you’re not as dependent on the caulking.
3. Masking Tape
Protect the frame and window from too much caulking by applying masking tape to the surface before you start working, leaving only the gap exposed to receive caulk.
4. Prepare the Caulk
With the surface cleaned and prepped, it is time to open the silicone caulking so you can apply it. Some brands only require you to cut the tip at the desired width and angle, while others require you to cut it open and attach the tip, so you will need to follow the instructions on the container. Before you cut the tip, compare it to the gap that you are filling, so you don’t cut it too large. The closer to the chip, the narrower the hole.
5. Place the Caulking Cartridge Into the Gun
With the tip cut, place the cartridge into the caulking gun. You usually pull out the pressure rod to make room for the cartridge, which will fit snugly into place. A few gentle squeezes on the trigger will push the pressure rod against the back of the cartridge, which will begin pushing out the caulk.
6. Apply the Sealant
Place the cartridge tip at one end of the gap that you want to seal, and move slowly to the other side while squeezing gently but consistently on the trigger to produce an even bead the entire way. Too much pressure on the trigger will create a larger bead that can make a mess, while too little pressure will result in a narrow bead that may not create a good seal.
7. Neaten It Up
Many brands of silicone caulking come with a small plastic spatula that you can cut using a utility knife to be the size of the bead you want. You can then run the spatula over the bead that you created to remove excess silicone and improve the appearance. If you’re using an older cartridge and lost the plastic spatula, you can use an ordinary spatula to help clean up messy parts.

8. Remove the Tape
With the bead cleaned up, carefully remove the masking tape and allow the silicone to dry. Depending on the brand, it can dry quickly or take quite a while, so make sure you read the instructions on the cartridge carefully.
9. Paint It
Once the silicone caulk is dry, you can paint the surface, and it will accept most types without a problem, creating a finished product that looks as good as new.

Temporary and Alternate Fixes
If you don’t currently have access to the materials required for a complete repair, you can try a few of these alternatives.
Draft Blocker
If your gap is in the right position and you are lucky enough to find something appropriately sized, a draft blocker can be a great inexpensive way to keep out the cold air. You can even make your own out of an old pair of jeans and rice.
Paint
If the gap is tiny, you might be able to fill it with a coat or two of paint until you can make the proper repairs. The downside to painting over the gap is that you may make more work for yourself later if you need to remove it to create a proper seal.

Board It Up
It’s unlikely that many people will choose this, but you can temporarily seal any gaps by using a large board and a few nails to seal up the window until warmer weather comes.
Expanding Foam
Expanding is a solution that’s especially useful for filling larger gaps. However, expanding foam can be quite messy, so we only recommend it when no other option is available.
Conclusion
It is not difficult to fix a gap between the window and the frame, and in most cases, you will only require one canister of silicone caulk. If the gap is large, inserting a backing rod will help reduce the opening and provide a smooth surface to caulk over. The silicone caulk will seal it in place, so you won’t need to worry about moisture or mold getting into the backing rod, though you will need to check it every season to ensure it’s not getting worn out.
Featured Image Credit: Aleksey Kurguzov, Shutterstock
Contents
