
Potatoes are a staple food in many homes. You can enjoy them as mashed potatoes, whole potatoes, or chips. Most potatoes are grown outside in gardens for commercial and subsistence use.
However, it’s possible to grow some healthy and nutritious potatoes indoors. All that’s needed are the right instructions on how to grow potatoes indoors.
Get to learn how to grow potatoes indoors and which potatoes to grow in the containers. Also, get to know the tips and tricks of growing potatoes indoors successfully.

Growing Potatoes Indoors
For centuries people across the world have eaten potatoes. Potato cultivation is almost 200 years old, with many people loving its high nutrient content. You can have some in your garden and more in containers indoors with the right growing conditions. Use a large and deep container because the plant will need to add the tubers.
The right growing conditions are a necessity for the good crop to thrive indoors.
What’s Needed to Grow Potatoes Indoors?
To grow potatoes indoors, you will need a few things before getting started.
- Large and deep planting container
- Seed potatoes
- Water in a watering can
- Soil
After you gather these items, you can begin the planting process. But, before that, get to know what a seed potato is.
What is a Seed Potato?
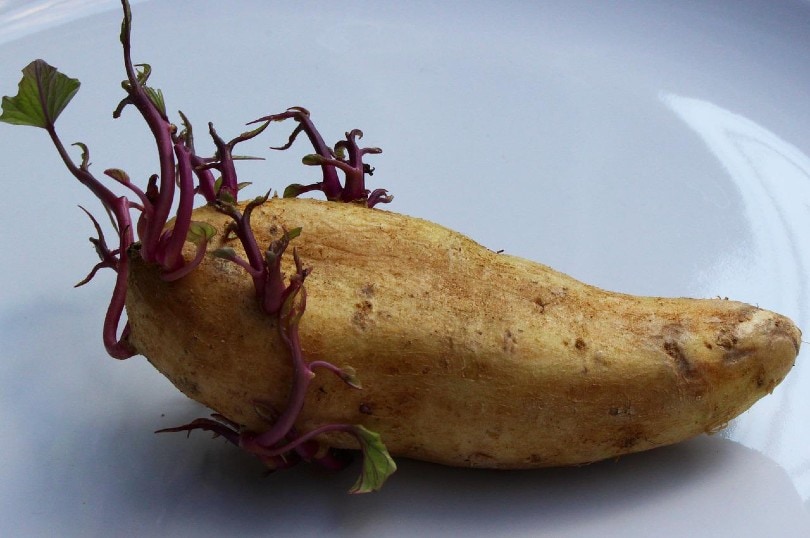
Growing potatoes take less time when you have seed potatoes. These differ from the normal ready-to-cook and eat potatoes you have at home. A seed potato is similar to an ordinary potato, but you start to notice some sprouting taking place from the eyes.
This happens when you place an ordinary potato in a moist, dark, and warm place for sprouting to take place. The good news is you can purchase ready-to-grow seed potatoes in many places, including local farms. Ask around or do an online search to see who sells these seed potatoes.
There’s also the alternative of sprouting your own seed potatoes at home. However, always ensure you grow organic potatoes that have undergone the best growing practices. You can speed up the sprouting process by picking a dark area to sprout them.
Step-by-Step Process of Planting Potato Seeds
After you have some potato seeds, you can proceed to start planting them in containers in your home. Below is a step-by-step guide to help you plant potatoes in containers.
1. Prepare the Seed Potatoes
Sprouting potatoes have the section with the eyes and the potato mass on the other end. Instead of placing a whole potato in the container, it’s better to cut away the potato mass. As for a large potato that has numerous eyes, cutting helps you have more than one seed potato.
Using a clean and sharp knife, cut away the potato mass and keep the section with the eyes in a safe area. Keeping the mass puts your crop at risk of getting root rot since this area will rot once in the soil. This happens because of lots of excess moisture in the soil when rotting is taking place.
When growing in a container, it’s better to keep the growing conditions pristine. The excess mass doesn’t serve any purpose hence the need to cut it away.
2. Pick the Right Container
Potatoes need a large and deep container to grow. It’s better to choose a bucket or a large planter that gives the ideal space. This container must have drainage holes at the bottom to ensure excess water drains away.
When you get a suitable growing container with drainage holes, also get a water tray. Since the potato will be growing indoors, you don’t want the excess water all over your floors. It’s better for it to collect on the tray that you place underneath this ideal plant container.
3. Make the Right Growing Soil
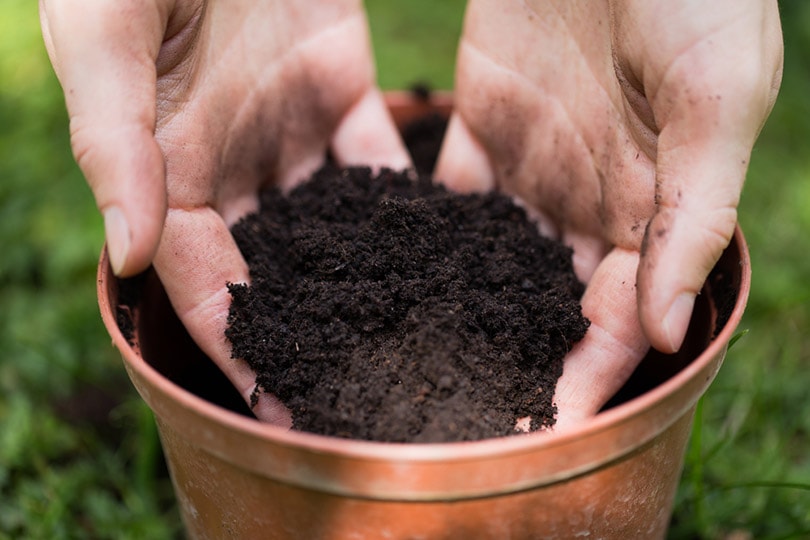
It’s better to have a growing mix that permits water drainage so that excess moisture won’t cause root rot.
- Worm castings
- Compost
- Sand
- Peat Moss
- Perlite
These are good ingredients to add to growing soil since they facilitate proper drainage. Check out if there are potato-growing mixes in the stores that already have this ingredient added.
4. Plant the Potato Seeds
Put the soil into the container and proceed to plant the potato seeds. Make sure to add just a few inches of soil in each growing container. Each potato should be inches away from the other so that each gets ample space to grow and spread its tubers.
Always ensure that the eye of the potato is facing up when you place it on the soil. If there are numerous eyes, place the one that’s most developed to face upwards.
After placing the potato seeds on the soil, you can cover them with extra inches of the remaining mix. Ensure the potatoes are deep, so use about 6 inches of soil per container. But don’t pack the soil after adding it to the growing pot.
5. Water and Pick the Best Growing Spot
Planting the potato seeds is a simple process. After adding a few inches of soil, use the watering can to water the seeds. The moisture will help the sprouting potatoes to continue growing. Place the container on a water tray and take it to an area with lots of indirect sunlight.
A growing potato seed needs ample light, so never place the plant in a dark corner of a room. Instead, pick the brightest place with ample sunshine coming in each day.
6. Do Some Hilling
When the potato seedlings are growing, you have to do something known as hilling. This is when you heap extra soil around the base of the growing plant. This provides extra room for the developing tubers to grow.
When doing so, you can cover the entire stem of the potato plant. But always leave the leaves growing on top of the mound of soil. Check the plant often and continue hilling about two more times provided the container you use can hold the extra soil.
What Are the Best Potatoes to Grow Indoors?
Potato seeds are simple to sprout, but you have to know the potato variety you want to grow indoors. There are numerous potato varieties from across the world that you can plant.
- Starchy
- Waxy
- All-purpose
These three categories are simple to grow in containers.
- Casablanca
- Red Gold
- Iris Cobbler
- Red Norland
- German Butterball
- Rose Finn Apple
- Yukon Gem
- Amarosa
- Yuko Gold
With any of these varieties, you can develop potato seeds and begin to grow. Shoots start to pop after 4 weeks when you plant the potato seed in a container.
Proper Care of Indoor Potatoes
Once potato seeds are in the soil, now it’s time for care. While potatoes are low-maintenance vegetables, they still need some tending to.
Watering Requirements
Every growing vegetable, including potatoes, needs water to keep growing. Potatoes love moist conditions, but it’s better to ensure the soil in the container isn’t wet. This is why the container you choose must have drainage holes at the bottom.
In the beginning, you can water the potato seeds once every one or two weeks. This gives the seedlings ample time to develop and pop out of the soil. Overwatering may harm these fragile seedlings.
However, after about 6 weeks, you can increase your watering schedule to every two to three days. By this time, you’ve done hilling and the plant is growing fast. After the plant puts in tubers, you can cease watering to give it time to harden before harvesting.
Fertilizer Application
Potatoes growing in containers need a boost of nutrients, so you also need a fertilizer schedule. The best time to start adding fertilizer is two weeks after planting the potato seeds. By this time, the shoots are out of the soil.
You can use top soil application or dilute the fertilizer in water. Apply the fertilizer to the growing seedling once a month. When the crop is almost ready, cease applying fertilizer 2 weeks to the harvest date.
Harvest Time
Potatoes are ready for harvest in 90 to 120 days after planting the seeds. Watch for flower production, which is a sign that tubers are ready for harvest. The flowers will drop then the foliage of the potato plant will start to dry off.
At this stage, cease adding fertilizer and water since both have no purpose. Leave the potatoes in the soil for another 2 weeks until all the foliage dries off completely. Then you can proceed to harvest your crop.
Harvesting is easier when you have a plastic sheet to spread on the floor. Tip each container and begin to dig out the potato tubers from the soil. As you do so, leave the potatoes on top of the soil or set them aside to dry.
The potatoes fresh off the soil have soft skin that easily bruises, so it’s better to keep movement at a minimum. When the skin is dry enough, collect the potatoes in a dry brown bag and store in a cool dry place.
Pests and Diseases That Affect Potatoes
Growing potatoes indoors requires proper care. This involves watching out for pests and diseases that might attack the plant.
- Colorado Potato Beetle
- Aphids
- Potato Leafhopper
- Wireworms
- Tuber Worms
- Black Rot
- Early Blight
- Potato Virus Y
- Black Scurf
- Pink Rot
Always take preventive measures when growing potatoes indoors. However, it’s always safer to have some herbicides at hand in case you have an attack.
When you notice a sick plant, separate it from the rest of the growing potatoes to prevent spreading the disease and pests. While pests can die after using insecticides, diseases often mean that the plant isn’t salvageable.
The 5 Tips for Growing Healthy Potatoes Indoors
Growing potatoes indoors can be lots of fun. This gives you a chance to harvest some healthy crops that you can eat at home. Here are some tips and tricks to help you grow the best potatoes
1. Prevent Green Skin
Have you ever come across potato seeds with some green skin? This usually happens when there’s light exposure as the seeds start to sprout. This is why it’s important to keep the seeds in a completely dark spot to prevent even the slightest light penetration.
2. Do Crop Rotation
As you grow vegetables at home, you can do crop rotation if you don’t use containers. For instance, if you have an indoor raised bed, you have to do crop rotation. This means when you grow potatoes two times on one bed, you interchange this with another vegetable in the coming growing season. Rotation is the best way to keep pests and diseases at bay.
3. Use Certified Seeds Only
There is the option of sprouting your own seeds. However, if you buy potato seeds to plant at home, ensure these have the right certification. Planting certified seed potatoes ensures you don’t grow diseased potatoes in your indoor container garden.
4. Ensure the pH is Ideal for Potatoes
Potatoes prefer a 5.2 to 6.4 soil pH. If the pH levels are lower or higher, you first have to amend this before planting potato seeds. The best way to do so is by adding compost to the soil plus other organic matter. Check to see if the soil is too alkaline or acidic before making any adjustments.
5. Leave Space Between Seeds
When planting potato seeds in a container, always leave room between each seed. This is because every seed will produce several tubers that need ample space. If you pack the seeds too close, you might end up with small potato tubers.
Conclusion
It’s quite possible to grow potatoes indoors. All you need are the right items like soil and containers that are deep and wide. This is because potatoes grow by adding tubers, which need ample room to grow.
Ensure you plant certified potato seeds or sprout organic seeds at home. The seeds are ready to plant when there’s a development from the eyes. Growing potatoes need the soil to be moist and to be in an area that receives lots of light. Otherwise, once you follow the advice given above, you are no doubt going to have a bumper harvest from your indoor gardening.
Featured Image Credit: 1195798, Pixabay
Contents
