

Ring has taken the world by storm in home security and burglar proofing, taking a significant market share with its cutting-edge cameras. A pioneer in video doorbells, the Amazon-owned company has the most indoor and outdoor wired and wireless options.
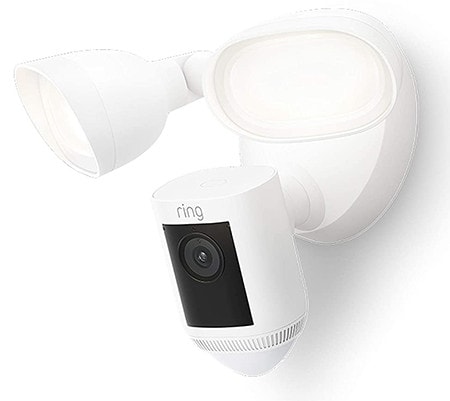
The Ring Floodlight Cam features motion sensing with ultra-bright LED floodlights for intelligent home security enhancement and monitoring. It’s a no-frills, low-priced, and easy-to-deploy outdoor camera that offers outstanding video and infrared night vision with highly customizable features.
You can also get away from standard designs with the Ring Floodlight Cam with various finishes, including bronze and graphite. This article explores how to install this hardwired home outdoor security contender, whether to replace existing floodlights or connect a new installation.

What Do You Need to Install a Ring Floodlight Cam In Your Home or Office?
Simplicity and functionality are some of the top features of the Ring Floodlight Cam, an intuitive home security fixture that combines a Wi-Fi digital camera1 and motion-sensing floodlight. It’s a superb package that includes two-way audio that allows communication from anywhere with an alarm siren.
You can keep an eye on the outdoor security of your home or office with a Ring Floodlight Cam, popular for its straightforward installation. You can set this gadget up with or without existing wiring if you have a fundamental electrical wiring perception, or you can get a professional electrician.
The weather-resistant Ring Floodlight Cam requires that you identify a suitable mount with connectors that the manufacturer provides. It’s a rugged smart home security device designed to withstand extreme temperatures, rain, or snow.
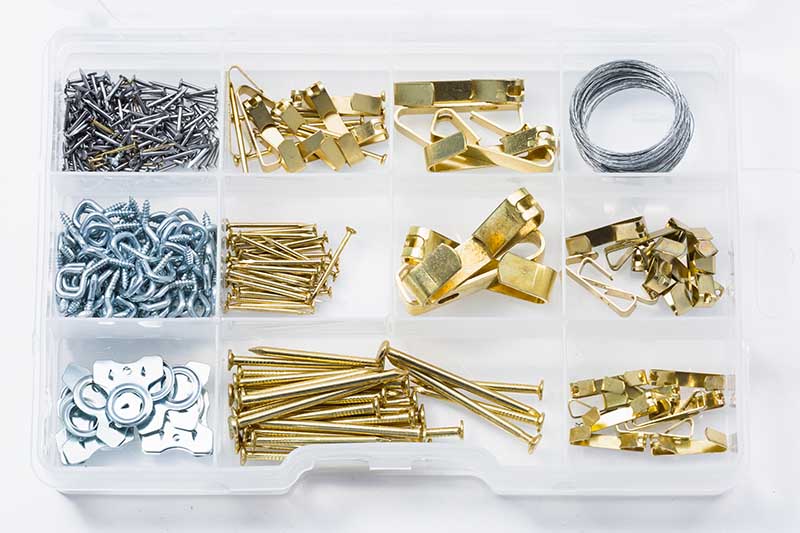
You can connect it to a standard outdoor electrical junction box to use with devices on Windows 10,2 android, and iOS. It’s easily connected to your Wi-Fi network. Besides mounting brackets and screws, other included installation materials for the Ring Floodlight Cam are a Phillips screwdriver, hanging hook, wire/nut connectors, and mounting pole cap nuts.
To install the Ring Floodlight Cam, you’ll need the following materials, which aren’t provided and these include:
- Power drill and bits
- Plastic switch junction box
- One 4-inch round junction box
- 2-inch UF adapter
- Wire staples and nuts
- 1 4/2-gauge 25 ft. Romex wire
- Pull stitch and cover
Installing the Ring Floodlight Cam In 6 Easy Steps
If you’re adept at handling electrical wiring, installing the Ring Floodlight Cam will take less than thirty minutes, even if there are no existing wires. The process is more straightforward if there’s existing lighting in your mounting location, as you’ll only mount the connecting wires and plates.
Steps to follow when installing the Ring Floodlight Cam include:
1. Collecting All of the Installation Projects Tools
Before installing the Ring Floodlight Cam device, collect all the tools you’ll need from the beginning to the end. You’ll have everything handy, thus saving time and avoiding the inconvenience of halting work, especially if you need help.
All the mounting hardware is provided for by Ring alongside the Floodlight Cam, including O’ screws, a hanging hook, mounting brackets, and cap and wire nuts. Gather all the tools you’ll need to install the camera, the pull switch to manually power it, and the junction box that provides power or holds it in position.
2. Locate a Suitable Power Source for the Floodlight Camera
Once you’ve got all your tools and supplies together, including the unboxed Ring Floodlight Cam, find a power source to connect the device. Except when mounting the camera where an existing outdoor floodlight was, an excellent location is near the nearest wiring junction.
Switch off the power for the junction box from the circuit breaker or distributor within the building, and use a circuit tester to ensure there’s no current flowing in the wires or the box if it’s metallic. Suppose you need to figure out which switch represents that section, power off the main supply, and then connect the new wiring for your Ring Floodlight Cam.
3. Make New Connections From the Junction Box to Your Floodlight Camera
This step aims to power your Ring Floodlight Camera from the junction box by creating new wiring to its switch. After locating and removing the junction box’s cover, connect new wires to the appropriate outlets in the box, usually at the bottom in standard versions.
Wires are often color-coded, and you’ll find these colors coordinating with outlets in the junction box. They include white for neutral, red or black for the live or hot and copper, brown or yellow, and green for the ground. Since electrical wiring makers vary in their codes, check the guidelines in the Ring Floodlight Cam’s installation manual against your electric wires.
Hook up the cables according to their color codes or markings to the junction box outlets and secure them properly. Ensure you’ve not left any loose wires since that can cause electric current shorting, which will fry your floodlight camera.
4. Installing the Floodlight Camera Switch With Its Junction Box
Powering the switch for your Ring Floodlight Camera is a crucial step in wiring for your mount, and it comes after securing the wires and closing the old box. Add the rectangular junction box that holds this switch in the position mounted to cover these wire connections.
Connect the newly laid wires to the coordinating inlet ports of the switch junction box, which is the power outlet for the Ring Floodlight Cam system. The hot wires, or those coming in with the power, will go into the switch’s bottom while the top ones hold the camera’s cables. If there are only single top and bottom ports, secure the neutral with a wire nut and twist the ground or earth wires together.
5. Mounting and Guiding Power Into Your Ring Floodlight Camera
Once you’ve wired the power source and switch for your Ring Floodlight Cam system, it’s time to direct the wires to where you’re mounting the unit. Drill through the wall so you won’t have to work on hiding the wires later once they’re connected, as it may affect their function.
Run the camera wires through the drywall or ceiling board to the position you’ve identified as the most suitable mount. Attach the bracket that holds your floodlight camera to the wall or fissure board, setting the unit horizontally, vertically, or even upside down.
Hide the excess wire using a 4-inch junction box and use the screw provided by Ring to place it on the bracket when mounting. For maximum effectiveness, ensure that the Ring Floodlight Cam is at least nine feet off the ground, or screw the back of the box to an underground feeder. While that provides additional firmness and water tightness, it’s also effective for directing the power wires to the middle of this bracket.
6. Wiring Up the Floodlight Camera and Finishing the Installation
Ring ships the floodlight camera with its head upside down on its stand, and you’ll need to loosen the lock collar and twist it 180°. You may also twist the floodlight knobs if they’re blocking the camera’s swivel, rotating them out of the way before mounting the unit.
Find the hanging hook provided by Ring and hang the floodlight cam system into the bracket, enabling the connection of wires without interference. Avoid yanking wires as they’ll fall out of position and become exposed, but secure each color-coded wire to its appropriate connector with the nuts provided.
You’ll remove your Ring Floodlight Camera from the hook once you’re done wiring, carefully feeding all its wires into the junction box through the bracket’s center. Align the mounting poles with the predrilled holes that place the central fixture on the mounting bracket, and screw the cap nuts using the provided screwdriver.
Once done, inspect your wiring and mounting before restoring power to the line from the circuit breaker. The ring app will guide you through setting up the floodlight cam unit with automated instructions, which include connecting to Wi-Fi and testing its video stream and field of view.

Standout Features of the Ring Floodlight Cam and Its Installation
The Floodlight Cam system from Ring is designed to replace outdoor lighting. It has an output of up to 2,000 lumens with 3,000K color temperature for 1080p Full HD video quality. It delivers a 140° field of view and includes motion capture zones, people-only detection, and scheduled motion detection for intelligent surveillance.
Audio functions include two-way talk, recording, and a remotely activated built-in siren, and you can turn the Floodlight Cam on or off from the Ring app. You can fully automate the device via Alexa voice control integration, which comes with an option for cloud storage.
The Ring Floodlight Cam comes with 928MHz connectivity for 2.4 GHz Wi-Fi, so as not to overload it, it gives the device its power source. Use a junction box to hardwire the device and prevent accidental electric shocks while protecting the wire connections from weather. That’s so it’ll operate safely and properly instead of wiring it directly to a socket and increasing its energy consumption.
Final Thoughts
The Ring Floodlight Cam is the perfect standalone brand if you require smart home security with recorded video, audio, and cloud storage options. As an Amazon Inc. manufacturer, you can rest assured that customer-first policies effectively cover all warranties, returns, and technical assistance by customer care.
Featured Image Credit: Martin D Brown, Shutterstock
Contents
