
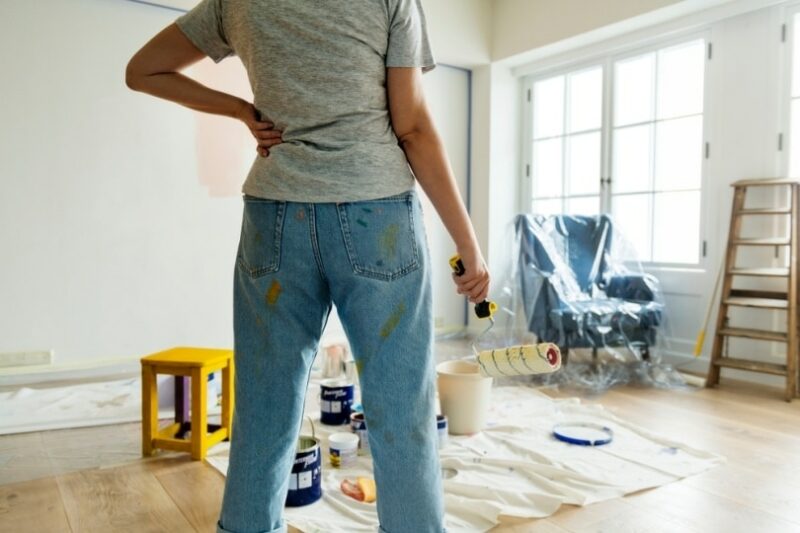
Painting the interior of a house and the exterior of the house may seem very different. However, the steps for preparing for painting are about the same. Paint sticks best on clean walls when primed. Therefore, we recommend cleaning and priming your walls for painting before you even open the paint buckets.
There are some special considerations for each type of painting, though. When painting outside, you have to consider the weather. When painting inside, you’ll probably need to protect your floors and furniture. You’ll have to remove most furniture when painting inside, but you’ll need to remove your shutters and other items when painting outside.
The same general concepts are the same, but the specifics may be different.

How to Prepare a House for Painting (5 Steps)
1. Remove Potential Contaminants
Any contaminants need to be removed before you start painting. This includes many different things, depending on whether you are indoors or outside. While lead paint has been outlawed since 1978, older homes may still have lead paint on their walls. If your home was built before 1978, you should test the walls for lead. It is recommended to have a professional do this testing. If the test is positive, you will have to higher expert removal of the lead paint before you repaint the walls.
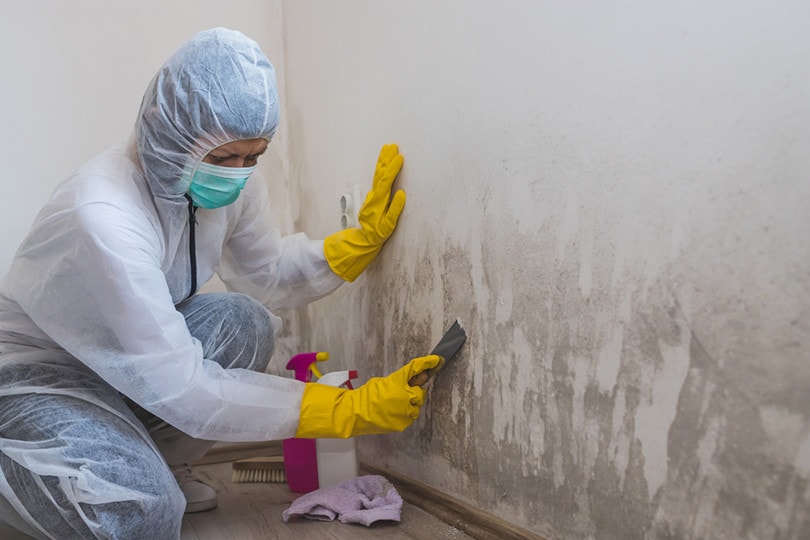
Mold and mildew are another common contaminate. You can notice mold and mildew thanks to its black, green, or brown color. Sometimes, it is also fuzzy. However, it can appear very similar to dirt in some cases. You can often tell the difference by trying to clean it off, though.
You can remove mold and mildew yourself. Use an EPA-registered fungicide or bleach. You can use bleach by mixing it with water in a 3:1 ratio, however, there are commercial cleaners that are often more powerful than just bleach.
If you have serious contamination issues, you may want to consider adding a mildewcide to your new paint. This will protect your wall from future issues.
2. Wash
Now that everything potentially dangerous is removed, we recommend washing the walls thoroughly. This applies to both interior and exterior walls. Inside, you’ll need to use a gentle cleaner and a sponge. You should carefully clean the walls of any debris. You may be surprised by how dirty the walls are once you start cleaning.
First and foremost, make sure you use wall-safe cleaners.
Outdoors, you can often use a bit more force. Some exterior walls can be power washed. However, walls with soft wood siding often require more careful cleaning. Often, you’ll need to scrub these walls by hand with detergent and water.

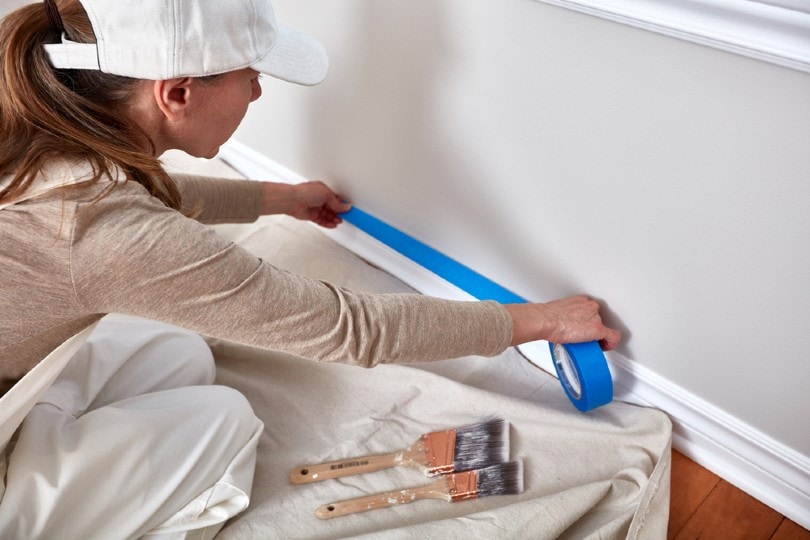
3. Make Repairs
Once you clean the wall, you may notice minor repairs that need to be completed. You should take care of these before you move on to painting. Often, small holes will need to be caulked and peeling paint will need scraping off. Doing these repairs before painting will allow them to disappear under a layer of paint instead of trying to hide them later.
Many of these small repairs can be completed by you. Often, the materials for them are inexpensive. The small cost and time investment will be worth it when you decide to get painting.
Outside, you may find more paint to scrap off. Outdoor walls tend to be more badly damaged than indoor walls, as they are exposed to the elements. However, this isn’t always the case.
Major repairs may need to be done by a professional. We recommend doing major repairs before painting for the same reasons we described above.
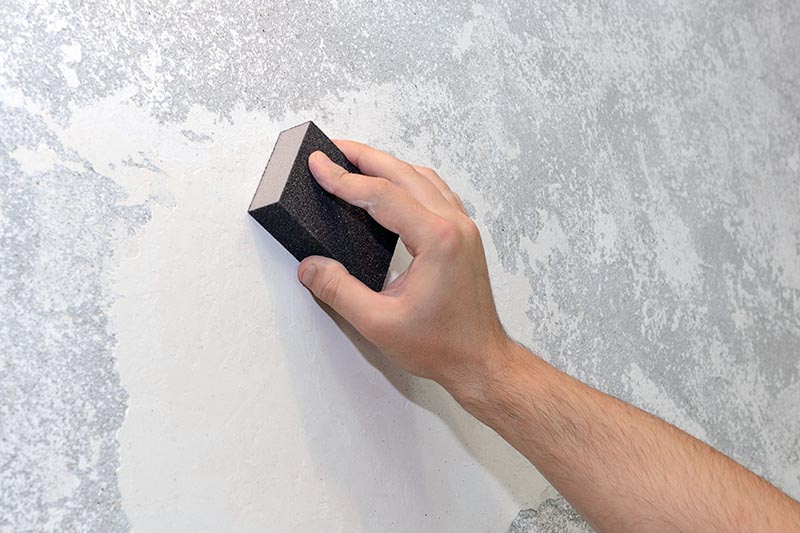
4. Sand Walls (If Needed)
Some walls will need sanding before they are painted. Exterior walls especially benefit from sanding, as it helps the bond between the wall and the paint become stronger. You don’t necessarily have to do this, but it will make the whole painting process much better. If you don’t sand the walls, your paint job may look fine right afterward. However, you’ll notice unusual wear and tear after only a year or so.
Wood requires refreshing through sanding in most cases. For places where you’re going to use glossy paint, you may want to do extra sanding. Using fine-grit sandpaper around doors and walls is recommended, for instance.
Sanding may not do much to improve the look of the wall, but it does improve the staying power of the paint. Therefore, we consider it a necessary part of any paint job.
5. Prime the Walls
Finally, you need to prime the walls to help the paint stick. You may not need to prime every wall for every type of paint. Many interior and exterior paints now have primer built-in, for instance. You’ll absolutely need to prime any areas where the old paint has peeled off. However, if you prime one area, it often looks best to prime the rest, too. For this reason, priming every wall is often just the easiest solution.
While you can get away with skipping in some cases (like when simply switching paint colors on a well-cared-for interior wall), we recommend priming when in doubt.

Conclusion
Once the wall is primed, you’re ready to paint. Be sure to protect any furniture or remove any limbs that may get in the way. However, the wall itself is ready to go. Do not leave any primed wall unpainted. Primer is not meant to be the topcoat and will deteriorate quickly. Be sure the weather is suitable when painting outdoors.
Generally, putting more work in upfront makes the paint stick around for much longer. While it may be tempting to skip some of this work upfront, you’ll regret it later. Be sure you have the time and capacity for preparing the walls before you commit to painting. You can often take a few days to get the preparations complete, just be sure the walls don’t get too dirty between cleaning and painting.
- Related Read: 12 Expert Tips On How To Prepare For An Open House
Featured Image Credit: Whiteaster, Shutterstock
Contents
