
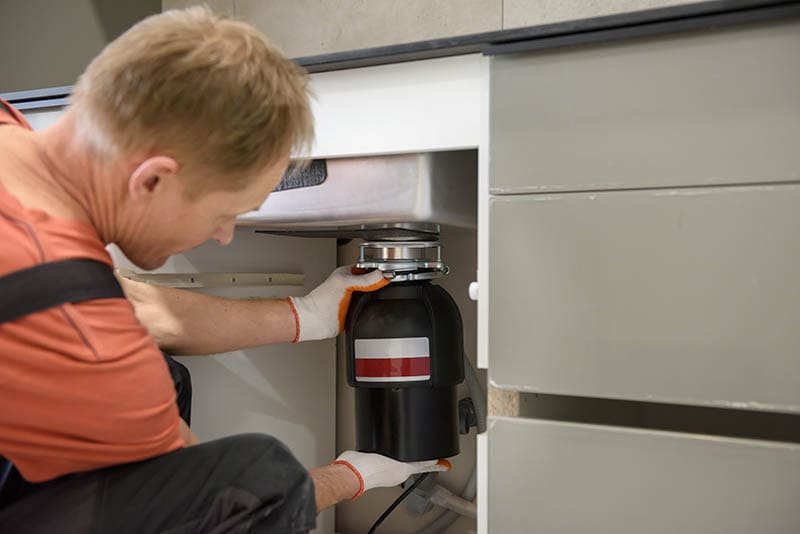
If your drain is frequently experiencing clogs, chances are that there could be a problem with your garbage disposal. Before removing the garbage disposal from your kitchen, make sure you have already decided whether you plan to replace it with another. If not, install a sink or basket strainer.
You can remove your garbage disposal on your own; the process is straightforward and will save you some money. Continue reading this article for detailed instructions on removing a garbage disposal, replacing a new garbage disposal, and installing a sink strainer.

Before You Start
Requirements needed include:
- Hacksaw
- Screwdrivers
- Rag
- Bucket
- Channel
- Putty
- Continuous waste pipe
- sink or basket strainer
- Sink tailpiece
- Wire capes
- voltage tester

The 5 Steps to Remove a Garbage Disposal
1. Cut the Supply of Power to the Garbage Disposal
Cutting off power is a vital stage that should not be ignored. It helps avoid certain work accidents like being electrocuted while working. Access the circuit breaker or electrical service panel and cut power by flipping the switch that takes electricity into the garbage disposal. Just to be sure you got the right switch, try to run the garbage disposal before you begin the removal process. It is even much better if you unplug it from the socket.
Suppose your garbage disposal has been hardwired to the house; you must locate the junction box on the wall. Disconnect the exposed wires leading to the box, use a screwdriver to remove the cover over the box, and untwist the wires that transfer power to the garbage disposal.
Once untwisted, place wire capes over the exposed wires, use a voltage tester to ensure no power is going through, and return the wires to the junction box.
2. Disconnect the Garbage Disposal Discharge Pipe from the Wall Outlet
After ensuring no electricity flows into your garbage disposal, the next part is the removal stage. There will be some water spills; therefore, place a bucket under the drain trap. You wouldn’t want a very messy job in the end.
At the end of each trap bend, slip nuts need to be carefully loosened, unthreaded, and pulled straight down to remove the waste pipe and the tee connected to the disposals’ waste pipe that is connected to the wall outlet.
3. Disconnect the Dishwasher
For those that own a dishwasher, chances are it is connected to the garbage disposal. Depending on how the dishwasher’s hose clamp has been installed, you may use pliers or a screwdriver to disconnect it.
For either tool you use, you will need to carefully rotate the hose clamp as you pull it off with your hand until it completely disconnects from the disposal nipple.
4. Remove the Garbage Disposal
On the lower side of the disposal, there is a mounting ring. Insert a screwdriver shaft into the ears of the mounting ring and begin to turn counterclockwise. Make sure you hold the garbage disposal with one hand as the other turns the screwdriver shaft counterclockwise.
It is better to have another person helping you hold the garbage disposal, so you don’t multitask. Once the mounting ring is loose enough, the garbage disposal will come down, and hopefully, you will be ready to catch it.
5. Remove the Mounting Assembly
If you plan to replace the garbage disposal with the same kind of disposal, you do not have to remove the mounting assembly. However, if you plan to replace it with a different disposal, you need to remove it so that later you can fix a mounting assembly that best suits your new disposal.
For the mounting assembly to be disconnected, the mounting ring must be loosened carefully with a screwdriver and removed. Focus on the screws that hold the upper and lower mounting rings. The groove of the sink sleeve is also held with rings that must be removed carefully, followed by the flange and fiber gasket. Use a rag to clean any existing sealing gaskets or putty.
Installing a Basket Strainer

As stated earlier, before removing your garbage disposal, be sure of your next step. If you plan to eliminate the existence of garbage disposal in your home, installing a sink or basket strainer is your next move.
The sink will be directly connected to the waste pipes, where unclean water will directly flow into the drain pipes.
Sink and basket strainers come in several makes, and their installation method may differ from manufacturer to manufacturer. It is, therefore, important to read the installation instructions despite your already existing knowledge of how to do it.
Below is a simple procedure for installing a sink or basket strainer to drain pipes.
- Fit the basket strainer into the sink. To ensure the basket strainer fits appropriately into the sink, apply some plumber putty on the flange under its lid. Ensure the strainer is directly at the center of the sink as you fit the two. Place the rubber washer and the bottom mounting cup on the strainer’s flange of the sink. Carefully tighten the mounting cup nut with pliers until it is firm. You may use a rag to wipe off excess oozing plumber putty from the strainer’s lids.
- Fit the drain tailpiece on the strainer. Use a washer and slip nut when fixing the tailpiece on the strainer. To tighten the nuts, use pliers. The tailpiece is often set at the bottom end of the strainer. Suppose you also want to include a dishwasher, a flanged branch tailpiece installed with an inlet for the dishwasher drain hose is required. Use a hose clamp to fix the drain hose on the tailpiece inlet. Use some plumber putty when setting the two for extra hold and prevention against leaks.
- Cut into size and install the continuous waste pipe. Place the elbow of the continuous waste pipe on the already fixed tailpiece. Ensure the other end of the waste pipe is facing straight into the tee on the drain assembly, mark it, and use a hacksaw to cut it into the right length. Once the continuous waste pipe has been cut to the correct length, fix it and tighten it with slip nuts.
Replacing a Garbage Disposal
Garbage disposal replacement is done when you want to place a new one in place of the old one. If replacing the disposal was your plan, there was no need to remove the mounting assembly, especially if your new disposal is the same brand as the older one.
Below is a simple procedure to follow.
1. Mount the new garbage disposal
On the lower end of the sink flange is a mounting ring in which you will fix your new disposal. Lift the disposal in a position that will align its upper edge and the lower lip of the mounting ring. Begin to twist the disposal from left to right as it threads into the grooves. You can also use the screwdriver to rotate the mounting ring until the disposal is completely fixed and locked in place.
2. Reconnect the garbage disposal to the power
Below the new disposal is a faceplate that needs to be unscrewed. Match the wires in the disposal’s electric housing to the ones on the power supply. Connect the wires, replace the cover and tighten the screws. It is better if the handling of all these electrical wires is done when the main power supply unit is off.
3. Connect the discharge tube to the new disposal
There is a valve on the side of the new garbage disposal. Ensure the end of the discharge tube is aligned with the valve. Push the tube in and use nuts or fasteners to tighten it. Suppose the discharge tube is no longer the right length, especially after getting a larger garbage disposal than your previous one; you may need to trim it.
The tube needs to be of the right length to connect perfectly to the plumbing valve on the ground. However, if the tube is now shorter, you may need to get a new one from the store that matches the correct dimensions from the garbage disposal to the underground plumbing valve.
4. Check for leaks
Once everything is set, you may need to run some water through the garbage disposal just to find out if there are any leaks. If you notice some water leaks, dry the area and patch it with a strip of thread seal tape.
5. Give the garbage disposal a test run
Once it is established and there is no water seeping out, switch on the main power supply so that power will flow through the disposal. Ensure the disposal runs smoothly; it shouldn’t make excess grinding or humming noise. Also, find out if the disposal is vibrating excessively. If you notice unusual sounds and vibrations, call a plumber.
It is mandatory that you get rid of any metallic objects in the sink; you wouldn’t want them to fall into the disposal, damaging it even before it begins to work.
What to Consider Before Removing a Garbage Disposal
Yes, it will reach a point when it is necessary to remove your garbage disposal; however, when is the right time? Before it crosses your mind, consider or do the following to ensure you do not waste your time and money due to a minor issue.
Check whether the disposal is plugged in
You may often try to run any kitchen appliance without success, only to figure out later it wasn’t plugged in correctly. Always ensure the disposal is plugged in, especially when turned off, without any warning signs of damage.
Maybe, all your garbage disposal needs is a little rest from working for so long. Press the reset button on the bottom of the disposal and allow it to rest for a few minutes. You will be shocked the disposal will begin working again after being allowed to rest.
Determine the age of the garbage disposal
A garbage disposal can last for up to 15 years with proper maintenance. You can help your garbage disposal have a longer life span by running some clean cold water through it daily after use. Therefore you may decide to remove your garbage disposal if it is no longer working after it has served you for more than 15 years.
Listen to the noises produced by the garbage disposal
There will be a time when you will notice irritating grinding noises. That is not often a sign that it needs to be removed or replaced. A tiny piece of silverware can cause the garbage disposal to make irritating noises. Take a flashlight and shine it down the drain, carefully remove the metallic substance, and rerun the disposal. Call a professional plumber before replacing your garbage disposal if the noises persist.
Bad smell from the garbage disposal
When there is a bad odor coming out of your garbage disposal, it could be due to stubborn food particles that are stuck in the unit. Try running some water through the disposal to flash out the particles. If at all your disposal has served you for longer than 15 years, then it may be time to replace it. The problem could be old age which is preventing it from functioning appropriately. If the disposal has only been serving you for a few years, replacing it will be too expensive, it could be a minor issue that a professional plumber can look at and fix within minutes.
Conclusion
A garbage disposal is handy in eliminating garbage and unwanted food particles in the kitchen. However, not all items can run through it. If you want your garbage disposal to serve you for years, only allow soft food particles like vegetables and fruits to go through it. However, food items like bones, coffee grounds, and potato peels may form clogs in the unit and eventually damage the appliance.
As observed above, removing and replacing a garbage disposal is an easy task that you can do on your own. However, be careful by making sure the main electricity switch is off. Listen to the noises made by the disposal after a new installation, and avoid placing metallic substances in the sink. Call a professional whenever you feel like you can’t do it on your own.
Featured Image Credit: DUO Studio, Shutterstock
Contents
