House Grail is reader-supported. When you buy via links on our site, we may earn an affiliate commission at no cost to you. Learn more.
How to Install a Transition Strip In 6 Simple Steps (With Pictures)
Pete Ortiz
Last updated:
A transition strip is a piece of molding that sits between and connects two floors. It allows flooring to transition smoothly from one room to the next. There are different types of transition strips available, typically designed for use with different floor types and materials. So, laminate flooring transition strips are different to the T-bar transition strips that are more commonly used to transition between two hardwood floors while a reducer molding is used to connect floors of different thicknesses.
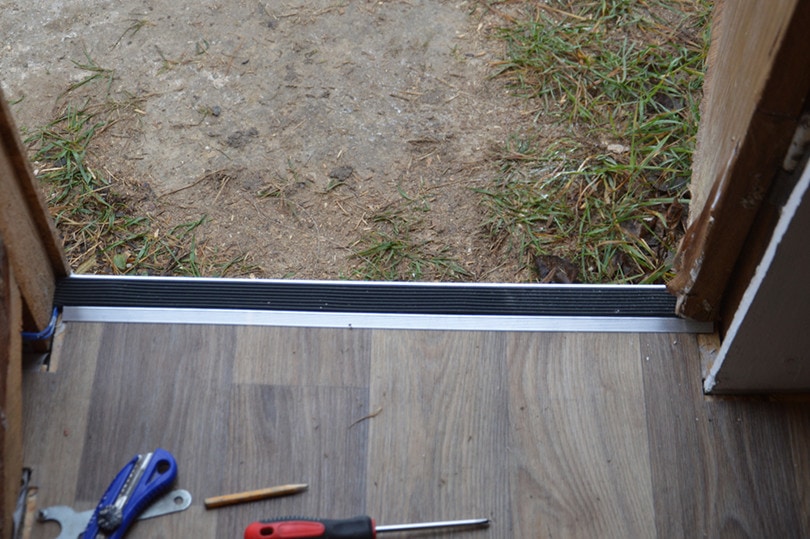
Why Install a Transition Strip?
Image Credit: Apx.org.ua, Shutterstock
The transition strip not only gives an aesthetically pleasing finish to the flooring used in your rooms, but it can prevent stubbed toes and trip hazards. While you should follow the manufacturer’s instructions, there are some guidelines and tips that can be picked up with a general installation guide. Below, you will find the general process for installing these strips, although you may find the process to be a little different depending on the floor materials, and especially their thicknesses, that you’re using.
Below, we have included instructions on how to install a T-bar transition strip, which can be used with laminate and hardwood flooring or to connect these two different flooring materials.
Getting the Right Transition Strip
There are different types of transition strip available, including:
Square nose molding – A square nose molding is not used to transition between two floor types but is used when flooring comes up against a vertical object such as a wall or hearth. If quarter molding won’t fit, square nose molding could be your best alternative.
Reducer molding – Reducer molding is used to combine two different types of floor where the materials are of different thicknesses. This is commonly required when transitioning from a laminate or hardwood floor to a vinyl or lino floor.
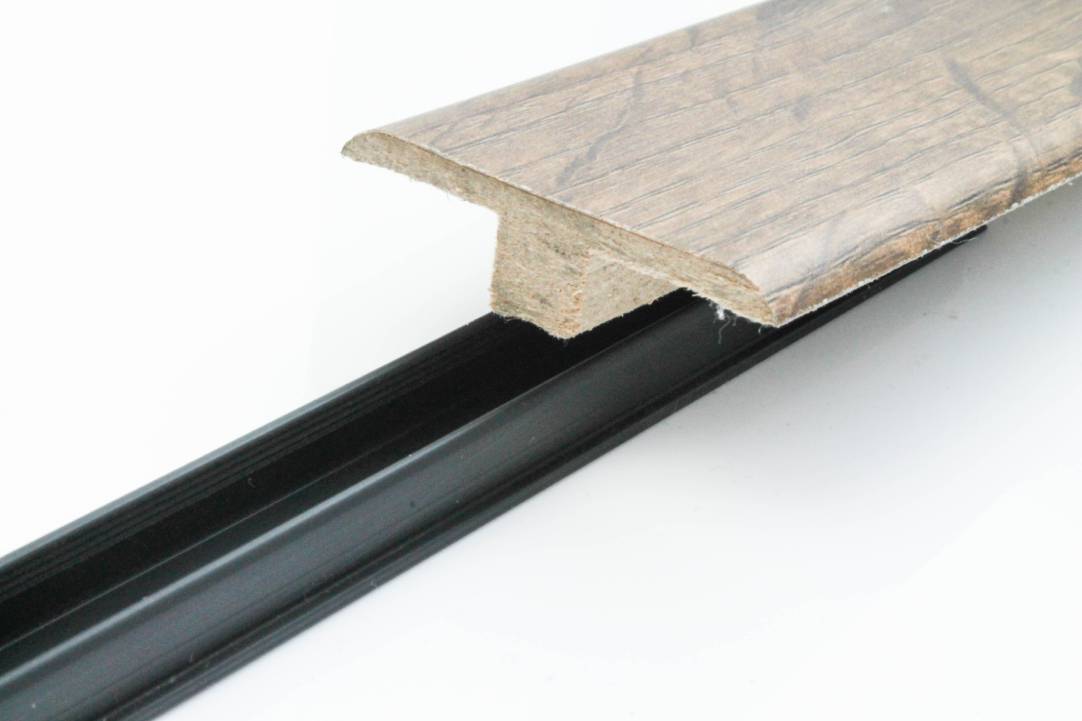
T-Bar molding – T-bar molding is used in doorways to connect floors of a similar thickness. It can be used for hardwood flooring and also for laminate floor.
The instructions below are for T-bar molding. Although the basic principles are the same, you may find some of the steps slightly different due to the design and shape of the transition strip.
Materials and Tools
Image Credit: Free-Photos, Pixabay
Whether you are gluing or screwing, you will need the following items:
Masking tape
Power saw
Snips
Tape
If gluing the strip, you will also need:
Adhesive
Caulk gun
Cloth
And if screwing the strip down, gather the following items:
Screw gun or drill
Wood screws
How to Install a Transition Strip With Glue (6 Steps)
Image Credit: Alex Verrone, Shutterstock
Do ensure that you follow manufacturer guidelines to ensure the best results, but if these aren’t available or you want to ensure that you’re doing it right, follow these steps for a successful installation.
Gluing the strip down is the simplest method, but it requires a relatively flat and even sub floor and glued strips may come unstuck sooner than screwed strips.
1. Measure the Doorway
Image Credit: Pixabay
Measure the exact width of the doorway, and then measure it again to ensure you got it right.
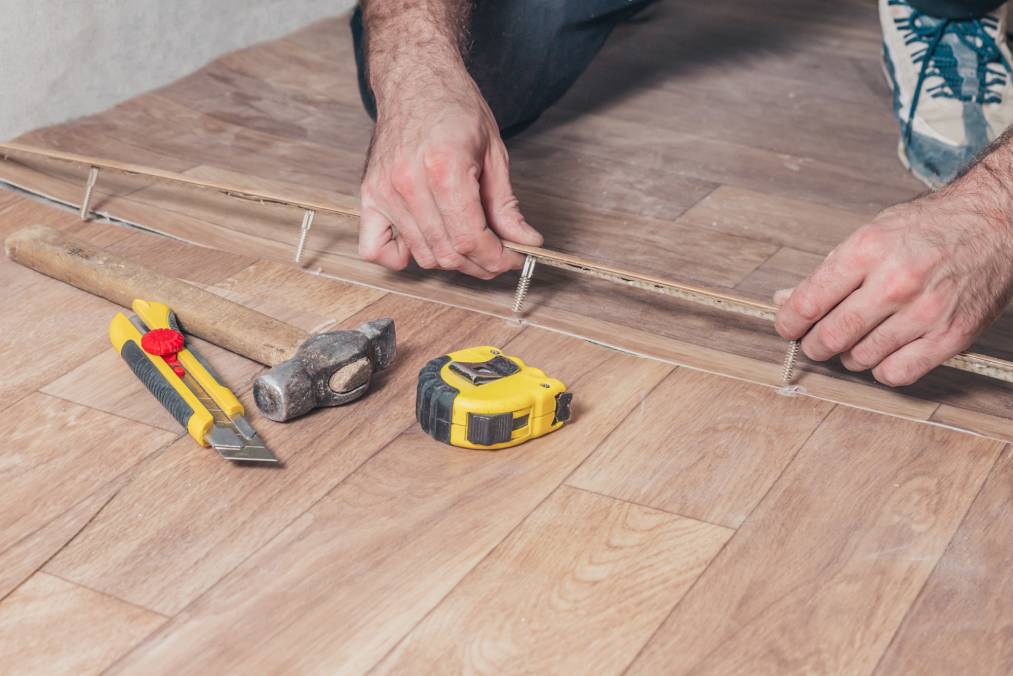
2. Cut the Strip
Cut the strip itself to exactly meet your measurements above. Use a power saw to cut the strip because this allows for greater precision and reduces the risk of damaging the strip.
If the strip has a metal track, cut this using decent metal snips.
3. Apply Construction Adhesive to the Strip
If the strip comes with a track, fit the strip and the tap together. They will usually snap into place but you can add some adhesive glue to ensure a permanent fixture. Apply a bead of the construction adhesive to the bottom of the track, if there is one, or the bottom of the strip, if there isn’t. The adhesive should be placed where the strip will touch the concrete floor.
Image Credit: Studio_Fennel, Shutterstock
4. Press the Strip In Place
Press the strip firmly into place between the two floors. The top of the strip should sit flush against both floors and there should be no gap between the strip and the floor surfaces.
5. Remove Excess Glue
Remove excess glue from the area. This is best done using a damp cloth and before the adhesive has had opportunity to start drying.
6. Hold the Strip Down With Tape
The adhesive will take at least several hours to dry. To ensure that the strip remains in place during this time, you can weight it down with heavy objects, or tape it down with masking tape.
How to Install a Transition Strip With a Screw (6 Steps)
Image Credit: VanoVasaio, Shutterstock
Screwing the strip down, if possible, offers a firmer and longer-lasting solution. The process is similar and follows these general steps:
1. Measure the Doorway
Measure the space between the two floors and between the two door frames. Double check to make sure the measurements are accurate.
2. Cut the Strip
Use metal snips to cut the metal track and a power saw to cut the strip itself and ensure that the cuts are as smooth and accurate as possible.
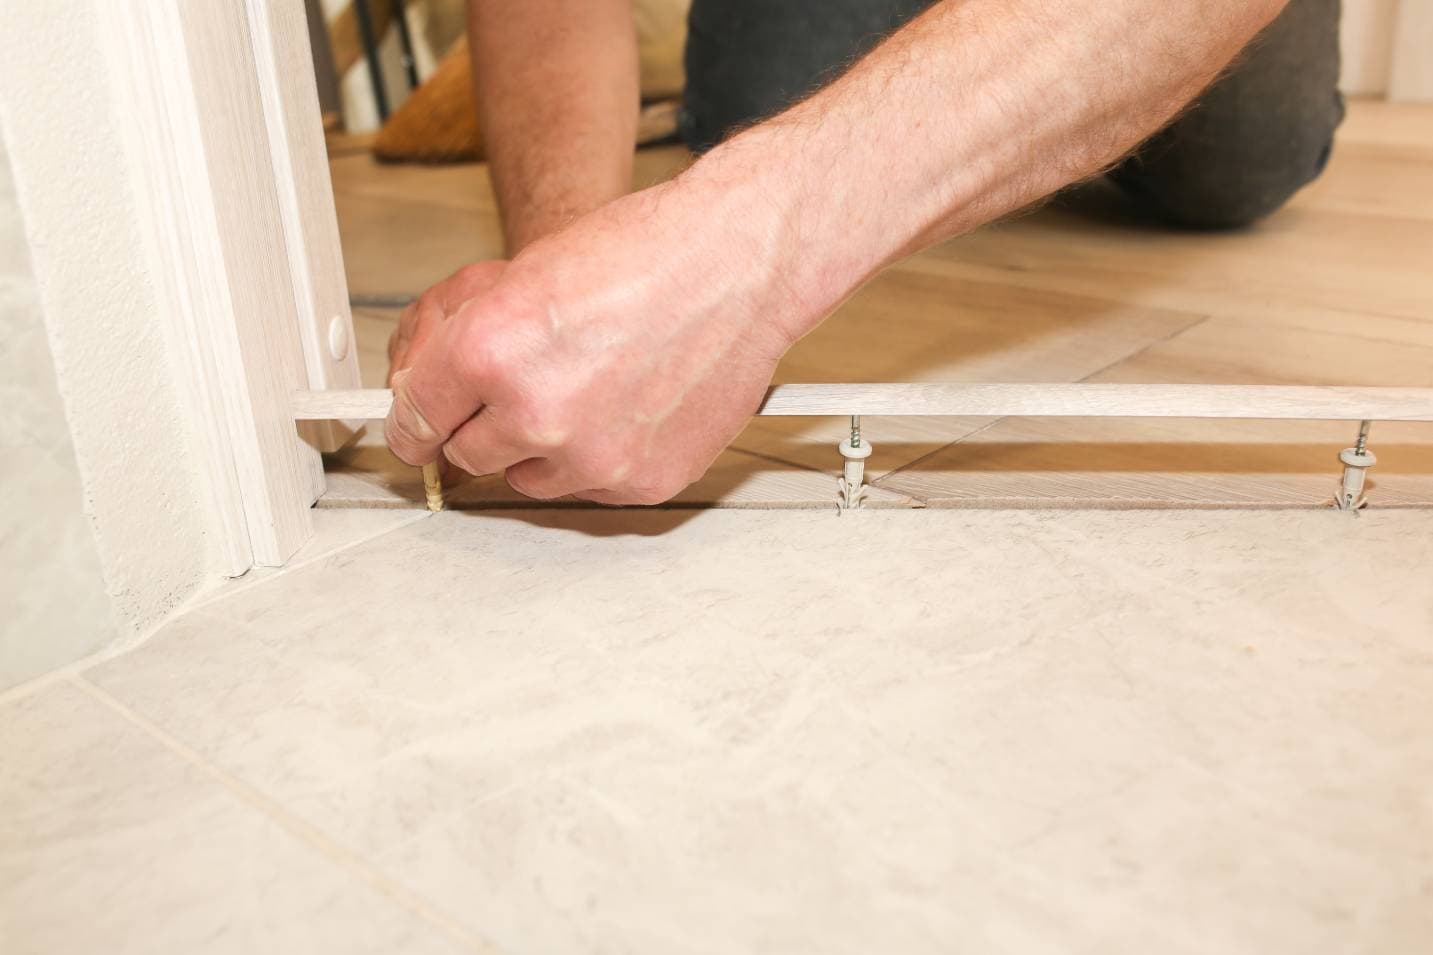
3. Place the Track In the Gap
The metal track should include pilot holes. Place the track in position in the doorway and between the two floors. Mark holes where the pilot holes are, on the concrete floor below.
4. Drill Holes and Install Concrete Anchors
Drill holes into the concrete, remove the track, and add concrete anchors.
5. Screw the Track Down
Replace the track and screw it into place using the pilot holes and the concrete anchors that you added.
Image Credit: Only NewPhoto, Shutterstock
6. Snap the Trim Into Place
Once the track is firmly in place, you can snap the strip into the track. Push down and ensure that the molding sits flush against the top of both floor surfaces.
Conclusion
Transition strips allow for a smooth transition from one floor to another. Although they are most commonly used to connect floors between two rooms, they may also be used to connect large sections of flooring and some specific types of transition strip are used up against hearths and other vertical surfaces. In most cases, you can choose to glue or screw the strips in place, using the guides above and the manufacturer’s instructions.
Pete has been working in the trades since high school, where he first developed a passion for woodworking. Over the years, he has developed a keen interest in a wide variety of DIY projects around the home. Fascinated by all sort of tools, Pete loves reading and writing about all the latest gadgets and accessories that hit the market. His other interests include astronomy, hiking, and fishing.
As the founder of House Grail, Pete's primary goal is to help consumers make educated decisions about DIY projects at home, in the garage, and in the garden.