
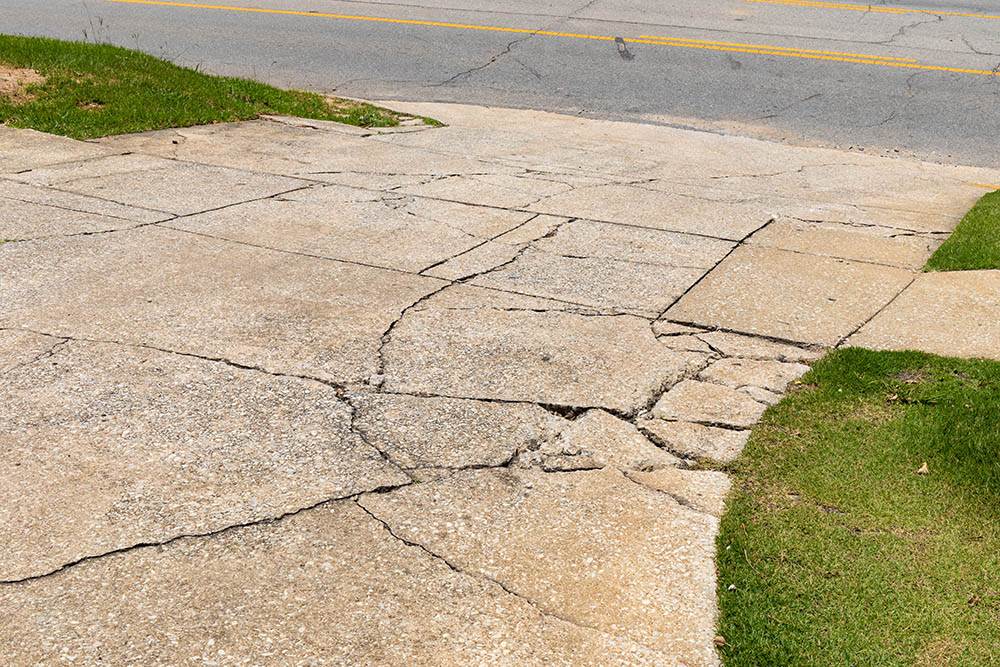
Cracks in a concrete driveway can cause the surface to deteriorate faster because it enables moisture to enter the cracks, which can freeze and expand, increasing their width and length. The best remedy is to fix them quickly, but many people are unsure of how to get started. Keep reading as we provide you with a step-by-step guide that you can use to get your driveway looking new again.

The 10 Steps for Repairing Cracks in a Concrete Driveway
1. Clean the Driveway

Before you can begin to repair any cracks, you need to make sure the surface is clean so no oils or other contaminants interfere with the bonding process. The best way to clean the surface is to use a pressure washer, as it can remove oils, mold, and mildew. You can also purchase a masonry cleaning solution to add to the pressure washer for an even better experience and a cleaner surface.
2. Mix Repair Concrete
You can use ordinary concrete to fix the cracks in your concrete driveway to minimize the visual impact. Pour enough concrete to fix your cracks into a 5-gallon bucket. If the cracks that you are filling are deep and wide, use regular gravel-based concrete. If the cracks are shallow and thin, you can use a concrete sand mix or a re-surfacer. Mix the concrete to the consistency of cookie dough.
3. Pour the Concrete
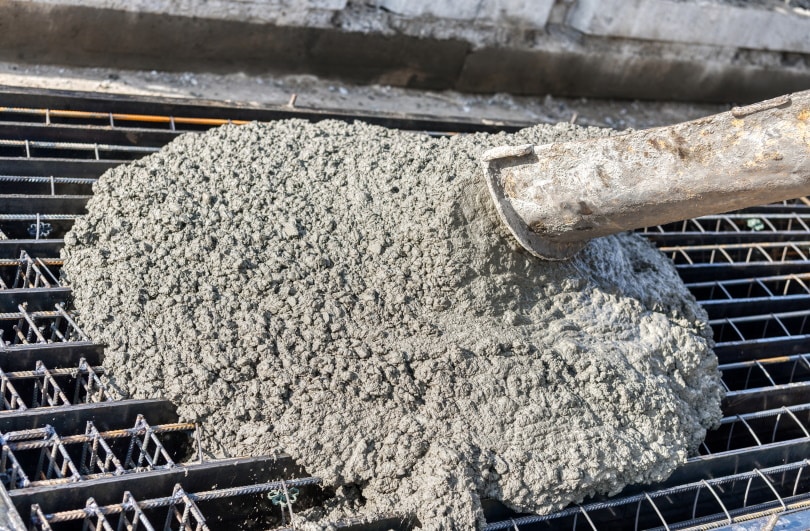
Pour the concrete over the cracks and damaged areas that you need to repair.
4. Fill the Cracks
Use a trowel to work the concrete into the cracks. Use the edge if you need to, and try to get as much filler concrete inside the crack as possible.
5. Smooth the Cracks
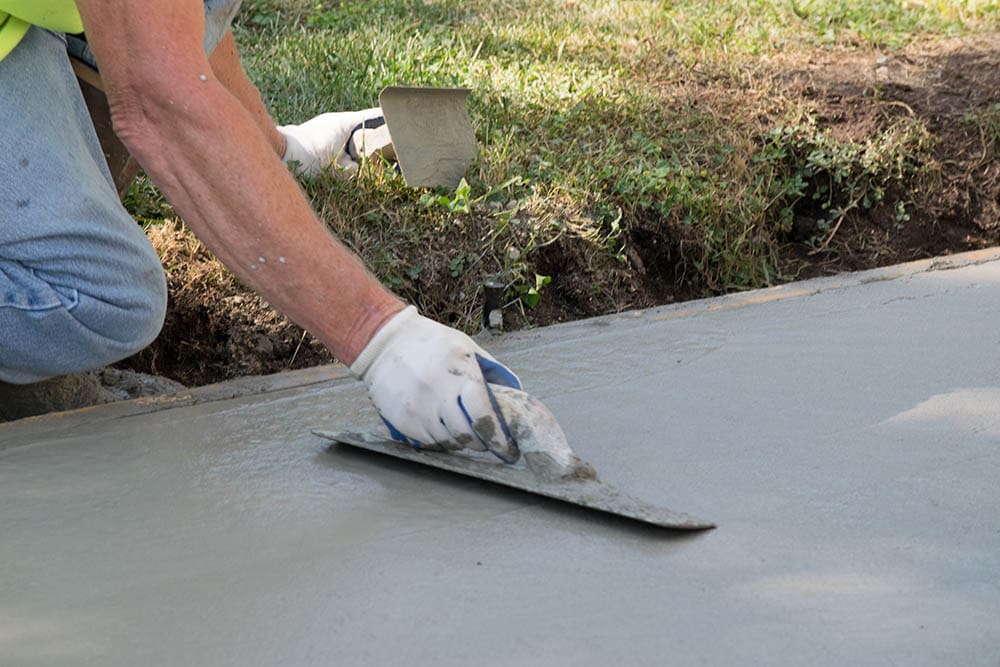
After filling the cracks as completely as possible, use the trowel to smooth over the area and remove excess concrete.
6. Let Dry
With the cracks filled and smoothed over, let the cement sit overnight to dry.
7. Mix Resurfacing Cement
Resurfacing cement is a smooth type of cement meant to go over gravel types to help protect them and improve their appearance. Mix this cement thinner than the kind that you used for repairing the cracks, and it should have the consistency of pancake batter.
8. Spread the Resurfacing Cement
Pour out the resurfacing cement and spread it with a large squeegee, being careful not to make any marks. This step will help your driveway have an even appearance and create a barrier that will help prevent contaminants and moisture from compromising the work just completed.
9. Adding Texture

After letting the concrete set for 1–2 hours, use a broom to add texture by gently brushing the surface. This texture will help prevent it from getting slippery if it rains or snows and help give it a more natural appearance.
10. Project Finished
After allowing at least 24 hours to pass without disturbing the concrete, you should be able to walk and even drive your car on it without worry. If you notice any new cracks appearing, fix them the same way.

Summary
Fixing cracks in cement is quite easy and doesn’t take too long. If the cracks are large, use gravel-based cement for improved strength. It’s also important to spend extra time making sure you get as much concrete into the crack as possible to create a good seal. Once the concrete and resurfacing cement dries, you will have a driveway that looks new and is resistant to forming new cracks.
Featured Image Credit: NatalieSchorr, Shutterstock
Contents
