

Orbital sanders are very handy tools that can make sanding large surfaces much easier than doing it by hand. However, they can be a bit tricky to use if you’ve never used one before. In this article, we’ll give you some tips and tricks on how to use an orbital sander so that you can get the best results in your projects.

The 12 Tips & Tricks to Use an Orbital Sander
1. Choose the Proper Grit
The first thing you need to do when using an orbital sander is to choose the right grit for your project. If you’re sanding something like a rough piece of wood, you’ll want to use coarse grit paper. For finer projects, like furniture or cabinets, you’ll want to use a finer grit.
Choosing the right sandpaper is an absolute must if you want your project to reflect the best results. Using a sandpaper grit that’s too coarse can damage your project, while using one that’s too fine won’t provide enough sanding power to see any real results.
2. Take Your Time
One of the biggest mistakes novice orbital sander users make is rushing through their projects. This usually leads to sanding too much in one spot and not enough in another, creating an uneven surface.
Instead, take your time and sand evenly across the entire surface. This may take a bit longer, but it’ll be worth it in the end when you have a smooth, consistent finish every time.
3. Use Even Pressure
When sanding, it’s important to use even pressure across the entire surface. This will help prevent you from sanding too deeply in one spot and not enough in another.
To do this, hold the sander so that it’s level and use gentle, even strokes. Don’t press too hard—let the weight of the sander do the work for you. Doing so will help ensure a more even finish.
The key is to use light pressure throughout the majority of the sanding process. As you get close to finishing, you can then increase the pressure to remove any remaining imperfections. But don’t go overboard. The best likely course of action is to switch grits to achieve the results you’re looking for.
4. Use the Right Motion
Orbital sanders move in a circular motion, but you don’t have to sand in a perfect circle. In fact, it’s often best to start your strokes in the middle of the area you’re sanding and work your way outwards.
This will help prevent you from leaving any unsightly swirl marks on your project—another one of the most common mistakes made by beginners. You might not be able to see these swirl marks right away. But as soon as you apply stain to your project, those swirls will become very evident.
5. Focus On One Area at a Time
Trying to sand too large of an area at once is another common mistake made by first-time orbital sander users. Not only will this make it harder to achieve an even finish, but it can also be very tiring on your arms.
Instead, focus on one small area at a time. Once you’re finished with that area, move on to the next. This will help you achieve a much better finish and save you some energy in the process.
6. Make Sure Your Sander Is Flat on the Wood Before Turning It On
Before you turn on your sander, make sure that it’s flat on the surface of the wood. If it’s not, you risk leaving uneven scratches on the wood.
To avoid this, rest your sander on the wood and then apply gentle pressure to it. Once it’s flat, you can then turn on the sander and begin sanding.
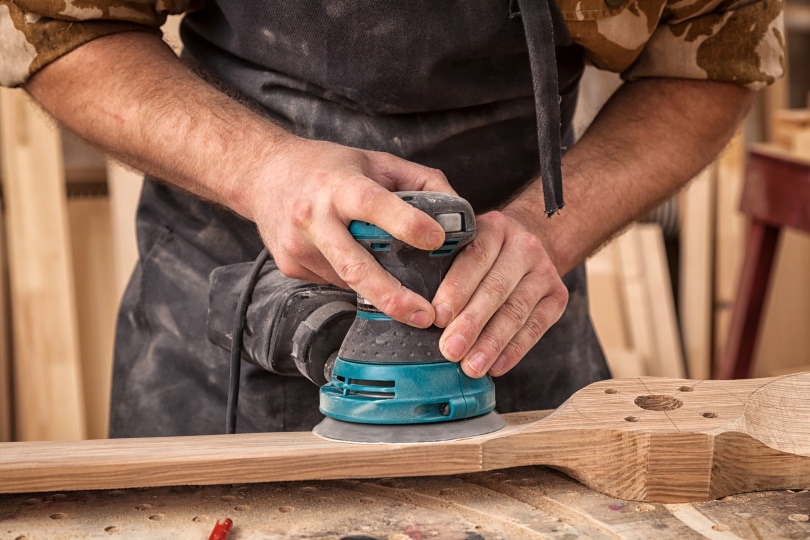
7. Control Movement From the Base
A lot of beginners make the mistake of trying to control the sander from the top of the unit. This is an understandable mistake, as it’s natural to want to guide the tool.
But the truth is, you’ll have much more control over the sander if you grip it from the base. This will give you a better feel for the tool and help you guide it more smoothly across the surface of the wood.
8. Keep the Sander Moving
One of the biggest mistakes you can make when using an orbital sander is to let it sit in one spot for too long. This will not only damage the wood, but it can also cause the sander to leave unsightly scratches.
Instead, keep the sander moving at all times. This will help prevent any damage to the wood and give you a smoother finish that you can be proud of.
9. Overlap Your Previous Passes
It’s natural to think that you have to sand an area until it’s smooth before moving on. But the truth is, you don’t have to be perfect. In fact, overlapping your previous passes can actually help you achieve a better finish.
When sanding, make sure to overlap each stroke by about 50%. This will help ensure that you don’t miss any spots and that you end up with a smooth, consistent finish.

10. Don’t Forget to Vacuum
You’re going to create a lot of dust as you sand with an orbital sander, so don’t forget to vacuum as you go. This is an important step in the sanding process that should never be overlooked.
If you don’t vacuum, all that dust will end up on your floor or in the air. Not only is this a health hazard, but it can also cause your sander to clog.
To avoid this, vacuum after each pass. This will help keep your work area clean and prevent your sander from clogging.
11. Wear Gloves for Comfort
It’s no secret that sanding can be tough on your hands. In fact, it’s not uncommon for beginners to develop blisters and numb hands after using an orbital sander for the first time.
To avoid this, make sure to wear gloves whenever you use your sander. This will help protect your hands and keep them comfortable as you work.
For best results, wear gloves with thick padding on the palms and fingers. This will help reduce vibration and make your sanding experience much more pleasant.
12. Finish Your Project By Hand
Trying to achieve precision sanding with an orbital sander is next to impossible. So if you’re looking for a truly perfect finish, you’re going to have to do it by hand.
After sanding with your orbital sander, switch to a hand sander for the final touches. This will allow you to get into all those tight spaces and achieve a smooth, consistent finish.

Conclusion
Now that you know how to use an orbital sander, put these tips and tricks to good use the next time you start a project. With a little practice, you’ll be able to achieve professional-looking results in no time.
Don’t hesitate to experiment with different techniques to find what works best for you. And if you have any questions, feel free to ask a professional for help. With these tips, you’ll be on your way to becoming a sanding pro in no time!
Featured Image Credit: evgengerasimovich, Shutterstock
Contents
