
Bathrooms have to endure high humidity levels on a daily basis. Moisture is the number one culprit of mold and mildew development, so installing bathroom tiles properly is necessary if you want to avoid some significant problems. While many homeowners believe tiling to be the most critical part of installing a bathroom floor, an entire stage comes before that. Waterproofing your bathroom floor before you lay the tile is a crucial step that will provide you with a long-lasting bathroom floor.
Read the article below to find out how you can waterproof your bathroom floor the easiest way.
 The Importance of Waterproofing a Shower Floor
 The Importance of Waterproofing a Shower Floor
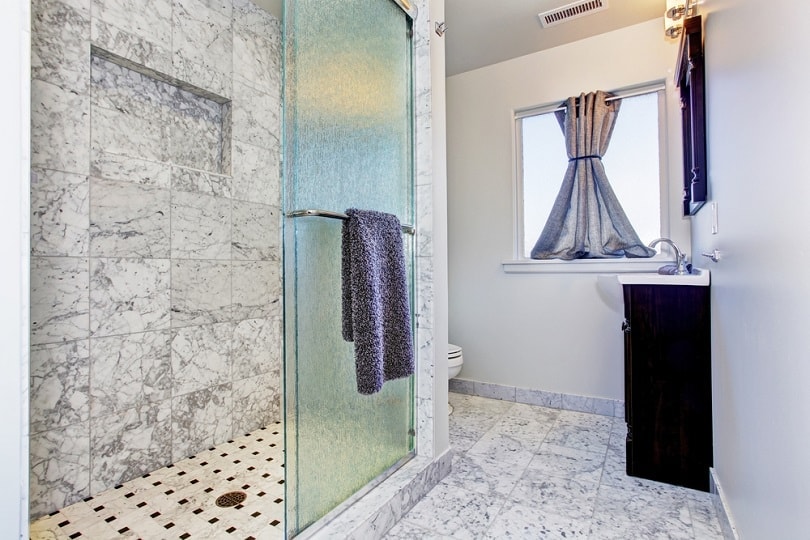
Tiling your shower is usually a big investment that should last a lifetime. Most showers must endure a lot of moisture and humidity daily, and while tiles are water-resistant, making them a favorite material for areas prone to moisture, water vapor can still become a real issue. Water vapor can get inside the tiniest crack or hole, causing irreversible damage behind the tile work. If you’ve ever done home remodeling—taking off old tiles to install new ones—you probably came across the mess that accumulates over time.

When you don’t waterproof a surface before installing tiles, the humidity will get trapped behind the tiles, collecting over time and developing mold and mildew. On the surface, your bathroom may seem healthy and clean, but once water vapor reaches behind the tiles, it can cause serious damage.

How to Waterproof a Shower Floor Before Tiling in 5 Steps
1. Gather all the Tools and Materials
Before beginning this DIY project, you will need to carefully acquire all the materials and tools. Make sure to get the exact materials you’ll need so that you don’t run out of any necessities. It is always recommended to have everything ready so that once you begin, the whole project will go smoothly.
What you’ll need:
- Tape measure
- Pencil
- Level
- Scalpel
- Thinset mortar
- Mortar mixer
- Damp sponge
- Margin trowel
- Wood float
- Waterproof membrane
2. Mark Your Desired Area and Prepare the Shower
Mark the desired area of your shower that you will be waterproofing. In this case, you will only waterproof the shower floor, so make sure to measure the waterproofing membrane and cut it down to size. You may need to cut it into a few separate pieces to get the best coverage. Before beginning with the project, it is essential to give your shower floor a thorough clean. Any dust particles or chips can significantly affect your entire project. Wipe the whole substrate flooring with a damp sponge to give it a final polish before starting to waterproof it.
3. Apply Thinset Mortar
Using a mortar mixer, create a thinset of the perfect consistency. To get the best mixture, it is recommended to follow the manufacturer’s instructions, which will tell you exactly how much water you need to mix for the thinset to have an ideal consistency. Begin applying the thinset on top of the substrate using a margin trowel. With the flat side of the margin trowel, apply a thin layer of thinset on the entire flooring surface. With the notched side held at a 45-degree angle from the substrate, make trowel ridges to create a better bond with the waterproof membrane. It is recommended for the ridges to be parallel to the shorter side of the waterproof membrane, which is especially helpful if you are working in several patches.
4. Lay Your Waterproof Membrane of Choice
After you have applied the layer of thinset, it is time to begin laying the waterproof membrane. There are many options for waterproofing a shower floor; most of the options come in the form of waterproof sheet membranes of your choice. Once you acquire a sheet membrane, cut it down to a size that will perfectly fit the size of your shower floor, taking into account the drain. Roll your membrane across the thinset, and smooth it out with your hands first. In this stage, it is important to get the maximum bond between the membrane and the thinset, which you will achieve by compressing the membrane with a wood float.
5. Finish Tiling Your Bathroom
The last and most crucial step to finish this project is to tile your bathroom floor. Mix another thinset mixture and apply it over the waterproof membrane in a thin layer. You will do this stage in sections. Once you apply a small section of thinset, lay your tiles on top. Repeat the process until the entire floor is covered in tiles, and then add grout—an essential component to make sure everything is waterproof.
 Conclusion
After learning the fastest and easiest technique for waterproofing your bathroom floor before tiling, you will be left with a flawless project to ensure your bathroom stays mold-free for a long time. Adequately finished tile work is the most crucial step in a durable and sturdy shower floor, so make sure to lay the tiles and grout properly once you’re done with waterproofing.
See Also:
Featured Image Credit: Artazum, Shutterstock
Contents
