
You might be the type of person who gets loads of daily mail, from letters to bills to magazines. In any case, you’ll need a mailbox to hold all this paper. Mailboxes cost a lot, though, especially if you pay contractors for the installation. But wait—why don’t you build it yourself? You’ll be surprised by how easy it is to construct a lovely letterbox with your own two hands.
The following list includes the best brick mailbox plans that you can build right now. These projects won’t take more than 1–2 days to finish; the list of required materials and tools isn’t particularly big, either. So, if you’re ready to get your hands dirty (literally) and put a rough, tough, and weather-resistant box right at your doorstep, let’s get to it!

The 11 Impressive DIY Brick Mailbox Plans
1. White Brick Mailbox
| Materials Needed | 200 8-inch bricks, mortar mix (360 pounds), sand, water, blocks, cement mix (40 pounds), rebar, mailbox |
| Tools Needed | Masonry trowel, jointer, hammer, saw, shovel, wheelbarrow, level, square, tape measure, brush, brick tongs |
| Difficulty Level | Easy to moderate |
If this is your first DIY brick project and you’re a bit nervous you won’t be able to pull it off, this white brick mailbox will be a great place to start. As long as you are patient and have the right tools, you’ll be able to finish it in a day or two. For an average-sized mailbox, make sure to have at least 200 bricks and 300–400 pounds of mortar mix. Grab a shovel, dig a hole (8–9-inches deep, 16×16 inches), lay the foundation, and only then add the bricks.
As soon as the first layer is in place, the rest will be much easier to handle. Use the level and the square to keep the mailbox even and crush the bricks into smaller pieces with a hammer.
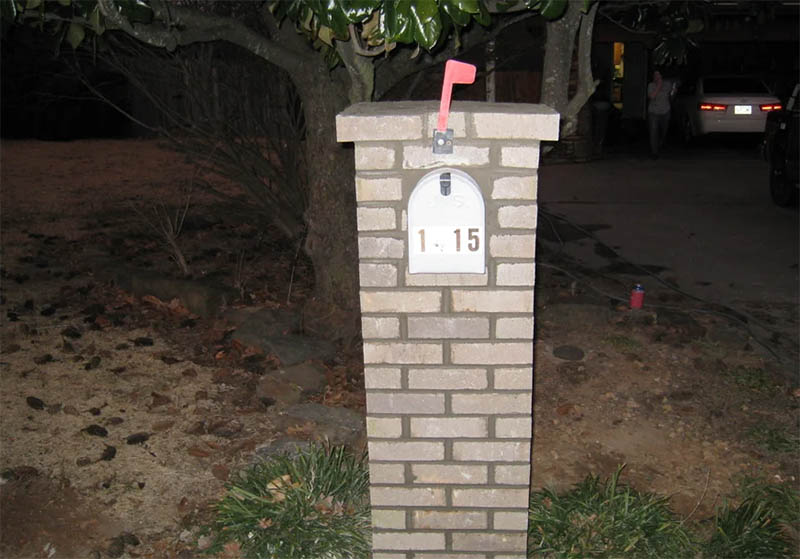
2. Quick-to-Build Mailbox
| Materials Needed | Red bricks, cinder blocks, concrete mix, mailbox |
| Tools Needed | Shovel, level, square, measuring tape, work gloves, trowel, hammer |
| Difficulty Level | Easy |
Don’t have a whole weekend for a DIY project? Then you should give this quick-to-build mailbox plan a try. It’s very straightforward and requires little effort on your side. You’ll only have to make the foundation 5–6-inches deep, but the mailbox will stand strong and serve for decades. Dig out the foundation (it can be of any size you want), add some concrete, and give it some to reach a pasty consistency to lay down the cinder blocks.
As for the bricks, there are no strict rules here: lay them in whatever manner you see fit. Not sure how many bricks you’ll need for this? Try dry-fitting them around the foundation—that should give you an idea.
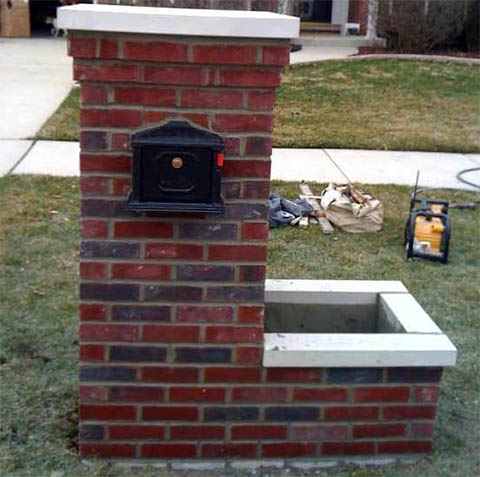
3. Two-in-One Mailbox with a Flower Box
| Materials Needed | Bricks, mortar, cement, water, cement chisel, paver, garden soil, flower, screws, mailbox |
| Tools Needed | Shovel, spade, mattock/hoe, level, square, trowel, hammer, drill |
| Difficulty Level | Easy to moderate |
To bring something new and exciting into a standard mailbox plan, you could add a flower box on the side. Just divide the foundation into two parts and plant your flower into the right box. The rest of the process will be rather straightforward but will take a bit more work (2–3 days tops). On the bright side, this two-in-one mailbox with a flower box can make heads turn and also boost the curb appeal of your house.
For the flower, don’t forget to get some garden soil. And if you have stone numbers for the address, use a drill to make holes for the screws and put the numbers on the side of the mailbox.
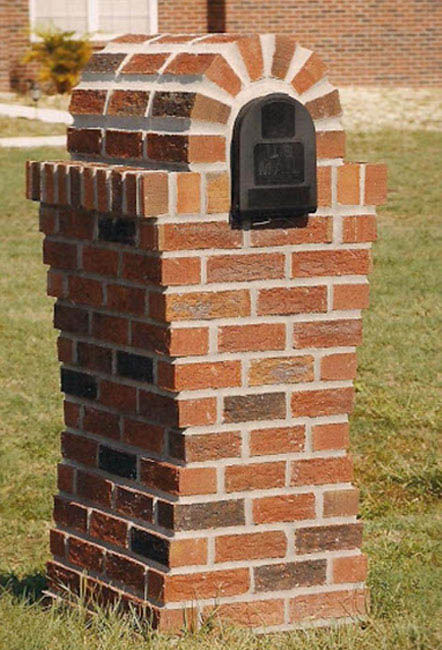
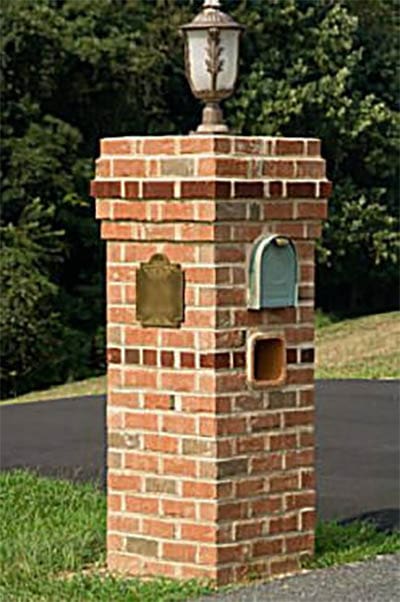
4. Cherokee Brick Mailbox
| Materials Needed | Premixed mortar, cement (fast-drying) pea gravel, bricks, concrete blocks, anchors |
| Tools Needed | Masonry trowel, jointer, tamper, shovel, brush, square, level, measuring tape |
| Difficulty Level | Moderate |
The best thing about bricks is that you’re not limited to a specific shape, color, or pattern, and that very much applies to this Cherokee brick mailbox. As always, pay extra attention to preparing the site and adding the right amount of concrete. Then, take your time with building the core. To make sure the mailbox lasts for a long time, put cement blocks in the middle and lay the bricks around them. To hold everything together, use steel anchors.
After that, experiment with the bricks until you find the perfect design that resonates with you. As for the top, go with a round top, flat top, or an eyebrow archtop. If you have the time for that, add a light fixture right on top of the box: have an electrician run a cable from your home’s breaker box.
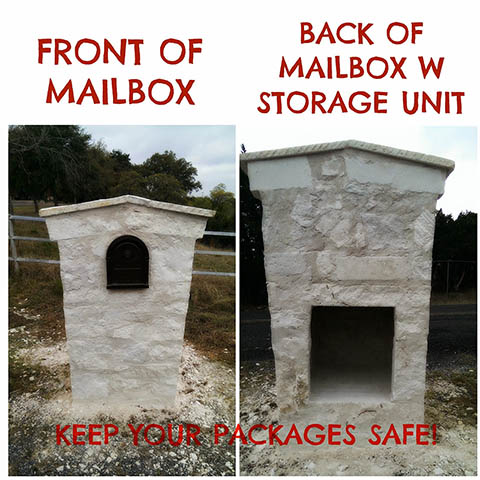
5. Brick Mailbox with Extra Storage
| Materials Needed | White bricks (or concrete blocks), water, mortar, cement |
| Tools Needed | Protective gloves, shovel, tamper, trowel, level, square |
| Difficulty Level | Easy |
Are you a busy person that receives lots of packages daily but doesn’t necessarily have the time to check them all? Then what you need is a brick mailbox with extra storage. It can be built from concrete blocks or even stone. The idea here is to not only have a mailbox facing the street but also a large “cargo area” in the back. This way, you won’t have to worry about the weather ruining your stuff, or, let’s say, dogs turning it into a mess.
It will take (relatively) little effort to complete this DIY project, as you don’t have to be surgical with the size or the shape of that extra storage unit. The top can be steeple, arch, or gable.
6. Flat Top Masonry Mailbox
| Materials Needed | Fast-drying cement (240 pounds), bricks (approx. 200), concrete blocks, sandstone for the cap, mailbox |
| Tools Needed | Digging shovel, wheelbarrow, trowel, hoe, hammer, brush |
| Difficulty Level | Moderate |
It doesn’t really matter whether you have stone, marble, or bricks, because this is quite a flexible DIY plan. Bricks are easier to work with, of course. Make sure you have enough of those, though, along with 200–300 pounds of fast-drying cement. Find the right spot for the flat top masonry mailbox and use a combination of concrete blocks and bricks to build the enclosure.
So, where does the mailbox go? Put it right on top of the concrete blocks, facing the street. The mailbox needs to open and close freely. To complete the top, cut the bricks with a saw or a hammer. Add a generous amount of mortar around the mailbox and “stick” the bricks to it. The cap can be built from bricks as well, but sandstone will look better.
7. Movable Stone/Brick Mailbox
| Materials Needed | Digging shovel, wheelbarrow, trowel, hoe, hammer, brush |
| Tools Needed | Level, framing square, measuring tape, circular saw, electric drill, marker, broom |
| Difficulty Level | Moderate/Hard |
What if you decide to move to another house in the future? Will you have to leave the mailbox behind? The answer is no if you use this movable stone/brick mailbox plan. As the name suggests, it’s not a stationary structure but rather one that can be transported once it’s built. So, instead of digging a hole and creating a concrete foundation for the mailbox, just build it on top of a piece of sandstone. This way, you’ll be able to take it with you anytime and anywhere.
Begin by building a wooden frame for the mailbox and then wrap wire mesh around it. With the mesh in place, add mortar to it and follow that up with bricks or stone—whichever you’ve got at hand.
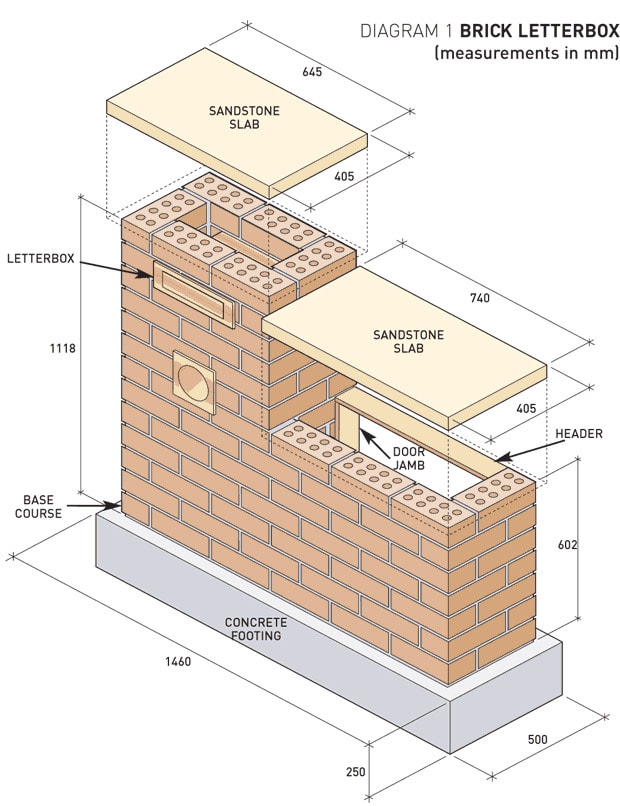
8. Front Yard Letterbox
| Materials Needed | Concrete, mortar, water, plasticizer, steel mesh, slab, bricks, string line, brass plates, screws, silicone, timber, adhesive, letterbox |
| Tools Needed | Carpenter’s square, spirit level, trowel, drill, saw, lump hammer, shovel |
| Difficulty Level | Moderate/Hard |
Got a water meter that you want to cover in bricks? With this front yard letterbox plan, you’ll be able to kill two birds with one stone (or, rather, brick). Prepare the concrete flooring and pour the concrete. Once it’s dry, lay down the first layer of the foundation and go from there. For easy access to the water meter, make a small wooden door facing the house. Be very careful not to damage the meter and all the pipes.
To take this DIY plan to the next level, add a newspaper holder right below the mailbox and put your address on the right side (use a drill to make holes and adhesive to hold the numbers in place).
See Also: 5 DIY Faux Brick Wall Plans You Can Make Today (With Pictures)
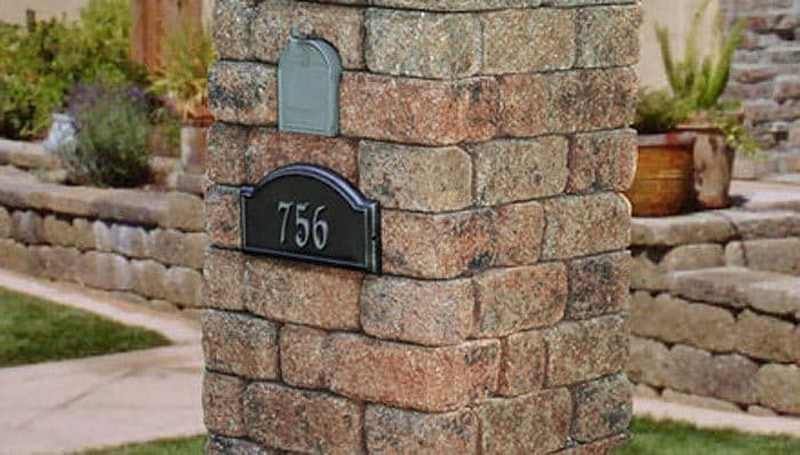
9. Patio Block Mailbox Column
| Materials Needed | (34) 16” blocks w/ pinholes, (38) 6” blocks w/ pinholes, 12 caps, a mailbox, and a bag of retaining wall pins |
| Tools Needed | Shovel, tamper, level, circular saw, and a masonry circular saw blade |
| Difficulty Level | Moderate |
If you want more than just a mailbox when building a brick mailbox, then this patio block mailbox column is a great choice. It’s a bit of a signature piece though, and it really only works if you have a similar style patio around to ascent it.
Still, while it can be a little more challenging to build since this plan comes from Lowes, they make it super easy to get everything you need and walk you through everything you need to do with their plans. It’s not the simplest design, but with a bit of patience, you should be able to build it!
10. Simple Brick Mailbox
| Materials Needed | Concrete, mortar, cinder blocks, bricks, and a capstone |
| Tools Needed | Shovel, trowel, joint tool, level, and a brush |
| Difficulty Level | Easy |
Just because you want a brick mailbox doesn’t mean you want a super complicated design. These plans from WikiHow are just that. It’s a simple brick mailbox design that we’re confident you can build yourself without any cutting or advanced tools.
It’s going to take a bit of labor though, and they don’t let you know just how many bricks you’ll need. That’s because they let you customize it to the height you want, but it would still be nice if they gave you a general idea so you knew how many to bring home to get started.
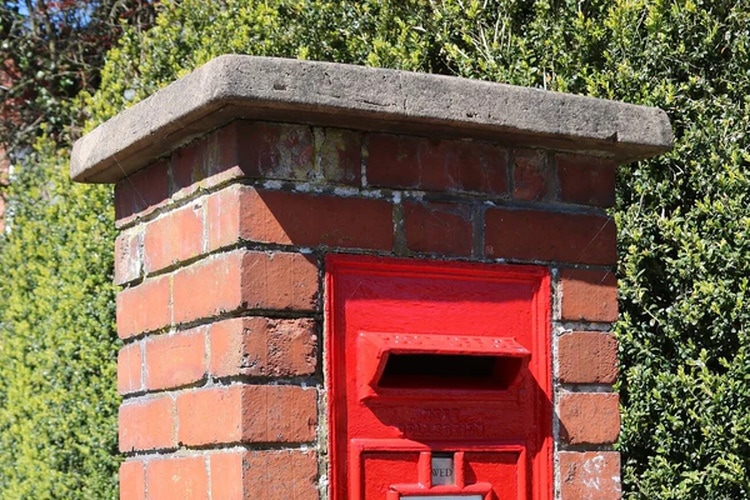
11. Vintage Brick Mailbox
| Materials Needed | Mailbox, bricks, mortar, metal anchors, concrete, concrete blocks, and pea gravel |
| Tools Needed | Gloves, level, shovel, jointer, wire brush, hard-bristle brush, measuring tape, trowel, and a rating square |
| Difficulty Level | Moderate |
There’s just something about the classic brick mailbox that you want to emulate. And with these plans on how to build one from Mailbox Empire, there’s no reason you can’t have one in your yard. It’s not the easiest option to build, but the plans do a great job of highlighting everything you need to do to build it.
Once you finish, you’re getting a vintage look with rugged dependability and stability, so it’s not something you’ll need to worry about again for quite some time.
Do I Need a Permit to Build a Mailbox?
The short answer is yes, you do. While your state or city might not require a permit for building a mailbox, it’s always better to be safe than sorry. Besides, most parts of the country do need you to apply for a permit. This involves filling out a form sharing your address, information on the hired contractors (if any), and a description of the project. Brick masonry mailboxes can’t be more than 24” x 24” or higher than 5 feet, for example.
The fee will be $50–100, and the government usually takes 7–10 days to process the application. Again, we highly encourage you to get in contact with the authorities and ask them to explain what the local requirements look like. Otherwise, you’ll end up having to pay a much bigger fee than for the permit, and they may even force you to demolish the mailbox.
Conclusion
A mailbox can be both functional and creative. It will be the first thing that people see when visiting you or just passing by. The better the mailbox looks, the better the first impression will be! Today, we checked out some of the most amazing and easy-to-build DIY brick mailboxes. They’re all trendy, reliable, and can boost your home’s curb appeal just like that.
Bricks are actually very easy to work with, especially if you’re building something simple like a mailbox. Just follow the detailed, thorough guides, make sure you have everything needed for the job, and enjoy the process!
Featured Image Credit: Mikey1SDF, Shutterstock
Contents
