7 DIY Christmas Tree Fence Plans You Can Make Today (with Pictures)
-
Pete Ortiz
- Last updated:

Like stockings and wreaths, the tree is a big symbol of Christmas. It smells like the woods and looks amazing with all the presents under it. The tree’s nails are quite pointy, though, and can be dangerous for your pet or toddler. And if a dog or a cat eats them, that will lead to even more trouble. So, how do you avoid that?
The answer is a Christmas tree fence! First, it will keep your loved ones/pets from harm’s way. And second, you can hang presents and garlands from it. Not sure you’re ready to buy one yet? No worries—we’ve got your back! The following list includes eight user-friendly, easy-to-make Christmas tree fence plans you can build now!
The 7 DIY Christmas Tree Fence Plans You Can Make Today
1. Popsicle Sticks Tree Fence
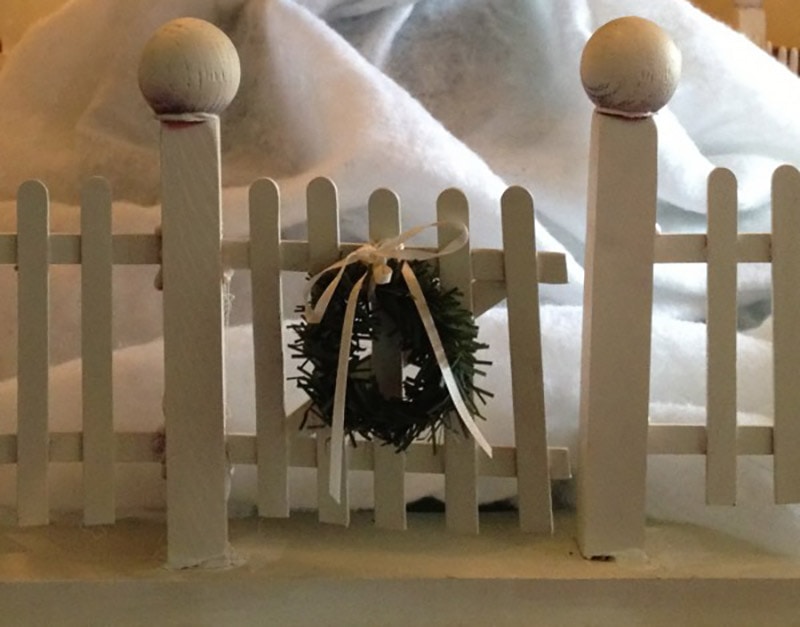
| Materials Needed: | MDF boards, popsicle sticks, wooden balls, wood glue, wreath (optional) |
| Tools Needed: | Dremel tool, glue gun, paint gun, measuring tape |
| Difficulty Level: | Easy/Moderate |
Scrap MDF wood, Popsicle sticks, and some cheap glue—that’s all you’ll need to get started on this project. As for the equipment, use a Dremel tool to cut the wood into smaller pieces and a glue gun to put it all together. Even if you have zero experience with DIY plans, this Popsicle sticks tree fence will only take 5–6 hours to complete. When working on the posts, do your best to make them match in size (6-inches tall).
Next, connect those Popsicle sticks using wood glue. To make the fence look “professional”, stick a wooden ball to each post. That’s pretty much it. Finishing up, paint the fence, and add a wreath to complete the picture. This fence won’t be very heavy or sturdy, but it will get the job done!
2. Pro-Grade DIY Fence

| Materials Needed: | Wood boards (1” by 2”), rails, a set of screws/nails, utility hitches |
| Tools Needed: | Saw, drill, hammer, measuring tape, pencil, safety glasses, sander (optional) |
| Difficulty Level: | Moderate |
For keeping your kid and the tree safe, this pro-grade DIY fence is just right. Before you get to the meat and potatoes, decide how tall you want the fence to be. There’s nothing hard about this part: as long as the fence is taller than your domestic animals and little boys/girls, you’re good to go. A pencil will help mark the spots for cutting. If you have a sander, use it to smooth out the sides and the edges. If not, just use the wood as it is.
Do make sure that the fence isn’t sharp or rough. And how do you connect the four sides of the picket fence? Utility hitches are the best option here. That way, you can pivot the fence and place it however you like.
3. Cute Christmas Tree Picket Fence
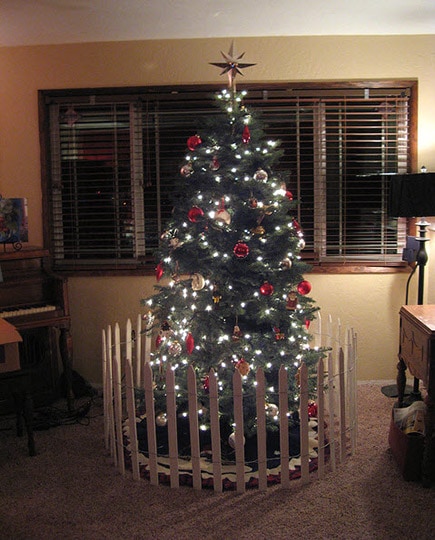
| Materials Needed: | Rolled picket fencing, wires, zip ties |
| Tools Needed: | Circular saw, measuring tape/ruler, wire cutters, drill (optional) |
| Difficulty Level: | Easy |
Not a big fan of drilling and sanding? Don’t worry! With this cute Christmas picket tree fence, you won’t have to do any of that. First, measure the diameter/circumference around the tree to know exactly how many pickets you’ll need. We recommend making the fence a bit bigger/wider so that your dog, cat, and toddler can’t reach the tree and hurt themselves. Cut the rolled fencing to the right size. If the wire is already there, just put the fence up, and you’re all done.
If not, you’ll have to make holes in each picket and put the wire through them. Or just wrap the wire around the pickets one by one. And don’t forget to use zip ties to hold it all together.
4. Universal Easy-To-Make Fence
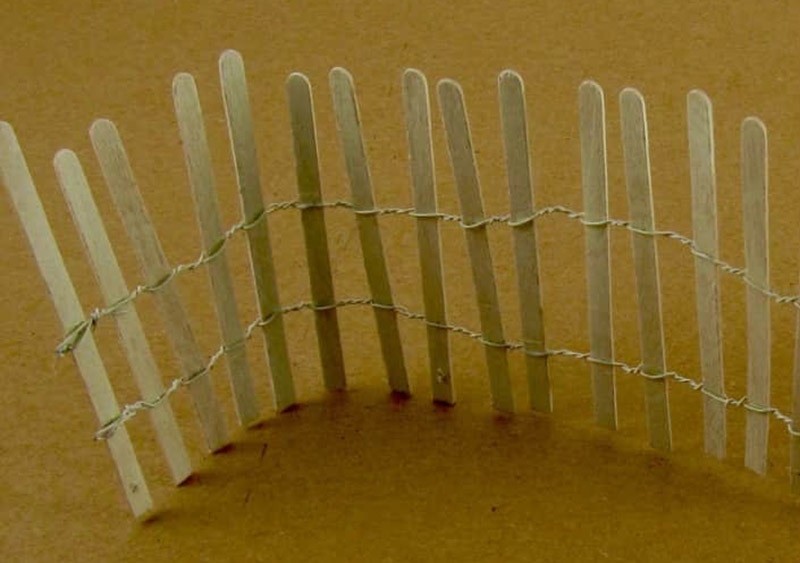
| Materials Needed: | Craft glue, craft sticks, wire, sandpaper |
| Tools Needed: | Wire cutters, spray paint, marker/pencil, measuring tape, ruler, saw (optional) |
| Difficulty Level: | Easy |
Mini fences can be very effective at keeping animals and babies away from the Christmas tree. Besides, you can use them as a garden fence or even as a decorative element by adjusting the size. To build this universal easy-to-make fence, grab your favorite wire cutters and, well, cut two pieces of wire. First, figure out the correct length of the fence and only then cut the wires.
And remember: the wires need to be three times longer than the fence. Now just twist them around the craft sticks to build that fence. If they’re too long, mark the spot with a pencil and cut them with a saw. Depending on how thick the sticks are, the wire cutters might be enough. Once that’s out of the way, add some glue to the wires and paint/stain the sticks.
5. Two-In-One Fence/Stocking Holder
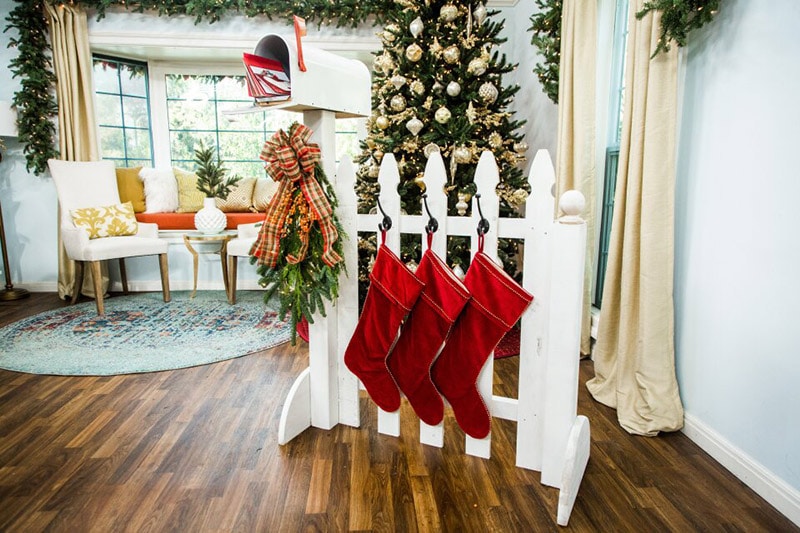
| Materials Needed: | Plywood, fencing, posts (4×4), screws (3-inch), hooks, mailbox (optional) |
| Tools Needed: | Jigsaw/circular saw, drill, measuring tape, work gloves |
| Difficulty Level: | Moderate/High |
Ready to step up your game? This two-in-one fence/stocking holder will be a great plan for you. Essentially, it’s a five-picket fence with a set of posts on each side. As a bonus, there are three hooks for the socks/stockings. So, once you get the hang of it, you can build a couple of these holders and put them around the tree to serve as a fence. To add to the whole Christmas vibe, stick a mailbox to one of the posts.
This project does involve a lot of cutting with a jigsaw and measuring with tape. So, put your gloves on and make sure you have the whole weekend available, as it will take time.
6. Full-Fledged Baby-Proof Gate

| Materials Needed: | Wooden stakes (96), boards, wood glue, hinges, a set of screws, paint |
| Tools Needed: | Drill, tape, marker, paintbrush, protective gloves, frame square |
| Difficulty Level: | Easy/Moderate |
There’s nothing more important than keeping your little one(s) safe. So, why not build a full-fledged baby-proof gate for the Christmas tree? It will be durable yet lightweight and easy to carry around. More importantly, since the fence can (and should) be much larger than the tree, your kid or pet won’t be anywhere near the needles. But do you glue or screw the stakes to the supporting boards? It’s totally up to you.
Screws will be more secure, though. In any case, you will have to use a drill and screws for the hinges to connect the four fence sections. When Christmas is over, unscrew the hinges and store the fence away!
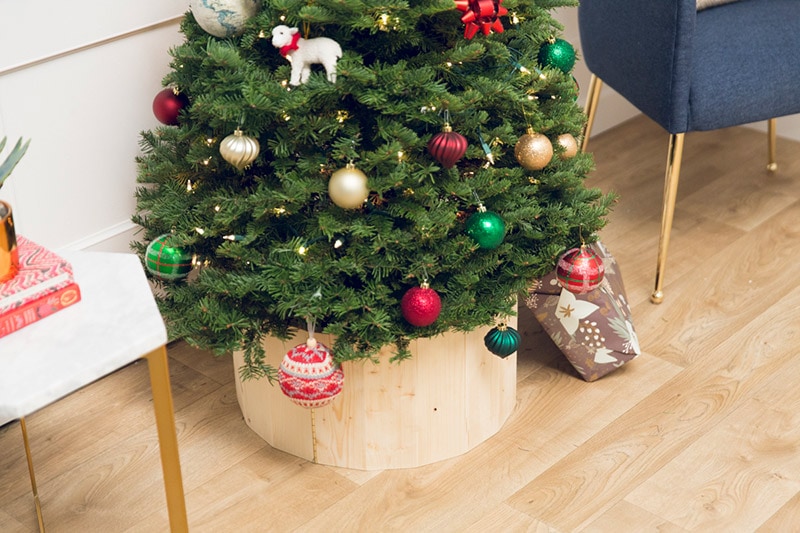
7. DIY Christmas Tree Collar
| Materials Needed: | Whitewood, screws, hinges, hooks, paint/spray finish |
| Tools Needed: | Circular saw, hacksaw, Kreg jig, clamps, drill + bits, tape measure, sander |
| Difficulty Level: | Easy/Moderate |
And what about a DIY Christmas tree collar? Much like a fence, it will keep a safe distance between the tree and a curious animal or baby. As long as it’s wider and larger than the actual tree, the collar will be even more effective than a regular fence. But don’t take our word for it! Get your tools and materials ready (wood, some screws, hinges, a saw, clamps, and a drill), build the collar, and see for yourself!
With this project, one can use an extra pair of hands. So, if you have a friend that’s willing to help, that will make the job a lot easier.
 What Else Can You Do?
Alright, we just learned how to protect your child and pet from a Christmas tree by using a fence, raised box, or a collar. But what if you don’t have any materials or tools around to build any of this? Are there any alternatives? Yes, check them out:
- Well, you can always put empty boxes in front of the tree, like from Christmas presents. This is the cheapest and quickest way of creating a “line of defense”.
- Or try hanging the tree upside-down. While this will take time and effort, it’s not that hard to pull off. If you buy a tree with an aluminum stand, just go ahead and secure it to the ceiling with a set of screws. And if you only have a tree, make a hole in the trunk, put a piece of wire through it, and fix that wire to the ceiling. Upside-down trees are a bit extreme, but will most definitely, work.
- What about an artificial tree? We know it doesn’t feel (or smell) quite like the real thing, but this way, you won’t necessarily have to build any fences or platforms. Fake trees aren’t spiky and don’t “bite”. However, if your dog/cat eats it, the plastic will make the poor animal vomit or something worse.
- If nothing else works, try spraying the tree with chili, vinegar, or a cleaning product. Or, put something sticky/slippery in front of the tree that makes the dog/cat uncomfortable. This isn’t an ideal solution but might keep pets away for a while.
Why Block the Tree in the First Place?
Like all conifers, Christmas trees have needles. They’re very sharp and can hurt a human or an animal (by getting in the ears or even the eyes). Also, if a dog or a cat swallows these needles, you’ll have to immediately drive to a veterinarian for help. Next, oil fir trees are known to upset dog stomachs. The garlands, toys, and lights will cause even more harm. It’s not that rare for dogs to chew on the power cord of the Christmas lights, which can lead to catastrophic consequences.
The same is true for a kid, except for the swallowing and chewing part (unless it’s a toddler, of course). So, yes, a Christmas tree fence is, above all, a means of protection and only then a decorative element.
Conclusion
A Christmas tree fence doesn’t have to be fancy or expensive. All you’ll need to build one is sleight of hands, some basic tools/materials, and a couple of hours of free time. Today, we checked out the best DIY plans that you can use to “shield” the tree, along with a stocking holder, raised platform, and Christmas tree collar. Don’t rush yourself. Some of these projects might be a bit tricky to handle from the first try.
But, if you follow our instructions closely and put some effort into it, we’re confident that you’ll master every single plan from the list!
Featured Image Credit: jill wellington, Pexels
Contents


 What Else Can You Do?