

Mirrors are the perfect decorative accent. Not only do they make spaces feel larger, but they can add drama and double as an art piece. The thing is that stores that sell home decor know the power of a good mirror and charge a small fortune. If you’re working with a tight budget, you might have resigned yourself to a mirror-less existence, but we’re here to tell you it doesn’t have to be that way.
With some creativity and patience, you can DIY your own mirror frame to rival any of the expensive ones in the store. All you’ll need to start is a mirror, which you can find at the dollar store or by thrifting. Keep reading to find 20 of the best DIY mirror frames for any skill level.

The 20 DIY Mirror Frames
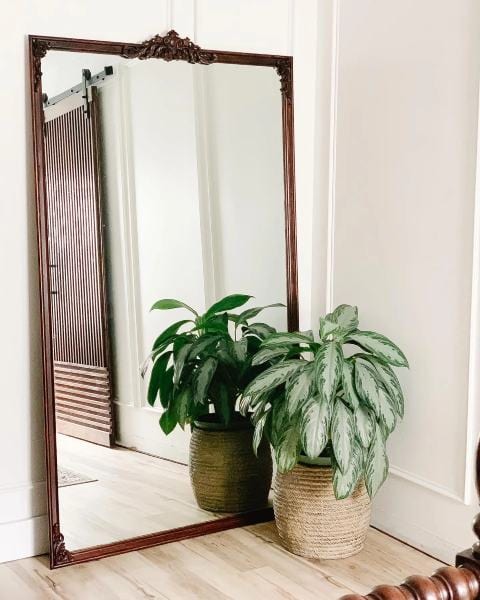
1. Anthropologie Dupe
| Materials: | Picture frame molding, wood glue, staples, corner clamps, Liquid Nails, metal mirror clips, plastic wood fill, wood stain, appliques |
| Tools: | Miter saw, sanding sponge, multi-tool detail sander, measuring tape |
| Difficulty Level: | Advanced |
Anthropologie’s gorgeous Primrose Mirror is a stunning vintage piece that adds style to any room. Sadly, this beautiful mirror costs a small fortune (up to $1,600), so it’s not in many people’s budget. Thankfully, blogger Lauren Jamison took it upon herself to put together this convincing dupe that you can put together in one weekend.
To make this beauty, you need to be comfortable with power tools and wood, but the extra effort is worth it. Lauren used picture frame molding to create the main portion of the frame. Once you have the frame skeleton, you’ll attach your mirror using Liquid Nails and metal mirror clips. Wood filler comes in handy to fill in any gaps in your frame, while your sanding sponge and detail sander can smooth any rough spots away.
Finally, pick a wood stain color matching your room’s décor and attach appliques with wood glue and Liquid Nails to finish your project.
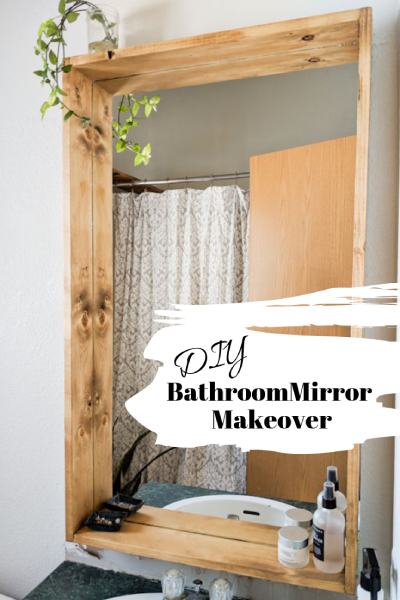
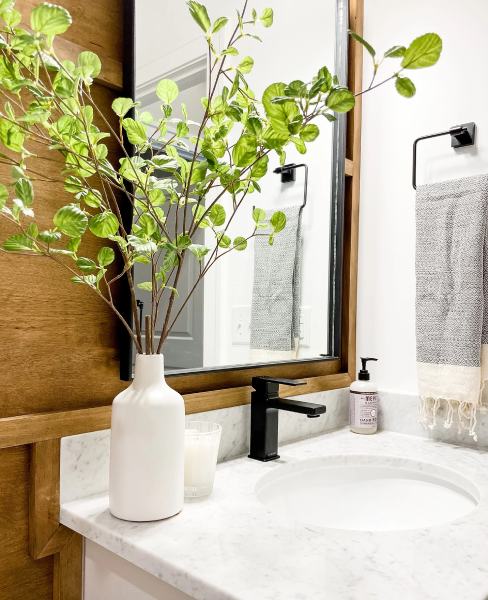
2. Wooden Bathroom Mirror With Shelf by My Simple Happy Living
| Materials: | E6000 glue, pine lumber, L-brackets, stain, nails, screws |
| Tools: | Miter saw, sandpaper, measuring tape, paintbrush |
| Difficulty Level: | Medium |
Though this project is listed as a bathroom mirror, this wood-framed piece can go in any room of your home. We think it would also be a nice eye-catching piece for a bedroom wall.
Once you know the dimensions of your mirror, cut your 1×4 boards. The original creator recommends adding 1/8 of an inch to each measurement to prevent the mirror’s edge from showing on the edge of your frame. She assembled her frame before staining using screws but mentions that nails or glue are just fine if you prefer to use those. Apply E6000 glue adhesive liberally to the back of your frame and stick it to the mirror. You may want a rag handy to tidy up any oozing glue before it can dry.
Attach your L brackets to the top of the mirror and the wall. Then, hang and style the built-in shelves your frame creates!
3. Boho Mirror
| Materials: | Twine, glue sticks, cardboard box, marker, measuring tape |
| Tools: | Knife, glue gun |
| Difficulty Level: | Easy |
“Boho” home decor is all the rage, so this DIY mirror project will surely be an eye-catching centerpiece no matter what room you hang it in. The creator of this project spent less than $10, so this is the perfect DIY if you’re on a budget. Most of the supplies you probably already have at home or can find at your local dollar store.
Take your mirror’s measurements and trace the frame size on your cardboard box. Next, cut out your frame and start wrapping your twine on each cut-out. Use hot glue to secure the string to the cardboard. Once you’re done wrapping each piece in twine, mount your mirror. When your mirror is on the wall, attach your twine-wrapped cut-outs to the mirror using hot glue.
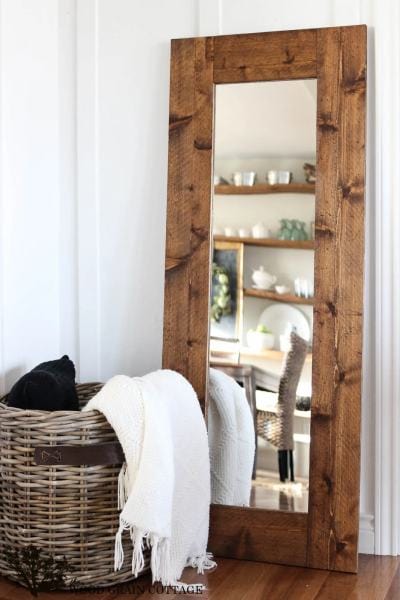
4. Wood Framed Standing Mirror by The Wood Grain Cottage
| Materials: | Picket fence board, flooring underlayment, clamps, wood glue, nails, silicone, stain, wax |
| Tools: | Chop saw, table saw, hammer, nail setter, brad nailer |
| Difficulty Level: | xxx |
Standing mirrors are practical and add style to your space. Not only can you check yourself out from head to toe, but the full-length mirror will make your room seem bigger than it is. Add a beautiful handmade wood frame to your mirror, and you’ll have yourself an aesthetic and functional piece of home décor.
This wood-framed mirror project will take some time and skill to put together. The creator used fence pickets instead of plywood to add more character. They also roughed up the pickets more, using their handsaw to make random cuts throughout the wood, adding a rustic touch.
Once your boards look how you’d like them to, cut out a piece of underlayment for the back of your mirror. Next, cut your fence pickets to length. Glue the picket to the underlayment and clamp it in place. Use a nail gun for further reinforcement. Once the frame is in place, stain the boards with your preferred color. You can also stain them before attaching them to the underlayment if that works better for you.
Add silicone to the underlayment where the mirror will go and place the mirror on top.
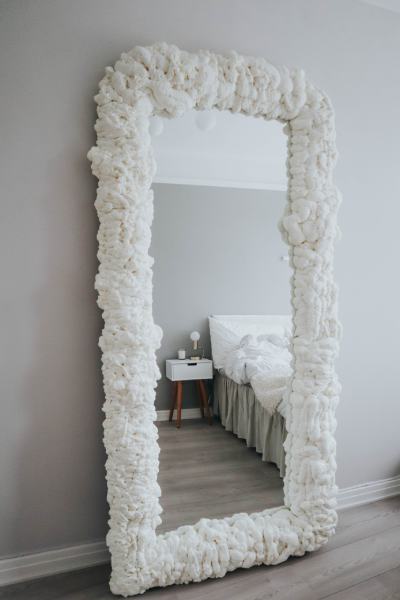
5. Cloud Mirror
| Materials: | Expanding foam, paint (optional) |
| Tools: | Knife |
| Difficulty Level: | Easy |
This cloud mirror is a stunning DIY project that’ll make your room dreamy and trendy. You must tackle this project outside, as the expanding foam is poison. You should also wear a mask and gloves at all times.
This project has only one step – spray your mirror with foam. Sounds easy enough, but there is a skill involved with spraying the foam just right. We recommend spraying the foam in a zig-zag pattern. You can apply two layers of foam to each side of the mirror without waiting for it to dry first. Once you’ve completed each side of the mirror, let it dry for at least 24 hours. You may need to let it harden longer if necessary. You can add more foam if you don’t like how it looks or if there are gaps that need filling.
You can leave the cloud the color it is or paint it to match your room’s aesthetic.
6. Thin Frame by Hughes Home DIY
| Materials: | PVC corner pieces, construction adhesive, CA glue, CA activator, sandpaper, tack cloth, spray paint |
| Tools: | Miter saw |
| Difficulty Level: | Easy |
If you’re looking for a more minimalist look, this thin frame project should fit the bill. The creator was hoping to get more of a metal frame look than wood, so they used PVC corner trim pieces.
Measure your PVC pieces for the length of your mirror. Cut the pieces and then dry fit each component on your mirror to ensure it fits how you’d like it to. Next, put your frame together using construction adhesive, CA glue, and CA activator. Once all four pieces of the frame are attached, allow it to dry overnight. If dried glue pieces are on the frame in the morning, use 220 grit sandpaper for sanding them away.
Paint your frame using a spray paint color of your choosing. You should apply several coats. Again, let it dry overnight. Once dry, use your construction adhesive, CA glue, and activator on the outside of your frame before securing the mirror. Again, let it dry overnight before hanging.
7. IKEA LÖNSÅS Mirror Hack
| Materials: | Cardboard, paper, Velcro, twine, thick rope |
| Tools: | Scissors, knife, printer, ruler, glue gun |
| Difficulty Level: | Moderate |
Everyone loves a good IKEA hack, and this project with their LÖNSÅS mirror is no exception. This boho-style frame is relatively easy to put together, though it will be time-consuming. The original creator provides mirror templates for different project styles. You can access it via Google Drive to make the project easier.
The first few steps involve quite a bit of precise tracing and cutting. Once you have everything you need traced and cut, you’ll glue your mirror to the cardboard. Next, you can begin wrapping your twine around the inside of your mirror frame. Go around two or three times and repeat the same process around the edge of your cardboard. Finally, cut small pieces of twine to fit perfectly between these two boards and glue them on. If you like the two-tone look of the creator’s project, paint a portion of the twine black.
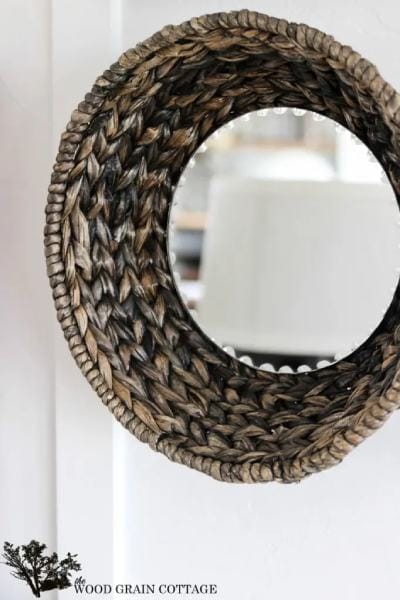
8. Wicker Basket Mirror by Infarrantly Creative
| Materials: | Wicker basket, glue sticks |
| Tools: | Glue gun |
| Difficulty Level: | Easy |
This wicker basket mirror is a super simple DIY that requires a wicker basket. You can find these at about any craft or thrift store. The hard part is to find a mirror that fits inside the bottom of the basket. Once you’ve found one that suits your needs, use hot glue on the back of the mirror and attach it to the inside of the basket. Hang this project with a nail, and that’s it!
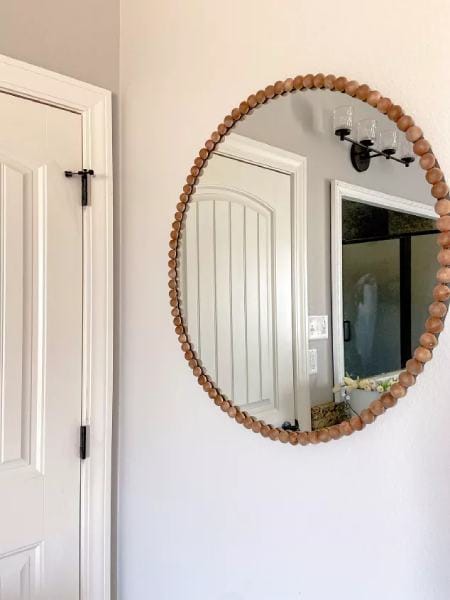
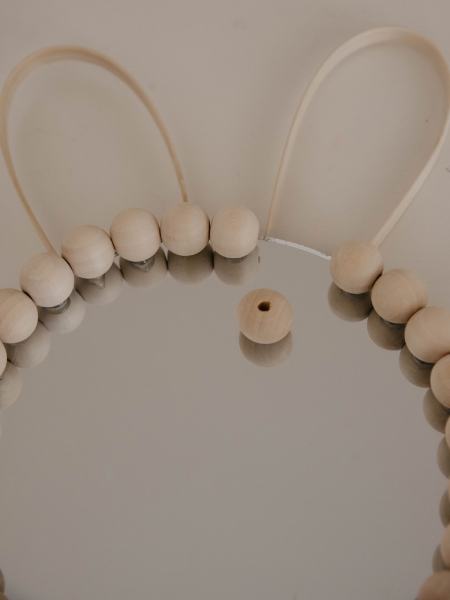
9. Wood Beaded Mirror
| Materials: | E6000 glue, wood beads, oil finish |
| Tools: | None |
| Difficulty Level: | Easy |
This wood bead mirror is a simple project that comes together quickly. First, stain your wood bead halves with Danish oil finish for a rich glow. This finish will also seal and resist stains and prevent peeling and chipping. Let your beads try overnight, and then use E6000 to glue them to the mirror frame (or right to the mirror if yours doesn’t have a frame). Let them sit overnight to dry completely and hang.
10. Floral Framed Mirror
| Materials: | Fake flowers, glue sticks |
| Tools: | Glue gun, scissors |
| Difficulty Level: | Easy |
This customizable floral mirror frame is an easy way to beautify any room in your home. Source your dried flowers from thrift shops or dollar stores to keep the price low. All you need to do is cut the flower heads from the stems and affix them to the mirror frame using hot glue. You can add some of the leaves from the stems for a pop of green.
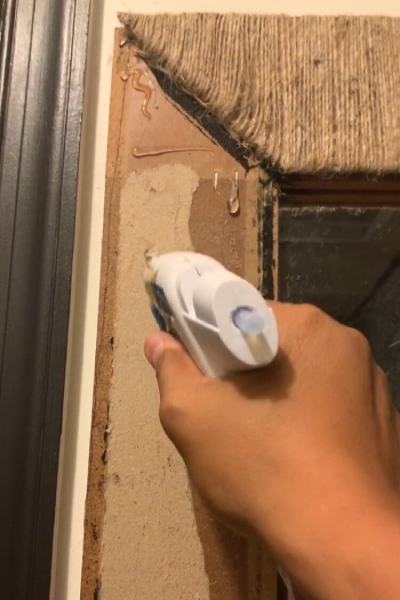
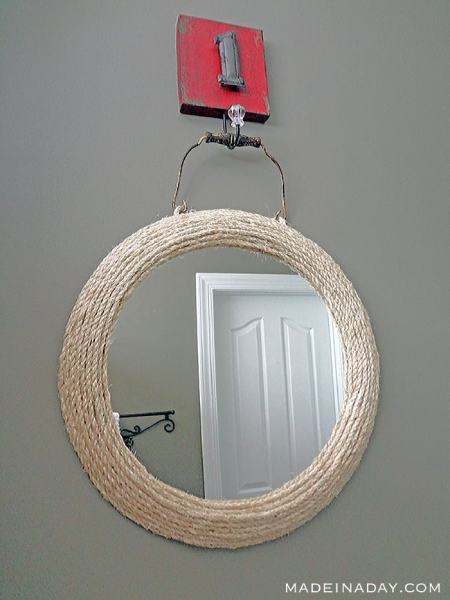
11. Jute Rope Mirror
| Materials: | Metal bucket handle, sisal jute rope, glue sticks |
| Tools: | Glue gun, scissors |
| Difficulty Level: | Easy |
Jute is a strong and natural fiber with many functional and decorative applications. It’s perfect for nautical- or boho-themed spaces and is easy to find at any craft or dollar store. This jute rope mirror frame is a simple and stylish project you can put together in under an hour.
Trim the end of your rope in a slant and hot glue it to the inner part of the circle frame. Start wrapping the string around the inner circle of your mirror, adding dabs of hot glue every few centimeters. Once the inner circle is complete, put glue on the frame itself and begin wrapping your rope around the frame. Press the two ropes together as you wrap to prevent any gaps. Keep gluing your rope onto the frame until you’ve reached the end. Cut the rope’s end in a slant and tuck it under the cord above it.
Make two loops out of rope and hot glue them to the back of your mirror to act as “hooks” for the bucket handle. Add the handle, and voila!
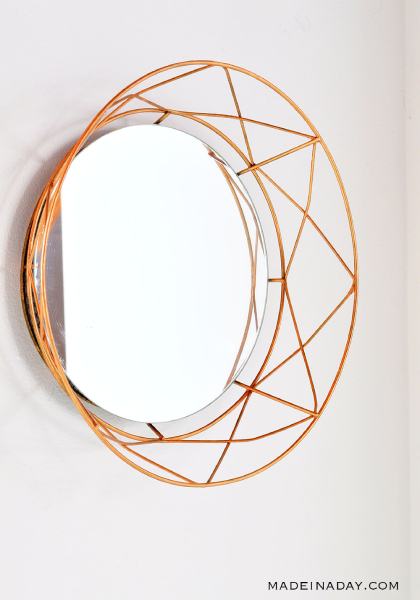
12. Geometric Mirror by Made in a Day
| Materials: | Decorative basket, foam circle, floral wire, copper paint, glue sticks |
| Tools: | Glue gun, paintbrush |
| Difficulty Level: | Easy |
Geometric mirrors are ‘in’ and trending, but buying one from the store is expensive. So instead, you can DIY your own with items at your local thrift shop. The most challenging part of this project is finding a basket that suits your vision and a mirror that fits inside. But once you have it, paint it with copper acrylic paint to freshen it up. You can also spray paint the basket if you prefer.
Once the paint is dry, affix the mirror to the basket with hot glue. If you cannot find a mirror that fits perfectly, you can improvise by making it 3D like the creator of this project. Insert a wooden skewer through a foam circle. Remove the skewer and thread plant wire through the hole it made. Feed the wire through the netting on your basket base and twist it until it feels secure. You should also add some hot glue to the foam for additional support. Finally, glue your mirror to the foam.
13. Beaded Bamboo Sunburst Mirror by Blue Augustine
| Materials: | Bamboo sticks, wood beads, E6000, glue sticks, raffia ribbon |
| Tools: | Glue gun |
| Difficulty Level: | Easy |
Sunburst mirrors have been a popular decorative accent for several years, and this simple beaded bamboo sunburst mirror project is an easy and beautiful way to harness the trend.
First, soak your bamboo sticks in water for several hours. Doing so will make them pliable and give you that sunburst look you’re searching for. When you remove the sticks from the water, you’ll need to move fast, so ensure you have all your supplies handy. Work with one stick at a time to ensure they remain flexible when you need them.
Gently bend a stick until both ends touch. Using the raffia ribbon, glue one end to each end of your stick. Wrap the ribbon a few times and cut it from the spool. Glue the other end in place and repeat for each piece. Use your hot glue gun to affix each piece of wood to the back of your mirror.
Glue the wooden balls to the outside of the mirror using E6000. Once they are all attached, flip the mirror so the beads are on the bottom, and place a few books on top until the glue dries.
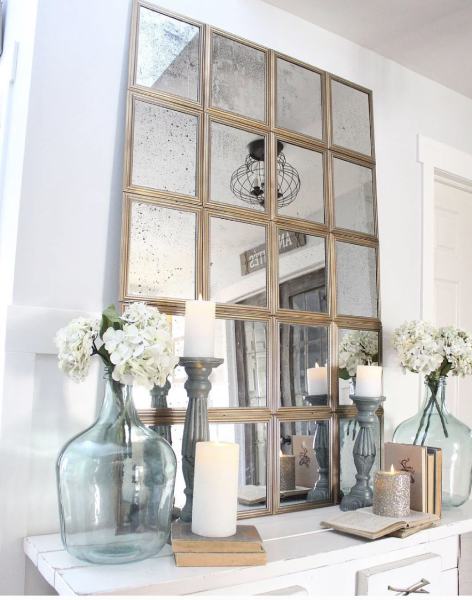
14. Window Pane Mirror Frame by Blooming DIY-er
| Materials: | Plywood, spray paint, paint stripper, oven cleaner, saran wrap, glue sticks |
| Tools: | Glue gun, scraping tool, miter saw |
| Difficulty Level: | Easy |
You can get most of the supplies for this window pane mirror frame from your local dollar store (with a few exceptions that you’ll need to get from the hardware store).
Take your dollar store mirrors and spray paint the frames in your chosen color. If you want a vintage look to your mirrors, age them using oven cleaner and a wet rag. Next, lay down your plywood and start arranging your mirrors in whatever way you prefer. Once you have a configuration you like, use hot glue to glue your mirrors onto the wood.
15. Wooden Dowel Mirror Frame by Double Arrow Designs
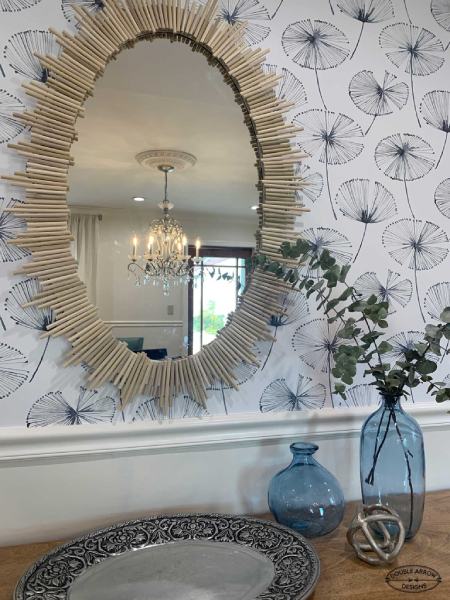
| Materials: | Wood dowels, glue sticks, hanging wire |
| Tools: | Pruning shears, sanding block, ruler, pencil, glue gun |
| Difficulty Level: | Easy |
This wooden dowel mirror frame is an easy project that can transform the look and feel of your room. It has a trendy boho vibe, but its natural and neutral color scheme can enhance any room.
To create the starburst effect, cut wooden dowels into whatever size you prefer. The original creator used several different sizes, from three to five inches. Use a sanding block to smooth the cut ends. Once your dowels are cut, place them on your mirror until you find your preferred configuration. Use hot glue to affix each dowel to the mirror frame.
16. Feathered Mirror
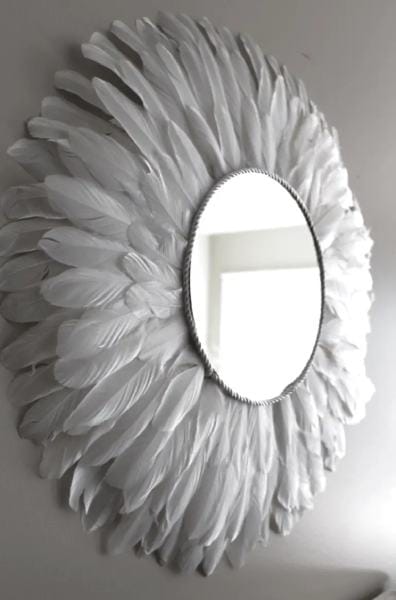
| Materials: | Goose feathers, serving tray or pizza pan, glue sticks, spray paint, decorative trim |
| Tools: | Glue gun, scissors |
| Difficulty Level: | Easy |
Feathers give this DIY mirror a fun and whimsical style, and the best part is that it’s easy to replicate. The most challenging part of this project is finding the perfect feathers to use. The original creator has a lot of tips on how to choose the right feathers, though, so be sure to read their tutorial thoroughly.
First, using cardboard or a display board, draw a circle the size you’d like your finished mirror to be. Next, use white spray paint to paint a pizza pan. Make a hole in the center of the pan when it’s dry, and center it onto the circle you drew on the cardboard. Tape it down. Now you can begin placing your feathers. Glue your feathers to the pizza pan, paying close attention to where the end of the feathers is. You’ll want to keep the feather ends aligned to ensure your mirror is a perfect circle. Ignore the quill end as the feathers are likely different lengths.
Add two more layers of feathers. Next, use E6000 to glue a pill cap to the middle of the back of your pizza pan. Once dry, flip the pan over and affix the mirror to the pan with E6000. Let it dry. If you’d like, glue a strip of decorative edging to the front of the mirror.
17. Vintage Macrame Mirror
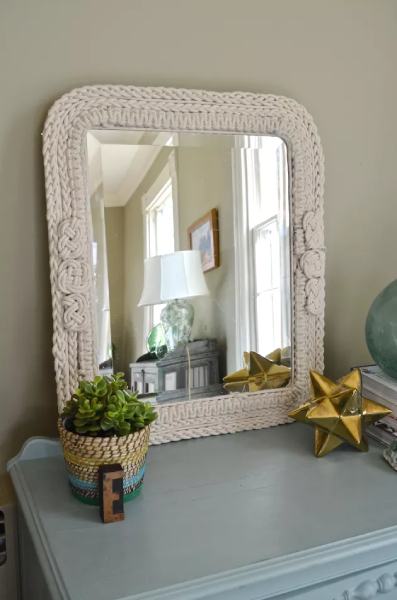
| Materials: | Cotton rope, tape, plywood, spray paint, Liquid Nails, glue sticks, nails |
| Tools: | Hot glue gun, jammer, jigsaw, hanging hardware |
| Difficulty Level: | Moderate |
If you love the look of macrame, this DIY rope mirror is right up your alley. Though you don’t need to use any power tools for this project, it is moderately difficult and time-consuming due to the complexity of the macrame braids.
Once your ropes are braided, you’ll glue your mirror to a piece of plywood using Liquid Nails. The plywood needs to be bigger than the mirror, so you have something to attach your rope to. Glue your macrame pieces to the frame beginning with the ropes closest to the mirror and working your way out. Once everything is glued on, trim any exposed plywood corners or add more string to cover.
18. Double Framed Mirror
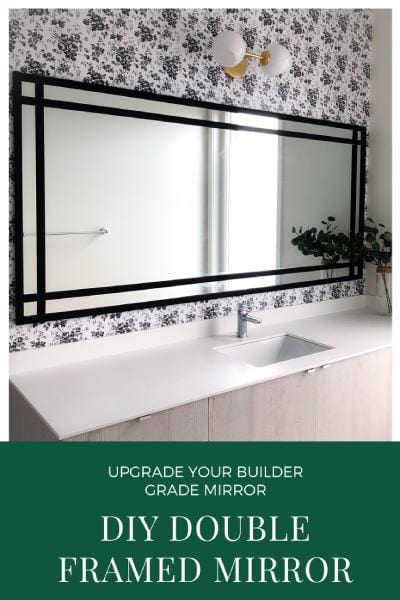
| Materials: | Thin trim, Liquid Nails, paint |
| Tools: | Miter saw, level, measuring tape |
| Difficulty Level: | Moderate |
Enhance the look of your mirror by adding a double frame to it. This project requires some skill with power tools, but the result is a beautiful and modern piece of décor.
You’ll start by creating a frame for the outside of your mirror using trim and Liquid Nails. To make the inside frame, cut two trim pieces to the same length as the top and bottom of your mirror frame. Glue them to the mirror. Measure how far apart the top and bottom frame is to cut the vertical pieces to fit. Add a square to each corner by measuring the distance between the two vertical pieces and cutting a piece to size.
19. Live Edge Mirror
| Materials: | Live edge wood, sanding sponge, Odie’s Oil, terry cloth, clear silicone, D-ring hooks, screws, picture wire, wall hook |
| Tools: | Tape measure, miter saw, table saw, band saw, plainer, sander, screwdriver |
| Difficulty Level: | Very advanced |
Live edge décor truly makes a statement in any home, and this stunning live edge mirror is no exception. The original creator of this project has a lot of power tools at his disposal, so you may need to get creative if you don’t have access to these machines.
Once you’ve acquired your wood, cut it to the size you need. You can use a jointer to get a nice smooth edge on the back of your wood. Next, use a bandsaw to cut your wood to your desired width. Next, use a planer to get your boards nice and flat. If you don’t have a planer, you can use a sander. A circular saw blade called a dado will cut the grooves into the wood pieces for your mirror to fit. A block plane and sanding sponge can clean up any rough lines and edges that the dado blade left. Finally, sand your wood to make it completely smooth.
Odie’s Oil is perfect for finishing the wood and is easy to use. Just wipe on and wipe off. Use clear silicone to attach your mirror to your wood pieces. Fit your mirror between your two wood pieces and clamp the two together for 24 hours. Add supports to the back of the mirror and hang it using picture wiring and D-ring hooks.
20. Bamboo Mirror
| Materials: | Bamboo, cardboard, hot glue sticks, twine |
| Tools: | Scissors, hot glue gun |
| Difficulty Level: | xxx |
This Bali-inspired bamboo mirror is an easy and fast project you can put together in under an hour. The original creator bought all her supplies from the dollar store, making this a budget-friendly DIY.
Cut a piece of cardboard the same shape as your mirror but larger. Glue your mirror to the middle of the cardboard. Next, take your bamboo sticks and glue them onto the cardboard. Start with the vertical pieces first. Glue the horizontal portions of bamboo by placing hot glue where they’ll intersect the vertical ones.
Cut a piece of twine for the hanger. Twist them twice in your hand for a braided look, and hot glue it to the back of your cardboard.
Conclusion
Mirrors can completely transform the look and feel of your home, but they don’t need to cost an arm and a leg. We hope you’ve found some inspiration from our round-up of the best DIY mirror frames, and now that the creative juices are flowing, you can start making your space more aesthetic. Keep your eyes peeled for mirrors at your local thrift shops or dollar store to save even more money on your project.
Featured Image Credit: Spacejoy, Unsplash
Contents
