

There are many different methods of welding, and they all have their time and place. But TIG welding is one of the most popular and versatile types of welding you can perform. If you can only learn one style of welding, TIG welding is one of your best choices.
But what exactly is TIG welding? And how does a TIG welder work? It can seem daunting at first, but after reading this article, you will know exactly how a TIG welder operates and how to use one.

What Is TIG Welding?
TIG stands for tungsten inert gas. It involves the use of gas, most often argon, to protect the weld puddle from contaminants in the air. It can be used on more metals than any other type of welding, including steel, chromoly, magnesium, copper, gold, bronze, brass, stainless steel, aluminum, and more. TIG welding is used across many industries, including building and repair, art, automotive work, aerospace engineering, and many others.
Benefits of TIG Welding
There are many reasons why you might opt for TIG welding instead of other welding methods. For example, it creates some of the cleanest welds you’ll find. TIG welds are also very strong and can be used to weld very thin metals that are not possible with other types of welding.
Additionally, there are no sparks or splatter when TIG welding, so long as the metal you’re welding is sufficiently clean. Similarly, there’s no slag created, so you’ll have a clear view of your puddle at all times. There’s also no need for flux since TIG welding utilizes gas to protect the weld puddle against contamination.
When TIG welding, you only need to keep one type of gas on hand to be able to weld various types of metals in different thicknesses. Plus, you can TIG weld in any position: vertically, flat, or even overhead.
How Does a TIG Welder Work?
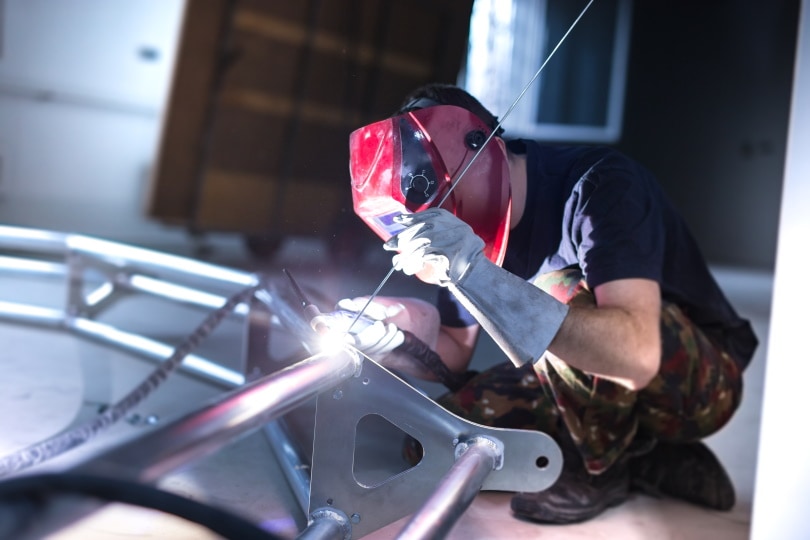
In TIG welding, a non-consumable tungsten electrode creates an arc between the metal pieces to be welded together. This arc is incredibly hot — over 6,000 degrees Fahrenheit. This causes the two pieces to essentially melt together. Meanwhile, an inert gas, usually argon, is being expelled by the torch to protect the weld zone against contamination.
When TIG welding, a filler metal can be used, but it’s not necessary. You can weld two pieces together without filler metal. But if you use filler metal, it will melt in the arc and solidify, joining the two pieces.
The tungsten electrode is housed within the torch, and you’ll be touching the tip to the metals you’re welding. You’ll operate the machine with a foot pedal, and when you press the foot pedal, the gas will begin to expel, and the electrical current will run so you can create an arc. Releasing the foot pedal will halt the process.
You’ll be creating TIG welds by layering small individual welds directly beside each other. Each weld will be created by a single touch of the torch to the metal. If you’re using a filler, you’ll be touching the filler rod to the same place the electrode makes contact. But if you opt to weld with no filler, you’ll simply touch the electrode to the seam between your metal pieces and a small weld bead will be created.
How to TIG Weld
Now that we understand the basics of TIG welding, it’s time to get started.
Step 1:
First, you’ll need to gather everything you need and get it all set up. Decide if you’ll be using a filler material or not. If so, make sure it’s on hand and clean. You’ll also need to thoroughly clean the metals you plan on joining. If they’re not completely clean, the weld might not bond well.
Step 2:
Now that your materials are ready, it’s time to prep the welder. You’ll need to figure out the settings you’ll be using, which will vary based on the types of metals you’re welding, their thickness, the size of your electrode, and more. While you’re in this step, you’ll need to prepare your tungsten electrode. To do this, sharpen it with a grinder or sander, which will also provide a precise point for accurate welding.
Step 3:
Plug in your torch and ensure that your foot pedal is in a place where you can comfortably reach it while working. Turn on the machine and get ready to weld.
Step 4:
Secure your work materials. You can use clamps to do this on a standard table, but a welding table will make it even easier.
Step 5:
Once your materials are secure, create a few small tack welds to hold the pieces together. To do this, hold the torch about ⅛-inch from the metal at a comfortable angle. Press the foot pedal and gently touch the torch to the seam between your metal pieces. If you’re going to use a filler rod, touch the tip of the filler rod to the same point. The arc will take just a fraction of a second. Once it’s finished, remove the tip from the metal and make your next tack weld.
Step 6:
Now that your pieces have been held together by tack welds, it’s time to start creating your bead. You’ll follow the same process you did to create the tack welds. However, this time, you’ll be creating each weld bead adjacent to the one before it so that they’re partially layered on top of each other. As you continue to make small beads beside each other at each point, your weld will start to take shape.

Conclusion
Once you know how to TIG weld, you can repair or build just about anything that uses metal. Bicycle frames, automotive panels, exhaust, metal sculptures, and more can all be built, improved, or repaired with the use of a TIG welder. But remember, TIG welding is an art form on its own. Don’t expect to be a master the first time you hook up the machine. It is a process, and you’ll continue learning and improving each time you take on a new welding project.
Featured Image Credit: Piqsels
Contents
