

Trees are a great addition to any property because they offer shade. Unfortunately, trees also die, and you will need to cut them down, often leaving an exposed stump that can be unsightly. Removing the stump can be expensive, so many people look for other options. One of the best ways to transform an old stump is to turn it into a fairy house, so keep reading as we provide you with several plans that show you how to do just that.


The Top 10 DIY Tree Stump Fairy House Plans
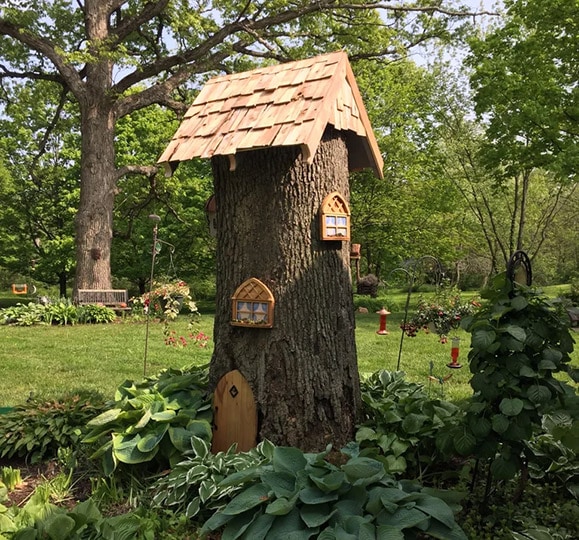
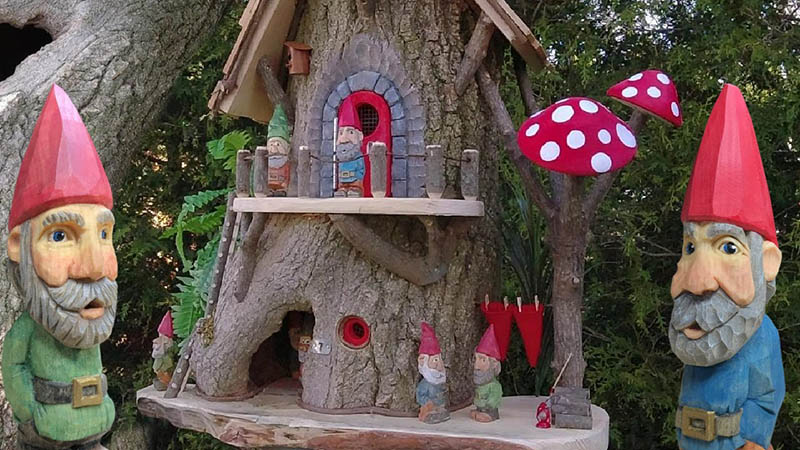
1. Gnome Tree Home by Instructables
| Materials: | Plywood wood, shingles, screws, nails |
| Tools: | Screwdriver, saw, hammer |
| Difficulty: | Moderate |
The gnome tree home is a fantastic project that’s good for beginners and intermediate builders. The finished product looks amazing partly due to the intricate roof that looks complex but is only carpenter shims and felt paper. The easy-to-follow plan also shows you how to make windows and doors, and the higher your skill level, the more intricate you can make these parts for the house.
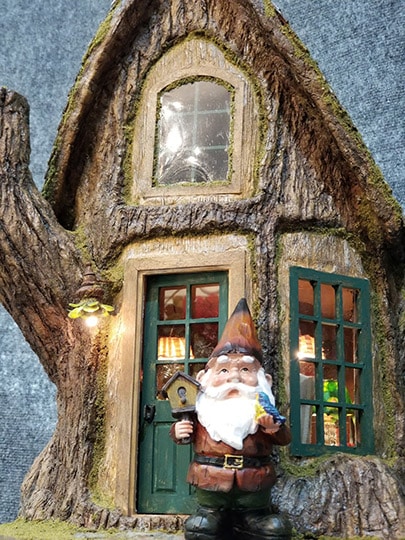
2. Gnome Tree Stump House by Gregg’s Miniature Imaginations
| Materials: | Papier-mâché, leaves, doll toys |
| Tools: | Paintbrush, glue gun |
| Difficulty: | Easy |
The gnome tree stump house is different than the other plans on this list because it’s not a plan for recycling an old tree stump. Instead, this plan involves creating a fake tree stump out of papier-mâché. We included it here because it’s packed with information on how you can decorate a fairy house. There are several great ideas for using old doll furniture and even handcrafted models to create the interior of the home. This plan works especially well if your tree trunk has a large hole in it or if you have the tools to make one.
3. Tree Stump Gnome Home by HubPages
| Materials: | Plywood |
| Tools: | Screwdriver, glue gun |
| Difficulty: | Easy |
The tree stump gnome home is a great project that walks you through the various parts of building a fairy house. It covers different ways to make the doors and windows and even discusses the landscape around the house so you can achieve a full effect. It’s a great place to start if you’re looking for something that provides ideas instead of a step-by-step plan.
4. Low-Effort Stump House with a Lantern by Mimi’s Mixed Bag

| Tools: | Cedar planking, plywood, scrap wood, aluminum angle, liquid nails, regular nails, glue, shepherd’s hook, lantern |
| Material: | Chainsaw, hammer, work gloves |
| Difficulty Level: | Moderate |
Tree stump removal is no small tusk. So, let’s take an alternative route and decorate it! For example, this low-effort stump house with a lantern will serve as the ultimate eye-catcher. If it’s a bit too tall, cut it to size with a chainsaw. With that out of the way, work on the stump’s top to make it look like a triangle. For the roof, you’ll only need two pieces of plywood and cedar planking for the shingles.
Cut the boards into four-inch blocks and glue them to the plywood with nails. Next, attach the roof to the trunk. To reinforce it a bit, use an aluminum angle. That’s it for the main part! If you have some miniature doors and windows (or took the time to craft them from scrap wood), go ahead and stick them to the tree. As for the hook, lantern, and gnomes, you can get them for cheap at dedicated stores.
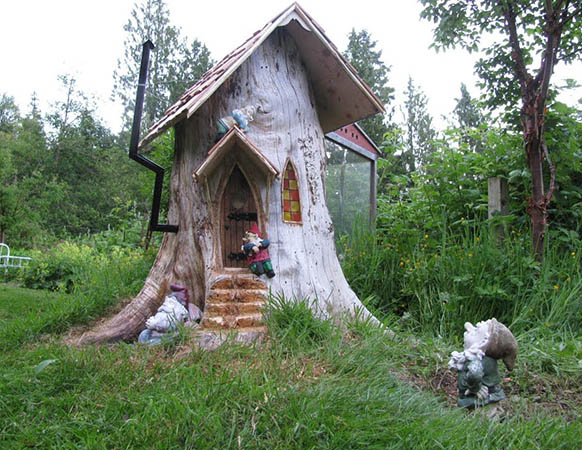
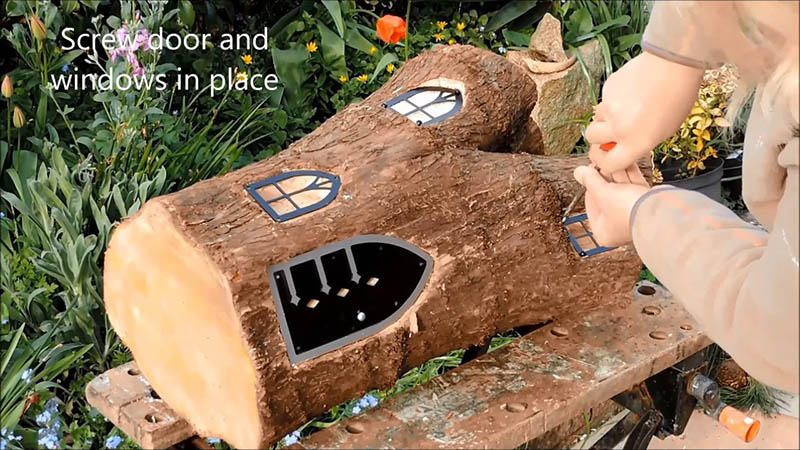
5. Fairy Home with a Fancy Door by Paul Elkins
| Tools: | Scrap wood, plywood, cedar planks, brackets, welding lens, silicon, a pack of nails |
| Material: | Electric chainsaw, hole saw, chisel, hammer, protective gloves, and goggles |
| Difficulty Level: | Easy/Moderate |
The main idea behind this fairy home with a fancy door is the same as in the previous DIY project. However, this time around, we’ll be cutting the openings out, not gluing them. A hand-held chainsaw is the best tool for that. Use it to shape the stairs, main door, and windows. After that, grab a chisel and a hammer to make the entrances a bit wide and deeper.
For the roof, opt for a combination of cheap plywood and planks. If you’re happy to do extra work, follow the instructions and build a tiny door using scrap wood, a welding lens, and brackets. Also, equip yourself with a hole saw to give it that “fairytale” touch. Secure everything with a pack of regular nails, and don’t forget to protect your eyes and hands!
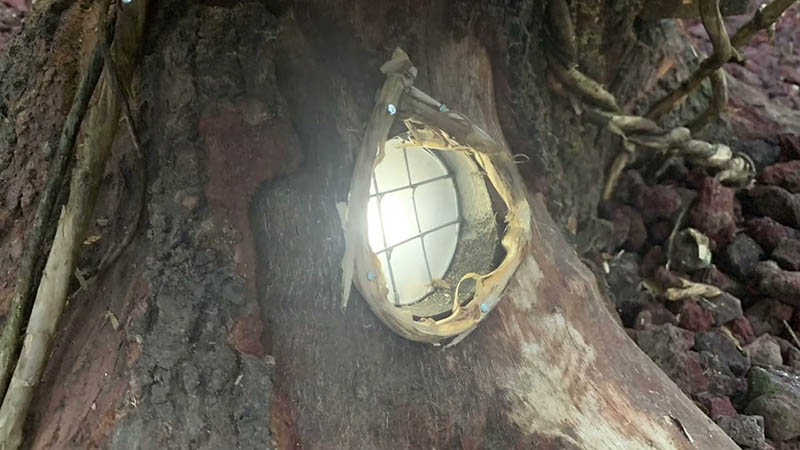
6. Cheap Fairy House with a Metal Roof by Simon Althorpe
| Tools: | Chimney, screw set, metal/concrete sheet, fairy lights (optional) |
| Material: | Pencil, marker, chisel, hammer, electric drill, screwdriver |
| Difficulty Level: | Easy |
Don’t have enough time (or a big toolbox) to take on some of the more complex projects? Then why not try and build a cheap fairy house with a metal roof? The shape of the stump doesn’t matter that much here. As long as you’ve got a piece of metal to attach to the top and some décor elements for the windows and the door, you can get it done in 1–2 hours. Start by outlining everything before you remove the bark.
Place the window/door on the stump, outline it with a pencil, and only then cut the wood out. All done? Great, now secure each piece to the tree with a set of screws. To make the house look magical when it’s dark outside, consider investing in some fairy lights. That will cost you $10–15, or even less, but the result will be well worth it.
7. Gnome House with a Working Chimney by Hoosier207
| Tools: | Wood planks, cedar flooring, shell brackets, steel wool, welded wire, wood stain, dowels, scrap metal, pipe, copper, foil, tea candle, LED lights (optional) |
| Material: | Regular saw, hole saw, hammer, chisel, pencil/marker, protective gloves |
| Difficulty Level: | Moderate |
For the most part, all fairy homes look the same, but you can spice things up a bit by building a gnome house with a working chimney. Get your hands on some scrap metal, a pipe, and copper to put the chimney together. To see real smoke coming out, you’ll have to install a tea candle and aluminum foil inside it. For the roof, use a combination of wood planks and cedar boards.
Shell brackets do an excellent job of reinforcing the wood. Want to make the roof look old? Steel wool combined with wood stain will help achieve that effect. The stain will also smooth out the surface and hide any imperfections. To light the gnome house up, install LED lights and/or a solar-powered light. At this point, you don’t have to follow the instructions closely. Just use whatever works!
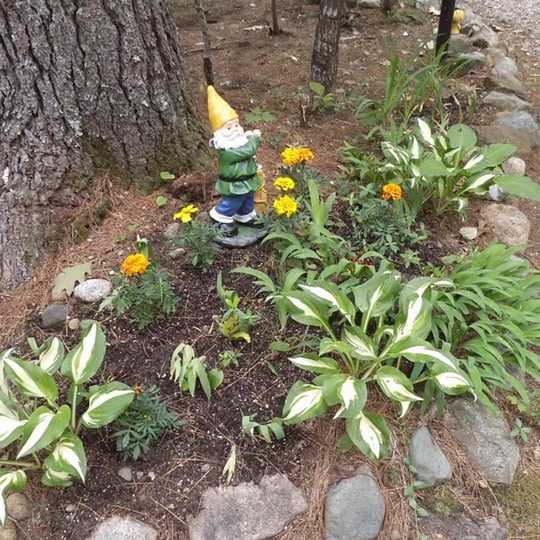
8. Tree Stump House for Kids by Esmie’s World

| Tools: | Wood planks, a pack of nails, glitter spray, solar lights, paint |
| Material: | Hammer, paintbrush, work gloves |
| Difficulty Level: | Easy |
What could be better than surprising your children with a magical fairy house? Well, if you’re up for it, this DIY tree stump house for kids will be the perfect project to work on while they’re away. It takes very little effort to make. If there’s a big enough stump in the yard and you have an hour or two of spare time, you should be able to get it done in a jiffy. Use whatever wood boards/plans you have handy for the roof.
The door and windows, in turn, look great painted. Depending on the paint, it might take a while to dry, though. But how do you make this fairy house stand out? Some glitter sprayed on the roof and solar lights around the stump: that’s what we recommend here. The decorations are optional, of course, but a couple of tiny gnomes, a chimney, and some mushrooms will go a long way.
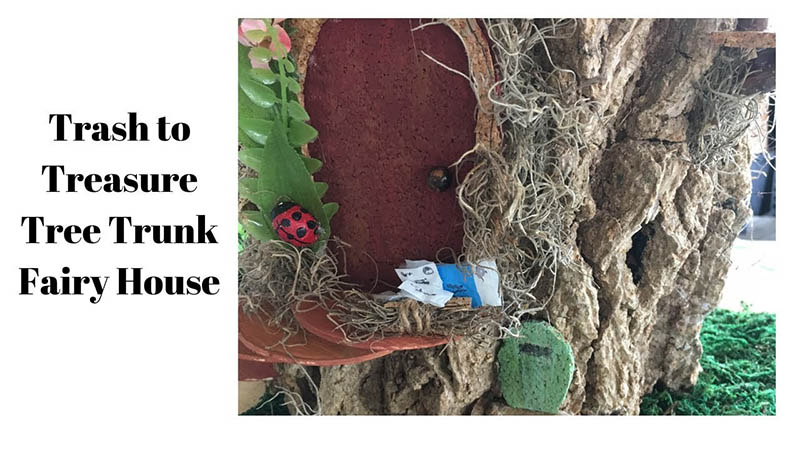
9. Fully Decorated Tree Trunk Fairy House by MadeWithGlee
| Tools: | Flat wood, duct tape, dowels, crock boards, wood logs, green paint, nails, wood glue, moss |
| Material: | Hammer, glue gun, handsaw, paintbrush |
| Difficulty Level: | Easy/Moderate |
This right here is a relatively simple yet time-consuming DIY plan. To put the fully decorated tree trunk fairy house together, you’ll need quite a few garden gnomes and other scale miniatures. Or you could try and make them yourself with some dowels, logs, crock boards, a can of paint, and sleight of hands. For the roof, two flat pieces of wood and some duct tape in between will do.
To give it a gnome house look, paint it green. The most important tool for this project is a glue gun. With it, you’ll be able to quickly stick all the décor pieces to the wood and see how it looks. And one more thing: since we’ll be using a trunk for this fairy house, not a stump, you can freely move it around the garden until you find the ideal spot for it.
10. Hollow Log House with Stairs by Linker
| Tools: | Hollow log, scrap wood boards, branches, twigs, rope, a pack of nails, screws, mesh, hinges, paint |
| Material: | Chainsaw, cut-off saw, hole saw, cordless drill, nail gun, angle grinder, chisel, hammer, carving knife, pencil, square tool |
| Difficulty Level: | Hard |
If there aren’t any tree stumps on your property (or they’re a bit tiny), there’s always the option of building a hollow log house with stairs. This is the hardest project on the list: to complete it, you’ll need a long list of instruments and basic carpeting skills. The log doesn’t have to be hollow, of course: any large piece of cut/fallen tree will work. Shape the log with a chainsaw and a hole saw: carve out the doors and windows and cut the top.
The grinder tool is perfect for smoothing out the rough edges. If you’re handy with a carving knife, chisel, and hammer, you’ll be able to add a door frame, build stairs to the second floor, and even carve out the gnomes. To craft the improvised guard rails, get some wood dowels, twigs, and rope. Take it slow, watch the guide closely, and you might just be able to finish this project over the weekend!
How Much Does a DIY Stump House Cost to Build?
It’s safe to say that as long as there’s a stump in your backyard, you’re in business. Even if you don’t have the necessary tools, you can always borrow them from a neighbor (or rent from a local hardware store). The décor elements won’t cost much, either. Retail chains like Dollar Tree sell all kinds of awesome stuff that you can glue to the stump. We’re talking about windows, doors, lanterns, gnomes, moss, artificial grass, and other items.
For the roof, it shouldn’t be hard to find some scrap wood and plywood in your area. So, all in all, the nails, screws, glue, paint, brushes, and miniature figures will only set you back $40–$50. Cut the stump with a regular saw (a chainsaw is more recommended) and carve out the doors and windows with a chisel and hammer combo. There’s no need for any fancy, expensive instruments: you just shape the stump, decorate it a bit, and that’s it!
Tips for Creating a Tree Stump Fairy House
Safety Equipment
When working on any project, the most important thing is to protect your health and safety, so before you get started, ensure that you have the proper safety equipment. For example, if you are cutting or carving into the stump, you must protect your eyes and hands from flying debris, so safety goggles and work gloves are necessary. Anything that creates dust, like cutting wood, will require eye protection and a safety mask, and anything that produces a strong vapor, like glue or paint, will require plenty of ventilation and a safety mask. Don’t skimp on safety equipment — you can reuse most of it, and an accident can cause permanent damage.
Roof
The roof is likely the most difficult part of a fairy house project because it’s large and has to sit right. Inexpensive plywood is a good option because it’s easy to cut and make into the shape of a standard rooftop. A beginner can make something simple, while an experienced woodworker can make something complex. You can also use a large piece of bark from an old tree or purchase a ready-made roof at your local hobby shop.
Windows and Doors
The windows and doors are what will turn your old tree stump into a fairy house. It’s easy to purchase these items at your local hobby shop if you’re not skilled at crafts. However, these items are easy to create using old popsicle sticks, small twigs, and similar items, and building them from scratch can help you make something unique to your personality.
Interior
If the stump is quite large and in good shape, you might be able to carve out interior rooms. Adding an interior to your fairy house can push the illusion even further, and you can decorate it with miniature toys that you can purchase at the dollar store or might even have lying around the house if you have children.
Exterior
Another way to make your fairy house look more realistic is to create a small landscape around it so the tiny people who live there can have a wonderful yard to play in. Small colored rocks like those you might put in a fish tank work quite well, but you can also use dirt, mulch, or anything else that looks good.

Summary
Creating a fairy house is a great way to repurpose an ugly tree stump. It’s easy to create, and we think that you’ll be surprised at how impressive it can be. It can be difficult to find detailed plans, but we’re confident that if you start with the gnome home or gnome tree house, you’ll get a good sense of what you need to do, and your imagination will take over to help you create something that inspires others.
You Might Also Be Interested In:
Featured Image Credit: Justine Meyer, Unsplash
Contents
