

What piece of outdoor furniture better says summer than the Adirondack chair. Built out of wood but constructed to be comfortable, it also has room between the slats to keep the air moving so you won’t stick to it when you stand up. They are perfect for the porch, or under a shade tree or even on a beach under an umbrella. Plus, they’ve got that old school look, projecting a little bit of 50s nostalgia while still remaining functional.
The other great thing about Adirondack chairs is that because they’re made out of wood, they’re something that DIY enthusiasts can make in their homes. All you need are the tools, the materials and above all a set of plans to help you make build what you want.
We’ve got some of the best plans we could find on the Internet, each teaching you how to build Adirondack chairs. Some put a cool new twist on a classic, some use modern techniques like upcycling to reuse old stuff and some are just flat-out budget models for Adirondacks on any budget. We’re pretty sure that you’ll find something in here that you really like.

Top 15 Free DIY Adirondack Chair Plans
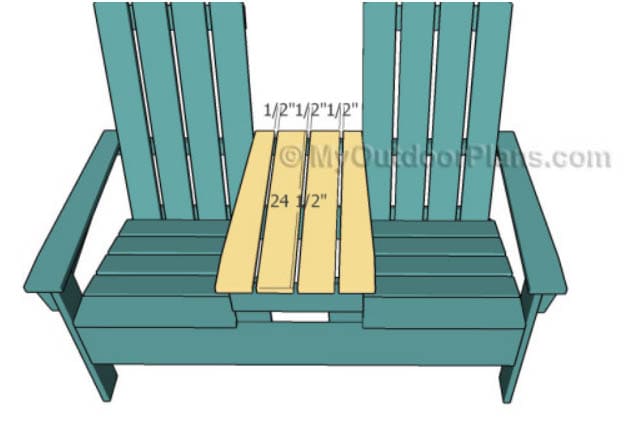
1. Adirondack love seat
| Tools: | Hammer, tape measure, framing square, level, miter saw, drill machinery, screwdriver, sander, safety gloves, safety glasses |
| Supplies: | Different sizes of lumber (see DIY link), 2 1/2″ screws, 1 1/4″ screw, glue, stain |
What’s better than an Adirondack made for one? An Adirondack made for two. Enjoy balmy summer nights with that special person in style and comfort. Or, if you’ve got two kids likely to squabble, this is perfect for giving them their own space but giving each of them enough space for themselves and a little buffer in between.
You can find the plans for it here, which tells you not just how to make it but provides a good inventory of the hardware and materials you’ll need. Plus it has detailed instructions on how to build it.
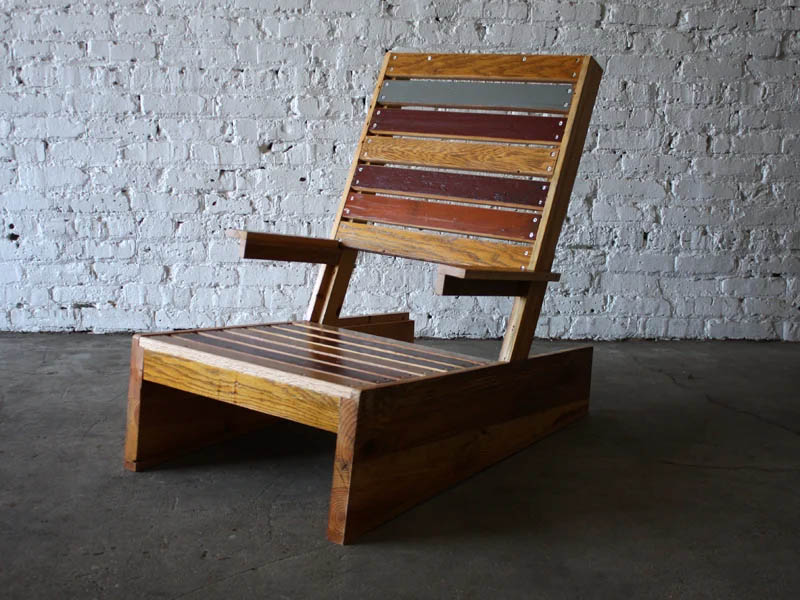
2. Scrap Adirondack
| Tools: | Chop saw, Table saw, Circular saw, Orbital sander, Drill/driver, Clamps, Chisel, Hand plane, Tape measure, Square, Pencil, Paintbrush, Rags |
| Supplies: | 1 8′ 2″ x 12″ (per chair), 1 8′ 2″ x 4″, Approx. 40 linear feet of assorted 3/4″ material, 8 2″ x 3/8″ hex-head bolts or a handful of galvanized 1-1/2″ screws, Galvanized (or, better, stainless steel), 1″ and 2″ screws, Wood glue , Outdoor-grade finish of your choice |
An intriguing twist on a classic look, we like a design that makes a comfortable chair look like it’s sinking. If that doesn’t project relaxation, we don’t know what does. The look itself is interesting enough if you don’t plan to use armrests that are much reduced compared to others.
There are lots of pictures and instructions where we found it, and to be frank if you aren’t a fan of the thin, short armrests you can always freelance your design.
3. Build big easy
| Tools: | Saw, drill, sander |
| Supplies: | 38ft (11.5m) of 3/4″ x 5 1/2″ (140mm x 20mm) wood, 8ft (2.4m) of 3/4″ x 3 1/2″ (90mm x 20mm) wood, 64″ (1600mm) of 1 1/2″ x 5 1/2″ (140mm x 45mm) wood, 90 exterior-type 1 1/2″ (38mm) long screws, 4 3/8″ x 2″ (10mm x 50mm) galvanized carriage bolts and washers, exterior-type glue |
The advantage to these is that they are much bigger and roomier than some of the other plans we’ve looked at. They take what these chairs do best and crank up the volume. You can melt back into this chairs that frankly make anyone of average size look like a kid.
It might not look at first blush that the plans here are complete. They are. The trick is to scroll to the bottom and keep clicking over to the next page for the next step in instructions. Avoid the button that tries to get you to pay $5 for the plans.
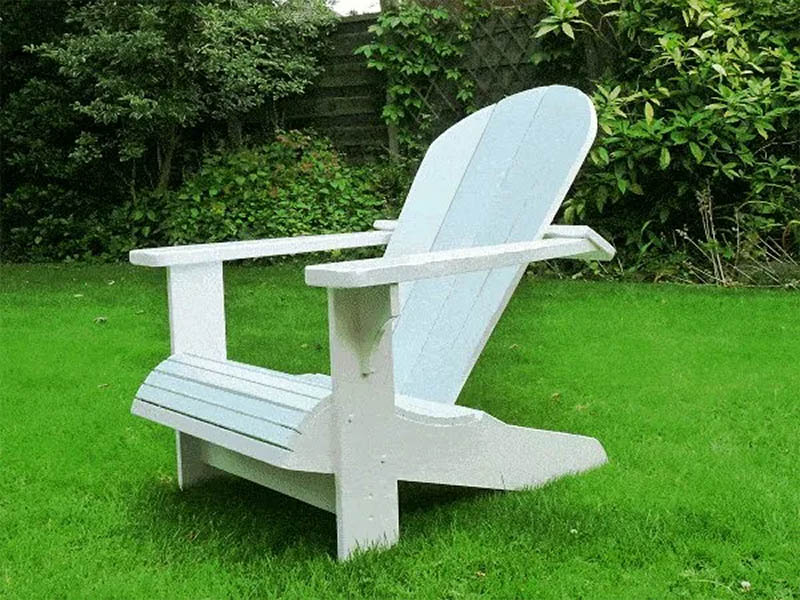
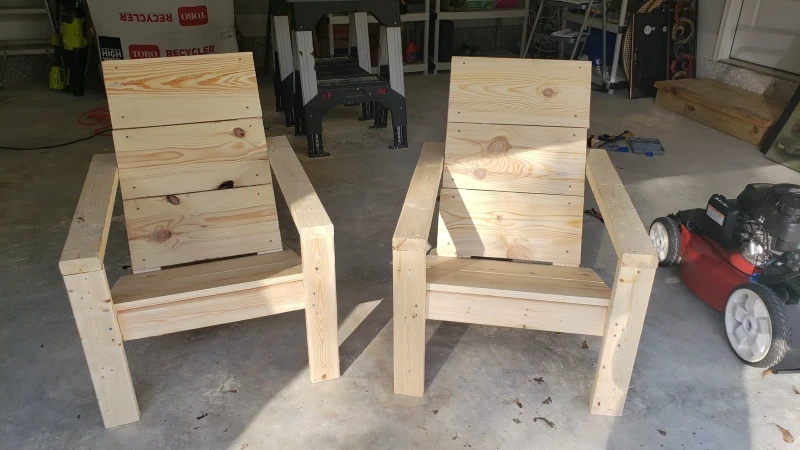
4. Ana White’s 2×4 chair
| Tools: | Saw, Drill, Sander |
| Supplies: | 3 – 2×4 @ 8 feet long, 1 – 2×2 @ 6 feet long, 4 – 1×4 @ 8 feet long, (30) 2 1/2” self tapping wood screws, (60) 2” self tapping wood screws, (20) 1 1/4” wood screws, exterior appropriate wood glue, 1 – 2×4 @ 8 feet long or stud length, 1 – 1×4 @ 12 feet long, 2” and 2 1/2” exterior screws, wood filler, primer or wood conditioner |
Among the sturdiest of the chairs we looked at, these chairs from Ana White are also among the most affordable. The reason is that their design relies on durable 2x4s that you can pick up from any lumber store instead of something designed more for looks.
You can find the instructions here, as well as a list of hardware and materials. Don’t forget to paint or stain them to match their surroundings.
5. Cedar wood chairs
| Tools: | Jigsaw, sander, drill, screwdriver, clamp |
| Supplies: | cedar side rail, cedar top back rail, cedar bottom back rail, cedar seat slat, cedar back slat, cedar front leg, cedar back leg, cedar arm bracket, cedar arm, cedar foot, cedar cleat, cedar leg, cedar stretcher, cedar slat, deck screw, deck screw |
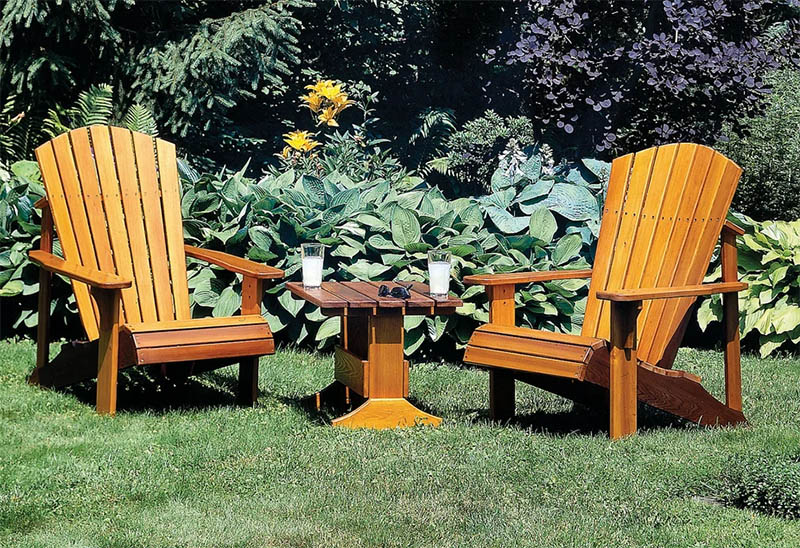
Cedar is a great choice for building outdoor chairs, and great to use in Adirondack chairs. These have a much more elegant, classic look with their stain and go perfectly in a garden or under a large shade tree.
Instructions are available here, including hardware and materials.
6. Pallet wood Adirondack
| Tools: | Saw, drill |
| Supplies: | Planks, screws, nuts and bolts |
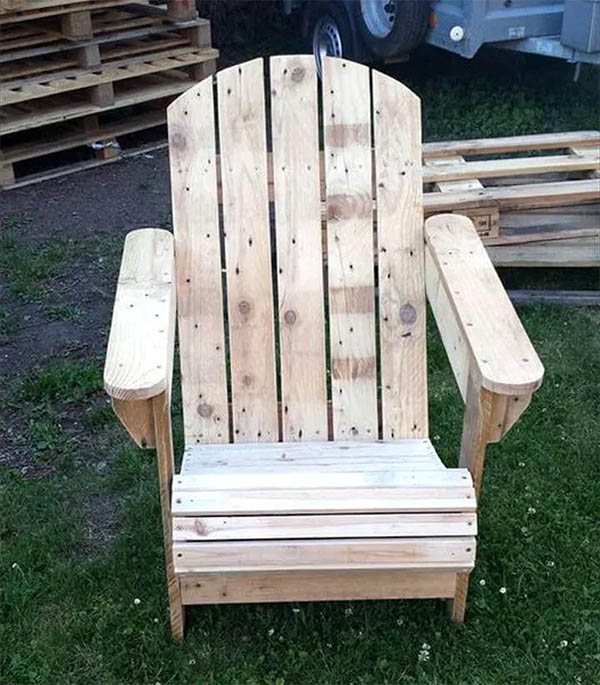
It wouldn’t be DIY without a design made from upcycled pallets. Since you can generally get those for free, that makes these also the most affordable designs available. They might look crude, but with a little TLC they can still look sophisticated.
You can find complete instructions here, and the great news is that since you’re using upcycled materials you can probably freelance when it comes to things like fasteners. Plus, because the wood tends to be more porous, they take to stain like a duck to water.
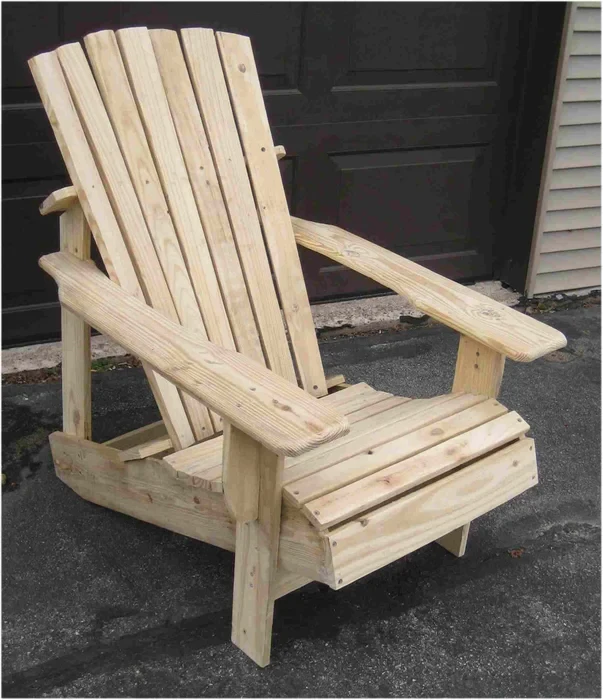
7. Back to the classic
| Tools: | Jigsaw, sander, router, miter gauge, drill |
| Supplies: | Wood, piloted roundover bit, screws, bolts |
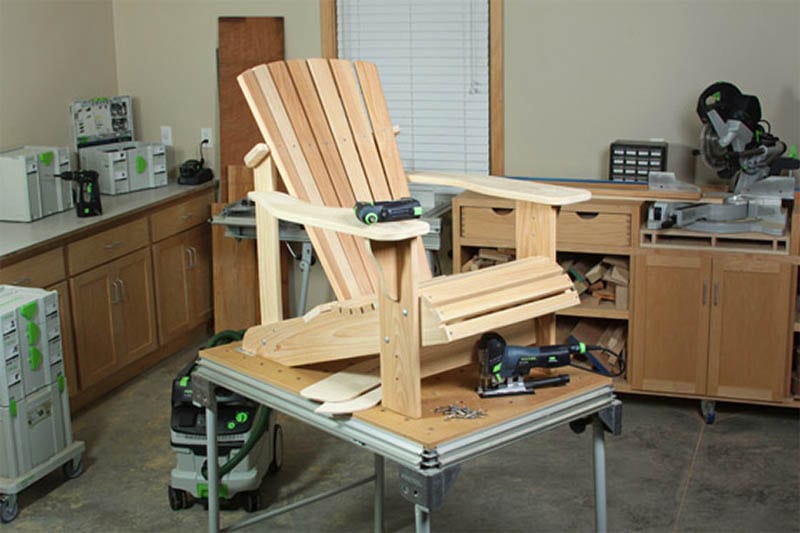
We close with a return to plans that teach how to build an Adirondack chair that’s a classic design. Because this one involves a lot of machining, it feels like a work of DIY love and more like a production along a woodworking assembly line. But, it’s still impressive and the finished product still does what every Adirondack chair is called to do, provide comfort and room to breathe.
The plans that are available here are detailed and long. Multiple pages, in fact. That’s good if you’re the sort of person who likes to follow explicit instructions. Let’s face it, an Adirondack chair is probably not really a good place to freelance a design.
8. Bar Height Adirondack Chair Plan

| Tools: | Saw, drill, measuring tape |
| Supplies: | Weather-resistant lumber, wood screws |
The only thing better than a simple Adirondack chair is a bar-height Adirondack chair. You can make it by elevating the stands to bar height, making it perfect for an outdoor bar area. This bar-height Adirondack should preferably have a rustic appearance to give it more character, especially if you put it in your backyard.
You can find the free plans here, which tell you the tools and materials you’ll need to make the chair and a list of instructions. If you are not a fan of the original plan, you can add some extra charm to it and make a few adjustments.
9. Adirondack Rocking Chair
| Tools: | Miter saw, sander, bandsaw, tool clamps, router |
| Supplies: | Cedar board, exterior grade screws, waterproof wood glue |
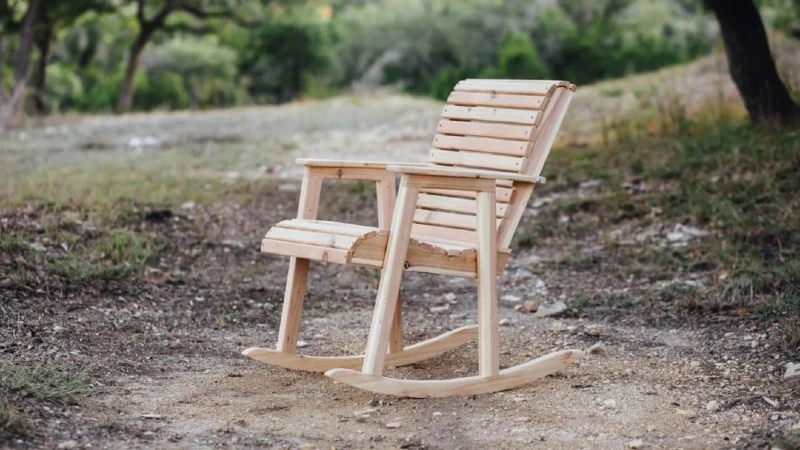
This DIY Adirondack Rocking chair is among the best relaxation chairs out there. This DIY project is guaranteed to bring attention to your backyard. One of the main features that make this chair look stylish is the slanted bottom and back that give you the feeling that you are leaning back more than you are.
This Adirondack rocking chair plan has simple steps and comes with pictures. It tells you how to make it and provides a complete inventory of the materials and hardware you need. If it’s your first project, you’ll need a friend with more experience to help you out.
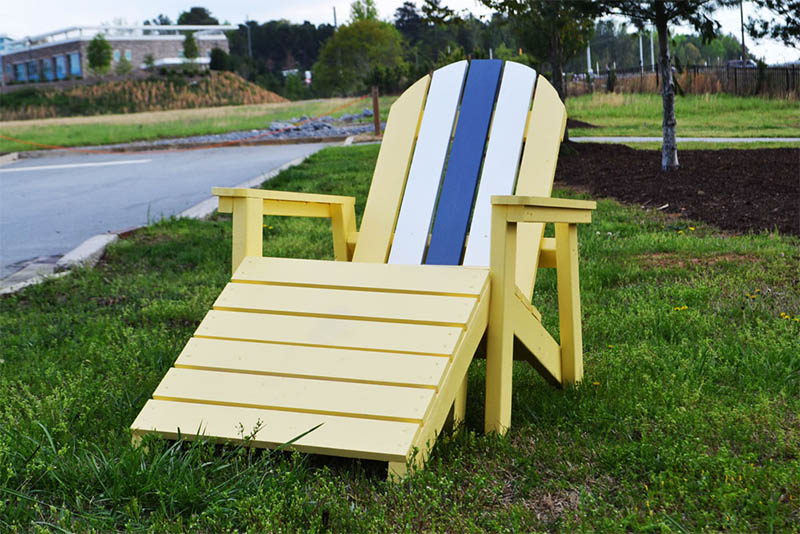
10. Lawn Chair Plan
| Tools: | Circular saw or miter saw, sander, safety glasses, measuring tape, pencil |
| Supplies: |
8 – 2×4 @ 8 feet long, 1 – 1×10 @ 8 feet long, 1 – 1×10 @ 10 feet long, pocket screws, exterior wood screws, plastic wood filler, wood stain |
This Adirondack lawn chair differs from a typical one and is great for reclining on the patio or the backyard. Lawn chairs have a smaller recliner which makes them excellent for socializing.
This free Adirondack lawn chair plan includes tons of diagrams and a set of written instructions alongside all the hardware and materials you’ll need. If you prefer the traditional Adirondack chair without the deep slant that makes it uncomfortable and hard to get out of, you can adjust the plans and customize your design.
11. Children’s Adirondack Chair

Everyone enjoys having an Adirondack chair to relax in, even kids. You can build a comfortable kid-sized Adirondack chair for your children or grandchildren and draw on some cartoon characters to make it more attractive.
You can find the free plans here with the complete list of materials and tools. Overall, this is a top plan with lots of diagrams and detailed instructions.
12. Adirondack Bench from2×4s
| Tools: | Circular saw, drill/driver, jigsaw, countersink drill bits, miter saw or table saw |
| Supplies: | Cedar lumber, wood glue, exterior wood screws |
This classic Adirondack bench can comfortably hold up to three people. It keeps the main Adirondack design and is built entirely from 2×4 boards so that you can save on cost. You can also use pallet wood. This bench is sturdy, easy to build, and has a beautiful design.
The complete plan has step-by-step instructions and the necessary equipment. You should complete the project within a day if you have all the materials and tools.
13. The Muskoka Chair
| Tools: | Hammer, Crowbar/prybar, Drill (cordless is best, but even a hand drill will work), Small bit for pilot holds (size depends on the screws you use), 3/8″ Spade or forstner bit for counter sinks, saw, screwdriver |
| Supplies: | Wood, Wood glue, screws, wood putty, 3-4 good pallets |
The Muskoka chair is something you should have in your garden, especially if you have a deck or large patio. It’s ideal for relaxing, reading books, and bird watching, especially during the summer heat. Making this chair is relatively easy; however, you need to have the skills to make curved cuts with a jigsaw.
The plans for this project can be found here; they have clear instructions on each step and a list of tools and materials you need. If you don’t like the low design, you can raise it to a comfortable level.
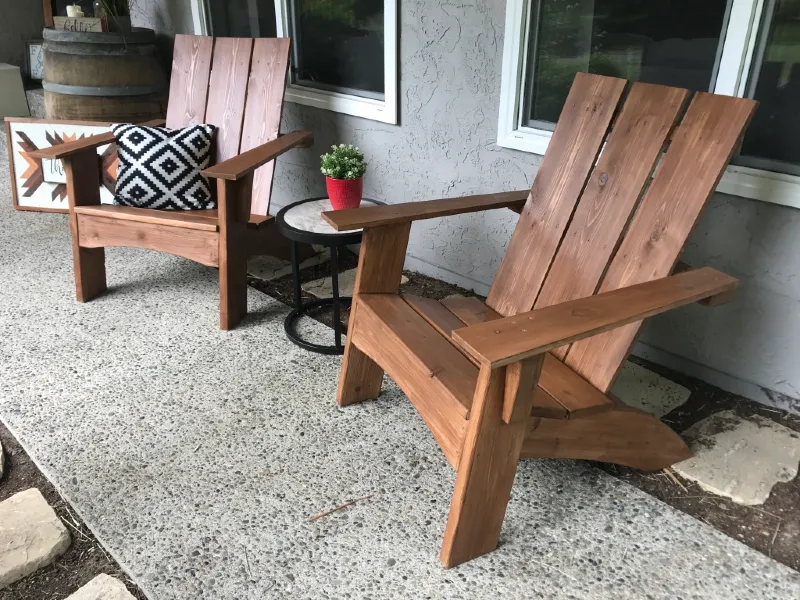
14. Modern Adirondack Chair
| Tools: | Saw, drill, sander |
| Supplies: | Stain, wood glue, cedar boards, exterior decking screws, waterproof wood glue |
If you like a minimalist design, this is the right DIY project for you and will only take you a few hours. They are an ideal addition to any outdoor living space and don’t sacrifice comfort for style. Invest in high-quality lumber and plywood since they hold up much better when exposed to rain and other elements. You can also paint it or apply a finish to prevent it from rotting when rained on.
You can see the complete plans here and the complete list of tools and materials. Ensure you source everything before starting the project to prevent making costly mistakes.
15. The Big Adirondack Chair

| Tools: | Circular saw, drill, clamp, measuring tape, sander |
| Supplies: | Wood, deck screws (2.5″ or 3″), eight 1/2″ galvanized hex bolts, washers, nuts |
Nathan from the Hahabird furniture blog decided to make a giant-sized Adirondack chair, and you might enjoy having a large Adirondack chair of your own. Kids usually love them and can even nap in them. You can paint, stain, or add a few decorations to make it more attractive. It makes a great addition to your backyard and serves as a focal point.
These instructions, with lots of pictures, will help you make one for yourself. You can adjust the dimensions depending on how big you want it to be.
Featured Image Credit: Lennart Nacke, Unsplash
Contents
