

In most cases, fixing a crack in your garage floor is a straightforward, DIY project. The most common material to use for the fix is epoxy—most likely a mortar epoxy. There are various kits on the market, each with its own specific application instructions. However, all the kits will have the same five basic steps to fixing the crack.

Tools And Supplies
Before you start, here is a list of tools and supplies to make sure you have:
| Safety: | Safety glasses, work gloves, earplugs |
| Tools: | Cold chisel or mortar chisel, hammer or mallet, shop vac |
| Materials: | Crack repair kit |
How to Fix Cracks in a Garage Floor (5 Steps)
1. Confirm the Crack is Not Structural
As a building settles, it is not uncommon for concrete to crack. Sometimes it is a small crack, but other times it can be long and wide. Just because a crack is large doesn’t automatically mean that it is structural.
If a crack seems like it might be structural, it’s worth investigating outside to see if there has been a substantial shift in the soil or foundation. If you’re not sure, then calling a professional for a second opinion isn’t a bad idea.
Once you confirm that the crack is not structural, then it’s time to get your tools out and move on to step two.
2. Ensure There Are No Loose Edges
If you were to jump straight to filling the crack with epoxy without cleaning the edges of the crack, then the best-case scenario would be the repair holding for a short time only. So, don’t skimp on this step if you want a long-lasting fix.
There are a few ways to do this, but one of the easiest ways is with a hammer and cold chisel or mortar chisel. Start at one end of the crack and chisel both sides along its length. Make sure to chisel the edge back until it doesn’t chip off easily. This will prevent a loose piece of concrete from weakening your seal.
- NOTE: You’ll want to make sure you wear eye and ear protection and gloves for this step.
3. Clean out the Crack
While chiseling the crack, you may have gotten some big chunks from the edge; remove these by hand. Then do a pass with your shop vac to clean out all the rest of the debris. Just like it was important to get the loose edges off, cleaning all the debris out is also important.
Some crack repair kits may even direct you to clean the crack out with water to ensure no dust or debris remains.

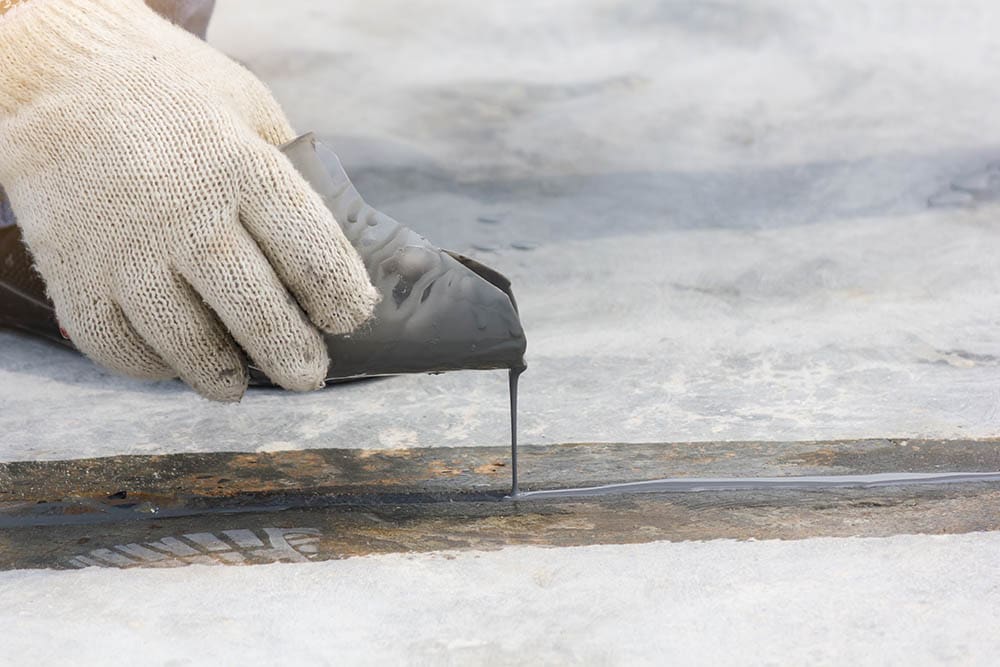
4. Fill the Crack
Once you’ve followed all your kit’s directions to prepare for epoxy or mortar, then it’s time to mix your filler. If you’re using a two-part epoxy filler—which is common—then once you mix it, the timer starts. You will have a limited time to get it in the crack before it starts to set.
To prevent any oopsie situations, read the entire set of directions before mixing your epoxy. That way, you can ensure you have all the details sorted out ahead of time.
5. Allow the Epoxy to Cure, Reapply if Necessary
Depending on the particular epoxy or mortar you use for the crack repair, the time it takes to dry and cure can vary from 24 hours to a week. If you need to add more filler to any low spots, this can often be done after six to eight hours.
After fixing the crack in your garage floor, this might be the perfect time to reseal or paint the entire floor. There are many options on the market for epoxy coatings or floor paint. Depending on what kind of use your garage floor gets will determine the options for your situation.

Why Do Concrete Floors Crack?
Concrete can crack for many reasons, such as an improper mix of ingredients when mixed and poured or the wrong type of concrete used for the task. Also, natural ground movement will cause cracks in just about any slab over time.
One way to prevent cracks is by making control cuts in the slab after it’s poured. This is not something the average homeowner will want to tackle, but it can be done at any time by a pro. Essentially, they make strategic, shallow cuts in the slab with a special blade. What this does is give the slab a controlled area to crack. This usually minimizes the damage of the crack and sometimes makes it less noticeable too.
When to Call a Pro
If a crack is wider than an ⅛ inch or if one side of the crack has dropped or pushed up significantly higher than the other, then the crack may be structural. A structural crack in itself is not usually something to panic about. However, if you fix it, it’s likely going to crack again after you’ve fixed it.
In a situation like this, it’s a good idea to get a professional to have a look. They may have a recommendation on the best way to fix the crack. If you absolutely must have the crack fixed, it may be possible to take out a portion of the floor to fix the problem and pour concrete again. These types of fixes can get very expensive, though.
Conclusion
At first glance, the thought of fixing something solid like a concrete floor may seem daunting. But hopefully, we’ve demonstrated with this step-by-step guide that a homeowner with a reasonable amount of DIY experience should be able to tackle most fixes. Keep in mind that having a professional at least look at the damage before you tackle it may save you time and money in the long run.
See Also:
- 2 Different Types Of Garage Floor Drains. What You Need To Know!
- How to Fix Ceiling Cracks in 7 Steps (with Pictures)
Featured Image Credit: Kitti16, Shutterstock
Contents
