
Herbs are a delight to eat, and they serve numerous purposes in a home. Among the most popular herbs you can grow is ginger. This potent root is great for cooking and also has some medicinal benefits.
Growing ginger indoors isn’t hard, but it requires some effort to achieve the desired results. It all begins with the right pot, root selection, light intensity, moisture, and more.
Read on and get to know more about growing ginger indoors successfully. After about 10 months, the root is ready to harvest and you’ll be able to store it for months in the freezer.

Types of Ginger
Have you narrowed down the type of ginger to grow indoors? If not, here are examples of some of the best cultivars you can find:
- Common Ginger
- Myoga Ginger
- Hidden Ginger
- Shell Ginger
- Yellow Ginger
- Butterfly Lily Ginger
- Crepe Ginger
- Bitter Ginger
- Dancing Ladies Ginger
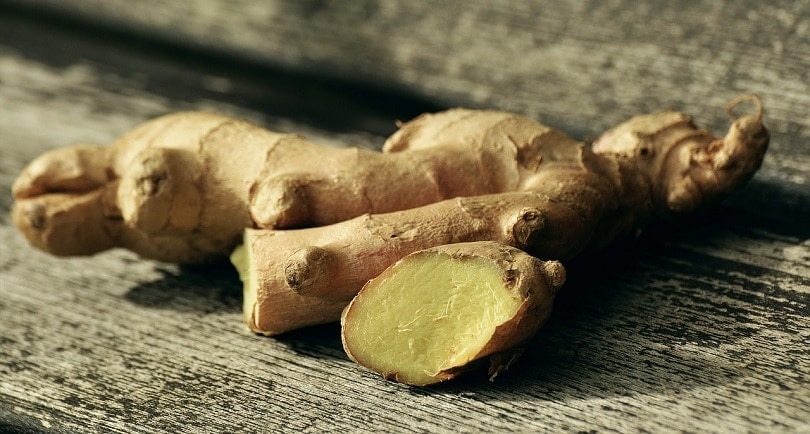
Among these different varieties, the most popular is Common Ginger. It’s found in many local stores and is ideal for culinary use. As a fresh herb, it has a pungent, aromatic smell and tangy taste.

The Step by Step Guide on How to Grow Ginger Indoors
Ginger is among the most popular herbs in the world. Many people love growing it outside in a garden where almost all the basic requirements are met. However, if you duplicate the same conditions indoors, you can grow the herb just as easily.
This potent herb has many uses, like flavoring food and making teas. You can enjoy it raw or dry it and grind it into a fine powder. Either way, it all starts by getting the growing process right. Only then can you enjoy an abundant harvest.
Below is a step-by-step guide for planting ginger indoors.
1. Pot Selection
Adding ginger to your indoor herb collection is a fantastic idea. However, right from the start, you have to meet specific requirements. Ginger is a rhizome that grows deep in the soil. So, while other herbs thrive in smaller, shallow pots, ginger needs a wide and deep container to thrive.
Find a pot that’s about 12 or more inches deep and 12 inches wide. The depth is as important as the width since the root tends to grow horizontally in the soil. The pot should be easy to move from one area to another.
Aside from that, the container needs several drainage holes at the bottom. Since ginger is a root, draining off excess water is crucial. Otherwise, you might end up with issues like root rot, which will decimate your harvest.
2. Type of Soil
Finding the right container for the job is only the first step. Next comes figuring out the right soil for growing this herb indoors.
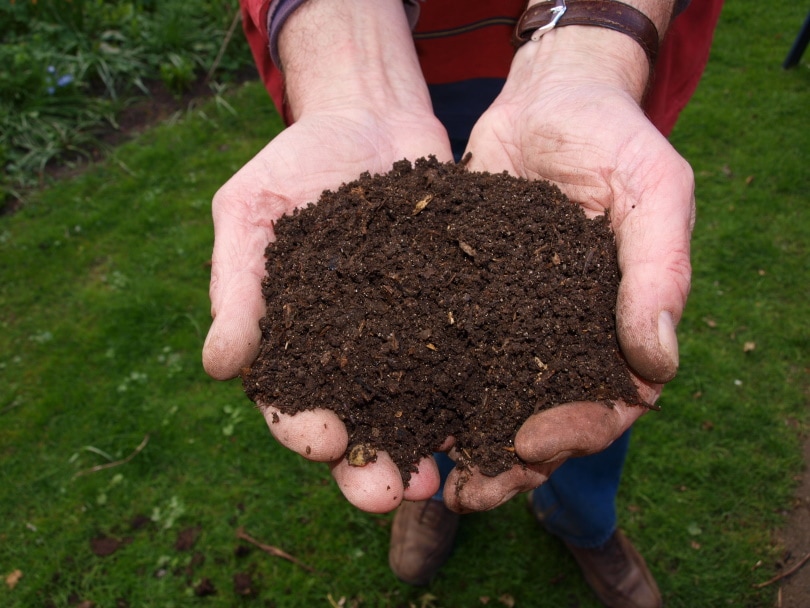
The roots require lots of nutrients, so the right soil for it is loam. Loamy soil is healthy to support ginger growth, but you can always add compost to it for some extra nutrition. While it won’t hold so much water that it becomes soggy, loam soil retains enough water to still keep the soil moist.
Another option is using a potting mix with the same characteristics as loam soil. A good example is a 5:1:1 blend that contains 5-parts bark to 1-part peat moss to 1-part perlite. Bark is an excellent aspect of the potting mix since it promotes moisture retention without leading to waterlogging.
Getting a good, deep container and the right growing medium brings you closer to growing ginger indoors. Next, you have to find some ginger and prepare it for planting.
3. Select a Healthy Root
Ginger is a rhizome that you plant in the soil. But, before you begin planting any of it, you must select the right cultivar. Picking the correct ginger roots gives you a better chance of harvesting the root at the end of the growing season.
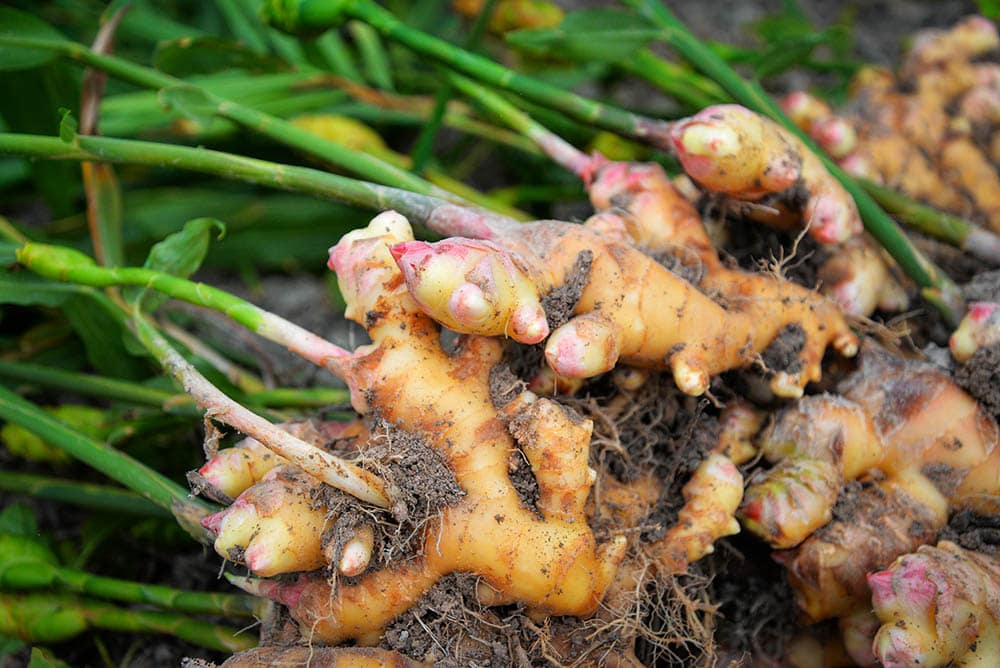
Find some fresh ginger root with lots of nodules at your local nursery. These need to be as bumpy as possible at the tips. The bumpy nodules on the roots are the buds where new growth will start taking place once the ginger is in the soil.
Avoid any weak and withering ginger root since it might not grow well. Instead, look for ginger with thin skin and plump flesh.
4. Encourage Sprouting
Have you ever wondered why ginger doesn’t grow on grocery store shelves? Well, this is because it undergoes chemical treatments to prevent this from happening. Therefore, after you buy it, the next step is to let it sprout before planting it in the soil. The same applies to ginger you find at a local nursery.
Among the best ways to sprout ginger is by creating a simple terrarium. Fetch an empty plastic container with a clear top and add some drainage holes in the bottom.
Add a few inches of the growing soil you intend to use. Then, place the ginger inside, sprinkle a little soil on top, and water the ginger root. Return the lid to the container, but ensure you don’t seal it tightly.
Place the container in an area that is room temperature and ensure the soil is always moist to the touch. In almost 8 weeks, you will see a small sprout emerge from the soil.

5. Plant in Large Containers
The small sprout emerging in the terrarium is a sign of success when growing ginger indoors. Now, you can proceed to transplant it to the larger container and await your harvest.
Add the soil or potting mix to the larger container and fill it until it is about half full. Plant the sprouting ginger root, then top up the soil to cover it. Since ginger spreads fast and is a heavy feeder, a larger container is absolutely necessary.
While planting, consider the placement of the ginger root. The sprouting part must always face upwards, which is the direction the shoot will grow. Ginger takes time to grow, so you must be patient while you wait for the roots to mature.
6. Hilling Ginger
Ginger shares lots of similarities with potatoes. With time, these rhizomes need more soil to grow more roots. This is why you need to incorporate hilling after a month or so to provide the ginger with enough room to multiply and give you a healthier harvest.
After planting, the next few months are all about caring for the growing ginger. Proper indoor care is crucial to provide a great harvest after 8–10 months of growth.

How to Care for Ginger Growing Indoors
Like any other houseplant, indoor care and management are crucial for a successful and healthy plant. Ginger requires water, light, and fertilizer, among other requirements. Any deficit may lead to issues like stunted growth or a poor harvest. Below are some ginger care tips.
1. Light

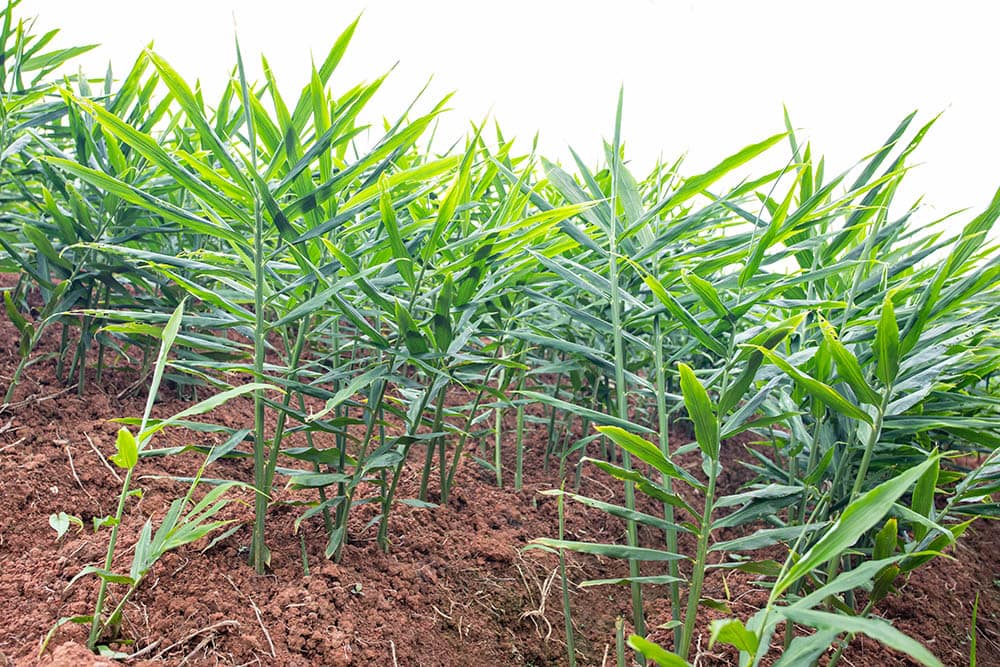
Ginger prefers bright and ample light. Outside, the subtropical climates suit ginger since it’s always sunny and bright. When you want to grow the herb indoors, you have to replicate the same conditions.
Place your pot in an area that receives lots of bright, indirect light. These plants aren’t too demanding, so light exposure can be up to 5 hours in a day.
Ginger can grow in low light, but this doesn’t mean it is okay to never give it any. Grow the herb in a container you can move around with ease so that you can follow the light as it moves. If this isn’t possible, consider purchasing a couple of indoor grow lights.
2. Water
Another crucial care tip is to ensure you are watering your plants the perfect amount. Ginger roots won’t grow in soil that dries out often. Always keep an eye on the soil or use a moisture meter to monitor the moisture levels.
However, be careful not to overwater since waterlogging can lead to issues like root rot.
3. Fertilizer/Compost Application
Apart from being a heavy drinker, the growing ginger root loves to feed. This is why you have to keep adding fertilizer or compost during the growing stages. The additional compost or fertilizer delivers all the nutrients that the plant needs to thrive.
Another reason for adding fertilizer to your indoor pot is because of the frequent watering. Remember, excess moisture will drain out from the soil through the drainage holes. As this happens, nutrients are washed out as well.
4. Temperature and Humidity
Ginger thrives in humid and warm climates, like in USDA hardiness zones 8–10. Indoors, you have to replicate the same conditions. The ideal indoor temperature is 65°F–85°F with high humidity. So, if it’s hotter or cooler than that, make the necessary adjustments to encourage the ginger to grow. You can even add a humidifier when there’s not enough humidity in the air.
5. Pest and Disease Management
Indoor plants and herbs are susceptible to pest infestations and diseases. This is why you must always keep an eye on your ginger plant as it grows.
- Red spider mites
- Mealybugs
- Aphids
- Fijan ginger weevil
- Soft scale
- Cardamom thrips
- Ants
- Chinese rose beetle
- Shoot borer
There are also some diseases that affect ginger plants indoors and outside your home. These include:
- Dry rot
- Soft rot
- Leaf spot
- Leaf blight
- Bacterial wilt
- Storage rot
Proper treatment can help you tackle the pests and diseases to protect the growing ginger.
How to Harvest Ginger
After about 8 months, it’s time to harvest your roots. The best indicator of your impending harvest is when the plant blooms. After that, the leaves start to turn yellow and dry up.
Ginger that is ready to harvest starts to form a tough skin when the leaves and stem dry up. Before harvesting, start by trimming the tops about 2–3 weeks before the harvest day.
When the time is right, remove the ginger root from the soil using your hands. Harvest the entire plant or remove only a small portion of it. Leaving smaller rhizomes in the soil will cause the plant to keep growing and bring forth more ginger.
Wash the ginger to remove the excess soil and pat them dry. Your ginger is now ready to eat.
Best Ways to Store Fresh Ginger
Harvesting fresh ginger is one of the best feelings since you likely have a good amount to use. After cleaning it, the next step is figuring out how to store it.
Thankfully, it’s not hard at all to store fresh ginger at home. With its skin intact, it can stay fresh for up to a week at room temperature. However, a better option would be to store it in the refrigerator using resealable plastic bags.
Ginger stored in the fridge will remain fresh for 2 months. This gives you plenty of time to grow some more and use the amount you have in your refrigerator. Keep it fresh even longer by placing the plastic bag in the freezer. This will help it last for up to 6 months.
Alternatively, you can pickle the fresh ginger root. Pickling has been used for centuries to keep specific vegetables, herbs, and fruits fresh.

Conclusion
Nothing beats growing fresh herbs in your home. While the outside climate might be beyond your control, you can grow herbs like ginger indoors successfully.
After about 8–10 months, the plant will be ready to harvest. However, this will only happen if you ensure you meet all the growing and care requirements.
Featured Image Credit: Poring Studio, Shutterstock
Contents
