

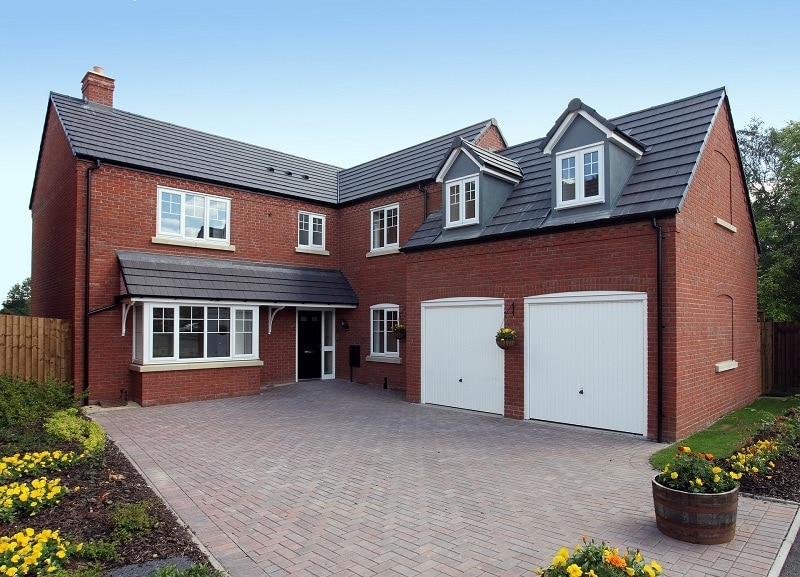
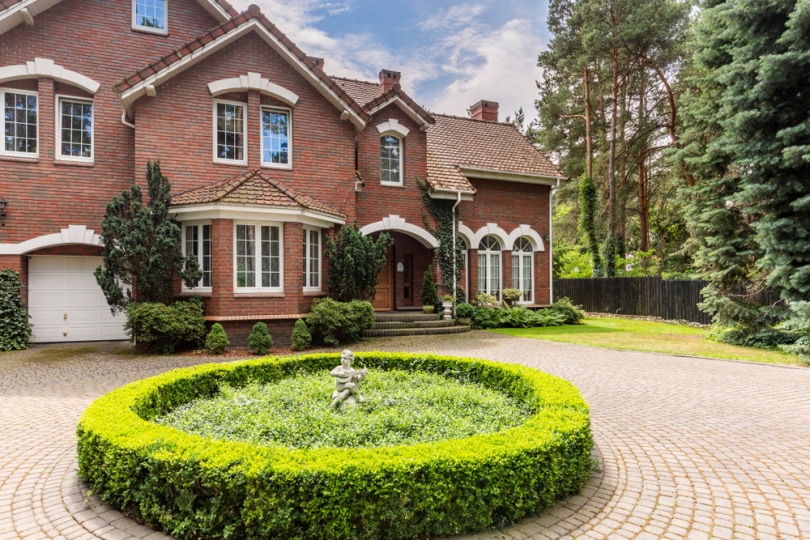
What’s the point of a driveway? First, it makes it easier to reach the garage, carport, or main gate. Second, it increases the curb appeal. But what about the material? Pavers are a great choice for a driveway. They are cheap, easy to work with, and last for a long time. Today, we’ll learn how to install driveway pavers the right way.
Is this going to be an easy gig? If you’re ready to use some elbow grease, this project shouldn’t be hard to pull off. You won’t need tons of experience with building materials or construction equipment, either. And you’ll be done in about a week. Just make sure to follow our guide closely and get all the tools ready!
| Time Needed | 3–7 days (on average) |
| Estimated Cost | $10–$30 per square foot |
| Difficulty | Moderate/High |

What You’ll Need for the Job
To build a driveway, you’ll need lots of pavers, be it concrete or bricks. That’s the obvious part. See that you have protective gear, measuring tools (a level and a tape), and a tamper. A shovel, masonry saw, and wheelbarrow will come in handy as well. As for the materials, get some gravel, sand, and strings. Here’s a full list of the required materials and equipment:
| Tools Required | Materials/Products Needed |
| Protective gloves + eye goggles | A set of paving stones/bricks |
| Measuring tape + level | Recycled road base (gravel) |
| A shovel/spade + rake | Bedding + polymeric sand |
| Concrete compactor/tamper | Edge restraints + spikes |
| Masonry or circular saw | Strings and stakes |
| Wheelbarrow | Paver sealer (non-toxic) |
The 12 Steps to Install a Paver Driveway
1. Planning Comes First
Just like any other project that involves bricks and concrete, the first thing on the menu is planning. To get everything right, make a scale drawing with all the ups/downs, turns, and the exact size of the driveway. Ideally, the location should be with a slight inclination so that the water naturally flows down, not up or to the sides.
If it’s a plain field, you’ll need to create an artificial slope that directs the water away from your house, garage, carport, or any other structure in the area. A 1-inch drop every 4-5 feet is a perfect slope for most driveways. Unless you live in a city or state with extreme humidity levels (it rains a lot), this slope should work just fine.
2. Check for Utility Lines
Before you do any digging, get in contact with the authorities to check whether there are any utility lines (pipes and wires) running underneath the ground. For that, call 811. This number will connect you to a call center. Please, don’t skip this part. Even if you want to plant a tree or install a picket fence, always use this call-before-you-dig number to get official confirmation.
It usually takes utility companies 2–3 business days to respond. And remember—citizens have the right to ask the local utility company to arrive at the site and mark the no-digging zones. And don’t forget about a percolation test. It will tell you about the soil’s water-absorbing capabilities. After that, you can set the base, level the surface, place the pavers, fill in the spaces, and call it a day.
3. Get Everything Ready
Earlier, we listed the materials and tools required to successfully install driveway pavers. Now, while all this equipment is widely available online or at home improvement stores, some of it can be quite expensive. Therefore, it might be a good idea to rent it. We’re talking about a concrete compactor, circular saw, or even a spade. And what about the materials, you might ask?
Should you go with concrete or bricks? If you’re on a tight budget, pick concrete pavers, as they’re significantly cheaper (learn more about that further down this guide). To get a better understanding, check the price at a couple of local home improvement or supply stores. As for the shapes and colors, go with whatever works for your driveway.
4. How Much Paver Do You Need?
It’s not that hard to figure this out. As long as the future driveway area isn’t full of bumps and holes, all you’ll have to do is measure the square footage. We recommend adding 5%–10% to that estimate to be 100% sure you won’t run out of pavers. If the surface is a bit complicated, get even more pavers (10%–15%). Why do that, though?
Well, no matter how careful you are with the measurement, you’ll still need to cut some of the concrete or brick pavers to make them fit. And the more sophisticated the design is, the more cutting will be required. To outline the work area, use a set of strings and stakes.
5. Get to Digging
Alright, now it’s time to dig the soil and get the base ready. How deep should you dig? For a driveway, the recommended depth is 12–15 inches. If the soil is wetter than the national average, you might want to add an inch or two to that. The edge restraints will require some space as well. Also, don’t forget about the sand layer (1–2 inches) and the actual pavers (they usually come in at 2–3.5 inches).
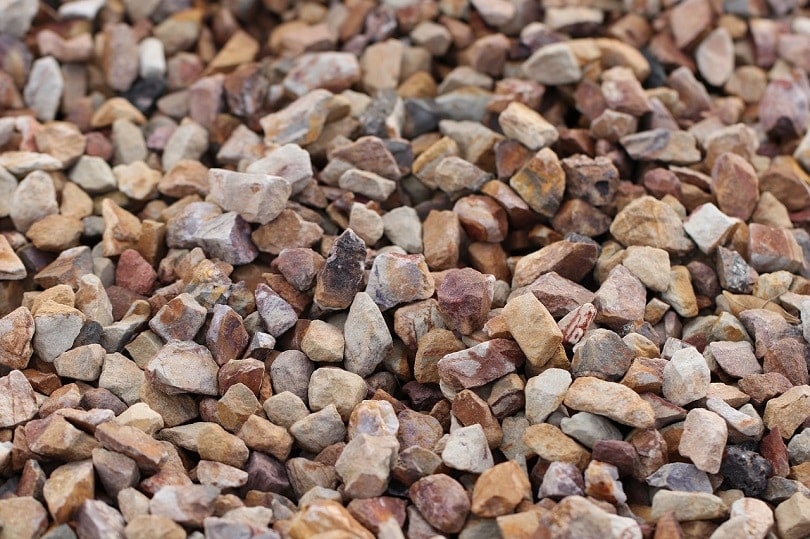
6. Laying the Base Material
Gravel has proven to be the best base material. It is cheap, reliable, and does a great job of absorbing moisture. Or it can be crushed stone—whatever works for you. Remember: poor drainage will ruin the whole project, and you’ll have to rebuild the paver driveway later. So, pay extra attention to this. When laying the base, don’t go all in. Instead, add 5–6 inches and then go over it with a tamper or a compactor.
Watering it will help with the compacting. Keep adding gravel until it’s of the right height (about 8–9 inches if you want the driveway to be 12-inches tall). Also, don’t be afraid to add a bit extra on the sides. Speaking of height, use stakes and strings to eliminate any dips and bumps and to make sure the slope is still there. This might take a lot of time and effort, but it’s a very important step.
7. Using Edge Restraints
What’s the point of using restraints? They keep the shape/design of the driveway intact. Without them, the pavers will shift around a bit over time. Place them evenly around the perimeter and secure them with the spikes that come with the package. The most expensive edge restraints are made of steel and aluminum, but plastic will also do.
A quick note: if the driveway is irregularly shaped, you will have to put some extra work in and cut the edges to fit the design.
8. Bedding: An Important Step
So, with the gravel in place, go ahead and add a layer of bedding sand. The main job of this layer is to hold the pavers in place (yes, similarly to the restraints). Don’t go too deep with it: one inch of sand should be enough. There’s nothing hard about this part. Just make sure the sand is lying evenly, and that’s it.
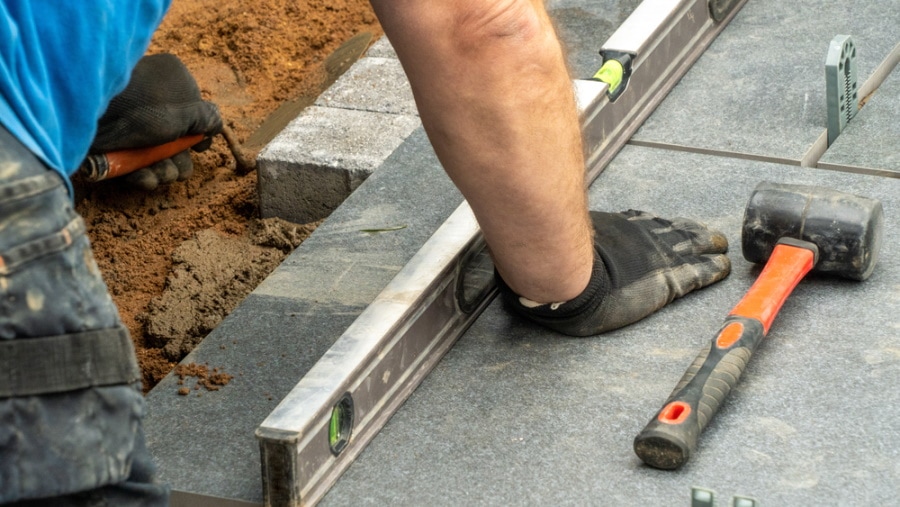
9. It’s Time to Lay the Pavers!
Yes, we’re finally here. To achieve the best results, start by laying the pavers along the sides. This is one of the easiest steps, although it does take some time. If the pavers are all identical, just lay them out. But if there’s diversity in the shapes and the colors, follow a prearranged pattern. Gently place every single paver into the sand. Do your best not to slide or push them in too hard.
Also, it’s recommended not to step on the sand. Instead, make your way forward by “jumping” from one paver to another. Don’t worry too much about the gaps between the individual pieces, as we will fill them later. Still, try to keep the pavers as close to each other as possible. Again, just like with the gravel and the sand, always check the level to ensure the slope is still there.
10. Cutting into Smaller Pieces
The driveway almost never fits the shape of all the pavers laid onto the sand. That means at least some cutting will be involved. Use a circular or masonry saw with blades that can cut through bricks or concrete. If you bought 5–15% extra pavers as we suggested earlier, you will have more than enough to cut.
11. Tamping the Driveway
With the pavers in place, the next step is tamping them into the sand. A tamper will get the job done, but a compactor will do it much faster. Go over the pavers 2–3 times. If there are any gaps (most likely, there will be lots of those), put some polymeric sand in there and seal everything with the compactor. Go over these areas 3–4 times.
The difference between polymeric and regular bedding sand is that the former is specifically designed for extra durability, which is exactly what we need for the driveway. Plus, it looks much better. To sweep it into the joints, use a mop, a broom, or any sweeper you’ve got handy.
12. Sealing the Deal
Last but not least, use a sealing product to boost the durability and longevity of the pavers. You won’t need any specific sealer for this: just see that it’s non-toxic and won’t ruin the greenery in the area. Clean the pavers with a garden hose and a broom before applying the sealer. Wait until the pavers are dry!

Are Driveway Pavers Worth It?
The short answer is yes, driveway pavers are an excellent long-term investment. The more cars you have and the longer the drive from the street to your house/garage is, the more reason there will be to build one. We’ll talk about the estimated cost in a moment, but right now, let’s just say that pavers aren’t that expensive, and they’re (relatively) easy to build.
Concrete vs Brick Pavers: What’s the Difference?
Any flat stones you see laid on the ground to shape a patio, walkway, or driveway are pavers. And they can either be built from concrete or bricks. So, which option is best? You’ll need the same tools and the same techniques to install them—that’s what they have in common. As for the differences, bricks are much more resistant to UV rays. Plus, they will serve you longer: bricks tend to crack, but they don’t erode as concrete does.
Next, this is a low-maintenance and environmentally friendly material. Does that mean you should pick them over concrete? Well, not quite! Bricks are more expensive, limited in terms of design and shape, and harder to cut. Concrete, in turn, is more impact-resistant and handles heavy weights (a big pro if you’re driving a full-size truck/SUV). Concrete is easy to cut, fit, and install. It does require more maintenance, though.
How Long Do They Last?
On average, concrete paver driveways last for 20–30 years. You will, of course, have to do regular maintenance, but it won’t take much time and effort. Applying a sealer and keeping the pavers clean is a very straightforward process. Still, if the lifespan is the #1 priority for you, go with bricks, as they serve for 40+ years. Are concrete or brick pavers affected by natural elements?
Yes, they are: if you live in an area with high humidity levels, that will have an impact. The same is true for overly dry climates. Overall, driveway pavers are quite sturdy, but, again, bricks tend to crack and break due to temperature extremes and heavy loads. Concrete fades and erodes, which makes the driveway look old and “cheap”.
How Much Will the Driveway Cost?
Brick pavers are more expensive than concrete pavers. Depending on the city/state, a concrete driveway will be 15%–20% cheaper to build. If you’re going for a large driveway, the price difference will be quite big. Now, the average price for one square foot of concrete driveway pavers is $10–$25. That’s the price for both the materials and the labor.
Most homeowners in the US pay $10–$35 per square foot and $3,500–$9,000 for the whole thing (depending on the size). Contractors usually charge somewhere between $5 and $15—roughly half of the total cost. So, if you manage to pull off the installation manually, you’ll get to save up to 40%–50%! A quick note: grass pavers are the cheapest option for a paver driveway, while cobblestone can cost up to $42,000.
In Conclusion
If you’re tired of having to drive through sand, dirt, mud, and slush to reach the garage, a paver driveway is a must-have. You can choose between bricks and concrete, and the installation process will be roughly the same. Some hard work will be involved, but the result will be well worth it, as the driveway will make your property look so much better.
Paver driveways aren’t very expensive. And, you won’t have to pay a contractor for the job. While it would be best to have a friend lend a helping hand, for the most part, this is a one-man job. So, make sure you have at least a week of spare time, gather all the tools and materials, and get to work!
Featured Image Credit: romakoma, Shutterstock
Contents
