
IKEA furniture is known for being affordable but also for having a large number of parts and pieces needed to assemble it at home. Since IKEA furniture is designed to be assembled by almost anyone in a home environment, most of their furniture is fairly simple and straightforward to understand. That makes it easy to remove an IKEA drawer if you need to. However, depending on the type of furniture you have, the drawer might not come out as easily as you think. Since IKEA has hundreds of different models of furniture, your drawer might be one of a variety of different kinds that may or may not come out with a simple tug.
Here is how you can remove any IKEA drawer in seven easy steps.

Preparation
Removing a drawer is a simple process, but you should still gather your tools and make a plan before starting. It is also a good idea to empty the drawer you are trying to remove to make it easier. However, if the drawer is not too full or too heavy, you can skip that step if you so choose.
What You Will Need:
- Phillips head screwdriver
- Flat head screwdriver
- Allen wrench
- Furniture plans (optional)
| Complexity | Basic |
| Time | 15–30 minutes |
Find the Plans, If Possible
It is always a good idea to keep your plans for your IKEA furniture, even after you have finished building it. If you saved the plans for your IKEA furniture, it is a good idea to find them and pull them out. The plans will help you decipher what kind of drawer you have and what kind of latch it has. This will help you to figure out exactly what you need to do to remove the drawer.
If you did not save your plans, don’t worry. It is usually easy to figure it out on your own.
The 7 Steps on How to Remove an IKEA drawer
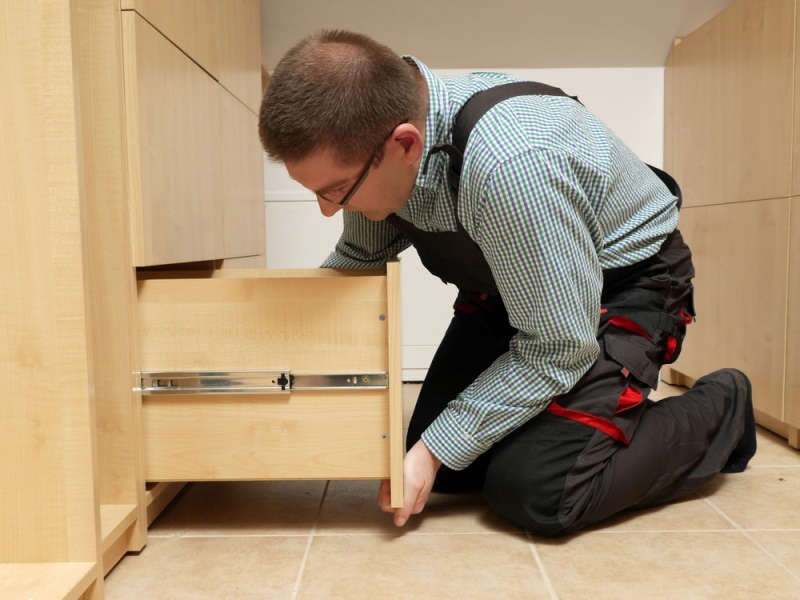
1. Pull Out the Drawer as Far as It Will Go
The first thing you should do is carefully pull the drawer out as far as it will go. Do not yank on the drawer too hard because you don’t want to damage it. Pull the drawer until it does not move forward any further. You might also want to empty the drawer before moving on to the next steps.
2. See If the Drawer Will Simply Slide All the Way Out
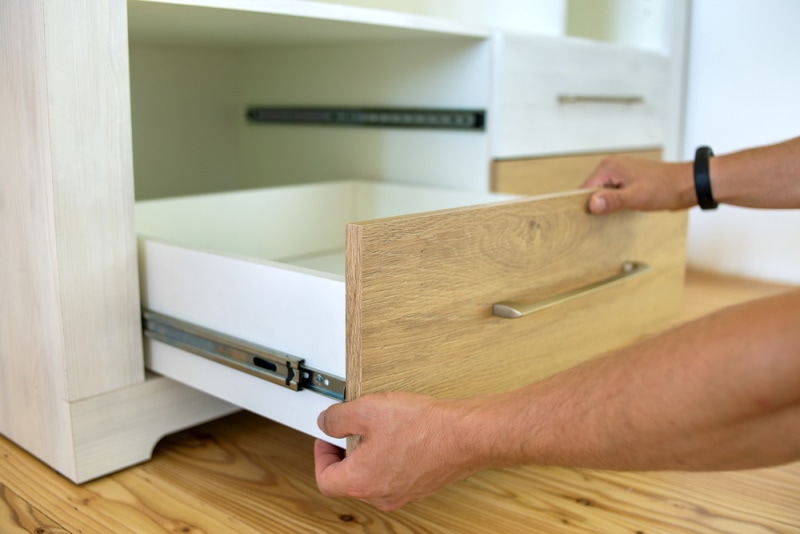
The first thing you should do is see if the drawer will pull all the way out. Some drawers do not have any clasps or latch securing them to the rails. These are the easiest drawers to remove because they will simply slide out without any other steps needed. You can also try pulling upwards on the drawer when it is fully extended to see if it will pop off of the rails and come free.
3. Look for Latches Connecting the Drawer to the Rails
If your drawer is still secured after pulling it out, look for latches attaching the drawer to the rails. Many IKEA drawers have simple plastic latches that can be pressed to remove the drawer. This is a good time to consult the plans if you have them to see what kind of latches might be present in the drawer.
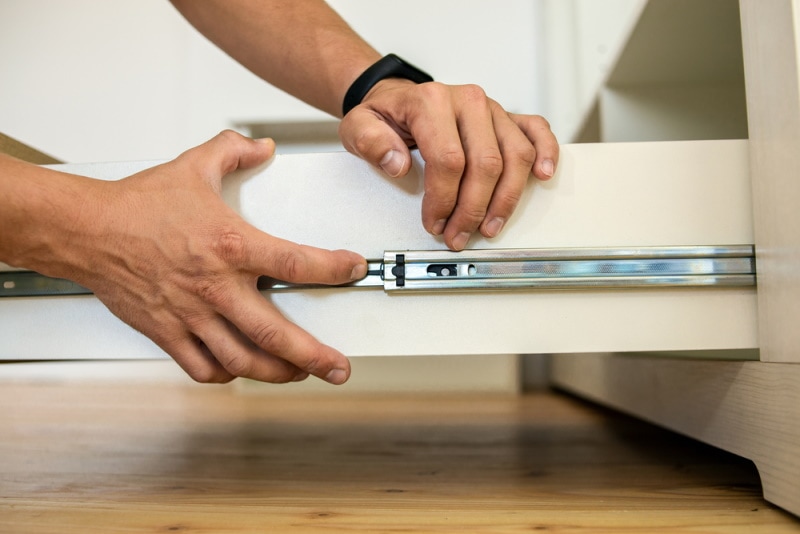
4. Press the Latches With a Screwdriver
Most of the common latches can be depressed to release the drawer. Take a screwdriver (flat head is preferable) and press the latches. There are normally two latches, one on either side of the drawer. Press the button with your screwdriver and then gently pull the drawer out to remove it.
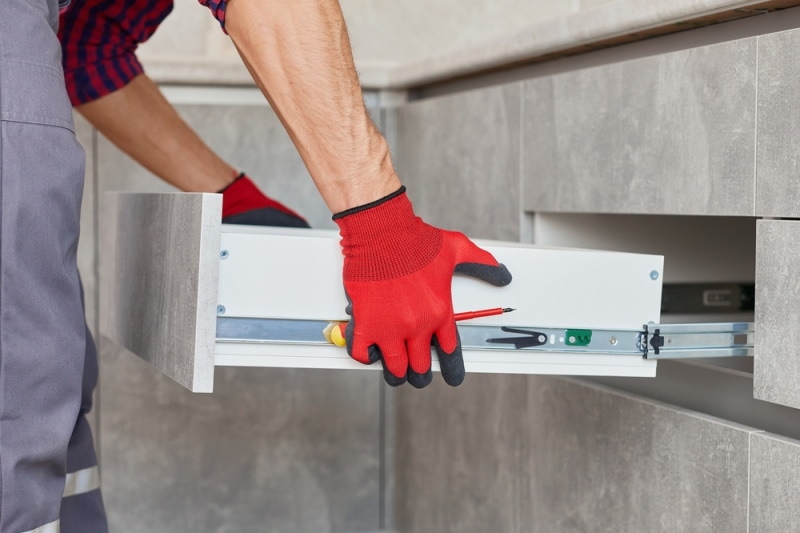
5. Located and Remove Drawer Blocks
Some drawers also come with drawer blocks. These are usually small pegs, caps, or screws that prevent the drawer from sliding all the way out. Look at the front of the rails to see if you can find the drawer blocks. If you see these blocks, work to remove them. Many of them simply unscrew. Set them aside but be careful not to lose them. You will want to put them back into place when you are done.
6. If There Are No Latches or Blocks, Try Pulling Up on the Drawer
If you don’t see any clasps, latches, or blocks in place but the drawer still won’t come out, you might need to handle the drawer by pulling up on it. Fully extend the drawer, grab the front of it, and then pull upwards to try to get the drawer to pop out of the rails. Don’t be too rough, and don’t move the drawer up and down. Just pull it upwards and the drawer should come free.
7. Reverse Engineer the Drawer
Lastly, if you still cannot get the drawer out, you might need to do some further detective work to figure it out. Carefully examine the drawer, paying attention to the rails on either side and the bottom. Your drawer might have a different method of attaching it to the furniture. This is also a great time to use the plans if you have them. Look for any screws or connectors that might be securing the drawer in place. Carefully remove these with a screwdriver or Allen wrench and see if the drawer is able to be removed. All drawers can come out. You just need to figure out what is holding it in place.

Conclusion
Whatever type of drawer your IKEA furniture may or may not have, these steps should help you examine and remove any drawer. The key is finding what the attachment device is, keeping the drawer in place along the rails, and removing it so that the drawer can come free. Sometimes this is as simple as a couple of screws, but other drawers might be more complicated. Every drawer can be removed with the right tool.
- Related Read: When Was Ikea Founded?
Featured Image Credit: pryzmat, Shutterstock
Contents
