
In this day and age, the vast majority of windows have screens of some sort. They keep the bugs from entering your home whenever you open the window while still allowing a nice breeze to flow through.
However, because screens are so thin and delicate, they often get damaged. Luckily, you can replace them very easily at home without much prior DIY knowledge. Even someone who has never performed a repair job before can easily get this project done.
Replacing a screen can seem pretty straightforward, but we’ve listed all the steps below just to make sure you don’t miss anything.

The 6 Steps to Replace a Window Screen
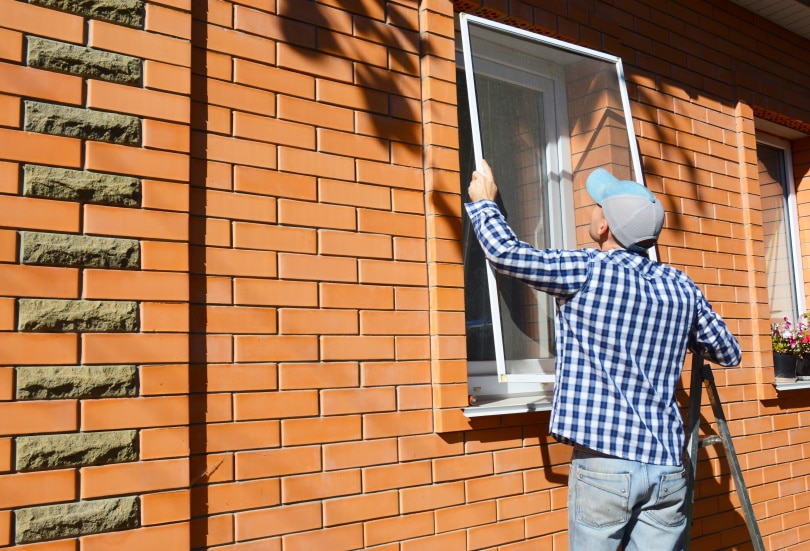
1. Remove the Frame
Before you can start repairing the screen itself, you need to remove the frame from the window itself. Usually, this is as easy as pulling the screen out of the window. However, many screens come with locking mechanisms that keep them taunt into the window frame, which prevents them from coming loose. You may need to unlock these mechanisms before the frame comes out.
Luckily, manufacturers make this part pretty easy. They know that homeowners may need to remove the screen for one reason or another, so they often make the screen easy to pop out.
Once you have the screen out of the window, it’s time to start removing the screen from the frame.
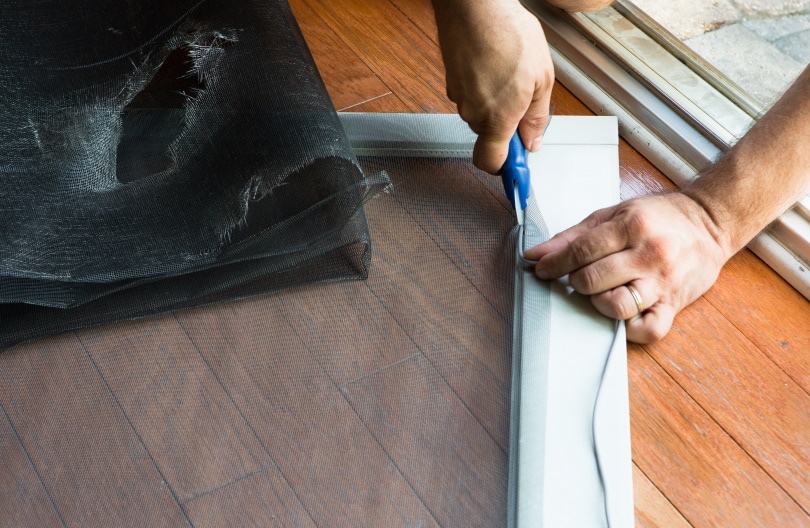
2. Remove the Old Screen
Your next step is to remove the old screen from the frame. A small plastic cord holds the screen in place, running in a channel around the screen’s frame. To remove the screen, you’ll need to use a screwdriver or some other device to remove this plastic cord from the channel. You’ll basically just want to brute-force this step, though it usually isn’t terribly difficult to do.
Once you pop out the cord, the screen should disconnect from the frame as well. You can simply throw it away.
3. Measure
Next, you’ll need to prepare the new material for the frame. Simply roll out the screening material and lay the frame on top. Leave about 2 inches on each side, just in case, and cut the screen to size.
4. Place the New Screen
Put the new screen material over the frame so that it is about even on all sides. You’ll want the screen to be overlapping the metal frame. If you’ve cut too much, don’t worry about it. Too much isn’t necessarily a bad thing, but too little is.
Because screening material is usually rolled up, the screen may have some natural curve to it. This will eliminate itself in time.
Pull the screen as tightly as you can and clamp it to the frame. You want it to stay in place while you perform the next step.
- See also: 9 Tiny Home Trends and Statistics
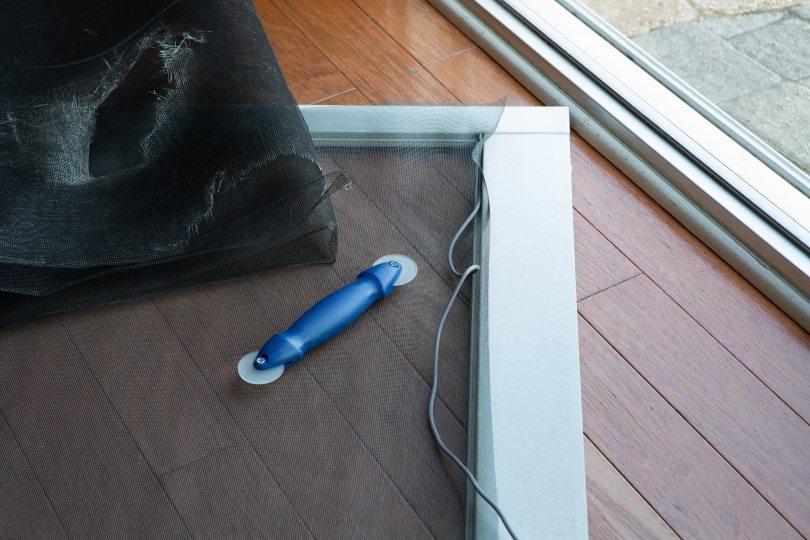
5. Add the New Spline
Now you’ll need to insert a new plastic piece, the spline, to ensure that the screen stays in place. You’ll simply want to start on one side and slowly push the new plastic rod into the frame. Usually, the rolling tool comes with a wheel that makes this process pretty easy. Just be sure that the screen stays stretched while you’re doing this. You don’t want it gaining slack or anything of that sort.
After the screen is permanently in place, you can trim any of the excess material. If you’ve done everything right, there will probably be a bit of excess left.
6. Put the Screen Back in the Window
Next, you just need to put the frame with the new screen back into the window. Simply do the first step backward, ensuring that you lock the frame in place as necessary.
- Related Read: How Much Does It Cost to Replace Windows?
In Conclusion
Changing out an old screen is extremely easy. Basically, you’re just removing the old screen, measuring your new materials, and then adding in the new spline to ensure that the screen stays in place. Overall, it doesn’t really get much simpler than this DIY job.
This project should cost you very little as well since new screening material is typically very cheap.
Featured Image Credit: Radovan1, Shutterstock
Contents
