

Using bricks to build any property is an incredible choice since you get a quality structure. Bricks are strong and durable, making them a wonderful construction choice. Plus, you won’t have to worry about continuous maintenance to keep the bricks looking clean.
But you might need to do some cosmetic work on it after a long duration. Brick can get tired and require some refreshing in the form of staining. In this article, you can learn all about brick staining and how to do it in a few easy steps.

What Is Brick Staining?
Brick staining is a process that involves applying a dye over brick; it won’t change its structure but will alter its color. Since brick is a porous material, it will absorb the dye and take on its color. This is excellent since you won’t ever have to worry about chipping.
When you opt for staining, you’re adding a new color to the bricks to make them look fresh. It’s something you can do when you notice the brick inside and outside your home looks tired. The good news is that it takes years for you to have to stain the bricks.
Simple brick stain only changes the color but won’t protect the bricks from wear. However, there are some complex stains that contain protective ingredients that improve your bricks’ lifespan.
When it’s time to stain the bricks, ensure they’re clean and free from any sealants to better absorb the stain. If your bricks have paint on them, you might not get the best results from staining and are better off painting over them.
Which Type of Stain Should I Use?
If you notice your bricks need some refreshing, you can use staining to create a better look. There are two types of stains that you can use on them. These are:
1. Stain Premixed with Sealant
Bricks are porous, and after staining, you don’t want things like water messing up the new look. For example, when staining bricks outside the house, you can use the stain premixed with sealant. It makes the bricks waterproof to prevent moisture buildup.
But you have to note that this type of stain can create issues later on. While you get to prevent moisture buildup, you might not be able to apply stain on these bricks again. Therefore, it’s better to use this stain on a few areas with better breathability.
2. Water-Based Stain
This is the best stain for indoor or outdoor use in your home or any project that you have. Water-based stain is simple to use and creates a breathable coating that protects your bricks.
What You Need to Stain Bricks
After you pick the stain to use on your bricks, now you can proceed to apply it. For this process, you will need certain tools and materials, as seen below.
- Plastic drop cloths
- Clean bucket
- Scrub brush (nylon bristle)
- Garden hose
- Long stick
- Wide paint brush (good quality)
- Safety goggles
- Mild dish soap
- Waterproof gloves
- Brick stain
Step-by-Step Process of Brick Staining
It’s better to gather everything that you need before you begin staining. Once you have all the items at hand, you can proceed.
1. Test the Bricks Absorption Capacity
It’s important to know that the bricks can absorb water. Therefore, you need to splash some water on it. If the water is absorbed and there’s no runoff, the bricks are good for staining. If the opposite happens, unfortunately, staining can’t work on the bricks.
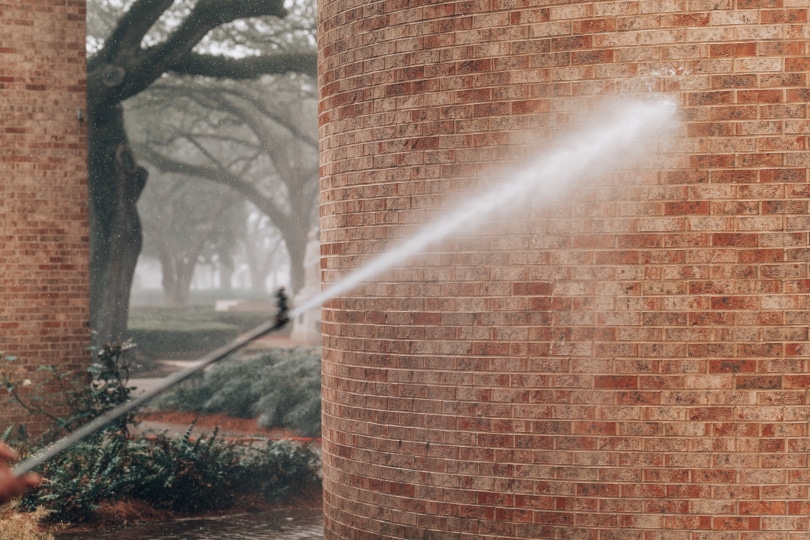
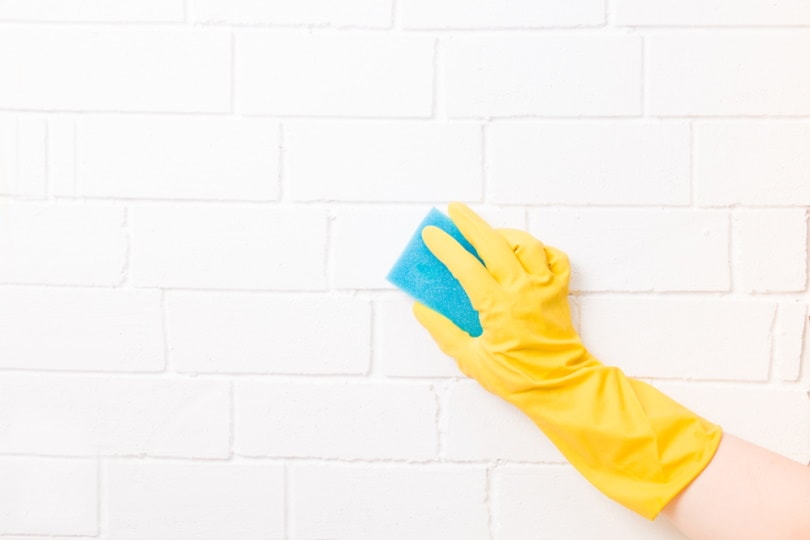
2. Clean the Bricks
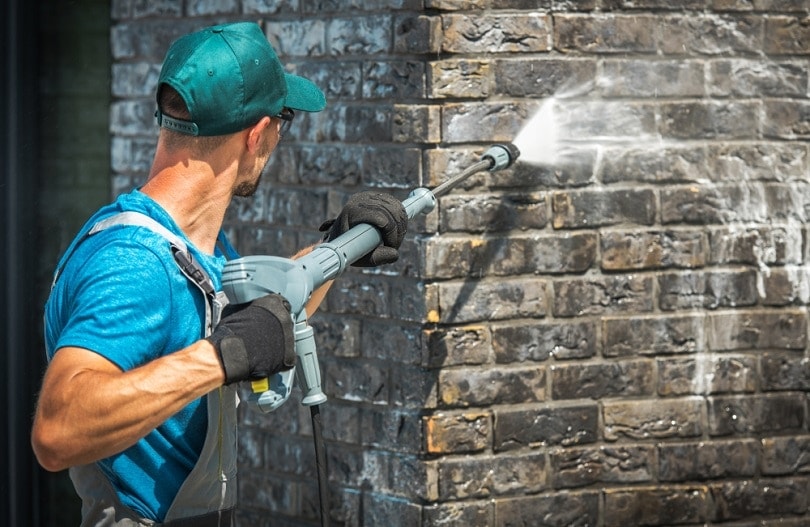
Staining produces the best results on clean bricks, so the next steps involve—you guessed it—cleaning! Fetch the hose pipe and connect it to a source of water. Spray the bricks with lots of water before applying the mild dish soap.
Using the nylon scrub brush, begin to scrub the bricks from top to bottom to remove any dirt, moss, or mildew. Run the hose all over the wall rinsing away the soap and gunk that comes off the bricks. If you have a big area that you need to clean, you can get some help or hire a professional cleaning crew.
3. Wear Your PPE and Protect the Floor

After the bricks are clean, it’s time to protect yourself, the floor, and any other area that doesn’t require staining. Wear your PPE and some old clothes that you don’t mind getting some color. Or you can get a coverall that’s meant for such tasks.
In addition, use the plastic drop cloths to protect any other areas that you don’t want to get stained. This includes windows, wood frames, doors, and even the floor. Also, you can have a bucket of water near you and a cloth to rinse off any splashes that get to these unwanted areas.
4. Mix the Stain
Get the stain and read the instructions on the container. Only by following these instructions can you get the best results. Most stains require mixing with water first, then you can proceed with staining. As per the instructions, measure the water you need, mix with the stain and use the long stick to mix it well.
After mixing, use a testing brush and try out the stain on a small part of the brick surface. Observe the color consistency and let it dry completely. If you like what you see, you can proceed to stain the entire area.
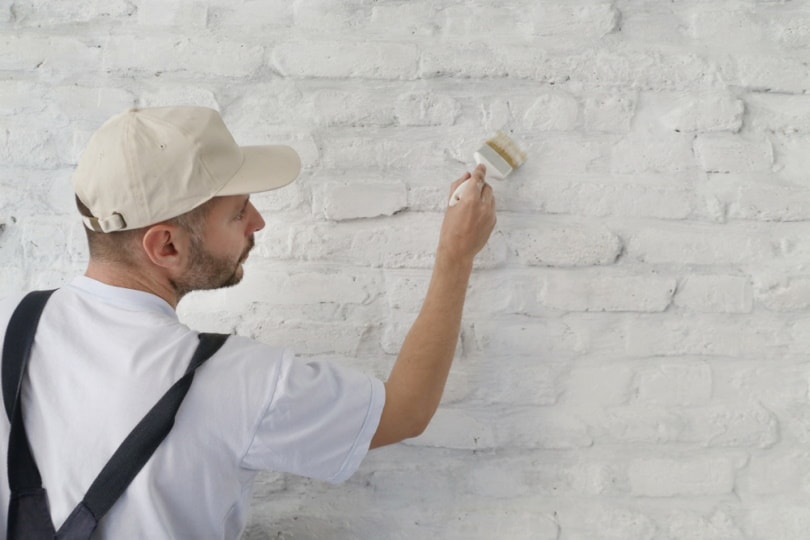
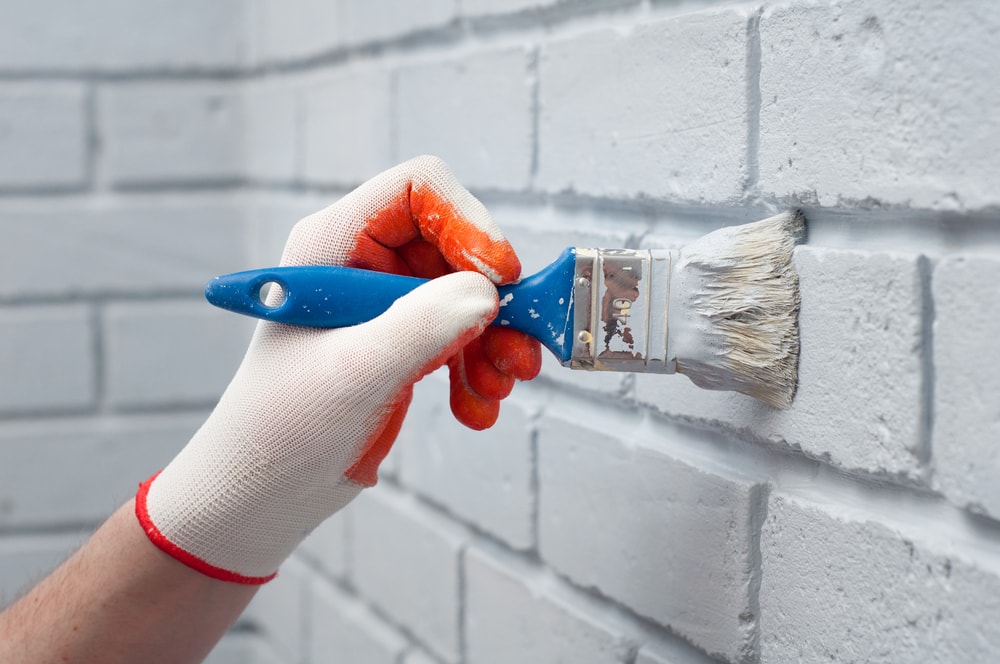
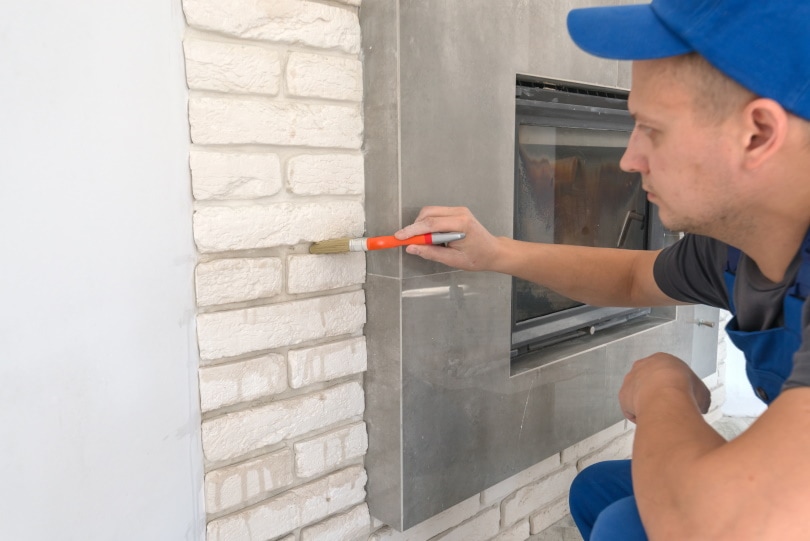
5. Stain the Bricks

Using the large brush, start to stain the bricks. Dip the brush into the stain mix, strain the excess off and apply the stain on the bricks. It’s better to start from the top part heading down but run the brush along the brick one at a time. Remember to stir the stain mix each time you dip your brush.
If the bricks are high, you can get a stable step ladder for easier work. Also, you can use a sprayer or a roller if you’re dealing with a large area and want to complete the process fast.
6. Clean the Drips
As you stain the bricks, it’s possible to get drips. These can create unsightly dark marks on the bricks if you leave the stain to set. Instead, dip a rag in clean water and clean out the drip immediately. If you want to prevent drips, always drain the brush on the side of the container before staining.
7. Let the Stain Dry
Allow the first coat of stain to dry, then apply another. Remember, the drying time will depend on temperature, humidity, and stain consistency. If the brick staining happens indoors, ensure there’s good airflow for less drying time.
In the meantime, you can start cleaning. Wash all the tools that you use to stain the bricks. If your staining bucket isn’t easy to clean, you can toss it.
Is Brick Staining Better than Painting?
Brick staining is better than painting since stain tends to last longer. Plus, you won’t have to worry about peeling, a common issue with paint. The bricks absorb the stain and prevent any moisture buildup, which can damage them.
Another positive reason to stain is that you have a wide array of colors to choose from. Stain lasts longer, and it’s easy to do without needing professional help. It seals the bricks, making them breathable but also protected for a long time.
Good brick staining can last up to 20 years, meaning you won’t have to worry about frequent refreshing. It’s better to work with high-quality stain that also protects your bricks.
Conclusion
Staining is the best way to give your bricks a new look lasting for a long time. Unlike paint, you won’t have to worry about peeling when you use a stain. But, you can only use stain if the bricks are free of paint or any other sealant that may prevent absorption.
Following the seven steps above, you can stain your bricks and enjoy the new look for quite some time.
Featured Image Credit: rigsbyphoto, Shutterstock
Contents
