
Brick is rich in character and a powerful statement, both inside and outside the house. But if the traditional feel doesn’t suit your style, it can seem awkward, heavy, and hard to work with when you want to change things up.
Fortunately, you won’t need to rip out and replace your brick to alter the aesthetics. Painting brick walls is an inexpensive way to add curb appeal to the exterior of your home and lightening up your fireplace can refresh the atmosphere indoors.
When you do it correctly, a coat of paint can revitalize brick and make it match your design tastes. If you’re ready for a fresh look around your home, we’ll show you how to get exceptional results with this guide on how to paint brick in four easy steps!

Do You Have To Wait to Paint New Brick?
If you have a new brick installation, you will have to wait at least a year before painting. New brick needs to weather and leach minerals and efflorescence—a chalky material that could damage paint if you apply it too soon.
How to Paint Brick in 4 Easy Steps
1. Clean the Brick
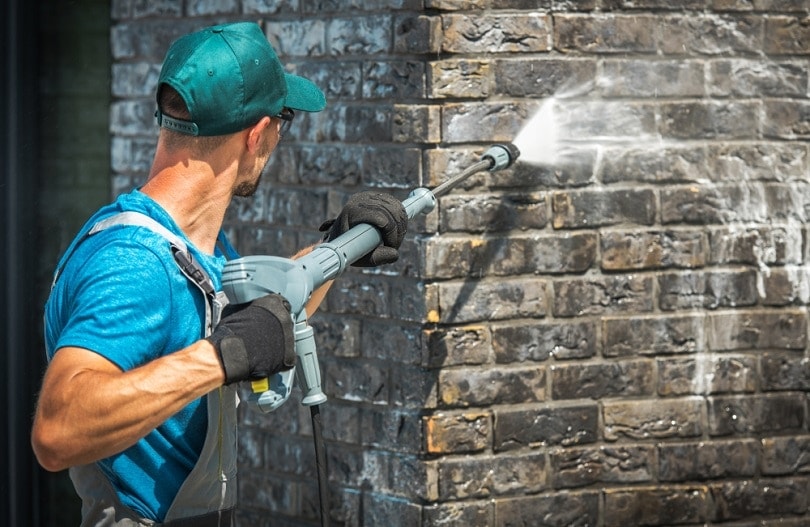
Loose dust, soil, and efflorescence can make it difficult for paint to hold onto the brick. Before painting, you’ll need to ensure the brick is completely dry, clean, and in good repair.
Start by clearing dirt and debris off of your brick. If you’re painting the exterior wall of your house, you can pressure wash your brick at around 1,000 PSI to clean it. Avoid using high pressure over 1,500 PSI because that can cause unnecessary damage to your mortar.
For a brick fireplace, soap and water will do the trick. Scrub with a wire brush or stiff-bristle brush to clean out the crevices and gaps.
Let the brick dry for 24 hours.
Cleaning with Trisodium Phosphate and Bleach
If you need some additional cleaning power, try trisodium phosphate (TSP). Dilute TSP heavily with water and use it with a sponge to clean interior brick structures or add it to your pressure washer for an outside wall. TSP is a hazardous substance, so it’s crucial to wear protective eyewear and gloves while handling it.
Along with everyday dirt and grime, it is critical to remove any mold and mildew on your brick, as painting over it will exacerbate the problem.
Remove mold by treating it with a mixture of one part water and one part chlorine bleach. Spray the affected brick and scrub the mold with a stiff-bristled brush. Let it sit for 1–2 hours before giving it a thorough rinse.
After rinsing off your cleaner, give the brick 24 hours to dry.
2. Repair the Brick
Brick has to be in good condition before you decide to paint. Painting over dirty, crumbling, or damaged brick will only temporarily mask problems and allow them to worsen behind the facade.
After cleaning the brick, you’ll need to repair any cracked brick and mortar. Use an acrylic caulk because it will hold paint better than silicone.
Significant issues with mortar may require repointing, a process where you remove worn mortar and replace it with new mortar. If you need to repoint, you will need to let the new mortar cure for at least 28 days before painting.
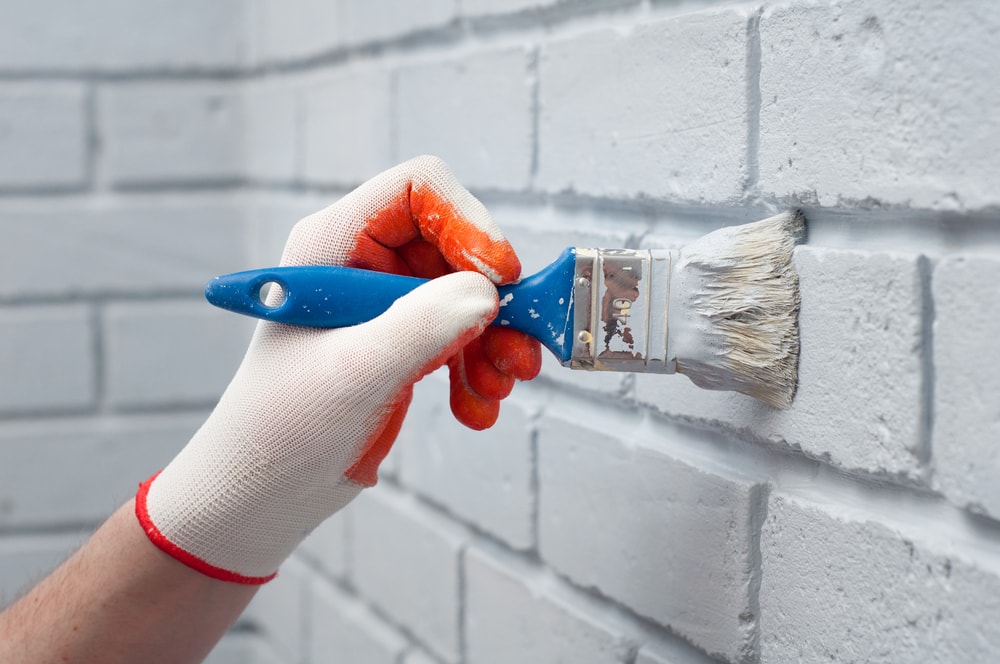
3. Apply Primer
After you have cleaned, repaired, and dried the brick, you will be ready to paint. If you are painting a brick fireplace, you may only need a paintbrush. Exterior brick walls will require a paint roller or, if you want to make life easier, a sprayer.
Tape off the edges of your brick before painting. Use a latex primer formulated for brick and masonry to get into all the nooks and crannies of the brick.
Since you will be going over rough surfaces and filling gaps between bricks, you’ll need to choose your roller carefully. Opt for a high-quality roller that can take a beating, one with at least a 1-inch nap to cover all the brick and mortar.
Let the primer dry. Add a second coat if there are exposed gaps to cover up.
4. Paint the Brick
After letting the primer dry, you can apply your paint. Like the primer, you will likely have to make 2–3 passes to fill all of the cracks and gaps. Let the paint dry for a few hours in between coats.
Staining Brick
If your brick is in good condition, you can try staining it instead of painting to enhance its natural color and texture. Test it on an inconspicuous area, and tinker with the mixture until it gives you the desired tint.
Staining brick is easier than painting. If you want to stain your fireplace, you may only need a clean rag to achieve a smooth, bright finish.

What Paint Is Best for Brick?
For exteriors and interiors, acrylic latex paint is an excellent choice for brick. It’s durable, resistant to mold and mildew, and quick-drying. Choose it in a glossy or semi-gloss sheen for an easy-to-clean application.
Aside from acrylic latex, you can also use elastomeric paint, a popular option specifically made for masonry. As you can guess from the name, it creates a flexible, watertight coating over the brick, a strong protective layer against weathering. Although it is more expensive and harder to use than acrylic latex paint, the moisture resistance and durability can have a notable impact on your wall’s integrity.
While you can get away with this kind of paint for walls and fireplace exteriors, you should never use it inside a fireplace or an area with similar high heat exposure. You’ll need a special high-temperature spray paint for the interior if you choose to paint it.
Related Read: Can You Power Wash Bricks? The Surprising Answer!
Conclusion
Painting brick is a decision that shouldn’t be made lightly, but it can also be exactly what you need to breathe new life into your home. It’s a much different surface than wood and drywall, so it can be hard to visualize a professional-looking finished product. But with these tips and the right painting materials, you’ll be blown away by how easy it is to get incredible, long-lasting results.
Featured Image Credit: Serhii Kalaba, Shutterstock
Contents
