
Got some old pallets taking up space in your backyard? It’s time to put them to good use! Instead of throwing the goods away or burning them, put a pair of protective gloves on, and let’s try and repurpose the pallets! The following list includes the best DIY plans for transforming an old, worn-out, and scratched pallet into a work of art.
We’ve got tables, beds, racks, and a lot more! To complete these projects, you’ll only need a set of basic tools and 3–4 hours of your time. You won’t have to spend big bucks on special equipment or ask a friend for help. Every single one of these repurposing ideas is fun, relatively easy to make, and 100% rewarding. Alright, now let’s get to work!

The 9 Brilliant Uses for Wooden Pallets
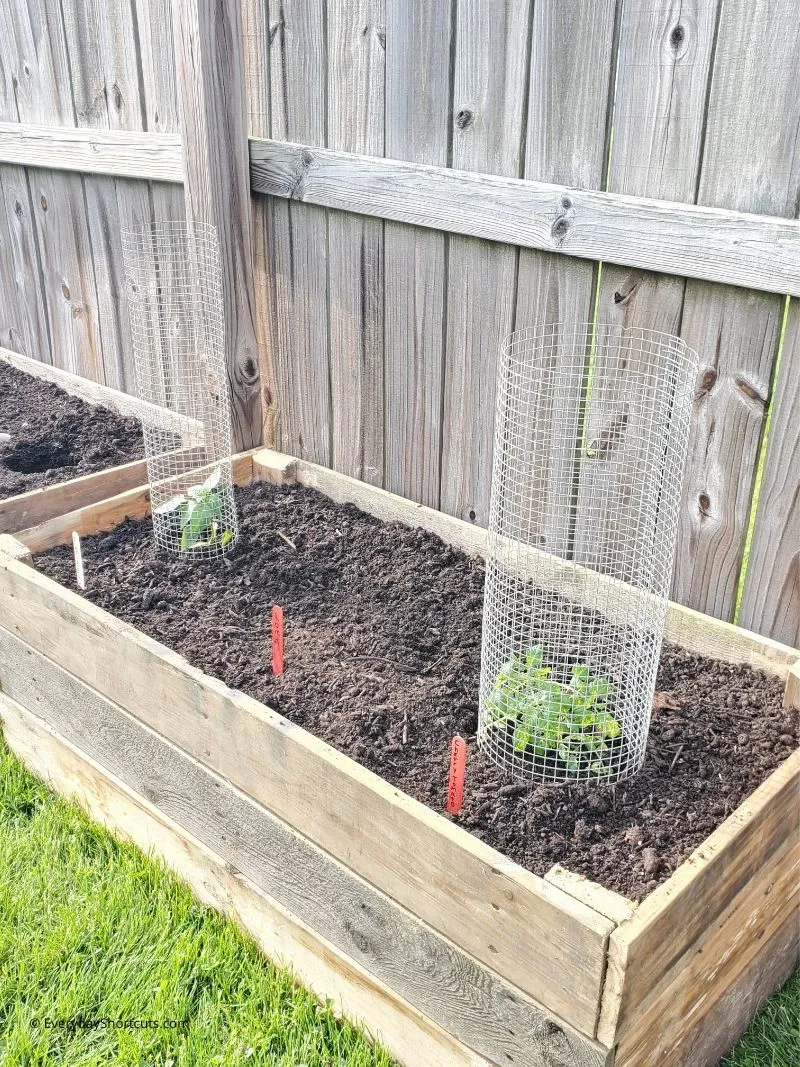
1. Raised Garden Beds by Everyday Shortcuts
| Materials Needed: | Pallets (x1–2), plastic sheet, soil, a set of nails, markers |
| Tools Needed: | Reciprocating saw, nail gun/hammer, shovel, work gloves |
| Difficulty Level: | Easy |
If your garden is growing rapidly and you’re running out of planter boxes, this DIY project will be perfect for you. Turning wooden pallets into raised garden beds takes minimal effort as they look very much alike. All you’ll have to do is some cutting and hammering here and there and a piece of plastic to put at the bottom of the beds. Speaking of cutting, make sure you have a reciprocating saw to deal with the nails.
The best thing about this repurposing plan—it’s up to you to decide how big or tall you want the beds to be. And the more pallets you have handy, the more beds/planters you can build!
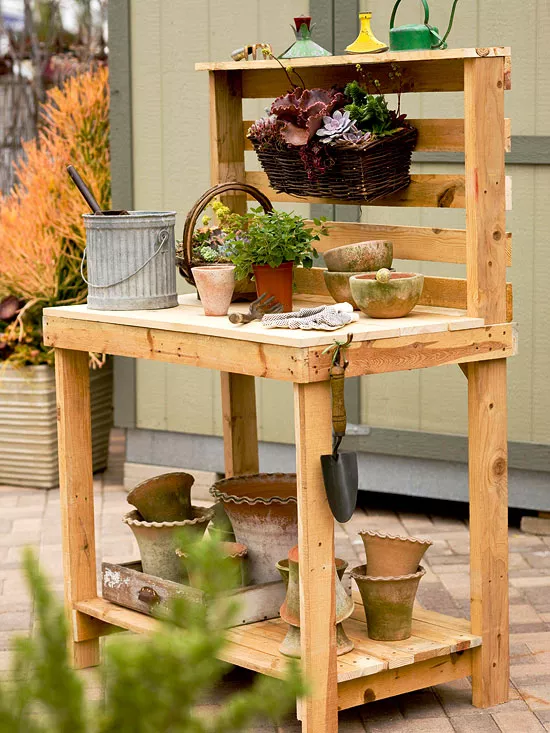
2. Classy Potting Bench by Better Homes & Gardens
| Materials Needed: | Wooden pallet, lumber (1 2×4), sandpaper, exterior screws, glue, primer/paint (optional) |
| Tools Needed: | Framing hammer, miter/circular/table saw, pencil, measuring tape, level, straightedge, screw gun, drill, pry bar |
| Difficulty Level: | Moderate |
Potting benches make garden maintenance a walk in the park. They can hold all your tools, buckets, and fertilizer products. Now, if you have at least one wooden pallet (in decent condition) and some lumber, you can turn it into a classy potting bench. On average, this project takes 4–5 hours at a moderate pace. Make sure it’s at least 30-inches tall so that you won’t have to constantly bend over to grab something from it.
Start by pulling all the nails from the pallets out with a pry bar or a hammer. For cutting the wood, use a combination of table, circular, and miter saws. A measuring tape and level, in turn, will help get the proportions right. Oh, and do consider adding hooks here and there to hold your tools and whatnot.
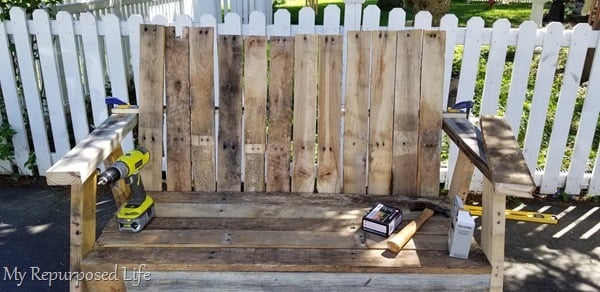
3. Comfy Garden Seat by My Repurposed Life
| Materials Needed: | Pallets (x2), 2×4 boards, wood screws, quick clamps, sandpaper, bungee cord, paint/finish |
| Tools Needed: | Deck wrecker, hammer, vice grips, drill + bits, level, measuring tape, table/jigsaw marker, sprayer |
| Difficulty Level: | Moderate |
Another brilliant repurposing idea for wood pallets is a comfy garden seat. For this plan, you’ll need two average-sized pallets, some wood boards, and clamps. If you’re handy with a jigsaw, you can make the back nice and arched; if not, at least try to make the boards match each other in height. A deck wrecker will make dismantling the pallets an easy task. But, a claw hammer will work as well.
Be patient and very careful when prying the nails and cutting the pallets. Once you’re done building this lovely bench/seat, you can easily move it around the garden, as it won’t be at all heavy. As for the paint, use a spray to apply it evenly. For extra longevity, use a two-in-one paint + primer product. White looks great, but any color will do.
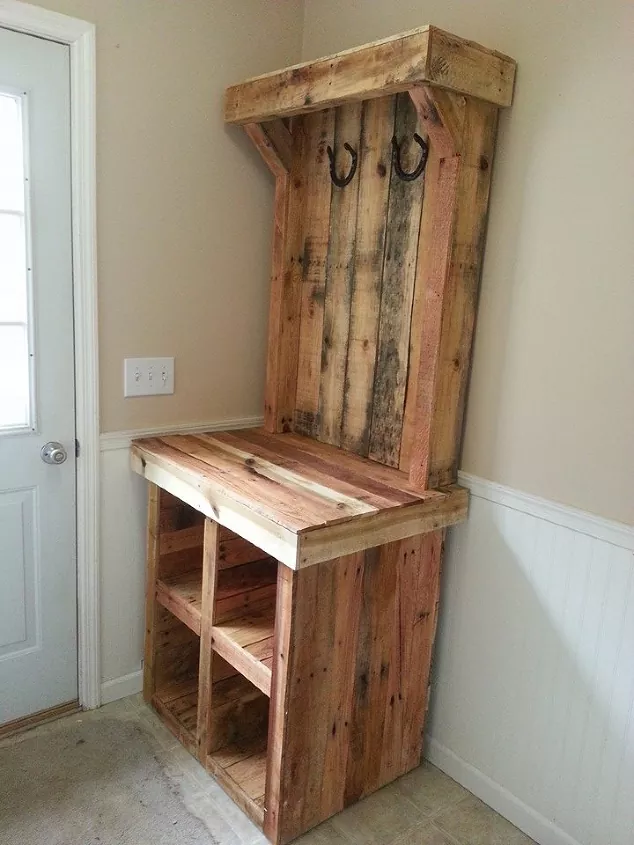
4. Easy-to-Build Coat Rack by Home Talk
| Materials Needed: | Pallets (x8), 2x4s wood, nails, mineral oil, hooks |
| Tools Needed: | Drill + bits, paintbrush, level, protective gloves, table saw |
| Difficulty Level: | Easy |
Everybody needs an extra rack to hang their clothes and stuff in the garage, mud room, or even the bathroom. With this easy-to-build coat rack, you won’t have to throw your clothes around anymore! Make sure you have at least eight pallets and a couple of wood planks for the frame. For this project, nails are better than screws, while mineral oil is better than paint as it can make the wood look “expensive” and last longer.
This is a relatively simple DIY plan. As long as the frame is in place, it shouldn’t take much effort to attach the pallet boards to it. When you’re done, don’t forget to screw the hooks onto the wood. And if you could use extra storage capacity for your shoes, turn the lower part of the rack into a cabinet.
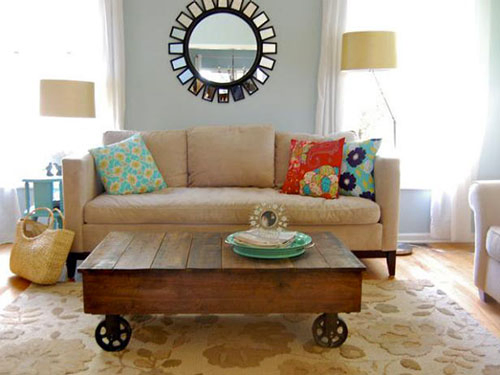
5. Pallet Coffee Table by Queen Bee of Honey Dos
| Materials Needed: | Pallets (x1–2), casters (4 in total), primer/stain, paint, wood screws |
| Tools Needed: | Circular saw, hammer, paintbrush, electric drill, marker, wood glue |
| Difficulty Level: | Easy/Moderate |
Wood pallets look a lot like tables, especially when stacked up on top of each other. And with the help of four casters, you can build a mobile pallet coffee table in a couple of hours. This repurposing plan does involve some cutting, measuring, gluing, and screwing, but it’s not at all complicated. Even one single pallet is enough; that second one is for making it higher and adding extra storage.
Replacing the old screws/nails with new ones and painting (for that classic look) or staining (if you prefer a rustic touch) is a big part of this project. The casters will come with screws and take 5–10 minutes to install. A quick note: for stability and reliability, attach the casters to the supporting blocks, not the boards.
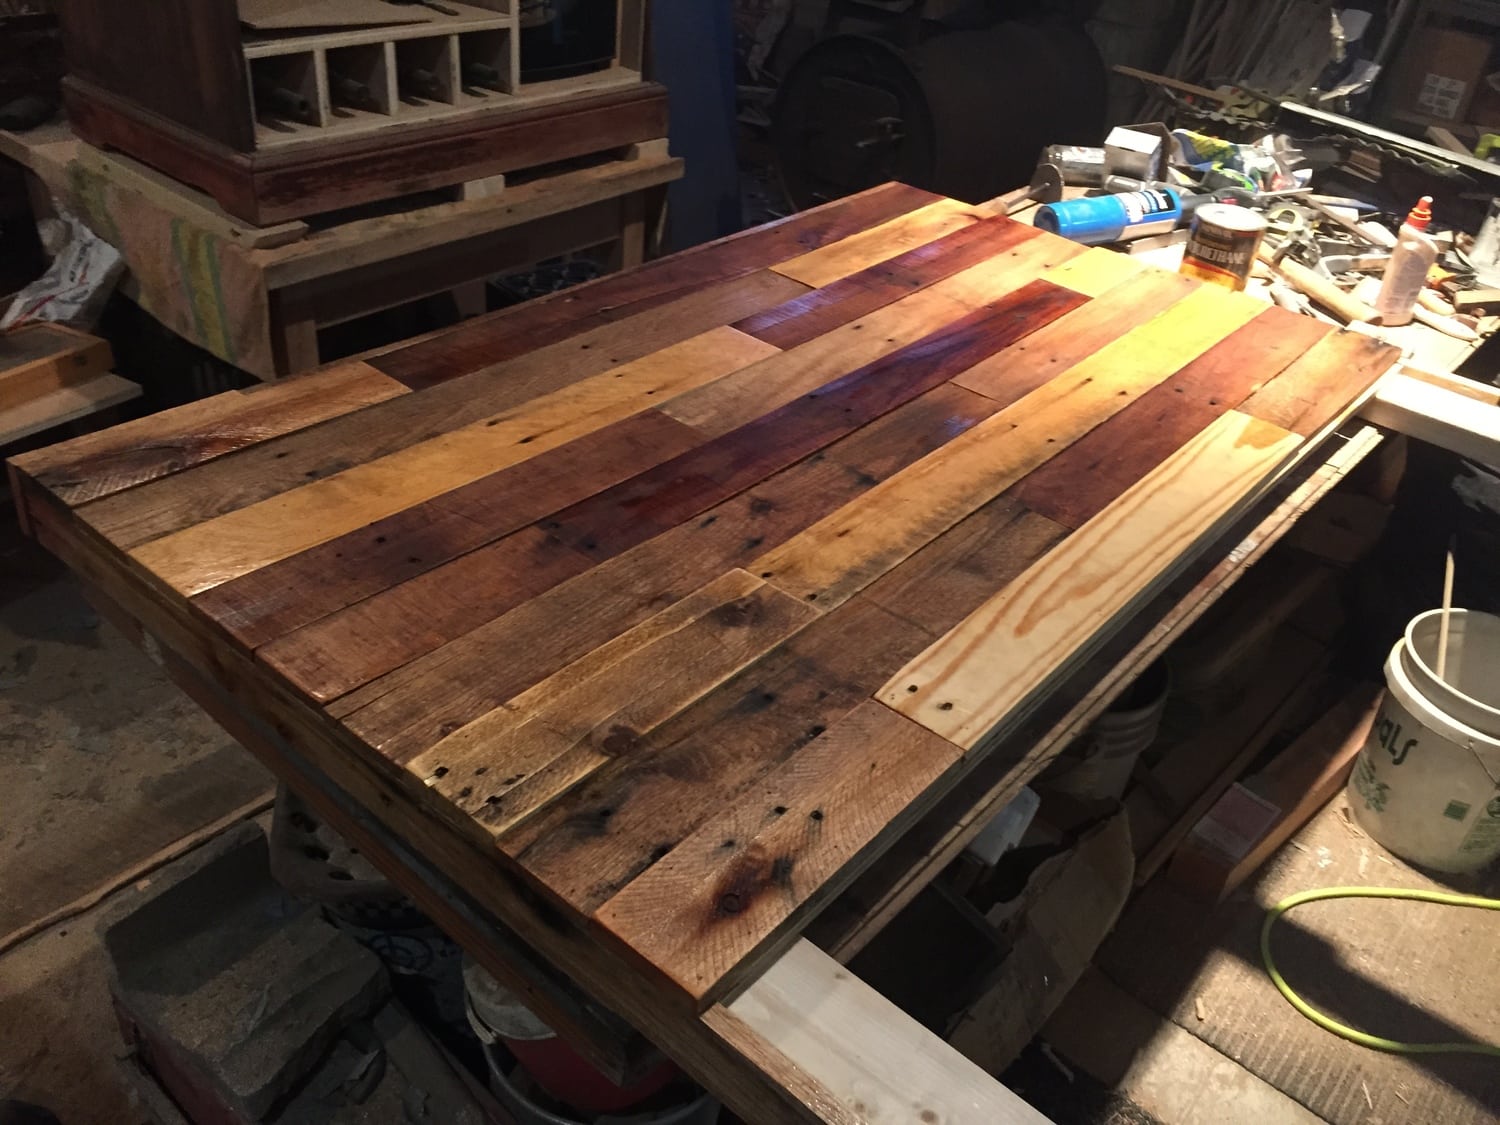
6. Stylish Pallet Wood Headboard by Revival Woods
| Materials Needed: | Pallets (x2–3), 2×4 plywood, screws, brad nails, bolts + washers, sandpaper, satin varnish |
| Tools Needed: | Measuring tape, hand-held drill, table/circular saw, construction glue, pencil |
| Difficulty Level: | Easy |
Headboards have two important roles. First, they make you comfortable; second, they protect the wall from scratches and abrasion. Unfortunately, headboards don’t last forever and cost $100–200 (on average). To have some fun and keep that hard-earned cash in your pocket, try building this one-of-a-kind, stylish pallet wood headboard. Get at least three pallets ready and some 2×4 plywood for the posts.
Use brad nails and bolts to put it all together. Now, while you can cover the makeshift headboard with whatever paint you have in mind, we recommend going with satin varnish. Sand the surfaces first for that clean look. Next, measure the frame (or the old headboard) to get the dimensions right and add 1–2 inches for some “wiggle room”.
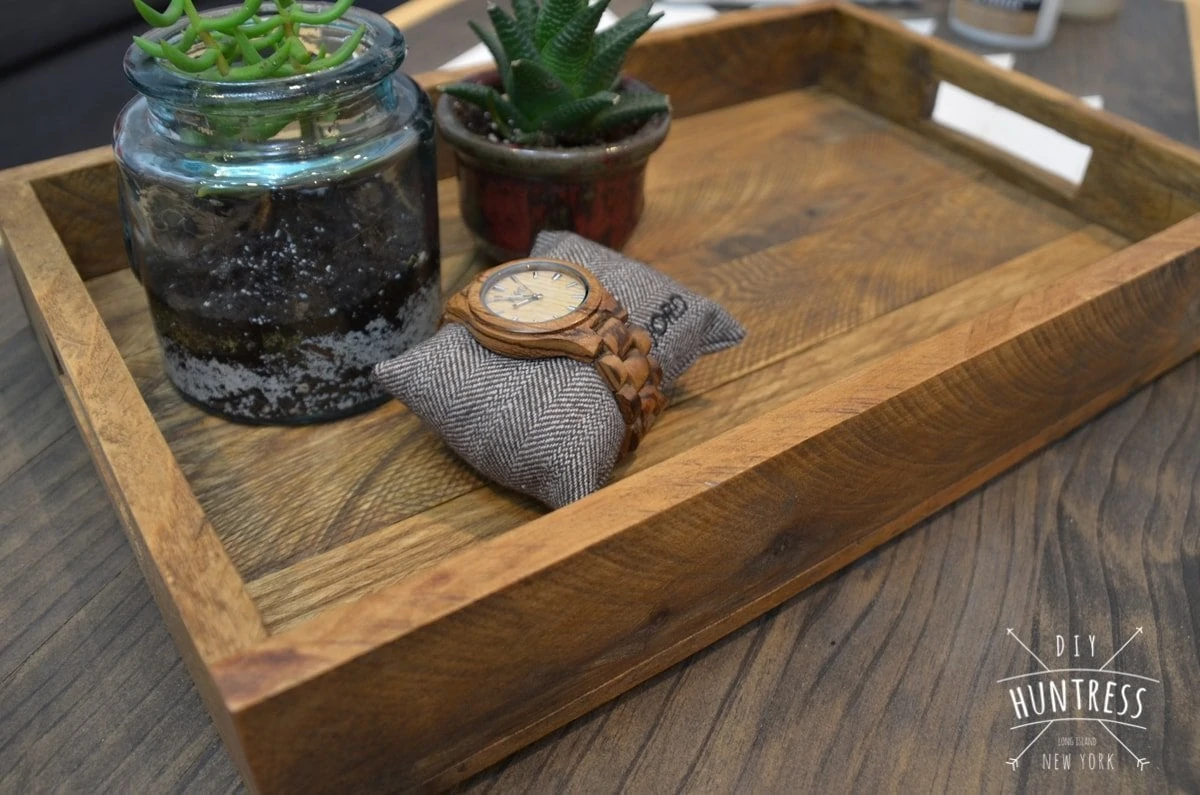
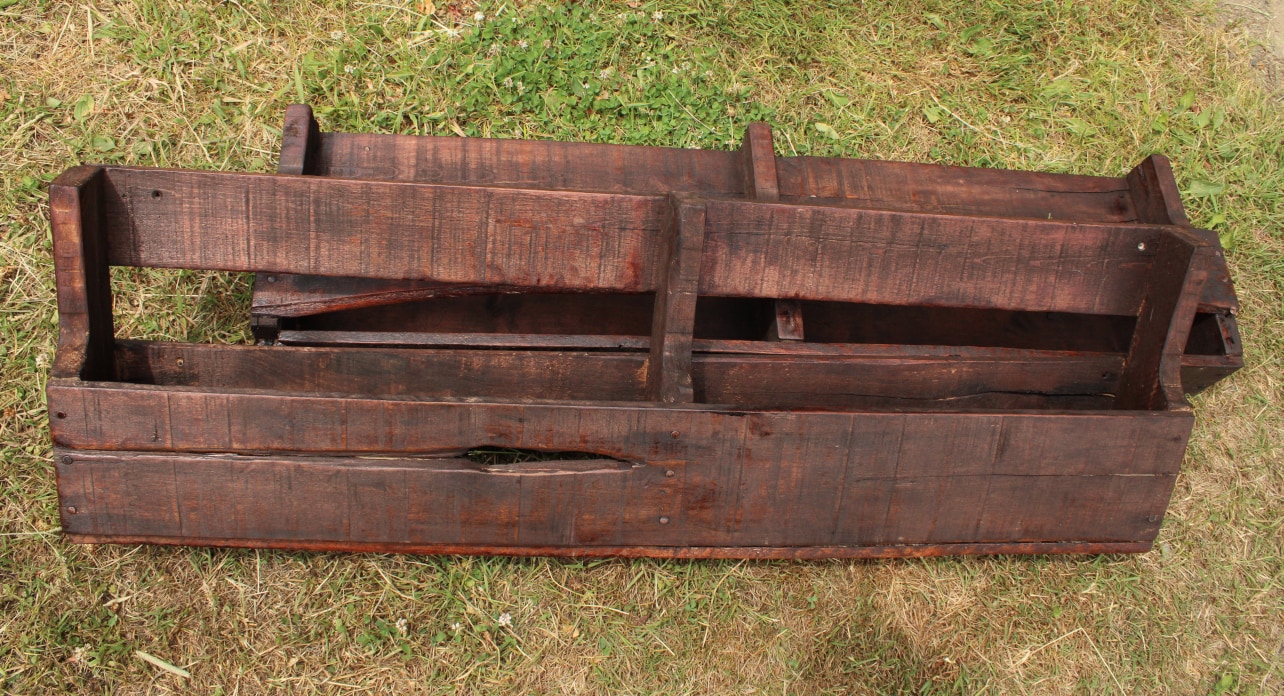
7. Cute Serving Tray by DIY Huntress
| Materials Needed: | Wood pallet, a set of brad nails, wood stain/paint, sandpaper |
| Tools Needed: | Table/miter/jigsaw, drill + bits, nail gun, marker, tape measure, glue, gloves |
| Difficulty Level: | Easy/Moderate |
Even if you already have enough trays at home, we still encourage you to jump on this DIY wood pallet repurposing plan. It looks great, doesn’t take a carpenter’s degree to complete, and will serve you for a long time. The most important thing to remember while building the cute serving tray is to get your hands on a decent-quality pallet.
Ideally, it should be crafted from oak and have no scratches or signs of wear. To connect the boards, use standard wood glue. Also, get ready to do precise cuts with three different saws. The trickiest part will be cutting out the handles on the sides with a jigsaw. Drawing them with a marker should help. Not sure you can pull this off? Well, you can always skip the handles!
8. Sliding Barn Door by Lehman Lane
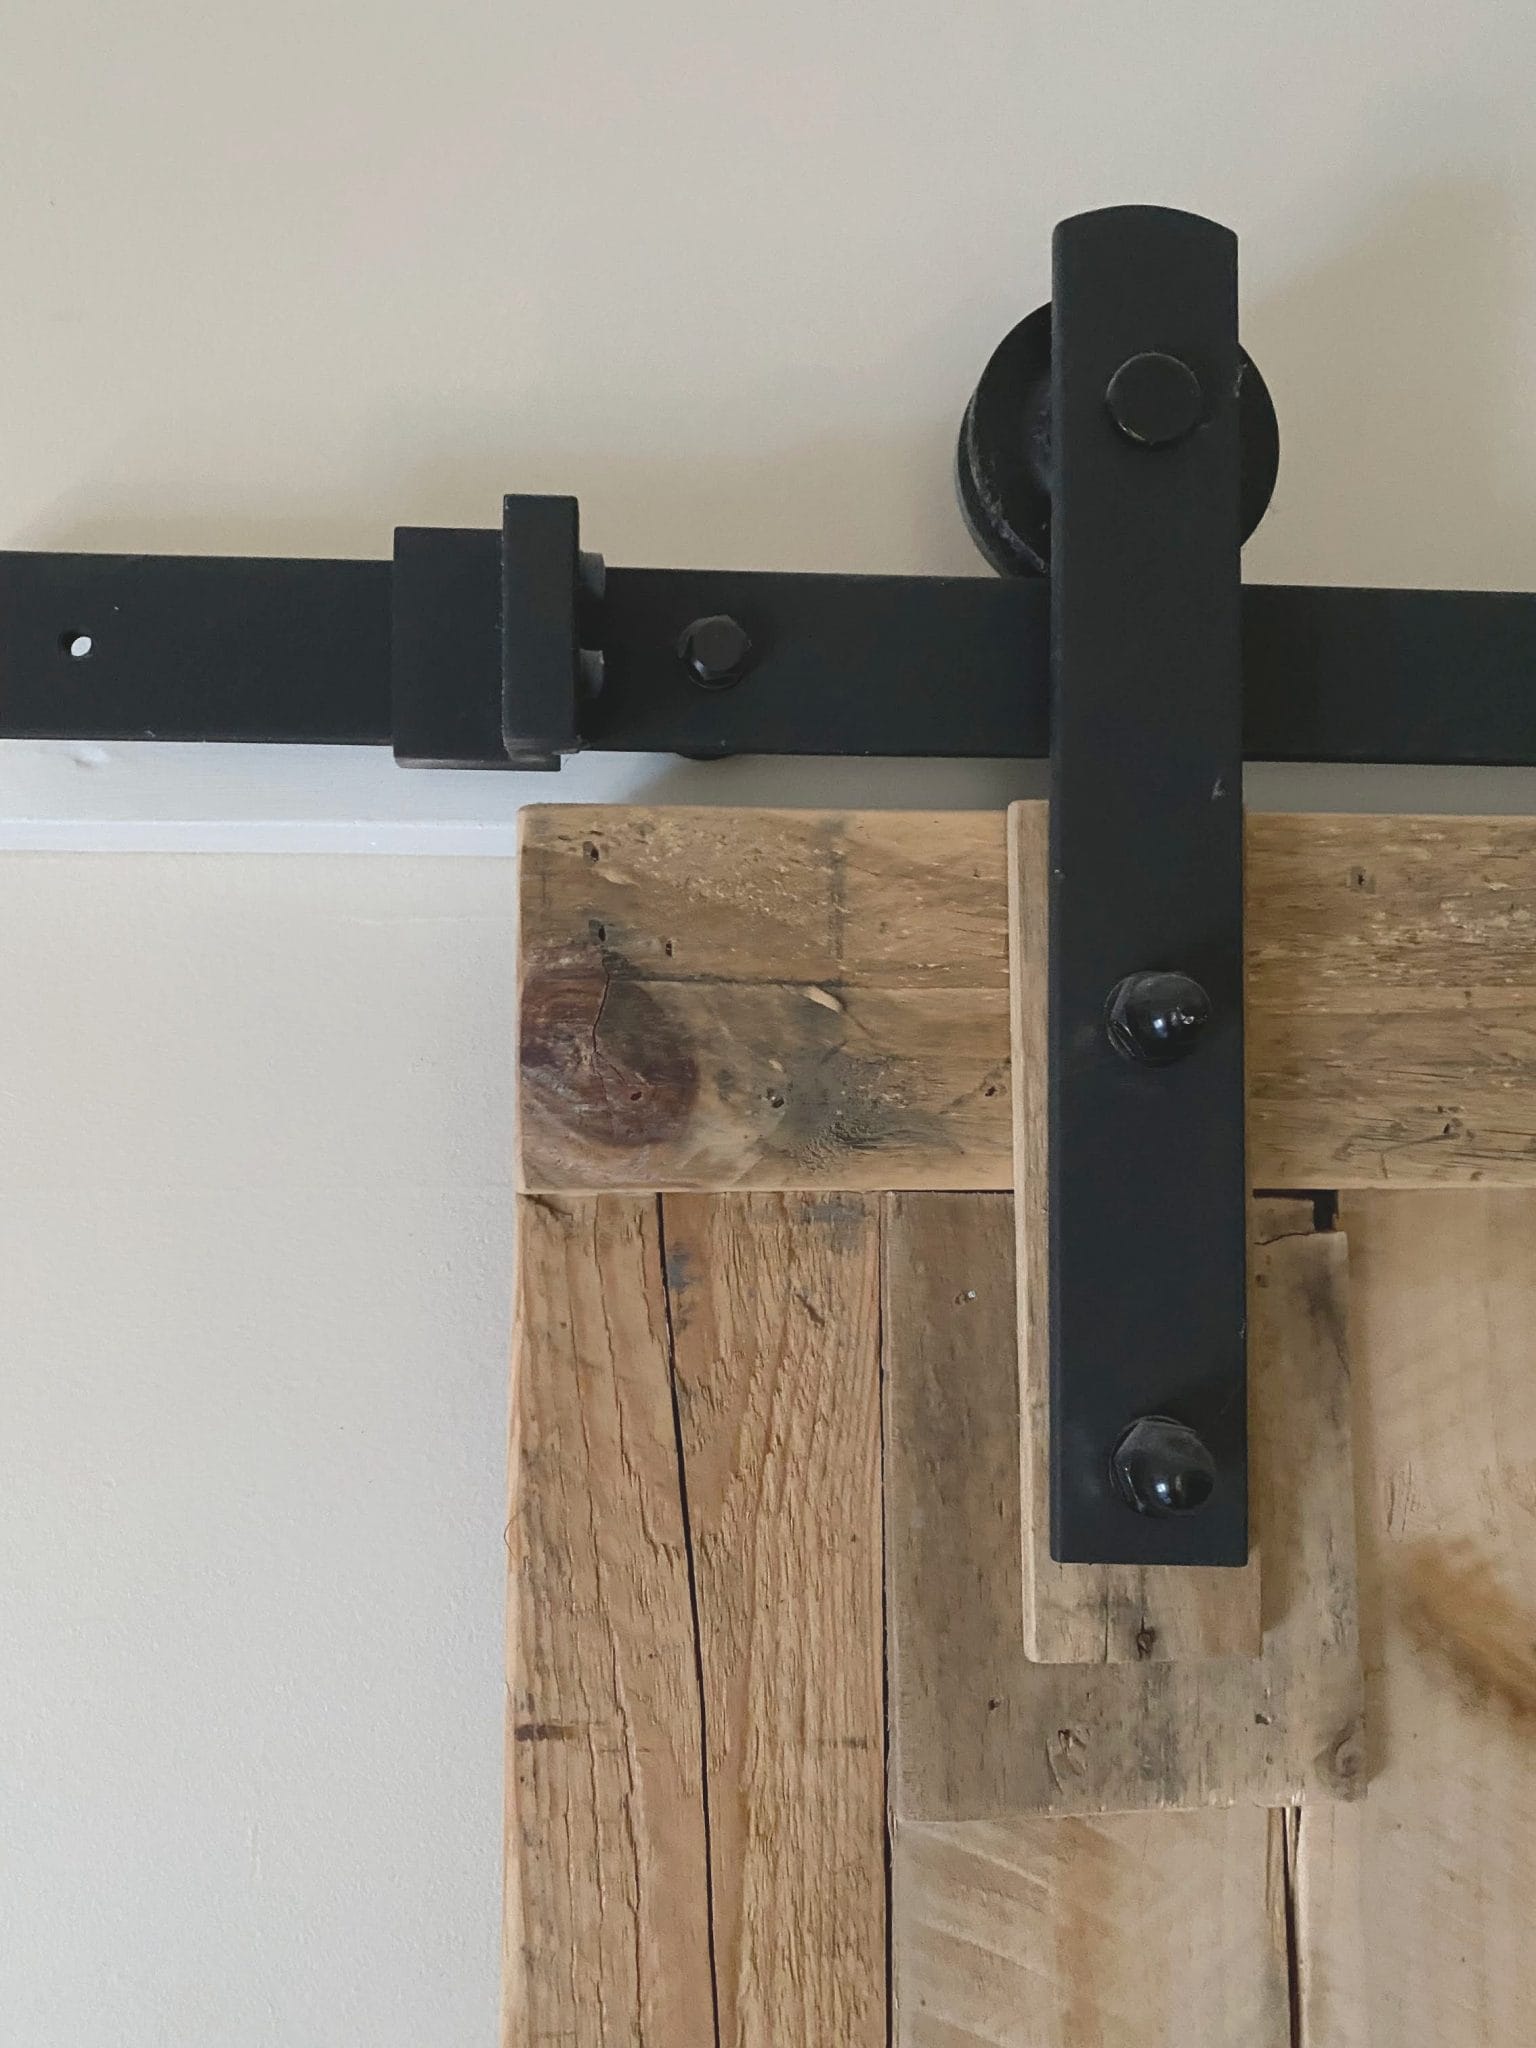
| Materials Needed: | Wood pallets (x2), finish nails, sliding door hardware |
| Tools Needed: | Circular saw, hammer, nail gun, crowbar (flat), wood glue |
| Difficulty Level: | Moderate |
Sliding doors are quite popular these days. They take very little space, can be opened and closed with one hand, and fit the trends. As for this sliding barn door, it will be a great addition to a kid’s room, closet, or even basement. The door has a very rustic slash minimalistic vibe and consists of two parts: a pair of wood pallets and a hardware kit. There are lots of great kits out there that cost $30–60 and last for many years.
Decide what size you want the door to be and remove all the old nails and screws from the pallets (or, use a circular saw to cut them out). The hardware takes 5–10 minutes to mount on the wall. To make the grip nice and strong, put a piece of wood between the roller bars and the actual door.
9. DIY Pallet Shoe Racks by Natural Living Homestead
| Materials Needed: | Pallet, paint/stain, polyurethane, a set of screws |
| Tools Needed: | Hand-held/reciprocating saw, hammer, stud finder, level, sander, brush, screw gun |
| Difficulty Level: | Easy |
If you’re running out of storage for your shoes, a set of DIY pallet shoe racks can help solve that issue. And, instead of placing them on the floor, we’ll be hanging the shoe racks on the walls. But wait: do you paint, stain, or go with the natural color? Mostly, that depends on how good or bad the pallets look. Unfinished wood has that “raw” touch, while stained pallets stand out.
When building the shoe rack, start by cutting a wood pallet into three parts. If you end up with a couple of spare boards, attach them to the bottom of each rack. Otherwise, the shoes might fall off. Before painting/staining, don’t forget to sand the wood. To line all three racks perfectly, use a level.

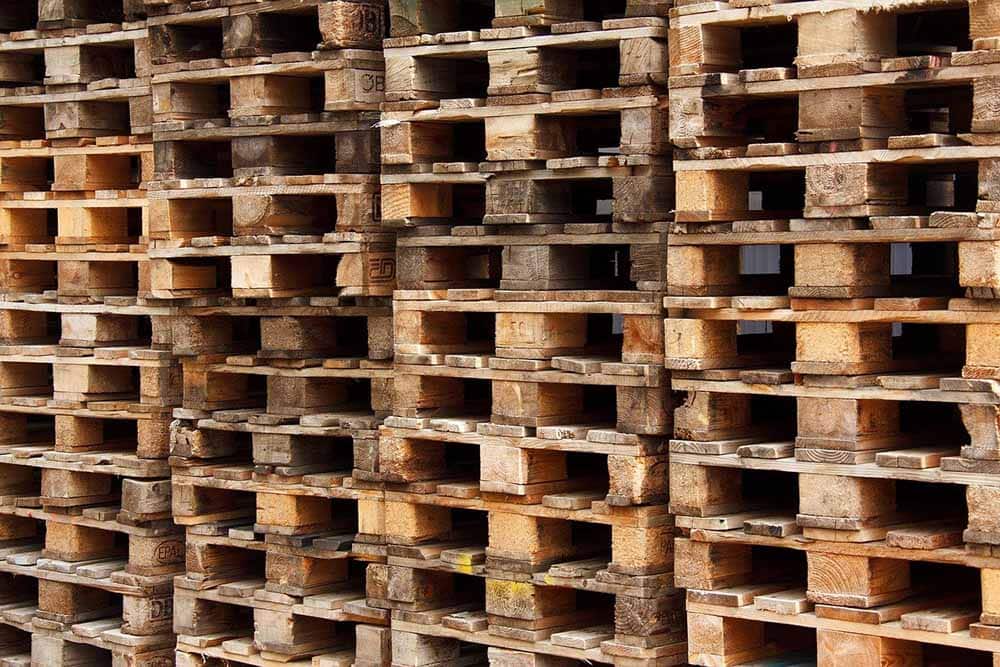
Where Can You Get Pallets for a DIY Project?
If you live in a busy and friendly neighborhood, chances are that someone’s renovating their house or tidying up their shed/garage right now. That means they’ll have a pallet or two to share with you. Take an hour or two to circle the block and ask around. Or, better yet, ask your family members: they might have a pile of pallets up for grabs. Websites like Craigslist are also worth checking out. You will need to be swift about it, though.
Not having much luck with that? It’s okay! You can go to a local construction site, recycling center¹, distribution center, school, pet store, liquid store, or bar instead. Try asking a small/newly-opened business or a grocery store for pallets as well. And if that doesn’t pan out, you can always visit a furniture store, garden shop, or hardware store and buy one for $10–15. If you go to Lowe’s, they’ll even give you a couple for free.
Can Pallets Be Painted or Finished?
Of course, you can do pretty much anything you want with the pallets as long as it looks good. The sky’s the limit here: use whatever colors, textures, and patterns you see fit. This is an excellent opportunity to let your inner creative voice speak up. There are no rights or wrongs when it comes to reusing wood pallets. Every single repurposing idea that we just checked out is unique, and that’s what makes them all special.
How Long Does Pallet Wood Last?
Did you know that the United States is the biggest producer of wooden pallets? That’s right, and US-based manufacturers often use pine or oak¹. Pine is a softwood species, while oak is a hardwood. Oak is significantly harder, denser, and stronger against natural elements (humidity, cold, and pests). On top of that, this hardwood is highly resistant to cracking, denting, and physical damage or direct impact.
When finished properly, oak can last for up to 30–40 years. Untreated, it will hold up for at least 20 years¹. Pine, in turn, is more flexible and easier to work with, especially if you’re just getting into woodworking and all that. More importantly, it’s cheaper. You can expect it to last for 5–10 years untreated and twice as long if you finish it.
Conclusion
Old pallets might not look much when they’re collecting dust in your garage. However, if you put some thought, effort, and passion into a DIY project, you’ll be amazed by the results. Repurposing is always fun, as it allows us to give a second life to “discharged” items. Essentially, a pallet is a couple of wood pieces nailed or screwed to each other.
But with the help of the brilliant DIY plans from the list, they will transform into something much greater. As a bonus, once these projects are completed, you won’t have to buy a new headboard, bench, garden box or bed, or, let’s say, fence! So, pick a project that suits you best, get yourself in the DIY mode, and get to it!
Featured Image Credit: Daniel Kirsch, Pixabay
Contents
