

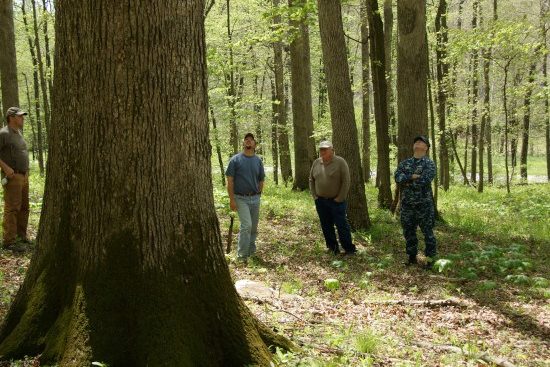
When we think of cutting trees with chainsaws, we may think of loggers and lumberjacks in a dense forest, taking down massive old-growth timber. It’s not something the average homeowner considers a task for the non-professional. The reality is quite the contrary. You can easily cut down a tree on your property if you are prepared for the experience. We’ve taken it upon ourselves to show you how to cut down a tree with a chainsaw safely!
Cutting down a tree is referred to as “felling.” When you’re felling a tree, you can’t go out and just start cutting. There are several crucial steps to take before you start cutting.
Before You Start Cutting
- How big is the tree?
- What kind of chainsaw do you have?
- Do you have the necessary safety equipment?
How big and where is the tree?
There is no hard and fast rule about the tree size regarding do-it-yourself landscaping, but generally, most trees under 50 feet tall are safe for homeowners to cut. However, this depends on the location of the tree. Is it near your house or utility lines?
Equally important, consider the tree’s diameter, which we’ll discuss next.
What type of chainsaw do you have?
There are many brands of chainsaws available, and they are becoming more powerful every day. Most are powerful enough to handle cutting small trees around the yard and, in many cases, even large trees. Before you cut large trees, you should have a good idea about what you are doing.
Chainsaws have a suggested range of cutting capacity for felling trees. An 18-inch chainsaw bar can reasonably cut a 36-inch diameter tree, which is roughly twice the chainsaw bar length. Larger chainsaws can do a little bit more at 2.5 times the diameter. Most consumer chainsaws max out at 24 inches, while professional models can reach 42 inches and longer.
- Related Read: What Size Chainsaw Do I Need
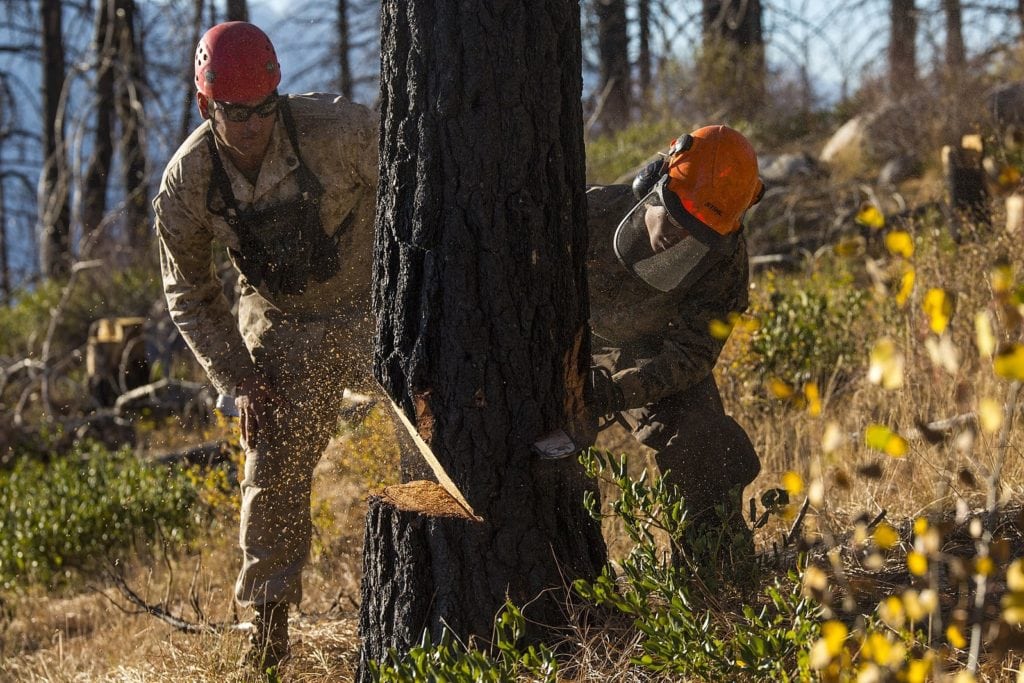
Safety Gear
It’s easy to underestimate the size and weight of a tree, especially as it gets larger, but they can weigh several hundred pounds, and a falling tree can destroy fences, swimming pools, garages, and homes. Make no excuses: Wear the proper safety equipment while you are cutting.
Here is a short list of safety items you should always wear while cutting trees.
Chainsaw helmet

Chainsaw gloves

Chainsaw chaps

Planning the Cut
Here are the factors to consider before you start your chainsaw.
Acquire Permits
Most cities and towns require you to have a permit or specific permissions before you cut down any trees over a certain size. Even when the tree is on your property, there may be laws governing how you can remove it. Contact your local tree commission to determine if you need a permit.
Fall Zone
Once you have acquired the necessary protective gear, you must pick a direction for the tree to fall. Rope off or place warning signs well beyond where you think the tree will land to protect anyone walking or driving in the fall zone, particularly if a tree or sidewalk is in the danger area.
- It’s easy to predict the fall zone if you can measure the tree, but a tree taller than that can get increasingly difficult to guess. It’s hard to guess distance by eye, especially when it involves height, so try to overestimate and take more space than you need.
- If a tree is leaning in a specific direction, it’s often advisable to let it fall in that direction when possible, as changing the fall direction of a leaning tree can be challenging.
- When choosing a direction to fell a tree, make sure there is room to work with the saw in the area you need. For example, there may be other trees, water, rocks, or other objects blocking access to where you need to cut. In that case, you need to revise your fall zone.
Getaway Zone
The getaway path is where you run while the tree falls, and you must plan this path well in advance. We recommend a getaway path that takes you on a path 120 degrees from where the tree will fall.
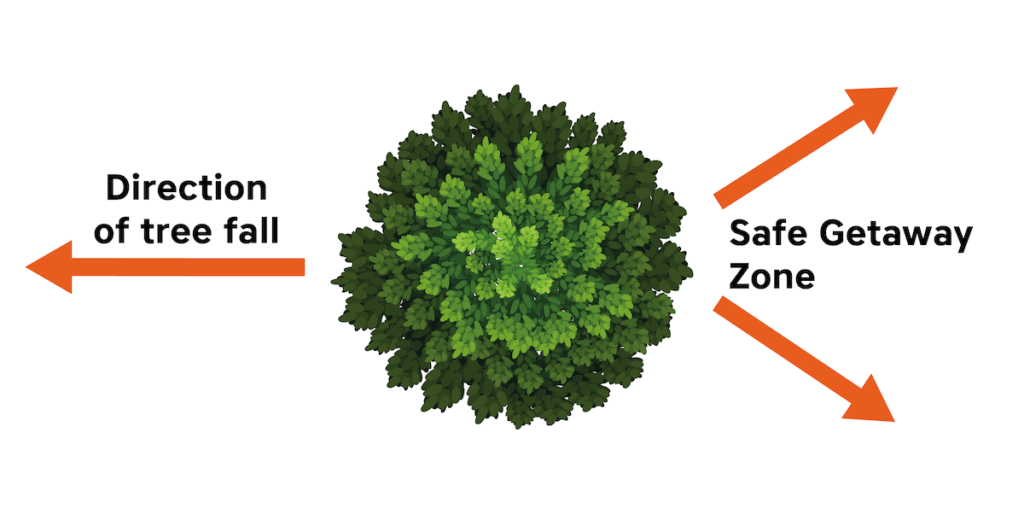
This path must be clear of debris so you can move quickly to escape danger. You do not want to change direction to avoid buildings or other structures. It would be best if you didn’t run in the direction of a stream or any walls, and make sure there are no roots or holes that can trip you as you make your getaway.
Still with us? Good, this is when things start to get fun!
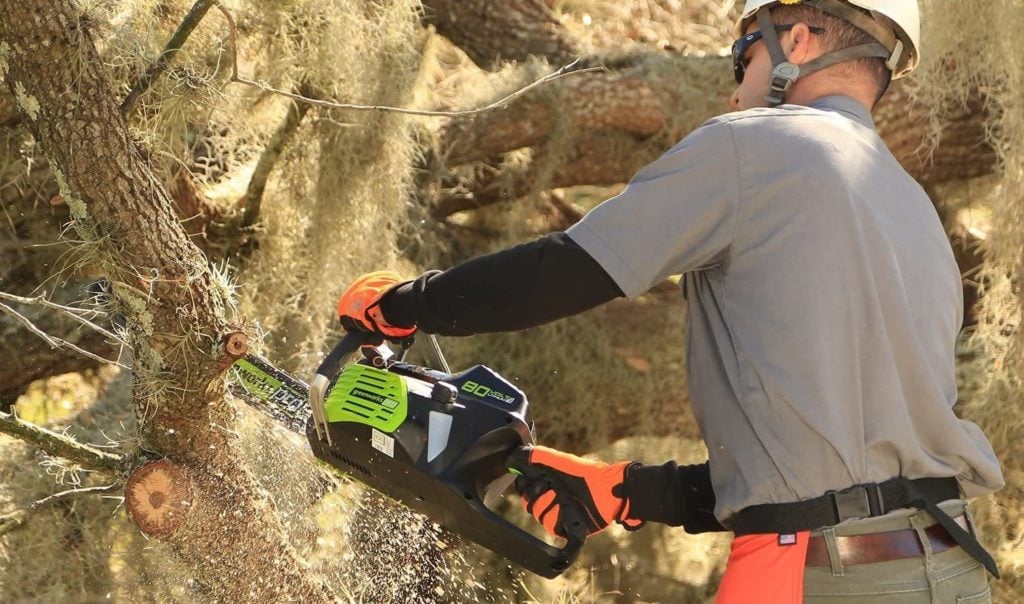
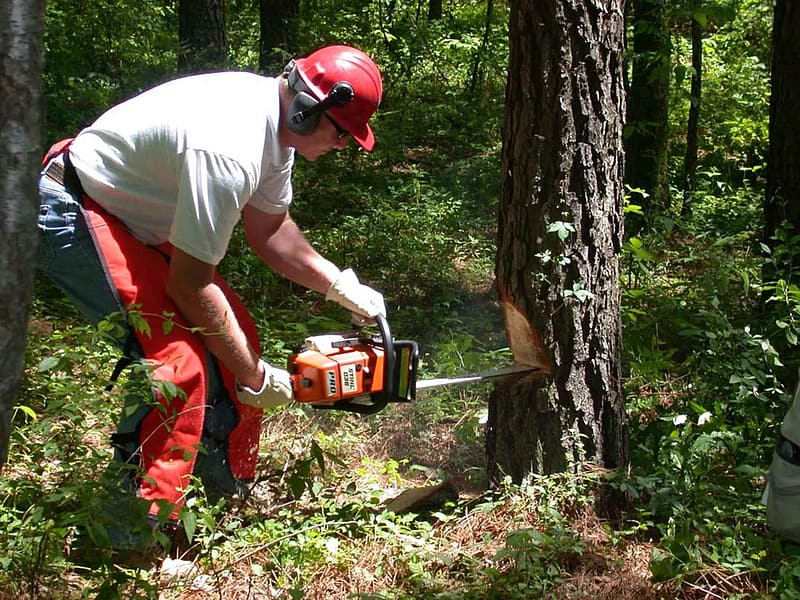
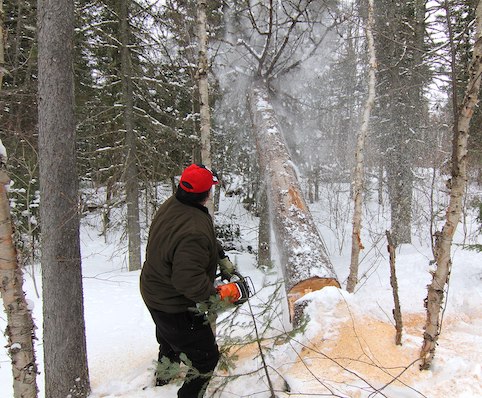
Cutting the Tree
- What is the first cut to make?
- What are notches?
- What are front and back cuts?
Early Cuts
With the fall zone and getaway path worked out, we can make early preliminary cuts.
Remove Lower Branches
This step requires you to remove any branches lower than your shoulder. You should never use a chainsaw higher than your shoulders because it’s very hard to operate properly at that height and could lead to injuries. The purpose of trimming the branches is two-fold.
- It allows easier access to all sides of the tree, making cutting it easier.
- These lower branches snap and fly in unexpected directions when the tree falls. Removing them first makes the area safer.
The Notches
The best and safest way to fell a tree is by using a notch cut. There are three types of notch cuts with slight differences between them that you can use for felling a tree. Using your saw to cut a notch lets you create a hinge that holds the tree to the base as it falls and helps guide it in the direction you want it to go. Let’s look at the three types of notches and how you make them.
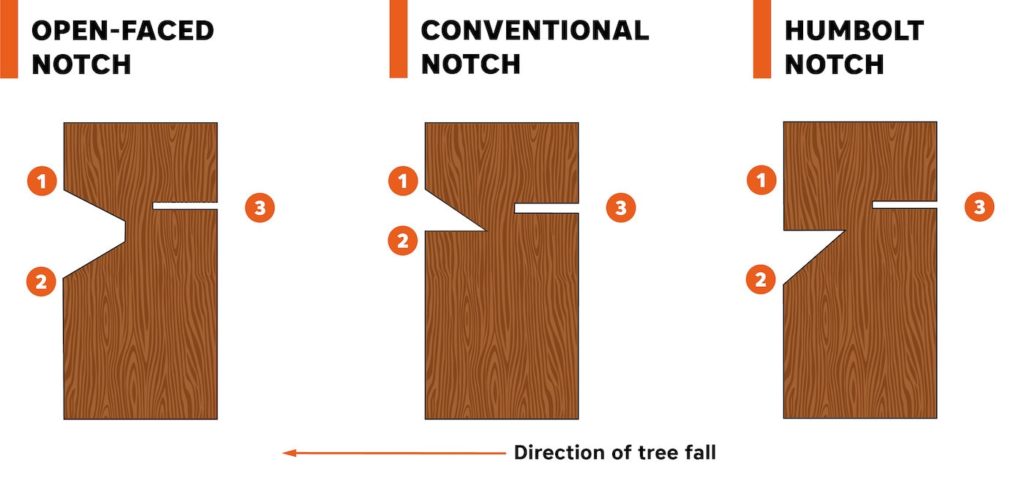
Open-Faced Notches are the Safest
We recommend the open-faced notch because it’s safer and does less damage to the tree if you want the lumber.
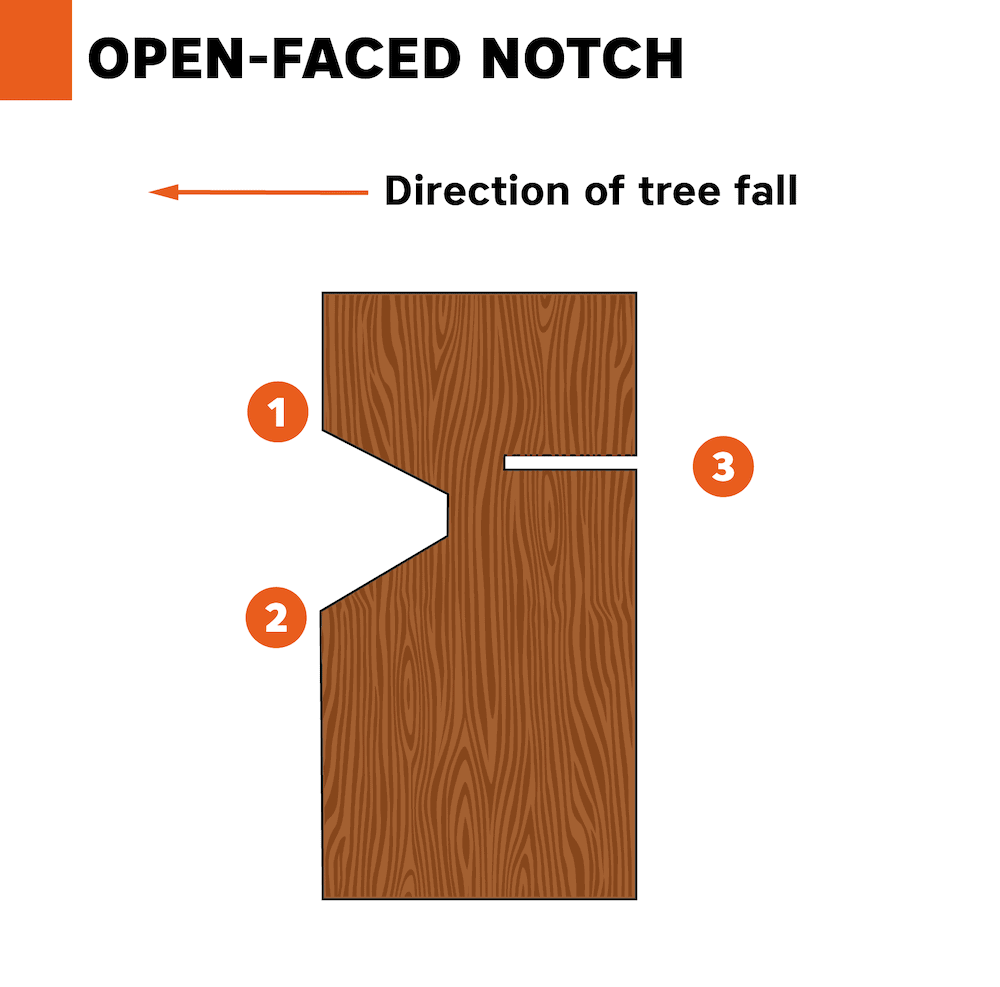
Creating the Open-Faced Notch
To create the open-face notch, make your top cut first. Cut at a downward angle of 70 degrees until you reach a depth of ¼ to 1/3 of the tree. For the second cut, you will need to saw upward at a 20-degree angle until it meets with the first cut. These two cuts result in a 90-degree notch, whereas the other two notches result in a 45-degree notch.
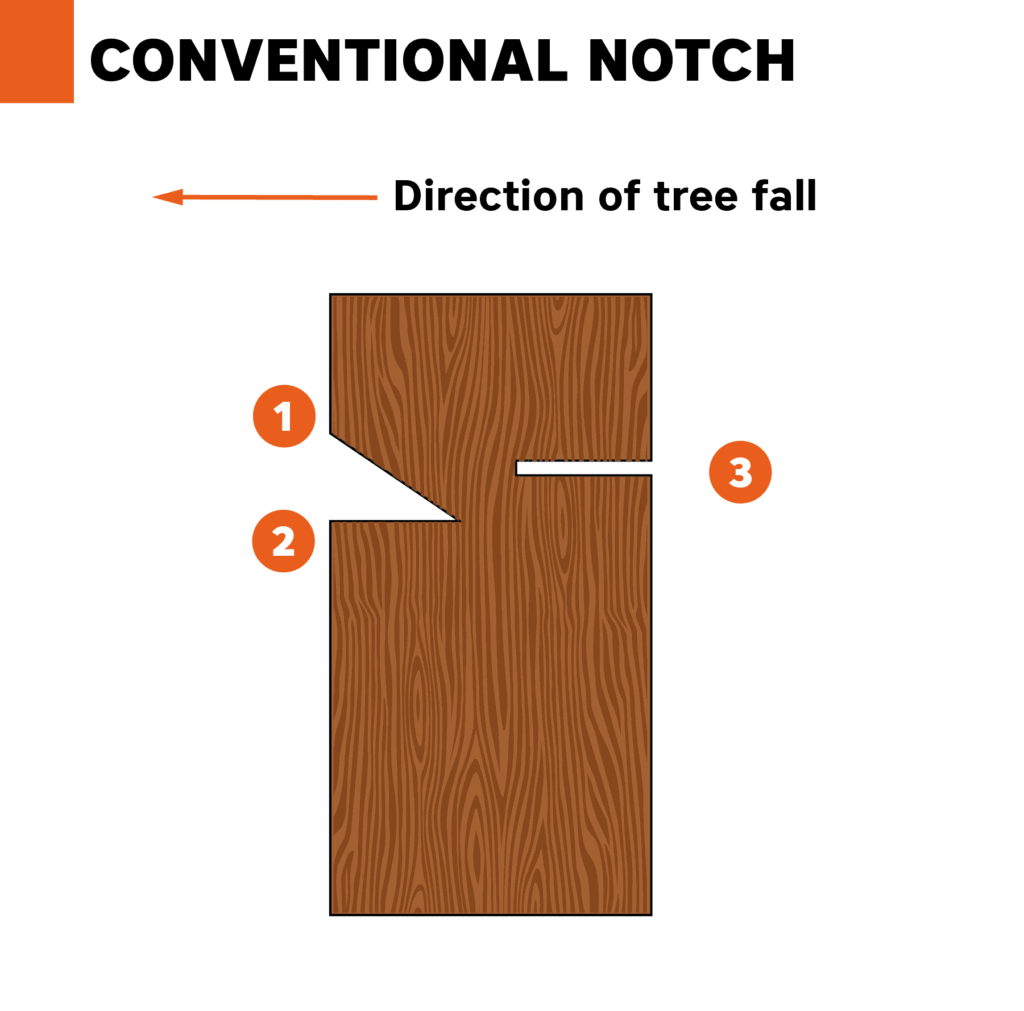
Creating the Conventional Notch
To create a conventional notch, Cut at a downward angle of 45 degrees to a depth of ¼ to 1/3 of the tree. Then, make a second-level cut until it meets the first cut.
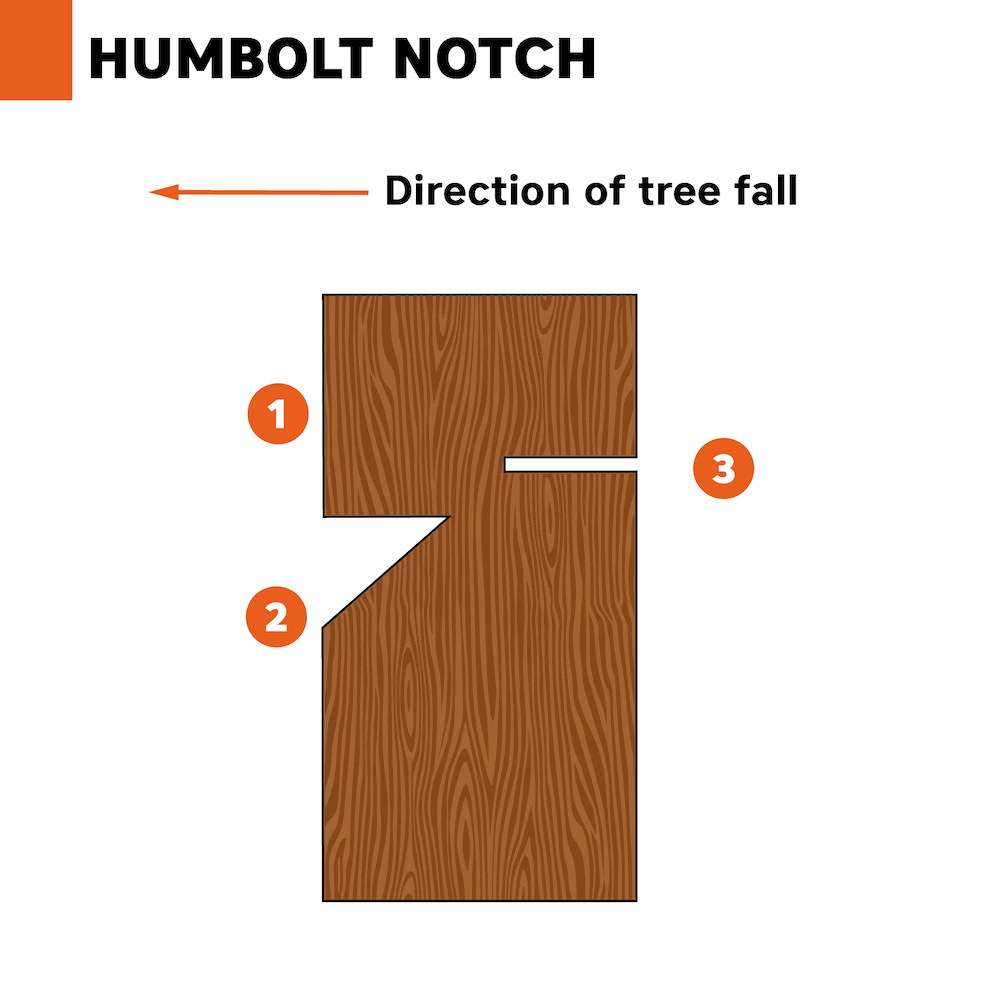
Creating the Humbolt Notch
The Humbolt notch is essentially an upside-down conventional notch. To create this notch, cut straight into the tree as if you were making a back cut. Stop the straight cut about ¼ or 1/3 the way through the tree. Make a second upward cut to meet the first at a 45-degree angle.
Making the Cuts

Face Cut
We perform the face cut on the part of the tree facing the fall zone. We cut at a height of 2 feet above the ground for maximum comfort and saw control. Face cuts require at least two cuts to remove the material.
Back Cut
We make the back cut on the opposite side as the face cut. It is a single cut into the tree that can cause the tree to begin falling, so extreme focus and attention are required. Stay calm if the tree begins to fall, and trust your planning. Use your getaway path.
This notch is not as safe as the face cut because it closes before the tree has made it halfway down. The tree will be in an uncontrolled free-fall state for the remainder of the travel.
How to Make Back Cuts
Open-Faced Back Cut
- The back cut is made directly behind where the two-notch cuts come together and should extend into the tree until the wood hinge it creates makes up about 10% of the trunk.
- For instance, if the tree is 20 inches wide, you would cut the open-faced notch 5 or 6 inches deep, and the back should be cut 12 or 13 inches deep, leaving a 2-inch hinge in place.
Conventional Back Cut
- The back cut will once again leave a 10% hinge, but this time, you will make the back cut about 1 inch higher than the second cut of the notch instead of where the two cuts come together, as we did in the open-faced cut.
Humbolt Back Cut
- You place the back cut of the Humbolt notch about 1 inch above the top cut of the notch.
- The Humbolt notch is more dangerous than the open-face notch because it only guides the tree for the first half of the fall, after which it is in a free-fall state.
Choosing the Best Chainsaw
If you haven’t purchased your saw yet, here are a few things you should look for in your next model.
Gas Power
- You are probably looking to purchase a gas-powered chainsaw for cutting down trees. Electric and battery-powered chainsaws are great for small trees and limbs, but they are usually underpowered for hardwood trees.
Anti-Kickback
- It’s a good idea to look for brands with an anti-kickback safety mechanism since a kickback provides a significant danger when working and can be life-threatening. A saw with a tapered tip can also help reduce the chance of kickback.
Other Features
- Many chainsaws feature guards to protect your hands and an automatic chain lock to improve safety. It may also have measures in place to reduce vibration and make it easier to start.
Our Favorite Gas-Powered Chainsaw for Cutting Down Trees
- 455 Rancher chainsaw is an ideal saw for landowners or homeowners who require a high powered and heavy duty chainsaw
- 55. 5cc 20 inch gas chainsaw with guide bar and chain
- 2 cycle engine with Intertie activated chain brake for safety while operating
Summary
When cutting down a tree, getting the required permissions is vital before you do anything else. Once you have them, we recommend creating a detailed plan with multiple escape routes. The larger the tree is, the more we recommend using the open-faced notch for increased safety and control. The other notches are fine for smaller trees or if there is no danger from an out-of-control fall.
We hope you have enjoyed reading and have a good idea of what is required to fell a tree. If you have learned something new, please share this guide on cutting down a tree with a chainsaw on Facebook and Twitter.
Related Reads:
- 12 Most Environmentally Friendly Ways to Dispose of Your Christmas Tree
- 22 DIY Christmas Tree Plans You Can Make Today
- 5 Ways to Kill a Tree Without Cutting It Down
Contents
