

Nothing quite takes an outdoor event to the next level like a bar, whether it’s for a family barbecue, a wedding, or just a Friday night. If you don’t have the funds to install one or you just want the challenge, you can build your own outdoor bar.
These clever and creative DIY outdoor bar plans will walk you through everything that you need to know to replicate the displayed outdoor bars, or they’ll inspire you to come up with your own version. Either way, you’ll have an outdoor bar in no time, and you won’t have to go to the store to get it!

The 8 DIY Outdoor Bars Plans
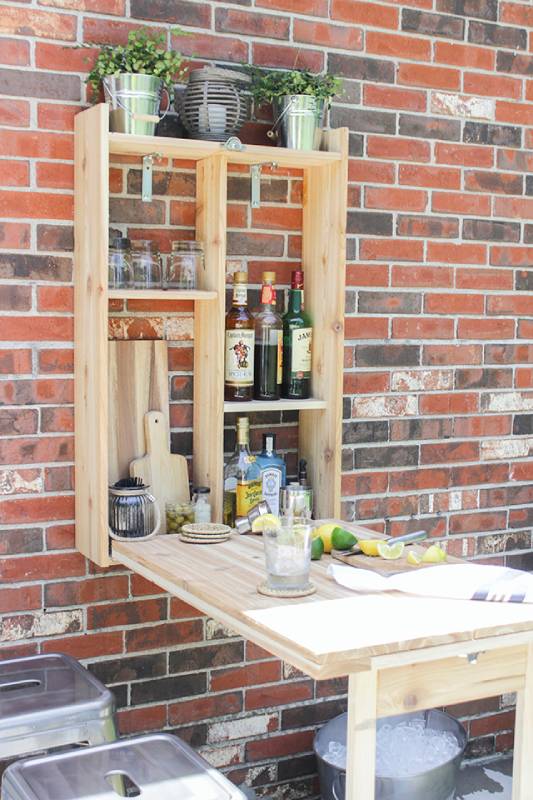
1. Outdoor Murphy Bar by Shades Of Blue Interiors
| Materials: | Two 1×8 cedar boards @ 6’ length, three 1×6 cedar boards @ 6’ length, 1×4 cedar board @ 8’ length, 1×2 cedar-tone weather-treated pine board @ 8’ length, ¼” or 1” pocket screws, ¼” nails, two narrow hinges, two heavy-duty tee hinges, sash lock, two 4” flat braced L-brackets, two 2” flat braced L-brackets, a half-turn button, four Phillips head screws, four wing nuts, wood glue, and exterior 3” screws |
| Tools: | Measuring tape, circular saw, wood clamps, safety glasses, hearing protection, pocket hole jig, drill, speed square, and a nail gun |
| Difficulty Level: | Challenging |
While this isn’t the easiest DIY outdoor bar to build, the plans are quite comprehensive to help you through the process. The murphy bar design means you can fold it up and out of the way when you’re not using it.
It’s not the best DIY project for a beginner, but if you’re confident in your skills and want a unique outdoor bar, this is it. Even better, you can customize the dimensions to whatever bar stools you already have!
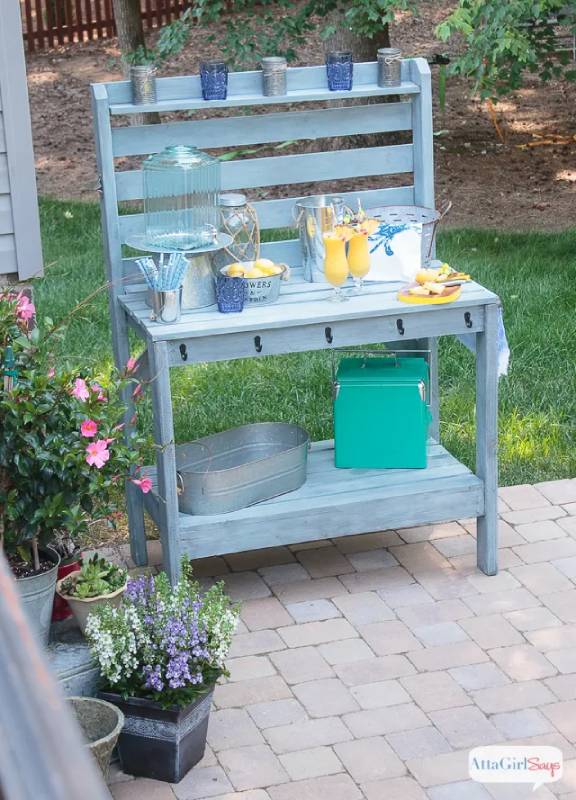
2. Potting Bench Server Bar by Atta Girl Says
| Materials: | Eight 1×4 boards @ 8’ long, two 1×4 boards @ 10’ long, four 2×4 boards @ 8’ long, 2.5” and 2” exterior self-tapping screws, wood glue, and paint |
| Tools: | Tape measure, pencil, safety glasses, ear protection, drill, and a circular saw |
| Difficulty Level: | Moderate |
While this design is for a potting bench and not a serving bar, there’s no denying that it works great for both options. The key is all in the finishing touches, and it looks fantastic as an outdoor serving bar.
Moreover, compared to many other DIY bar options out there, it’s one of the simpler projects to build and complete. But that doesn’t mean it’s easy if you don’t have a few DIY skills.
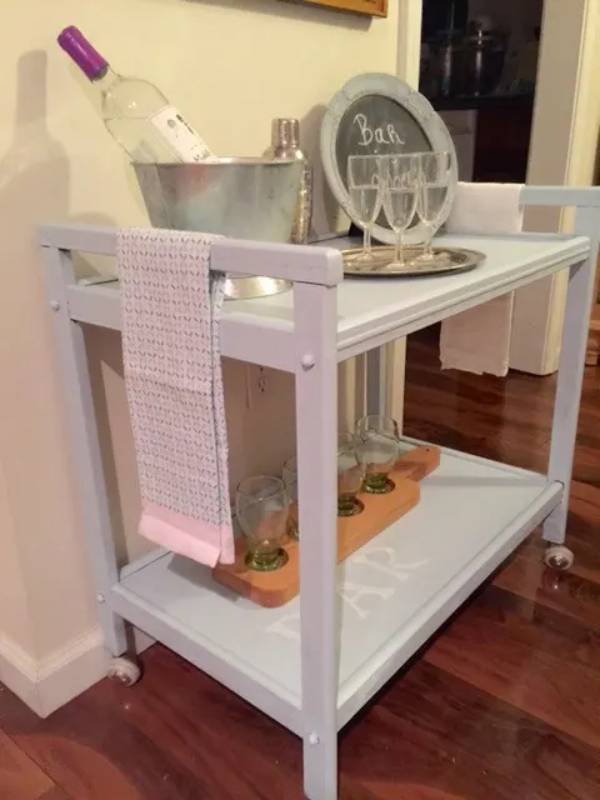
3. Simple Rolling Bar Cart by Our Crafty Mom
| Materials: | Seafoam paint |
| Tools: | Paintbrush, large letter stencils, and a stencil brush |
| Difficulty Level: | Easy |
If you’re not the handiest when it comes to DIY projects but want an outdoor bar cart without spending a fortune, this DIY bar cart is exactly what you’re looking for. It uses a traditional cart that you can find in a wide variety of thrift stores, and then you completely upcycle it into something great.
Even better, while this is upcycling at its finest, it’s easy to accomplish if you follow the guide. It doesn’t even require any fancy tools!
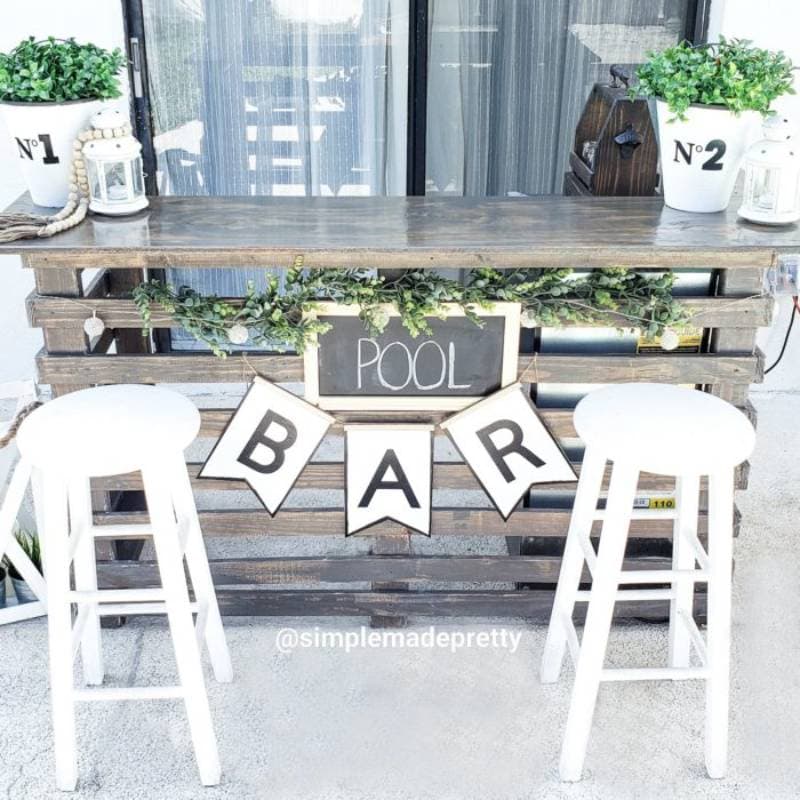
4. Quick Outdoor Bar Cart by Simple Made Pretty
| Materials: | Three 2’x4’x8’ pieces of wood, seven 1’x3’x8’ pieces of wood, 4’x8’x25” plywood, deckmate screws, exterior deck screws, paint or stain, and polyurethane |
| Tools: | Circular saw, miter saw, power drill, wood clamps, sanding machines, paint brushes, and rags |
| Difficulty Level: | Moderate |
While the previous plan was all about upcycling an outdoor bar cart, this one is all about building your own from scratch. While that requires more work and tools, it does mean you don’t have to go from thrift store to thrift store trying to find the perfect cart to upcycle.
It also gives you more control over the final project. Still, there’s no denying that it’s more effort, and if you don’t have the supplies on hand, you won’t be able to complete the project.
5. Changing Table to Bar Cart by Mom Home Guide
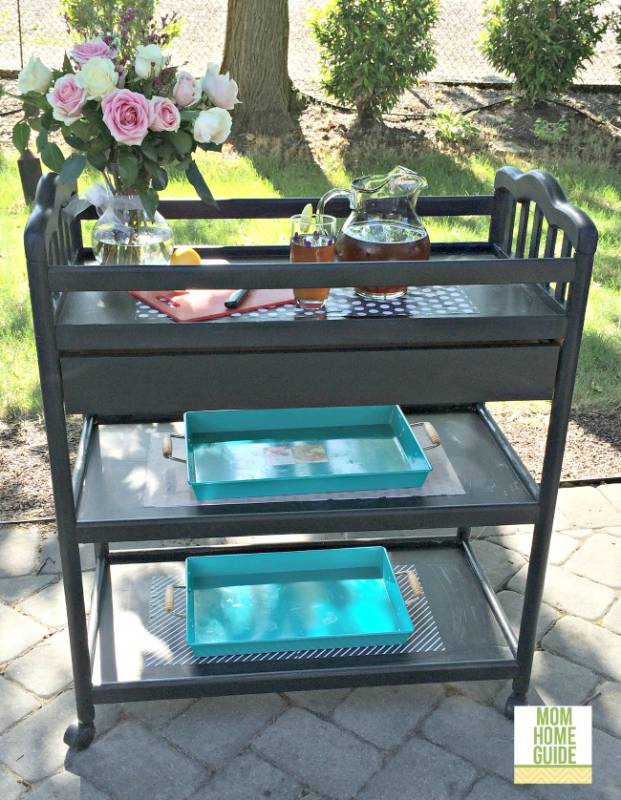
| Materials: | Changing table, 16 ounces of paint finish, 8 ounces of varnish, three sheets of scrapbook paper, and mod podge |
| Tools: | Paintbrush |
| Difficulty Level: | Easy |
Once your baby doesn’t need their changing table anymore, it’s time to celebrate! These DIY plans give you everything that you need to turn that changing table into the perfect outdoor bar cart.
Just keep in mind that if your changing table looks a bit different, you might need to tweak the plans, but the general concept should stay the same. If you already have a changing table on hand or will in the future, you’re not going to find a more cost-effective option than this for making yourself an outdoor bar.
6. Rolling Bar Cart by Grillo-Designs
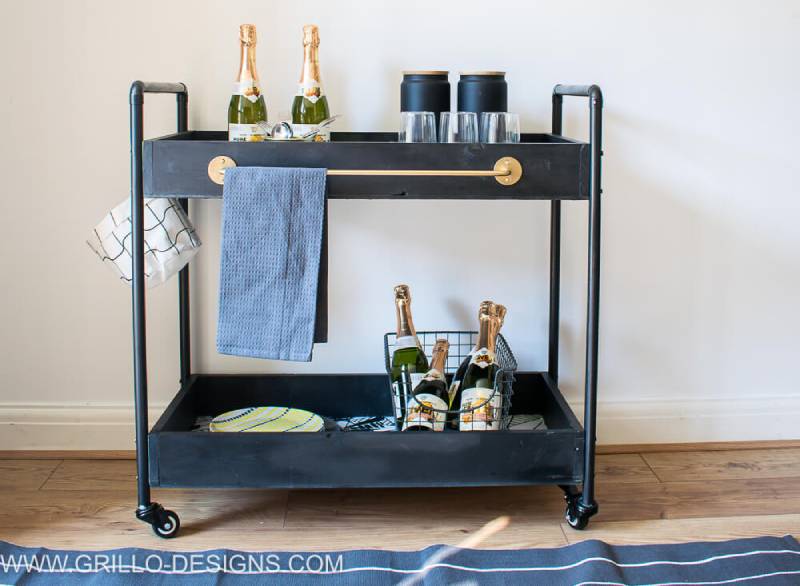
| Materials: | Two 6.5’ x 0.85” copper pipes, four copper pipe corners (0.85”), primer spray paint, black spray paint, clear lacquer, gold spray paint, 7.85’ timber wood, MDF wood, 8mm screws, four castor wheels, super glue, wood glue, duct tape, and wallpaper sample |
| Tools: | Miter saw, sanding machine, pipe cutter, drill, clamps, and a jigsaw |
| Difficulty Level: | Moderate |
This isn’t the easiest bar cart to make, but if you’re looking for one that isn’t all wood, it’s a great choice. This DIY guide breaks down everything that you need to know, which makes things much easier.
Also, while we like the example colors, you can pick up different spray paint and go with whatever color scheme works best with your décor.
7. Upcycled Beverage Station by Our Southern Home
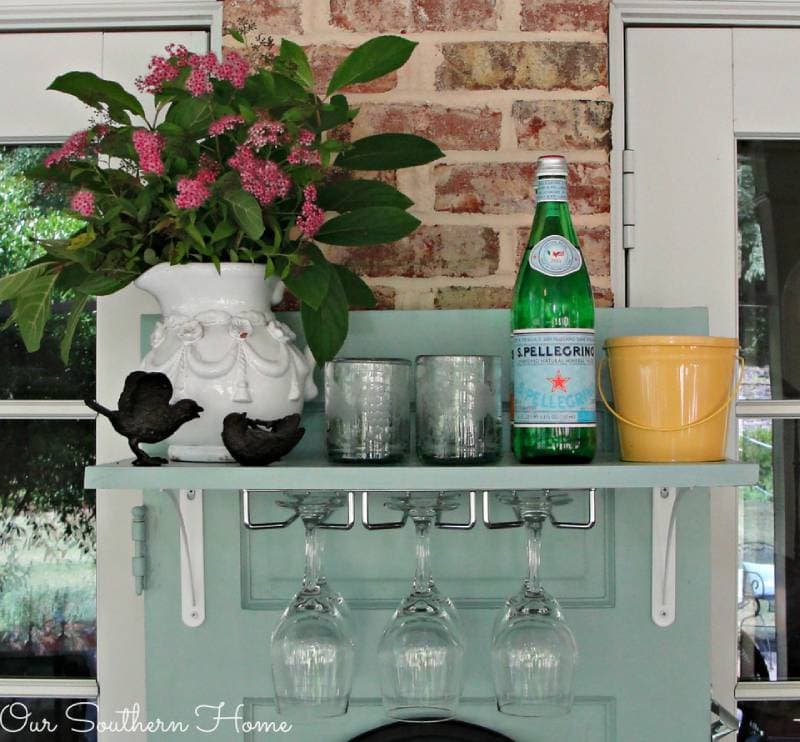
| Materials: | ProBond, wood glue, old door, two scrap boards, four shelf brackets, two outdoor porch spindles, wood screws, spray paint, outdoor paint and primer, and wine glass rack |
| Tools: | Clamps, drill, and a paintbrush |
| Difficulty Level: | Moderate |
While many of the ideas on this list are for bar carts, this is a stationary beverage station that you can use as an outside bar. However, it is worth noting that this is an upcycled beverage station.
This means that you can’t just build everything from scratch; you have to go out and find a few gems in local thrift stores that you can transform into this beverage station. It also means that you likely won’t get this exact beverage station. You’ll need to tweak the original blueprints to whatever you find.
But the good thing about that is that your upcycled beverage station will be completely unique!
8. DIY Grill Bar Cart by Jaime Costiglio
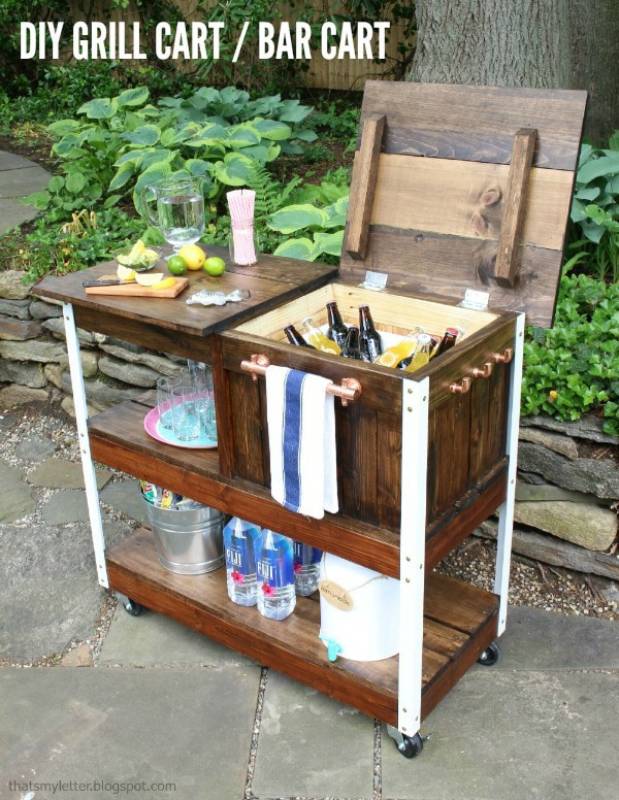
| Materials: | Six 2x4x8 studs, four 1x8x8 boards, three 1x4x8 boards, 2x2x6 board, 1x6x6 board, four 2×2 angle irons @ 36”, 3” screws, 2” screws, 1.5” screws, 2.5” pocket hole screws, 1.25” pocket hole screws, four caster wheels, and cutting oil |
| Tools: | Circular saw, drill, Kreg jig, clamps, tape measure, safety glasses, hearing protection, and a pencil |
| Difficulty Level: | Challenging |
Of all the bar carts on this list, this DIY grill bar cart is our favorite. It’s not only a mobile drink countertop, but it also has a full cooler inside to help keep all your drinks cold. It even has multiple shelves for storage space, and the top countertop is great for grilling supplies.
Whether you’re looking for a grilling cart with a cooler or a mobile bar for your next outdoor event, this awesome DIY grill bar cart can do it all. Just know that it’s not the easiest to build, though the guide does break everything down into easy-to-follow steps.
Final Thoughts
With any of these outdoor bars, you can elevate your next outdoor event. They might take a bit of work to build, but they’ll give you a sense of pride and accomplishment when you finish them!
Even better, you’ll get a top-notch high-quality outdoor bar without having to spend an arm and leg to get it.
Also, it will last much longer than most generic store-bought options, so you won’t have to worry about ending up back here in a year or two. All that’s left is for you to pick up the supplies so you can start building!
Featured Image Credit: Austin Distel, Unsplash
Contents
