
The Christmas season is almost here. That time of the year when houses get decked out with festive lights, inflatables of all shapes and sizes, and dangly ornaments. But now is the year to try something new and unique.
If you are a DIYer, this is the season to showcase your creativity and ingenuity and save some dollars. And whether you’re searching for Christmas decorations to add to your front lawn or a centerpiece for your home’s holiday party, these DIY outdoor Christmas decorations will inspire you, your family, and decorate this season.

The 25 DIY Outdoor Christmas Decorations
1. DIY Paper Plate Lollipops by Smart School House

| Materials: | Paper plates, paint, glue, cellophane, ribbon or wire |
| Tools: | Paint brushes, scissors, utility knife |
| Difficulty Level: | Moderate |
Paper plate lollipops are a great way to decorate your outdoors. They also make excellent gifts and perfect and engaging activities for kids. You can use them as a centerpiece on your outdoor table or hang them.
The best part is that they are effortless to make, and the materials only cost a few dollars. To make them, paint the paper plates and sandwich a dowel between the two plates with hot glue. Wrap the lollipops with cellophane and then add a ribbon.
2. DIY Outdoor Wreath Joy Sign by Fynes Designs

| Materials: | Wood letters, glue, spray paint, fishing line, a wreath of your choice |
| Tools: | Scissors, utility knife, glue |
| Difficulty Level: | Moderate |
This wreath is another perfect way to be a creative DIY this Christmas. You can use it to decorate your front door or place it in the garden. The sign will make your home look more festive and welcoming.
You can play along with the colors to create your perfect style while combining them with the season’s themes. To make this sign, stick the letters to a backboard, but if you use scrap pieces, paint them with a contrasting color to the board.
Then stick them on the board with glue and add a hook for hanging the wreath.
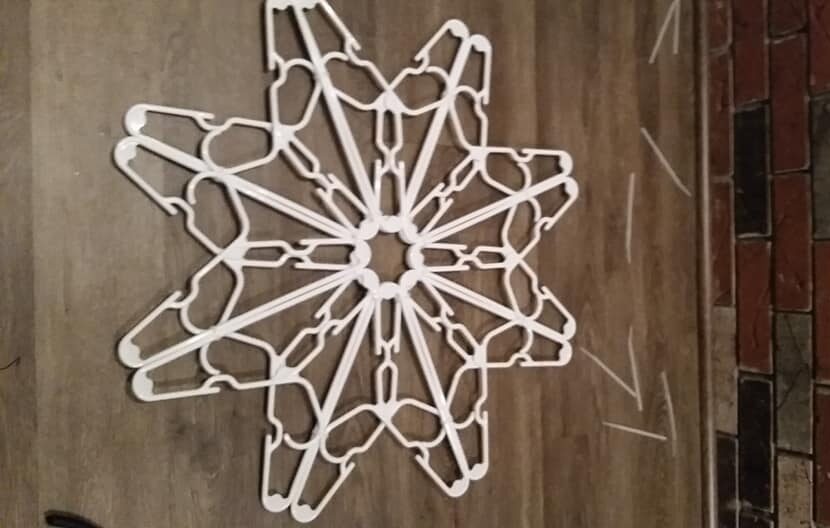
3. DIY Coat Hanger Christmas Snowflake by CraftBits
| Materials: | Coat hangers, spray, glue, zip ties |
| Tools: | Scissors |
| Difficulty Level: | Moderate |
Coat hangers, when well modified, make an excellent addition to your outdoor decor. If you’re looking for an inexpensive way to decorate your home, then you should definitely try them.
To make them, you need 16 coat hangers. Take eight of them and divide them into pairs. Line them along their straight edges, each pair to touch the next pair’s hook. Arrange the remaining eight on top of the formation and stagger them to create the snowflake’s points. Then tie using zip lines, but not too tightly.
Finally, decorate as per your desire.
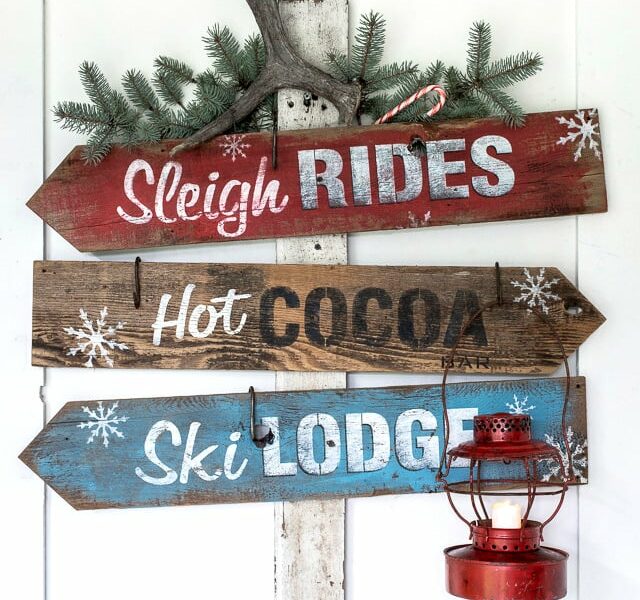
4. DIY Christmas Directional Signs by Funky Junk Interiors
| Materials: | Wood, pole, paint |
| Tools: | Brush, weeding tool, electronic cutter, cutter file |
| Difficulty Level: | Moderate |
If you are hosting a big group of people, these directional signs will serve two purposes; direct people and decorate your outdoors.
They are cost-effective because they can be used for more than one season. To make this sign, cut one end of the wood to look like an arrow. Paint the wood and then hammer the signs into the pole. For a sturdy base, you can use flower pots or a Christmas tree base. Finally, set it at the desired spot.
5. DIY Log Snowmen by Inspirational Momma

| Materials: | Sliced wood logs, ribbons, twigs or sticks, hot glue |
| Tools: | Drill or chainsaw |
| Difficulty Level: | Moderate |
The log snowmen are log or wood-made and perfect for decorating your garden, porch, and other outdoor areas.
To make the snowman, use the sliced wood logs to make the body, with each lower piece being bigger than the preceding one. The head and hat will be the smallest. Next, paint the logs to give the impression of a man and place them in your desired spot.
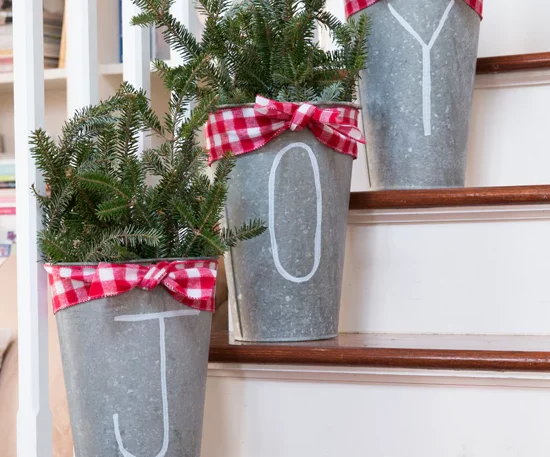
6. DIY Galvanized Bucket with Lights and Greenery by Finding Home Farms
| Materials: | Bucket, ornaments, a vase for each bucket, a ribbon, a chalk pen, fairy lights |
| Tools: | Utility knife |
| Difficulty Level: | Easy |
Buckets can make ideal decorations for any DIYer. They are inexpensive, which means that anyone can afford them no matter what their budget may be. The only thing that you need is some greenery or flowers and some lights.
This is easy to make as you only need to put the vase into the bucket and then decorate the outside. If you prefer to hang them, ensure they are well-tightened to prevent them from falling and causing injuries to people.
7. DIY Painted Pine Cones by eHow

| Materials: | Choice paint, pine cones, glitters, paint, primer |
| Tools: | Not necessary |
| Difficulty Level: | Easy |
Painted pine cones are popular outdoor Christmas decorations for any DIYer. You can use them to decorate your yard, porch, or front door. You only need to paint them to your taste and hang them.
To make these decorations, collect cones and clean them, but if using those from stores, they come clean. Dry the cones and spray a primer to help the paint stick better. Paint the cones with the desired paint. After drying, hang the pines and enjoy the beauty.
8. DIY Wood Scrap Stars by Jaime Costiglio

| Materials: | Boards, paint |
| Tools: | Brush |
| Difficulty Level: | Moderate |
You can never go wrong with wood when it comes to decorations. These stars look good, especially on the front porch or front window.
To make these stars, start by cutting the boards into ten strips measuring 2 and 16 inches wide and long, respectively. Overlap the pieces, join two parts with a nail, and then join the whole pieces into one. Finally, paint them with a desirable color. In addition, you can make them as simple as possible or go all out with fancy designs like hearts and circles.
9. DIY Wrapped Front Door by A Piece of Rainbow

| Materials: | Decorations |
| Tools: | Scissors or utility knife |
| Difficulty Level: | Easy |
These signs are a fun way to add color and style to your front door for the holidays. You can customize them with your pictures, words, and phrases or make them as simple or elaborate as you like.
To wrap your door, use a fabric or ribbon of your choice and wrap the door in a cross-like shape. If you use gift wraps, you can cover the entire door and then use other pieces to add some pomp and color.
10. DIY Christmas Ornament Topiary by The Creativity Exchange

| Materials: | Pot or urn, glue, ornaments, 8-inch ball ornament |
| Tools: | Glue gun |
| Difficulty Level: | Moderate |
The ornament topiary signs are a great way to display your Christmas spirit. You can make them in a wide variety of designs and colors. This is the perfect choice to create a massive or tiny topiary that will last all season.
Start by placing the largest ornament in the container you intend to use. You can use an adhesive for more stability. Successively put other decorations on top, ensuring they are well-secured.
Finish off by laying the 8-inch ball ornament and setting it to dry.
11. DIY Vintage Sled by Anderson + Grant

| Materials: | Sled, ribbon, decorations, greenery |
| Tools: | Scissors, utility knife |
| Difficulty Level: | Easy |
This option is the best to bring any old-school sled back to life and is a great way to add some holiday cheer to your backyard. Sleds are a classic Christmas symbol used as decorations or gifts.
To make them, start by attaching the greenery to the sled and securing it with a ribbon or wire. Next, add some ribbons and bow ties. You can add more decorations to your taste, such as placing them on a decorated pot.
12. DIY Christmas Light Balls by Christmas Lights etc.

| Materials | Chicken wire, LED light strings |
| Tools | Small wire cutters, measuring tape, gloves |
| Difficulty Level | Easy |
Installing ornamental lighting on your lawn is a surefire way to set the Christmas mood. These giant Christmas light balls are relatively easy and inexpensive to make. You only need to invest in LED lights and chicken wire.
Of course, your kids can join you and help cover the wire balls with lights.
To make your pieces more enticing, consider making balls of different sizes. Also, use clear lights or multiple light colors to give your outdoors a unique appeal. Check out this video tutorial by Christmas Lights, Etc., for more detailed step-by-step instructions.
13. Oversized DIY Christmas Wreath by HGTV

| Materials | 4’x10′ corrugated drainage pipe, weighted hula hoop, green satin spray paint, green duct tape, light strings, wired greenery (garland) |
| Tools | Utility scissors |
| Difficulty Level | Easy |
If you want to make heads turn with the biggest Christmas wreath on the block, here is a project you must try. Although the final piece is jaw-dropping, the work needed is not as intensive as many would assume.
Once you have gathered the necessary supplies, the project will take two hours at most.
The Christmas wreath is one of the most symbolic pieces of outdoor décor. Hanging this giant piece on your door will spruce up your overall outdoor Christmas decorations and help you make a grand first impression on your friends and loved ones.
14. DIY Easy Christmas Tree Lights by Hometalk

| Materials | 1 1/2″ PVC conduit pipe, T-posts, string lights, duct tape, landscaping staples, spray paint |
| Tools | Reciprocating saw |
| Difficulty Level | Moderate |
Do you have $25 to $30 to spare? Here is an easy project to put your money to excellent use. The primary materials needed are a PVC conduit pipe, duct tape, and string lights.
To make the overall outcome of your project more appealing, consider building at least three tree lights. You could even space out the trees to light the path to your main entrance. There is much wiggle room to get creative and give your outdoors the facelift it deserves.
15. Easy Quick DIY Dollar Tree Porch Decoration by Hometalk

| Materials | Bouncy balls, deli-style containers, painter’s tape, spray paint (black, metallic gold & silver), black glitter, craft sticks, 18-gauge wire |
| Tools | Sponge brush, needle nose pliers, wire cutters & box cutter |
| Difficulty Level | Moderate |
Are you more than the average DIYer?
Check out this fun project that will not cost you more than a few bucks. The best part is that bouncy balls are versatile pieces you can hang on your porch and just about any other part of your yard.
Here is a detailed step-by-step tutorial to help you create these ornaments in a single afternoon. Make sure you enlist the help of your kids to make them proud of charming any guests that visit you this holiday season.
16. DIY Giant Christmas Bell by CraftBits
| Materials | Plastic bowls, silver spray paint, extreme sheen metallic paint, e6000 glue, ribbon, and greenery |
| Tools | Wood burning tool, paintbrush |
| Difficulty Level | Moderate |
Your outdoor space is an extension of your home. There is no better way to give your front porch a Christmas feel than to install these DIY giant bells. They are a classic and can give your exteriors the same warm festive atmosphere as your indoors.
The primary materials for this budget-friendly project are kitchen bowls and some spray paint.
Check out this YouTube tutorial by Create and Craft with Katie to get a clearer idea of how to make these beautiful bells. You’ll also enjoy some valuable tips to complete each phase of the project efficiently.
17. DIY Godzilla Giant Sparkleball by Instructables

| Materials | 400 plus 10-ounce cups, light strings, wooden clothes pins, heavy gauge plastic coated wire, large round plastic tub |
| Tools | Soldering iron, hot glue gun |
| Difficulty Level | Easy |
Do you want to learn how to build this giant sparkle ball to give your lawn a beautiful light display? This is a fun project for DIYers of all skill levels.
It offers a budget-friendly way to add some holiday cheer to your outdoors. You don’t need a big budget because you can repurpose stuff you have at home to reduce the cost of the materials required.
This detailed guide will come in handy. It provides a clear outline of the tools you need and the steps to take to make your project successful.
Aim to build several starlight spheres and display them across the porch or even hang some on tree branches!
18. Fancy Stacked DIY Large Yard Ornaments by Made in a Day

| Materials | 6 plastic or foam ornaments, a small bowl, hot glue, ribbon |
| Tools | Hot glue gun, scissors |
| Difficulty Level | Easy |
Christmas yard ornaments are a classic decoration you can’t afford to lack in your front yard. Unfortunately, they can be expensive, especially during the holiday season.
But what if you could build a bigger, better yard ornament for only a portion of the budget? If this idea sounds interesting, here is a tutorial to help you make DIY large yard ornaments.
When choosing your foam ornaments, ensure your selection graduates in size. The idea is to achieve a staked design with the largest ornament at the top.
19. DIY Santa’s Elves Yard Display by Instructables

| Materials | 2×2, 1×2, 2×4 lumber, dowels, masking tape, newspaper, paper mache, poster board, masonry waterproofer paint, acrylic paints |
| Tools | Jigsaw, drill with large bits, paint brushes, sandpaper, hot glue gun |
| Difficulty Level | Complex |
If you want to flex your muscles and showcase your refined craft skills, this fun project could make you the talk of your neighborhood.
Creating Santa Elves may not be the most straightforward task, but it can be very rewarding. While the project may take more than a few hours to complete, the outcome will instantly enhance the look and feel of your yard.
20. DIY Tomato Cage Christmas Tree with Lights by The Frugal Girls

| Materials | String lights, 8″ clear zip tie, (4) four 6″ galvanized garden stakes |
| Tools | Prongs |
| Difficulty Level | Moderate |
Christmas lights are a quintessential part of any proper outdoor holiday décor. However, they can seem like a luxury if you’re on a budget. Fortunately, this simple project is budget-friendly and can be achieved with a bit of elbow grease.
Typical light decorations go for up to $60 per piece. Making them yourself is much cheaper, and depending on size, each piece will only cost $15 to $20.
You can make significant savings and still give your yard a personalized touch.
21. DIY Santa Sleigh by DIY Decor Mom

| Materials | (4) Sheets of plywood, lumber, (3) spray paint colors, drywall screws, chalk, cardboard |
| Tools | Jigsaw, permanent marker, 80-grit sandpaper, box cutter, circular saw, and drill |
| Difficulty Level | Complex |
The typical outdoor Christmas decorations range from simple light-ups to huge ornaments hanging on the front door porches. But what if you want something unique that will enchant your entire neighborhood?
This project will turn heads!
Building a DIY Santa Sleigh is a costly and complex undertaking. Still, the structure can bring a fun and colorful element to your outdoors. You could add some elves inside or build a bench so your kids can hop inside.
22. Giant DIY Solar-Powered Christmas Lights by Real Simple
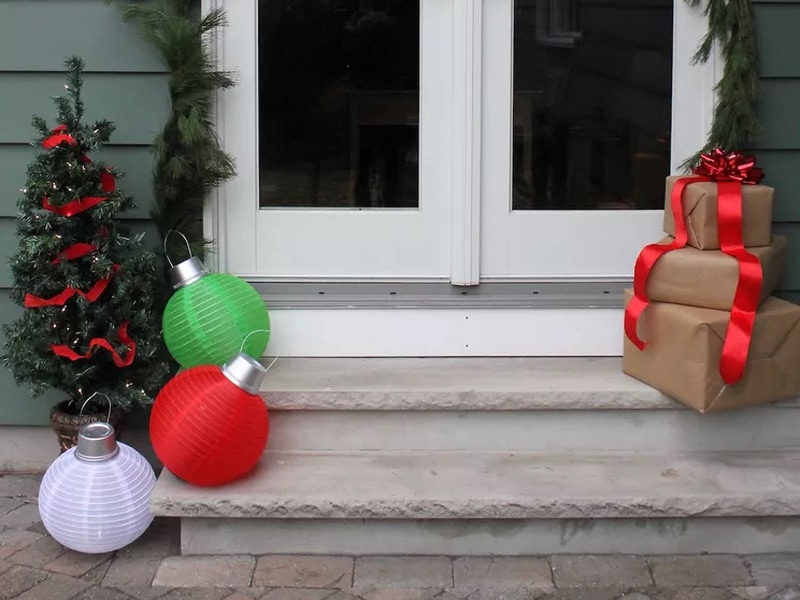
| Materials | LED solar lanterns, silver metallic spray paint, 12-ounce plastic containers, floral wire |
| Tools | Needle-nose pliers, scissors |
| Difficulty Level | Easy |
If you are like most families, you like to spend some time outside during the holiday season.
Whether you want to have dinner outdoors or throw a bash, lanterns can be handy. Depending on their placement, their glow can serve as a decorative or a functional feature.
Here is a simple tutorial on how to make these giant solar-powered Christmas lights. Make sure you go for Lanterns of different hues to give your outdoors a pop of various festive colors.
23. DIY Outdoor Joy PVC Sign Christmas Decoration by Pender and Peony

| Materials | PVC pipe, PVC cement, PVC caps, black iron pipes, tinsel, 90-degree sweeps, “T” sweep & outdoor spotlight, string lights |
| Tools | Hand saw, hot glue gun |
| Difficulty Level | Moderate |
A huge, glowing sign that reads “JOY” is just what you need to dress up your lawn for the holidays. Although this project looks complex, it’s easy and offers a perfect way to light dull spots around your yard.
For a neat outcome, take measurements of your PVC and aim to get the letters as proportional as possible. These detailed instructions will make choosing the joints and taking exact PVC measurements much easier.
24. DIY Driveway Arch for Christmas Lights by Y2KOK
| Materials | PVC pipe, PVC coupling, PVC cement, primer, LED Christmas lights (warm white), black spray paint |
| Tools | Reciprocating saw, glue gun |
| Difficulty Level | Moderate |
Lighting up your driveway is one of the best ways to make an impression this Christmas. You want to create a welcoming feel that will usher in anyone visiting your home.
Building a driveway arch doesn’t have to be an expensive affair.
With as little as $55, you can illuminate your driveway at night and ensure people can see the hard work you have put into other outdoor Christmas decorations. Here is a YouTube tutorial to guide you through the project.
25. DIY Christmas Topsy Turvy Pots by The Keeper of the Cheerios LLC
| Materials | Clay pots, spray paint, garland, seal coat, outdoor paint, screws and large pipe or conduit |
| Tools | Drill and hammer |
| Difficulty Level | Moderate |
If you are looking for a moderately challenging DIY project with a great payoff, you must attempt this one. You will love the outcome of these Christmas topsy-turvy pots, especially if you are a low-key artist.
They offer a fabulous way to add holiday cheer to your outdoor décor.
If you are not much of an artist, don’t shy away from using stencils. There are numerous printable templates you can find online at no charge.
Here is a step-by-step guide to getting you started on the project.
In Conclusion
Having your house lit up with Christmas lights is undeniably excellent and impressive, but much cheaper and more fulfilling with these DIY options.
And regardless of your skill level, these options will give you a creative and beautiful outdoors. Therefore, gather your tools and materials and create something beautiful and creative this season.
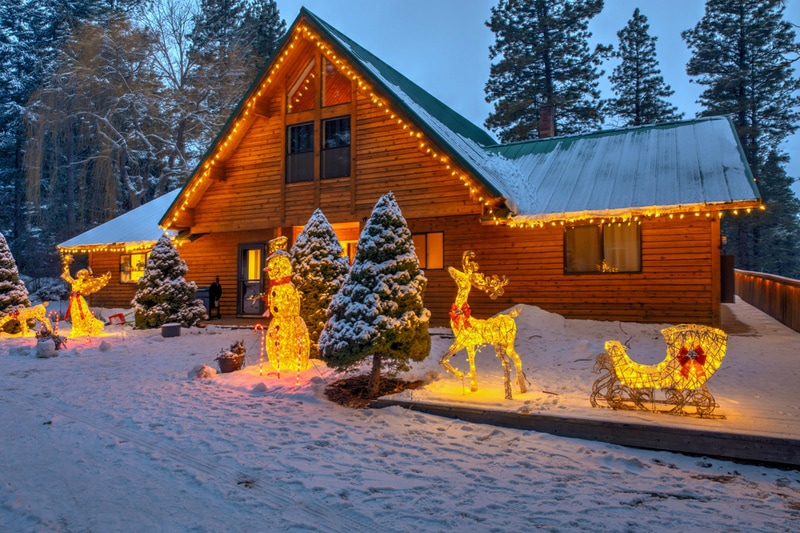
Featured Image Credit: Artazum, Shutterstock
Contents
