

We all have a cabinet in our house that, instead of being used for what it was intended for, we toss our cleaning supplies inside to keep them out of sight. While this may be common practice, it isn’t helpful when it comes to utilizing space around the house.
Instead of doing what you are used to and what your parents and grandparents most likely did, why not step up to the plate and build a storage cabinet for your cleaning supplies? These DIY storage cabinet plans are easy to follow. With a bit of DIY knowledge, the right supplies, and the tools you may have on hand, you can get your home better organized. Take a look and decide which plan is right for your needs.

The 5 DIY Storage Cabinet Plans for Your Cleaning Supplies
1. Broom Storage Cabinet
| Materials | Pine boards (2@6×8, 2@4×8, 2@2×8, 1@4×4, and 1@3×4), ¼ inch hardwood plywood sheet, 3 faux tin panels, wood glue, hot glue, screws, and other hardware |
| Tools | Drill, tape measure, hot glue gun, saw for cutting boards to preferred sizes |
| Difficulty Level | Difficult |
This Broom Storage Cabinet may be a bit on the difficult side, but the team at Shanty2Chic has mastered the storage cabinet when it comes to cleaning supplies. With pine boards, glue, screws, and easy-to-follow YouTube videos, you can put your DIY skills to the test. This cabinet is built from scratch and can be added to any room you choose. Once you are finished your broom, mop, and other cleaners will be safely tucked out of the way and no longer an eyesore in your home.
2. Chic Storage Closet

| Materials | Peel and stick vinyl flooring, bookshelf, baskets, and labels (boards of your choice if you decide to add the extra shelving) |
| Tools | Scissors, drill, tape measure, and wood screws |
| Difficulty Level | Moderate |
If you have an empty closet in your home, you can easily turn it into a storage cabinet for your cleaning supplies. This Chic Storage Closet idea is another from the ladies at Shanty2Chic. Instead of building an entire storage cabinet, for this one, they simply remodeled the space they already had. Peel and stick vinyl was used to freshen up the floor, most of the shelving inside is a bookcase relocated to the closet and attached to the wall. You can even add extra shelves on the side if you need more room. To complete this chic idea, cute baskets and labels were added to keep everything organized.
3. Cleaning Supply Tower
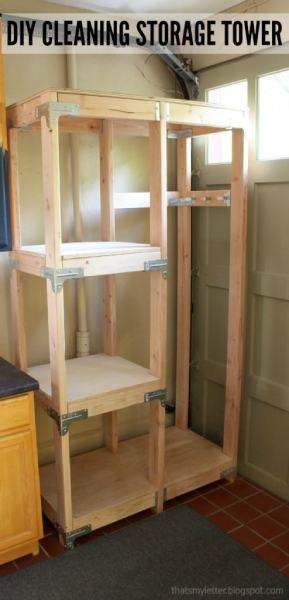
| Materials | 8@2x4x10 studs, 1 sheet ¾”plywood, 17 RTC2Z rigid tie connectors, 10 FB24Z brackets, 2 boxes 8×1 ¼ inch strong drive SD connector screws, and 1 ½ inch wood screws |
| Tools | Drill, tape measure, and saw for cutting boards to preferred size |
| Difficulty Level | Difficult |
This Cleaning Supply Tower is great for those who have tons of supplies lying around the house. By following the instructions you can master building a tower that is strong and dependable while being completely customizable. Once you have the supply tower built, you can paint, stain, or put your own spin on things to make them work for the space you’ve placed them in. Best of all, this tower will hold lots of cleaning supplies so you won’t be searching the entire house when you need something.
4. Cleaning Storage Caddy
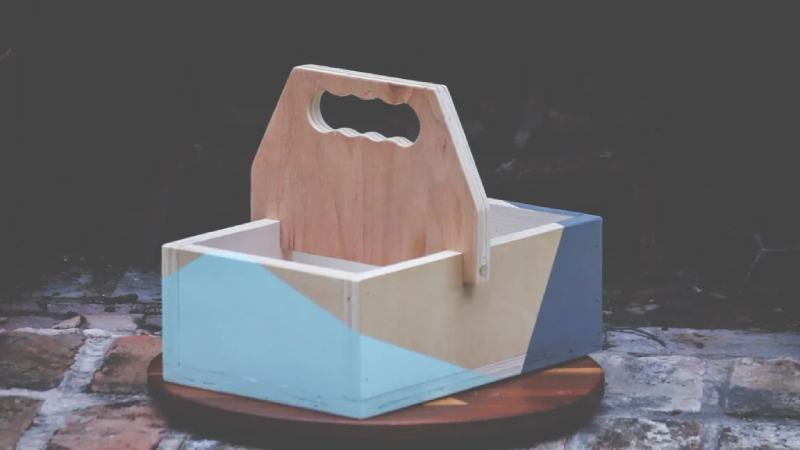
| Materials | 3/4 inch plywood, wood glue, 3/8 inch dowel, painters tape, and spray paint of choice |
| Tools | Drill and driver, tape measure, table saw, glubot, brad gun |
| Difficulty Level | Moderate |
If you don’t have tons of cleaning supplies lying around, this Cleaning Storage Caddy could be the answer to your organizational needs. With a bit of plywood, wood glue, a dowel, and a drill you can be on your way to creating a wooden cleaning caddy that will last for ages. You’ll avoid spending money replacing your caddy each time it gets a dent in it. You’ll also love that this caddy can be customized to your liking instead of buying whatever they have available in stores.
5. Back of the Door Storage Cabinet

| Materials | 2@1x4x8 boards, 1 ¼ inch brad nails, 1 ¼ inch pocket hole screws, and wood glue |
| Tools | Tape measure, miter saw, nail gun, Kreg jig, and a drill |
| Difficulty Level | Moderate |
When space is limited around the house, a cleaning supply storage cabinet can still be utilized. This Back of the Door Storage Cabinet was originally intended for spices and kitchen supplies but can easily be modified for cleaning supplies. With a few boards, nails, screws, and tools you can design your cabinet and decorate it to your preferences. If you want the world to see your creativity, it can also be hung in plain sight if that’s your preference.
Storage Cabinet Tips
Having a DIY storage cabinet for your cleaning supplies is only the first step when it comes to getting your supplies organized. Here are a few tips you can implement to help bring things together and get your home organized.
Utilize All Your Space
Several of the DIY storage cabinets listed above share the basic idea of how to build the cabinet itself. However, it’s up to you when it comes to utilizing the space. One great way to do this is by adding a mop and broom wall mount to your cabinet. This will keep these commonly used items out of the way and ready to grab when needed.
Another great way of utilizing space is Command Utility Hooks. These hooks can be hung on any surface without causing damage. They are also available in multiple weight limits. Whether you are simply hanging your dusters or want to hang heavier cleaning items, they can clear up your shelves and leave items at your fingertips.
Baskets Help with Organization
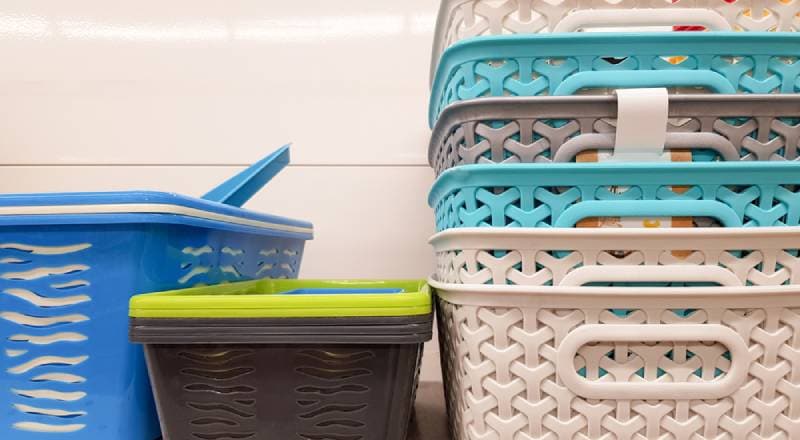
While having a storage cabinet for your cleaning supplies is great in theory, one that is cluttered and messy isn’t the goal. One way of keeping your cleaning cabinet organized is ClearSpace Plastic Storage Bins. These handy bins are see-through to allow you to easily find what you’re looking for. You can even add labels if you prefer.
When using baskets, another tip is to create chore baskets. Place all your bathroom cleaning supplies in one basket, and all your kitchen cleaning needs in another. You can attach labels to tell you which basket is for which task. When it comes time to clean, you won’t need to grab from multiple areas of your storage cabinet. Instead, you can grab the basket needed and be on your way.
Over-the-Door Organization
Once you’ve built your storage cabinet, you may need additional space inside. One way to add more storage is an over-the-door shoe organizer. These handy items offer slots you can tuck your dusters, cleaning rags, and even cleaning bottles safely inside. When you access your storage cabinet, simply grab what you need from the organizer and be on your way. This is a great trick for keeping your supplies organized inside the space you’ve created for them.
Keep Your Storage Cabinet Protected
Like with anything you put time and energy into, you want to keep your storage cabinet protected. We all know the dangers of having our cleaning supplies in a cabinet. Chemicals drip, lids get loose, and damage can be done. One of the best things you can do when DIYing a cleaning cabinet is to include a protective liner for the bottom of your shelves or cabinet. These non-adhesive liners can be cut to the size you need and easily removed for cleaning when needed. Then you won’t constantly be worried about your cleaners causing damage when you aren’t watching.
Final Thoughts
As you can see, there are several DIY storage cabinet ideas out there that can help you safely and conveniently tuck away your cleaning supplies. If you’re tired of having cleaners, mops, buckets, and dusters lying around every cabinet in your home, grab the idea above that suits your needs best and get to work. Before long, your cleaning supplies will be more organized and you’ll be proud of the job you’ve done.
Featured Image Credit: New Africa, Shutterstock
Contents
