
Do you have a bathroom or bedroom door in desperate need of replacement? Whether you’re dealing with a dated design or a damaged frame, swapping out a door can be an excellent way to upgrade the decor and comfort of a room.
Hanging a door is straightforward, but it’s easy to make mistakes if you overlook minor details. We’ll walk you through how to install a pre-hung door in seven steps and what you can do if you want to replace only the door slab. With this guide on installing an interior door, you’ll ensure a smooth installation and a properly functioning finished product.

How to Install a Pre-Hung Interior Door
If you’re replacing a door and frame in a rough opening, you’ll want to use a pre-hung door. Measure the space and buy a door with the correct size and swing direction.
Tools You’ll Need
- Box level
- Brad nailer
- Claw hammer
- Wood shims
- 8d finishing nails
- Utility knife
Preparation: Check the Floor and Door Opening
Before hanging your door, you’ll need to check that the floor is level and that the pre-hung door will fit in the opening. The door opening should be around 1–2 inches wider than the new door frame.
To check if the floor is level, place a box level on it in front of the door opening. If the floor is uneven, slide a shim under the level until the bubble is centered.
Measure the gap between the floor and the level on the side that you shimmed. You’ll need to cut that much off from the new door jamb on the opposite side. For example, if there is a gap from the floor to the level of ⅛ of an inch on the left, you’ll have to shave ⅛ of an inch off the right side door jamb.
If the door frame is too long, measure the difference to get it to fit. Cut the excess off the bottom of the door jambs with a circular saw.

How to Install an Interior Door (7 Steps)
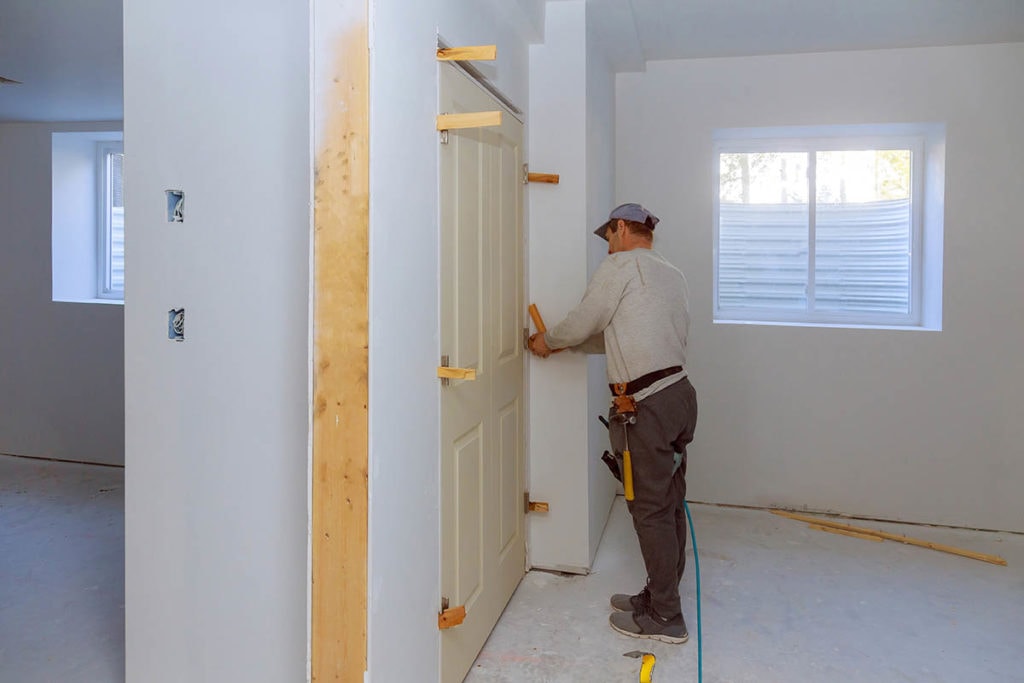
1. Insert Pre-Hung Door in Door Opening
Place the pre-hung door in the door opening, keeping the edge of the jamb flush with the wall. Remove the door plug from the latch hole. Swing the door open 90 degrees and place a block or shims underneath it to prevent the weight from pulling the door frame out of place.
Check the top jamb to ensure that it is level. If you cut the side jamb correctly to account for any deviation in the floor, the top should be fine, and the door will latch properly. Once it looks good, make sure the side jamb is plumb on both sides.
2. Set Shims in Place
Add shims between the side jambs and studs. Because the shims are tapered, you’ll need to run two of them in opposite directions to prevent the door frame from twisting as you fill in the gap. You can adjust the width of the shims by sliding them along one another.
Add at least three sets of shims on both sides of the door, placing them just above the hinges on the swing side and roughly the same spot on the latch side. The shims should fit snug but not enough to push and bend the door frame.
3. Attach the First Set of Nails
Once the shims are in place and the jamb is level, you can start securing the frame in place.
Using a Brad nailer or hammer, put two 8d nails into the top section of the swing side jamb, driving them through the door frame, the shims, and the wall stud. Position the nails 1-inch from the edge of the door jamb, stacking one about ½ an inch on top of the other. Repeat the process on the other side of the doorstop so that four nails are going through the top section.
4. Level and Nail Hinge Side
After securing the door frame at the top set of shims, you can attach the middle and lower sets of hinge jamb shims in the same way. Before nailing in the rest of the hinge side, you’ll have to ensure that the jamb is in the proper position.
First, use your level to see if the jamb is plumb. Then, test the door by opening and closing it a few times, checking that the door swings smoothly and the latch lines up.
When the door is closed, look at the hinge side reveal (the gap between the door slab and the door frame) to ensure it is even from top to bottom. If it isn’t, the jamb is bent in some way, and you’ll need to widen or narrow the shims to straighten it out.
Look at how the door slab hits the doorstop on the latch side when the door is closed. The door should touch the door stop from top to bottom. You’ll need to adjust the jamb to fix any uneven or overly large gaps.
When everything looks good, nail four 8d nails into the middle section and four more into the lower one.
5. Secure Shims to Strike Side
Now that your hinge side is secure, you can remove the block under the door and allow it to swing freely. The door should sit still where you place it. If it drifts open or closes when you let go, it means that the hinge side is not perfectly plumb and needs adjustment.
When you’re ready to secure the strike side, start at the top section, nailing four 8d nails through the jamb, the shims, and the wall stud like you did on the hinge side.
Close the door, and check that the reveal on the strike side is even from top to bottom. Adjust the shims as needed until the reveal is even. Drive 8d nails through the remaining sections on the strike side to finish the frame installation.
6. Remove Excess From Shims
After nailing in the door frame, close the door to see if the reveal is even on the top and sides. Next, use your utility knife to remove any excess shim jutting out past the wall. Score the shim flush with the door frame and snap it off at the line.
7. Finish Door with Accessories
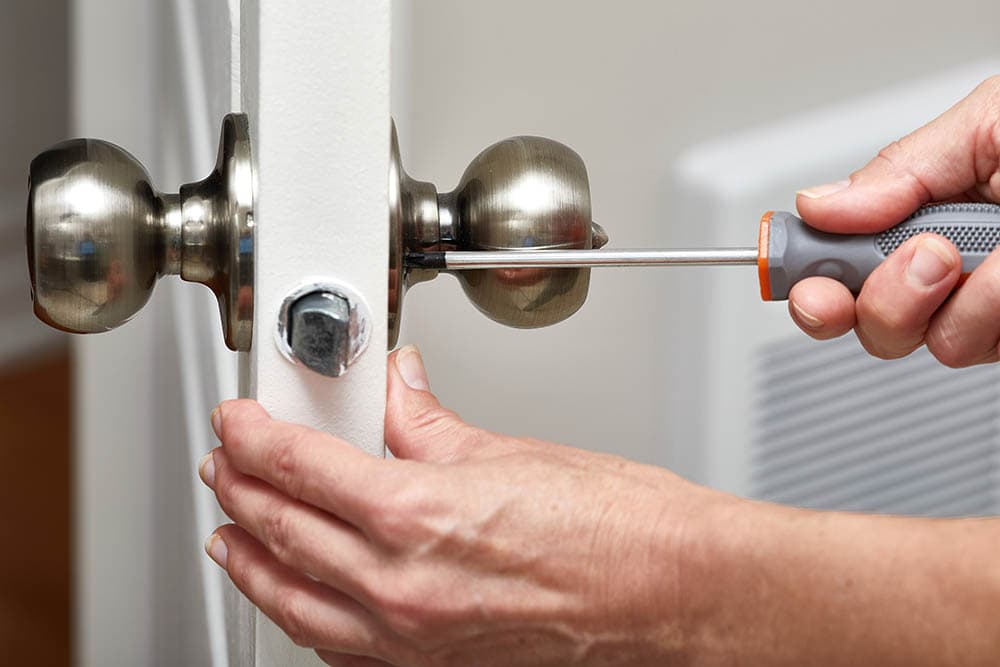
Pre-hung doors don’t often come with knob and latch hardware, so you’ll need to buy them separately.
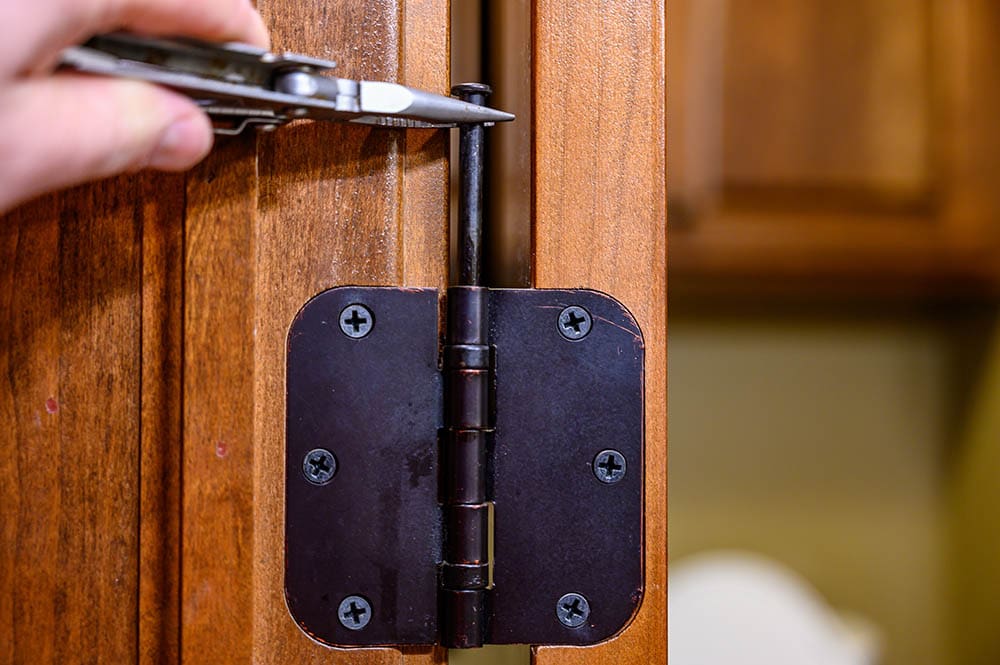
If you’re buying a door lever, make sure it is the correct orientation for your door swing. Likewise, although the door comes with hinges, you may want to buy new ones to match the door handle or lockset. Note the shape of the door hinges, as some have square corners and others have rounded corners. If you purchase the wrong hinge shape, it won’t work with the door.
After adding the doorknob and strike plate, your door is ready to use. All that is left is to add trim and a crosshead as desired, using 6d finishing nails to drive them into the wall studs.

How to Install a New Door in an Existing Frame
When you have a damaged door slab but the frame is intact, you can save money by replacing only the slab. The process of swapping a door slab requires more woodworking skill than installing a pre-hung door.
Tools You’ll Need
- Pencil
- Drill
- Utility knife
- Chisel
- Tape measure
- Combination square
- Door lock installation kit
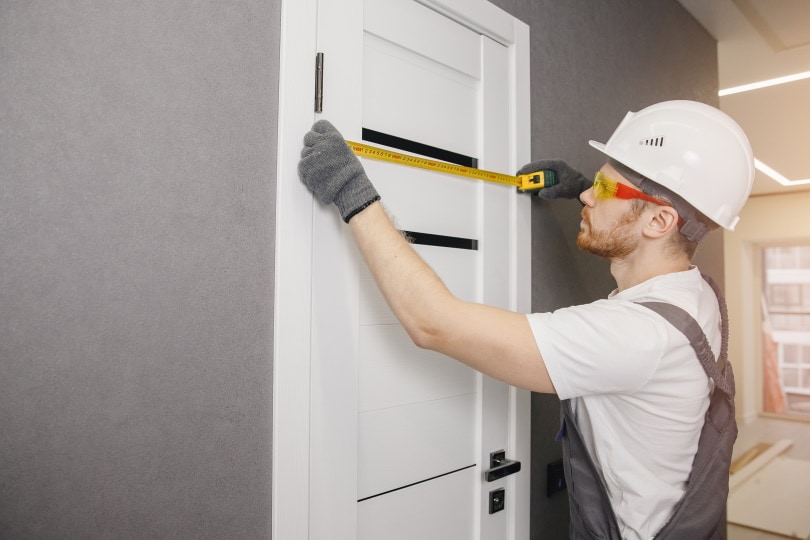
Preparation
Before buying a new door, you must measure the old door so you can order the correct size. It’s okay if the new door is slightly taller than the old door because you can trim the excess later, but the width must be identical.
How to Install a New Door in an Existing Frame (9 Steps)
1. Mark and Remove the Old Door Slab
Before taking off the old door, measure the gap between the floor and the bottom of the door and note it. You’ll use this to size the new door slab.
Unscrew the old door slab from the hinges and set it aside. Take one hinge off the door frame so you can use it as a reference when finishing the new door slab. Set all hinge hardware aside if you plan to reuse the old hinges.
2. Lay the Old Door on the New Door
Lay the old door slab on the new door slab, orienting them in the same direction so that the hinge sides align. Use clamps on either end of the stack to hold them in place as you work.
If the old door is slightly shorter than the new door, use your pencil to mark off any excess on the bottom of the new slab. You can trim the bottom of the door later.
Note that you only want to make the doors the same height if the old slab was the proper height off of the ground. If the old door had a gap larger than roughly ⅛ of an inch, you will want to make the new slab slightly longer. You want to keep the distance from the bottom of the slab and the floor as close to ⅛ of an inch as possible.
3. Measure Mortise Length and Location
Line your combination square up with the edge of the hinge mortise on the old slab. The mortise is the indentation that holds the hinge. With the square as a guide, draw two lines down the new slab indicating where to cut the mortise sides.
Next, measure the width of the hinge mortise with your square and transfer the measurement to the new door. You should now have three marks outlining the position of the hinge on the new slab.
If you don’t have a combination square, you can use a straightedge and a tape measure to make the outline. Measure the distance of the sides of the hinge mortise from the top of the door. Transcribe those measurements to the new slab, using a straight edge as a guide.
4. Measure Mortise Depth
Using your hinge as a guide, mark the shallow depth of the mortise on the new slab. It will be critical to avoid going past this line when chiseling out the mortise.
5. Outline and Score the Hinge
Position the old hinge over the outline you marked on the new hinge, lining up all of the edges. Draw around the edge of the hinge to make a complete outline for the new mortise. Use your utility knife to score the outline down to the depth of the mortise line.
6. Chisel the Mortise
Cut several parallel relief lines roughly ½ an inch apart between the sides of the mortise outline. Make sure you don’t cut deeper than the hinge depth.
Chisel out the mortise, working from one relief line to the next until it’s completely cut out. After forming the mortise, put the hinge in place to check the fit and mark where the screws will go in.
Repeat this process to complete the middle and bottom mortises.
7. Drill Pilot Holes and Attach Hinges
Drill pilot holes for the center screw on the top and bottom hinges. Position the door in place and attach it to the door frame with only these screws. Check the door operation to ensure it opens and closes smoothly.
8. Attach the Doorknob
Remove the door to attach the knob and latch. You can use the old door as a guide to mark the position of the latch plate and knob hole.
Follow the installation instructions that come with the new knob. A doorknob installation kit will have everything you need to bore out the holes for the knob. When drilling out the hole for the knob, drill only halfway through on one side and then halfway through on the other to prevent splintering.
9. Attach the Door
When the doorknob hole is cut, you can paint the door your desired color before attaching any hardware.
Attach the door at the top and bottom hinges in only the center hole. Test the door to ensure it opens, closes, and latches correctly. Finish up by installing the remaining screws in the hinges.

Conclusion
Replacing a door can seem like a daunting task. But when you follow the steps outlined here, you’ll be amazed at how easy it is to refresh the look of your entryways!
If you have cheap, boring door designs or worn-out pieces, a new door is an excellent way to spruce up an interior space. By taking it into your own hands, you can save money on installation costs and walk away satisfied after completing a successful DIY project.
See Also:
- How Much Does It Cost to Install an Exterior Door? (with Pictures)
- Doorknob Replacements: Costs and Importance Explained
Featured Image Credit: ungvar, Shutterstock
Contents
